
Hi, it's Jean sharing a spring-themed card using digital Neat
and Tangled stamps. I've used two free stamps available here.

A few months ago, I described how I use digital stamps in this tutorial. One huge advantage with digital stamps is that the
images can be re-sized, which is what I've done with the card shown here. I
used the same bird stamp for both the mother bird and the baby bird on this card.
While I love the look of Copic coloring AND I enjoy the
process, for this card I wanted to do something different. I printed the images onto colored cardstock run through my
printer.
Let's go through the steps. This tutorial explains how to create the card in Photoshop (directions in PSE would be similar).
1) Create a 4 1/2" square document.

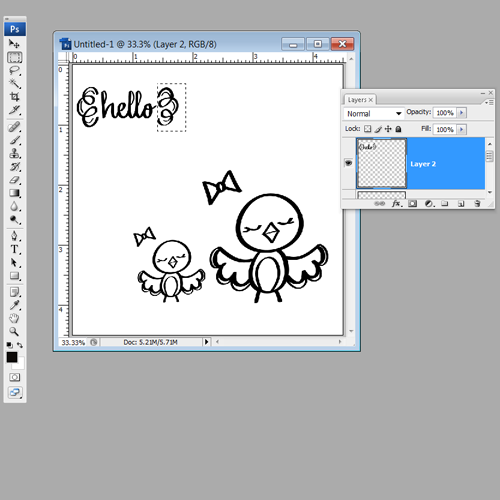
2) Open the digital stamp and drag it onto the canvas.

3) Duplicate the image, position onto canvas, and resize.


5) Drag and place the sentiment onto the canvas. Using the rectangular marquee tool, select the right-hand scroll and hit delete to remove it from the design. Repeat with the left-hand scroll.
6) Delete the bow on the little bird layer by selecting it with the elliptical marquee and hitting delete. For the larger bird, select the bow with the elliptical marquee, right-click, and choose "Layer via Cut." This places the bow on its own layer.

7) Now it's time to print. Create a letter-size document.

8) Drag all of the items from the 4 1/2" square canvas onto the letter-size canvas. Position in one corner of the canvas (in order to save paper).

9) Selectively print the layers by toggling the layers on and off as needed.
- Print the two birds onto white cardstock.
- Print the sentiment and two birds onto yellow cardstock.
- Print the small bird and bow onto blue cardstock.
- Print the large bird onto pink cardstock.
10) Fussy cut your birds, adhere parts, and adhere the completed birds onto the white cardstock. Die cut the sentiment and adhere. Finish off with baker's twine and a colored cardstock card base!


Thanks for this tut!!!! adorable card!
ReplyDeletegreat tutorial..thanks for sharing.. super cute card.. love the bright fun color combo
ReplyDeleteBeautiful card and AWESOME tutorial! You have made it so easy to understand! Thank you so much for sharing this. I know that this will be a much referred to post for me!!!
ReplyDeleteGreat tutorial...thank you! I thought you had colored the images...I'm impressed :-)
ReplyDelete