Fall is creeping up on us, and our September release is sure to help set the mood!
We have all new stamps and dies for you this month. Including some special dies we have up our sleeve, but you will just have to wait until next week to see!
In the meantime, here are some seek peeks to get you excited! Leave me a comment to let me know what you're most looking forward to! :)
All the fun starts Monday at 8am EST! See you then!
Today I'm so thrilled to share with you fun idea of using Snake Scales Cover Plate Nice and Neat Die! When I turned it in my hands I've noticed that if to watch up side down it looks like lot of heads, so my decision was to add eyes to some of them and create kind of crowd.
I used brown cardstock for a die cut to create an outline of the crowd, adhered it and used fine marker to turn scales into faces.
For a sentiment I used "See you later" one from the Later Alligator Stamp set that I think fits this card the most. I heat embossed it with white embossing powder on a stripe of brown cardstock.
Hi there, it's Cheiron here with my monthly post. Today I have created a card for you with my favorite sentiment set, So Many Sentiments...this set has just about every sentiment I need for the cards I always send. For me the easiest way to use these is to stamp them on black cardstock and emboss them in white and put them on a bright background. I used one of the alcohol ink backgrounds from my stash, and cut a Star Cover Plate die from white cardstock. Then I cut in again from glitter cardstock and added the glitter stars back into the empty spaces.
Once that was done, I added the sentiment on top. These cards would be great to make as a do it yourself set for a gift by boxing up a bunch of colorful backgrounds, cover plates and pre-stamped sentiments for the recipient to mix and match. Even if they are not a card maker, they could still create some super fun cards :)
Hello friends, Danielle here! Welcome to Rubeena's Crafting Anniversary 2-Day Blog Hop! You should have arrived from Nina's blog.This hop is epic with more than 60 guests and over $600 in sponsored prizes! Not only are we celebrating four years since Rubeena first discovered cardmaking but also crafting in general. This industry is made up of wonderful individuals who are creative, inspirational, kind, and incredibly supportive! Hop along so you can learn about why we create and how much joy it brings us! For details on day one of the hop, you can visit this post. My card today just about sums up why I love to craft - good vibes only! When I am in my craft room, being creative, I feel nothing but joy! Beautiful colors, fun stamps, clever dies - there is no limit to what I can create. Crafting allows me to be free. It's a great form of meditation for me, often bringing a sense of calm to an otherwise crazy day, quieting my mind. And because of crafting I have met some of my very best friends! For this card, I stamped the large triangle from our Triangle Pattern Builder stamp set repeatedly in a variety of Distress Ink Oxide colors, and then spritzed lightly with water. While that was drying, I stamped our Good Vibes sentiment, and cut it out. To adhere I used some foam adhesive, and then finished it off with some Clear Mix sequins.
I hope this card brings little brightness to your day :)
I'm so happy Rubeena invited me to hop along for such a wonderful celebration! Now keep on moving - your next stop is Cheiron!
In celebration of this anniversary, Rubeena has several amazing sponsors. Winners will be randomly selected from comments left on all the blogs. The winners will be announced by Wednesday, September 5 on this page. Winners will have up to 2 weeks to contact Rubeena at ararerubycrafts@gmail.com to claim their prizes. GIVEAWAY! We are also doing a giveaway here! Leave a comment on this post to be entered to win our Triangle Pattern Builder stamp set, Good Vibes stamp set, and Clear Mix sequins! Winner will be announced September 2nd!
This card was so simple to create, and used one stamp from each set. I took the outline diamond shape from Thanks So Much and stamped it repeatedly with Versamark ink onto a panel of white cardstock. I sprinkled with white embossing powder and heat set.
I then took one of the smaller images from the set and stamped in the corners of the diamond shapes, again with Versamark ink and heat set in white.
I grabbed my Zig Clean Color Real Brush Pens and scribbled roughly with rainbow colours inside each of the embossed areas. I then spritzed the panel with water and watched the colours beautifully bleed into one another, and again heat set.
I trimmed the panel down to slightly smaller than my card base and foam mounted to the card front. I stamped a sentiment from the Floral Frame set onto a strip of black card stock, heat embossed in white, trimmed down and foam mounted to the card front.
Happy Sunday! Today we're sharing a final project from this month's guest designer, Kristina. Her cards this month have been such a treat, and we're sad to see her go!
Hello everyone! It's Kristina here. Today I want to share with you my last card for Neat and Tangled blog as a guest designer this month.
For today's post, I decided to make a vintage card with pale watercolored flowers.
First, I stamped the images from the Friendly Florals stamp set on a piece of watercolor paper with Antique Linen distress ink.
Then I watercolored the flowers with light peachy coral and the leaves with muted blue green and olive watercolors.
Once my coloring was done, I added a few paint splatters and then when it dry I stamped the sentiment in clear embossing ink, sprinkled with metallic embossing powder and heat that.
I foam mounted my watercolored panel on a kraft card base and added sparkling sequins as a final touch.
Thank you so much for joining me today and have a great day!
Hey there! It's Keeway and today I wanted to bring you a more classic thank you card using the Thanks So Much and Art Deco sets. The style of both these sets interact beautifully together, especially with all the fun geometric shapes and lines.
I started this project by embossing the small rectangular frame with stripes onto a soft grey cardstock. Then, I heat embossed the sentiment that perfectly fits within that diamond shape right after. I wanted to give this piece a frayed edge, so I decided to cut the edges with my paper trimmer rather than the die cut to make sure I had enough edge to work with.
Next, on a piece of watercolor paper, I heat embossed the large art deco design in white. I used my distress oxide colors to watercolor this piece as the chalky tones to these colors compliment the soft grey very well. I varied to intensity of the colors throughout the design.
Once the panel was dried, I adhered my grey rectangle to the center with foam tape. Then, adhered the whole thing onto a white A2 landscape base.
There are two things that I love most about stamps and dies and
stencils. One is the absolute endless possibilities they give and the
other is that they don't ever 'run out'. So once you've invested in a
few products you really have no limit to the amount of different
projects you can create. And of course, I'm not just talking about card
making! Your Neat and Tangled products work just as well on scrapbook
layouts, pocket pages, notebooks, Bible journaling, home decor projects,
you name it!
Today I was inspired to create a spread in my Travelers Notebook documenting a phase Shiloh went through as she was teething. First she developed her two middle teeth on the bottom, and then she sprouted her top incisors next. She looked like a little vampire! And keeping in mind I was still breastfeeding at this stage, so it was slightly frightening! LOL!
Now I know there are all ranges of 'normal' out there, but my other 3 kids had done the standard thing of growing all their middle teeth first, so this was something a little unusual for me. Wondering if my baby was some kind of freak, I turned to the font of all wisdom.... and asked my Instagram followers what they thought ;-) You all reassured me that plenty of your babies had done the same thing and so maybe it wasn't so weird after all!
Anyway, it was still a story worth documenting and I had the ideal stamp set in mind to help me tell it. I figured the toothy chompy alligators from the Later Alligator set would match my theme perfectly, and I was right. A flawless combination of teeth and cute - just like Shiloh!
I created a series of little windows down the side of my page using the stacked circles from the latest release Build a Tag Die Set. Then I filled each one with different images to make a little scene, varying the shapes and images and products to generate a lot of interest. And as always I made sure to leave plenty of space to write my journaling.
You can watch the process of how my page came together in my video today. I hope you enjoy!
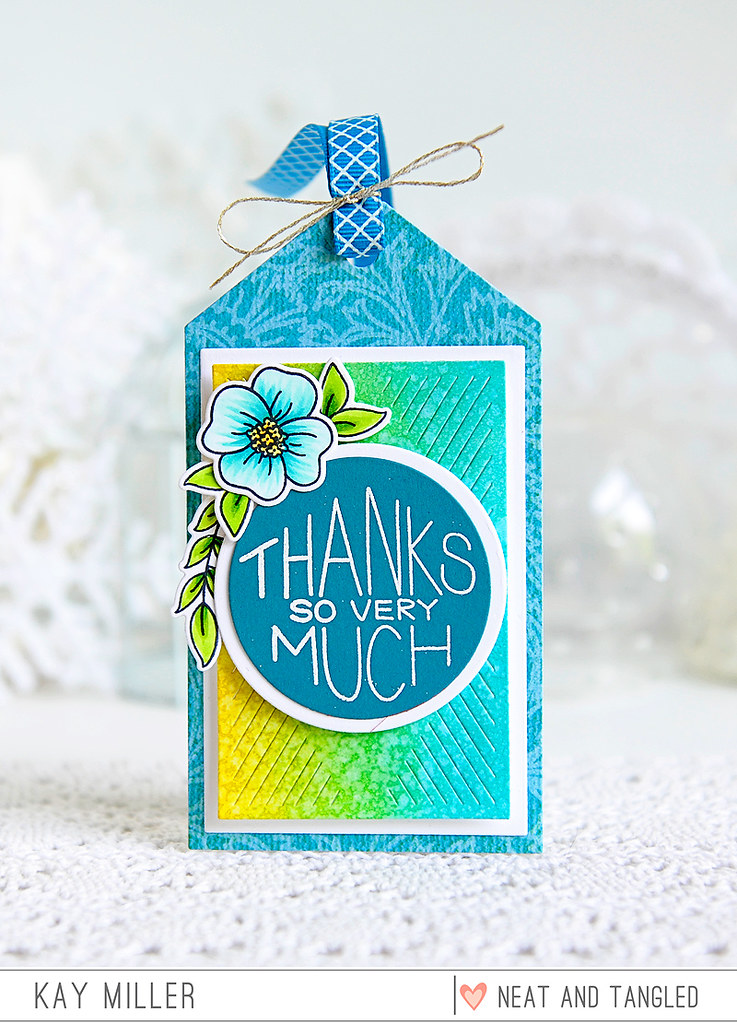
I cut the tag base out of some patterned paper that I had on hand. I then blended some distress inks onto card stock and cut the piece from the Gift Card Box Addition dies. I added the white background layer to the back and adhered this to my tag front.
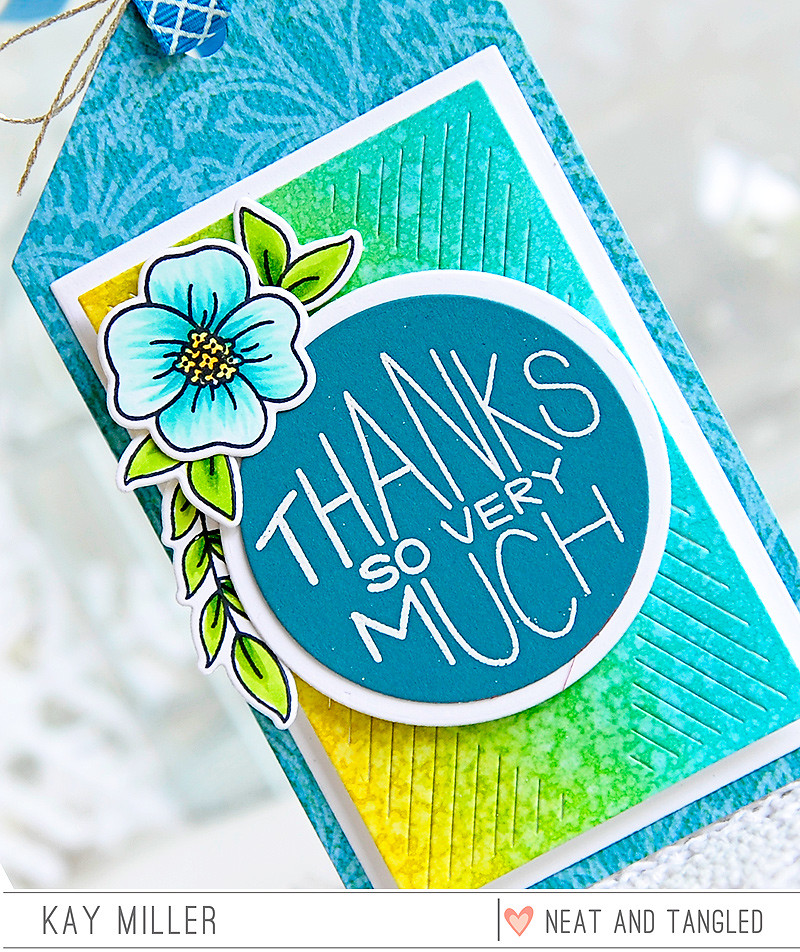
I heat embossed the Thanks so very much sentiment on blue card stock with white embossing powder, and cut it out with the circle die included in the Build A Tag die set. I cut the white circle out to mat it with, and adhered this to my tag with foam tape. The flowers and leaves are from the Floral Frame stamp set. I colored the images with Copic markers, cut them out with the coordinating dies, and adhered them to the tag with foam tape. To finish it off, I added some ribbon through the hole at the top and tied some sliver thread around it.
To make a blue card, I placed the central piece into the frame and cut off the part that was not seen behind the panel. Then, I adhered this little piece back to the panel side, so the frame looked bigger than it actually is. I finish both cards with Nuvo Drops in White.
Thanks so much for stopping by, hope you liked that simple ideas and will give them a try.
Have a wonderful week,
D.
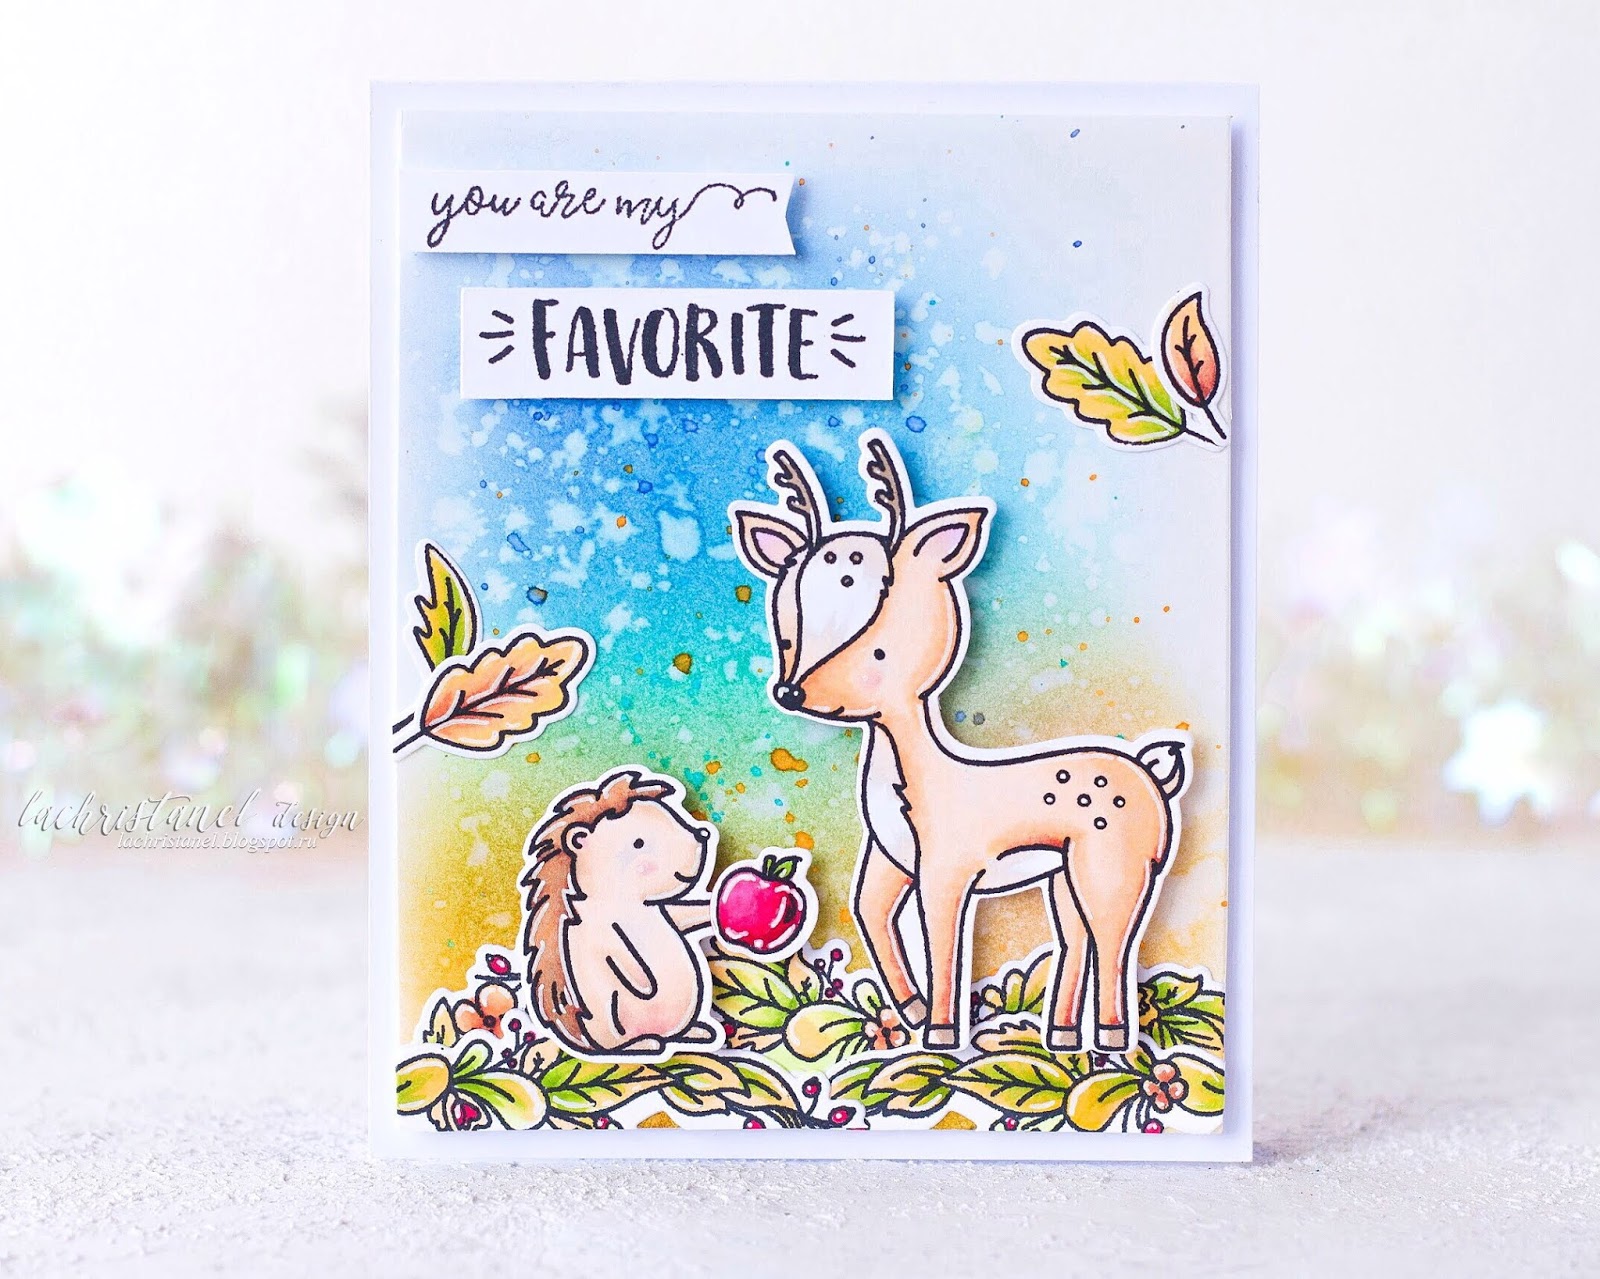
Hello everyone! It’s Kristina here. Today is my second post as a Guest Designer for Neat and Tangled! For my today's post, I decided to make a fun autumn card with adorable deer.
I started by blending distress inks on a white piece of paper. I used Salty Ocean, Cracked Pistachio, Dryed Marigold distress inks and splattered my panel with the same inks.
After my background was done, I stamped the cute images from Into The Woods and Floral Heart stamp sets with black ink onto white paper. Then, I colored all the images with Copic markers and die cutting them with coordinating dies.
I adhered floral hearts on the bottom of my panel and fussy cut the edges. Next, I foam mounted the images and two white banners on my panel and my card is complete!
Thank you so much for joining me today and have a great weekend!
Hello from Scotland, it's Bibi Cameron here and today I'm sharing a video -post with ideas using the new Gift Card Box from the latest Neat and Tangled release and I made a super easy pop-up gift card holder to put inside the box as an extra decorative and useful element.
The box measures 3- 3/4 " x 2.5" and it is 1/2 an inch tall.
This box is extra versatile and it can be customized for any occasion. It can accommodate a regular gift /reward card and it will be great packaging for small treats, jewellery, mini cards, tags, slim sweeties, chocolates or even money.
To create the insert for the box above you need a 6" x 3-3/4" or 6" x 3-1/2" inches piece of 240 grams to 300 grams cardstock ( The thicker the cardstock the narrower should be the insert so that it will allow the box flaps to fold down in place and the box can be closed).
Fold and glue the pop-up insert as shown in the video.
The gift card will remain flat inside the box as shown in the picture.
To create the insert in the card above, you need a 6" x 3-5/8" or 6" x 3-1/2 inches piece of 240 grams to 300 grams cardstock. Remember that the thicker the cardstock the narrower should be the insert so that it will allow the box flaps to fold down in place and the box can be closed.
Score at 2", 2- 1/2" - 3 1/ 2" fold and glue the paper as shown in the video.
The gift card will remain straight up inside the box as shown in the picture.
I was keen to try several boxes designs for Halloween, children parties, birthdays, Christmas ... the box is adorable every time.
This month I'm sharing how to color this adorable little Alligator from the Later Alligator Stamp set. I'm going to show you how to color the no line technique and we are going to keep the color a little on the lighter side to resemble a watercolor look.
Dropping by to announce the winners from last week!
Thank you to everyone for all your excitement and kind comments! If you are a winner please email me at danielle@neatandtangled.com to claim your prize!


