End of Year Clearance + Cheers to 2021!

 Hello friends!

Can you believe we are at the end of 2020? Time was strange this year, in that it feels like this year has been both long, and simultaneously flown by incredibly fast.

Just like many of you, our year has been filled with ups and downs and everything in between.  I sit here in front of our Christmas tree feeling grateful for my family, my friends, my home, and the continued support of this community <3

If you've been following along, you know I am working to clear out the rest of our old inventory to make way for the new in 2021.  There are still many great items left in the shop!

Just as a heads up, I will be pausing the online shop from January 17th- 31st to reorganize and make some updates :) 


Sale is good on in stock items only.
Sale includes items in SALE section
Please allow for extended shipping times
Orders cannot be combined
Sale will continue as long as inventory remains


I am wishing you all a very happy New Year,  filled with peace and love.


Cheers to 2021! 
Danielle


8

Happy Thanksgiving! + Black Friday Sale

 Hello friends!

For those in the US celebrating Thanksgiving, I hope you had a beautiful day. I'm sure for many of you, this Thanksgiving was unlike any other, and I hope you were still able to enjoy the day in some way.

I've said many times this year already, but I can't say it enough. Thank so much for your continued love and support.

If you are a newsletter subscriber, you know that at the end of summer I made the decision to shift my focus away from new product development and back to more of a stay at home mom role while my kids are home doing remote learning. It was certainly an unexpected transition. It was difficult to make a choice to push pause on the business, but after my last newsletter, explaining this all, I was so surprised. So many of you sent me personal emails, letting me know you were supporting me, and that this time with my kids was important, and something I'll look back on and know was for the best.  I was moved to tears and the kindness and compassion from my community here. 

I do have a few things in the works for early 2021, so I hope you will stick around with Neat and Tangled! But in the meantime, I am trying to clean out as much from the shop as possible. A fresh start for the new year if you will.

So, in the spirit of simplifying, I'll keep the sale simple as well!  Please enjoy 40% off the entire SHOP all weekend long. Just use the code GRATEFUL2020.  


With love,

Danielle


2

Grey Cardbase and Circular Dies with Daria Grushina [Part 2]

 Hello dear friends,

Daria here.  Hope you going to have a wonderful weekend and may be some time for crating... As I have a new card to share with you. 

I am here to continue my challenge of using both light grey cardstock and Circular die set. I am curious how many I can make (lol). Join me, if you find this idea interesting and fun and tag us in Social media. 

As about today's project, I wanted to use circles as frames for the critters. I am again playing with Santa's Wonderland stamp set, that is not available any more. But, you may use any critters stamps you have on hand, or may be not even them but flowers, or cupcakes to create for example a birthday card. 

So, I die cut lots o circles, stamped cute images over three of them and then coloured them with simple pencils. At first, I simply wanted to place those over my grey cardstock base, but then, I've decided to add something else. 

I added circles in different sizes and colours and adhered some directly to paper some using foam tape. I followed the rule of irregular numbers in creating colour accents: three blue circles, tree white circles three pink shapes (two circles and a banner).  Each time I am consistent with number of circles behind each image. Although they are all of different sizes, it helps to balance them more equally. 

Sentiment is places over a banner shapes from Skinny Strips die set (my personal all time favourite). Again, you may use any theme for you card and change images and sentiment. Overall, I like the way it tuned out. Hope you do to (wink). 

xoxo, 

Daria.  


20

Grey Cardbase and Circular Dies with Daria Grushina [Part 1]

 Hello-hello awesome people,

Daria here.  Recently, I was organising my cardstock and found a few lists of beautiful light grey cardstock. Surprisingly, it is one of my favourite colours, as it works with everything. 


So, I have decided to challenge myself to make several cards using it. To make it more interesting, I've added to the scheme a Circular die set. This way, it is going to be a little series of cards made using both light grey cardstock and circle dies

Here is the first one. 


I love the idea of using different circles to create a background. I've already made a few cards using this technique to mimic confetti background (you may found them here). 

This time, I am using it to create snow. It is easy and perfect for any winter scene cards. 


I am also playing with our older stamp set to create a little scene. I free cut the slopes to place the North Pole sign from Santa's Wonderland stamp set. 

Unfortunately, this stamp set is not availably any more. But, I also feel guilty not to use great stamps from my stash. And, I thought it would be good to use them anyway in case you already had them. Or may be, you will decide to switch it with something wintery that you already have. 

I heat embossed the sentiment in gold and added a couple of gold sequins.

That's all for today.  Thanks so much for stopping by, and see you next time,

xoxo,

D.

9

2020 Update + Sale

Hello dear friends!

Hope this update finds you well as we head in to the last months of the year.

What an unexpected year, to say the least!

As most of you know, I had paused any new releases back in March when we found out my children would be finishing out the school year remotely at home and I'd be helping with their online learning. 

Our family took the summer to relax and escape to the beach. And I (im)patiently waited to hear the news of school. Here in Northern Delaware we learned all public schools would be starting fully remotely, with a plan to return hybrid in mid-October.  Again, I decided to push pause on any new releases. With my husband being a teacher, I knew I'd be the one primarily helping the kids with their virtual learning and I did not want to add any more stress to our lives.

At the end of last week, we learned the school our kids attend pushed the return to hybrid learning again, now until November. Rather than continue to hold my breath and keep pushing product creation and release dates I've made the decision to officially announce there are no new releases planned for the remainder of 2020, and no dates for 2021 at the moment.

Many people don't know that Neat and Tangled has actually been just me and my husband (who also works full time). Of course we have our amazing design team, and at times I've had help with customer service emails from Sarah, and product packing during busy times from Marla, but other than that it has just been the two of us. Preparing all product, inventory management, packing all orders, and everything in between. So for now while I am busy with the kids during the day, there's just not enough time, or energy, to actively create, launch and manage new product.

I know it may be a disappointment to our long time customers. And if you know me, you know this decision did not come lightly.  However, as I have shared so many times, Neat and Tangled was born out of a desire to be able to stay home with my children, do something I love, and build my schedule around my family. I feel so very grateful that at this time in our lives, I am able to pause work to shift my focus back to my children.

So while I help them, in between Zoom calls and snack breaks, I'm busy behind the scenes clearing out old inventory, reorganizing my office, painting and doodling new designs.  We still have quite a bit of retired product hanging out that I would love to see find homes to make room for the new. So a big sale it is!

A few details:
- Sale is good on in stock items only, and cannot be combined with other coupon codes. 
- Please allow for extending shipping notifications due to the large volume of orders placed! 
- Coupon code can be used on items already marked down in the SALE section.
- All items in the SALE section of the shop are retired products, and will not be restocked - once they are gone they are gone!

Head over to the shop to grab some new favorites!

Also, for those of you who followed our last few releases, you'll know I brought on Robbie Bryant, a friend and local tattoo artist, to collaborate with on designs.  It has been an exciting year for him as well, as he is preparing to open his own tattoo shop, Omnia, here in Delaware in the coming month. If you follow him on Instagram, be sure to send him well wishes on his new endeavor!

As always, thank you for the continued love and support!

With love,
Danielle


7

Finding Inspiration in Previous Projects with Daria Grushina [Part 2]

 Hello dear Friends! 

Daria here. To continue my thought on finding inspiration from previous projects, I wanted to share one more card. It uses the same supplies:  Grateful Heart stamp set with coordinating dies, patterned paper, gold embossing powder and a few gold sequins. 

The only thing I've added is die-cut letters for the sentiment. 

I think, this card has the same feel as a previous one. At the same time, it is different: design, scheme, colours. It is more monochromatic with just a touch of color behind the letters. 

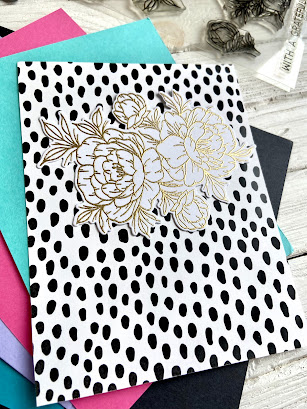
I again started with heat embossing beautiful flower cluster from Grateful Heart stamp set in Gold embossing powder. Die cut it and foam mounted over a patterned panel from Modern Graphics paper pack from Julie Ebersole. 

Then, I've added die-cut letters for the sentiment in gold glitter paper along with a little pink behind. They were made using Classic Block Alpha by Ellen Hutson. But you may use any letters you have on hand. 

Gold sequins add that extra shine and movement to the card. 

Can you tell me, which of the three cards made as an inspiration from one another you liked the most? Or may be you also have a similar creative process?

Thanks so much for stopping by, and see you next time,

xoxo,

D.

2

Finding Inspiration in Previous Projects with Daria Grushina

Hello-hello awesome people,

Daria here. It is been a while.  At my previous post, I've shared with you this card


It was a super simple and fast to make project.  While writing about this card, I also got an idea of another card, using photos of the project as an inspiration. To say the truth, it happens with me a lot. I start to make something and wile making a card I've often got a completely different idea in the process or afterwards. Does it happen with you too?


So today, I am again going to share a card with  Grateful Heart stamp set. I started with heat embossing beautiful flower cluster from Grateful Heart stamp set in Gold embossing powder. Die cut it and foam mounted over a panel I made from coloured cardstock. I think pink and grey are just made for each other and look so good together. 


I also used a patterned paper from Modern Graphics paper pack from Julie Ebersole. It always give a right contrast and modern feel to any card project. 


Sentiment is from the Floral Frame stamp set, and also heat embossed in gold. I finished it up with one sequin in gold. 

That's for today.  Thanks so much for stopping by, and see you next time,

xoxo,

D.

5

End of Summer Sale!

Hello friends!

Hard to believe it is September already! What a year it has been!

I don't know about you, but I am looking forward to the change of seasons. Bring on the fall!

To celebrate the end of summer, let's say goodbye with a sale.


The sale is good on in stock items only.

The sale applies to items already marked down in the SALE section of the shop.

It cannot be combined with other coupon codes.

Due to the volume of orders, please allow 7-10 business days for your order to ship.

The sale will run the entire month of September!


Over the last few weeks dies, stamps, and rubber backgrounds have been restocked, so be sure to check the shop if you've been waiting!


2

Neon Mail Background with Cheiron

Hi there crafty friends. It's Cheiron here with another monthly post. This month I am using the Mail Background stamp, which just came back into stock in the Neat and Tangled shop, so grab yours while you can! 

I don't know if you are a fan of neon, but I love it so much! I am glad to see some neon pieces trending for fall in some of my favorite shops and was inspired to pull out some neon supplies from my stash to make this quick and easy card. 

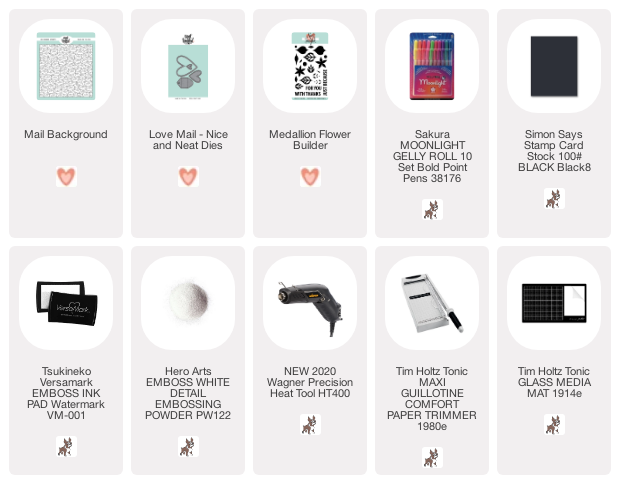
First, I stamped and embossed the Mail Background in white on a black piece of cardstock. Then I used my Gelly Roll Moonlight pens in all my favorite colors to color in the hearts. Once the hearts were dry, I stamped the Just Because sentiment from the Medallion Flower Builder Set onto a strip of white cardstock. I added a few neon envies cut from the Love Mail dies to complete the card. That's it! Super easy and super colorful and ready to send to brighten someone's day! 


SUPPLIES: 

2

Super Simple Thank You Card with Daria Grushina

  Hello-hello awesome people,

Daria here. Today, I am sharing a super simple and fast to make project. Again, I am working with  Grateful Heart stamp set. Love when image speaks for itself and already is a gorgeous focal point. So, I've decided to go with the image, gold embossing and simple, almost minimal design. 


I started with heat embossing beautiful flower cluster from Grateful Heart stamp set in Gold embossing powder. Die cut it and foam mounted over a grey cardstock base. Sentiment is from the same stamp set, and also heat embossed in gold. I finished it up with a few sequins in gold. 


With this design, it is super easy to mass produce Thank You cards. Moreover, it will work with any color scheme. I made a few photos to show how good this image would look with different colours of background. 


You may even choose to use pattern or embossed paper. 


While thinking about this post, I also made another card, using photos of the project as an inspiration. I will share it next time. Meanwhile, I will be happy to see what you create. If you get inspired, be sure to tag us in social media.


Thanks so much for stopping by, and see you next time,
xoxo,
D.


3

Diamond Pattern Card with Daria Grushina

 Hello-hello dear people,


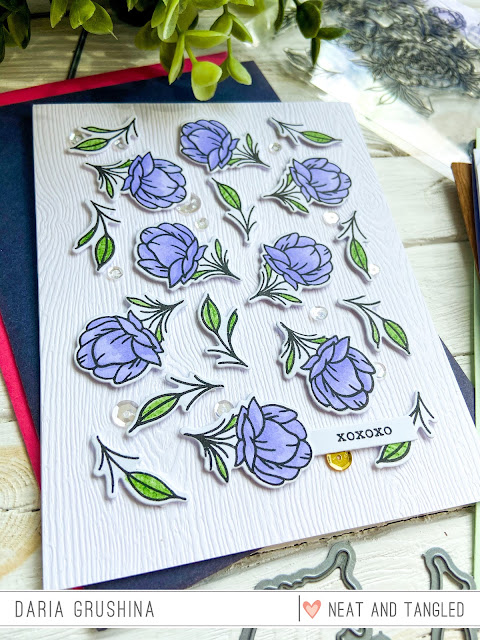
Daria here. For my today's post, I've created a diamond pattern using Geometric die set and little flowers and leaves from Grateful Heart stamp. And I really like the way it turned out. 


I started with stamping and colouring small flowers and leaves from Grateful Heart stamp. Then, I die cut the flowers with  coordinating dies, along with several diamond shapes from Geometric die set. 

I arranged these geometric shapes over my card base and then worked on each flower cluster individually. I adhere every cluster using both glue dots and foam squares. 


When all of my individual pieces were done, I adhered them with foam tape to the card base. 

I also added a sentiment from  Typed Sentiments stamp set and placed on a banner from Skinny Stripes dies. A few sequins in Crystal Clear added a little bit of shine. 


As I had a lot of extra flower let, I've decided to do second card. For my second card, I went with a design I tried earlier, but with a little twist. I leave the link here, so you may check it out.  I arranged flowers, added leaves, and adhered everything with foam tape. I left little borders on the sides to mimic the frame. 


I placed a little sentiment from Typed Sentiments stamp set over a short banner from Skinny Stripes dies on the side, picking from one of the flowers. 


A single gold sequin attract attention to the sentiment and gives a little more interest to the card. 


That's it, hope you like it and may be will give a try. 
Thanks so much for stopping by, and see you next time,

xoxo,
D.

6

Pink + Gold Card with Daria Grushina [VIDEO]

Hello-hello Awesome People!

Daria here. I was playing with Floral Frame Stamp and die set. And there is a video too. There is lots of heat-embossing, pink and gold. So, it turned out to be very girlish birthday card. 


Here, you may find the process:


I started with stamping the Floral Frame with Versamark Ink and heat embossed it in gold embossing powder. Then, I die-cut it using coordinating die.


Next step was to stamp the Delicate Dots Rubber Background stamp to the pink panel. This beautiful colour of cardstock comes from Over The Rainbow Assorted Cardstock Pack. I used the central portion of the Floral Frame that left after die-cutting to mask the center. This way, I had a space for the sentiment free from the background dots.


I heat-embossed the sentiment from the same stamp set in the middle of the panel, using white embossing powder. I adhere the frame with foam tape. I also added a few sequins here and there for some extra shine.


This card turned out to be really tender. I love the combination of pink, white and gold.  Plus, it is completely made with heat embossing, and I love heat-embossing. Each time, it is like magic. Hope you like it (wink).


Thanks so much for stopping by, and see you next time,
xoxo,
D.


ps: There is another project, I've done with the same Floral Frame Stamp and die set. You may find it here, including a process video for the card. 
0

Grateful Heart Thank You with Cheiron


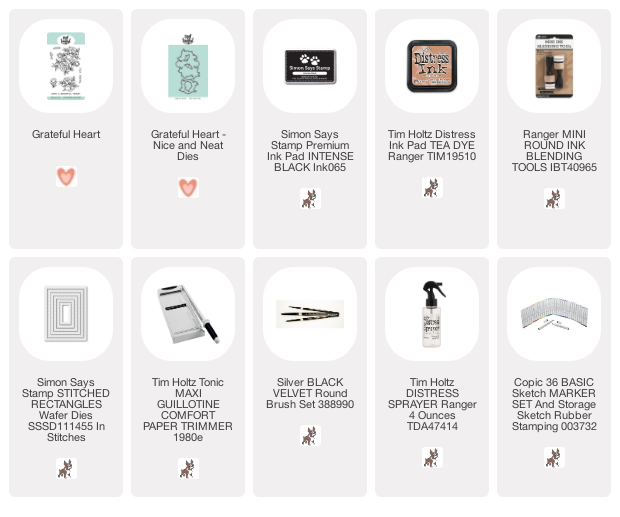
Hi there crafty friends, it's Cheiron here and today I have a card for you using the Grateful Heart stamps and dies. It's a quick and easy card, with some quick Copic coloring on the flowers and a Distress Ink panel as the background.


I blended Tea Dye Distress Ink onto a panel of Distress Watercolor cardstock, and also splattered some Tea Dye Ink mixed with water onto the panel. Once it was dry, I stamped the sentiment.

I stamped the flowers onto a piece of Neenah cardstock and colored them in with Copic markers, then adhered them to the panel with foam tape. Super quick and easy and reminded myself that coloring and cutting a ton of these flowers would be great to have on hand for future cards!


SUPPLIES:
1
Back to Top