Flower Medallion Celebrate Card


Hi friends! Stephanie Gold here with you sharing a fun card using the incredible Flower Medallion Builder Set. I started by stamping 5 petals and stamping them in two teal shades. I die cut one of the petals from a white panel as well and popped the panel up on the card base.


After adhering a pink panel to the lower portion of my card base, I stamped the "celebrate" sentiment in black overlapping the white and pink panels. I popped the teal petals up using extra dimensional adhesive. I finished the card off using black paint splatters and some sequins from the Bubble Gum and Peacock Feathers mixes.


Thank you for stopping by everyone!! I hope you all have a wonderful week! Much love. :)

Xo, Stephanie

Follow me: MY BLOG // FACEBOOK // INSTAGRAM // PINTEREST
2

Awesome Distress Oxide Glazed Resist Card Set


Hi there! It's Cheiron here and today I'm sharing some fun cards that I created with one of my favorite products, stencils. For these cards I used a technique that I learned from Tim Holtz called Distress Oxide Glazed Resist. When I make background panels and play around with inks, I find it best to make multiples since I already have all of the supplies out on my table. 


To do this technique you will need your favorite Neat and Tangled stencils and some Ranger Distress Glaze. I used the Geometric Blooms, Polygon, Swirly Twirly, and Star Simply Stencils. I wanted a round shape as well to add some variety, so I cut the Punchinella die out of Yupo Paper and used it as a stencil. You will put some of the glaze onto a foam blending tool and dab it off onto your craft mat before applying through a stencil onto some Mixed Media Heavystock paper. You want just a very thin layer of the glaze...a little goes a long way! Be sure to clean your stencils with rubbing alcohol when you are all done to remove the glaze from your stencil. 


Here are a few first layers that I made using warmer colors. You can see the glaze I put through the stencil resists the ink. 


Here is another version of my first layers using cool colors. 


Once you are done, pick a different stencil and add another thin layer of Distress Glaze. Then add another layer of Distress Oxides (I went opposites this time and added cool colors onto my warm and vice versa).  You can stop here or continue to build more layers using this technique until you get the desired result. 


Once I was done with all the panels, I die cut the words from the Awesome die set and stamped each card with a different message form the Awesome stamp set to create an entire set of Awesome cards. This one used the Swirly Twirly stencil and Punchinella die. 


This one was made using the Star stencil and Punchinella die. 

I hope you have enjoyed these colorful cards and this fun technique. I always like playing around with new techniques and finding other ways to use my supplies and I hope you will try it out too. Have a great week! 

10

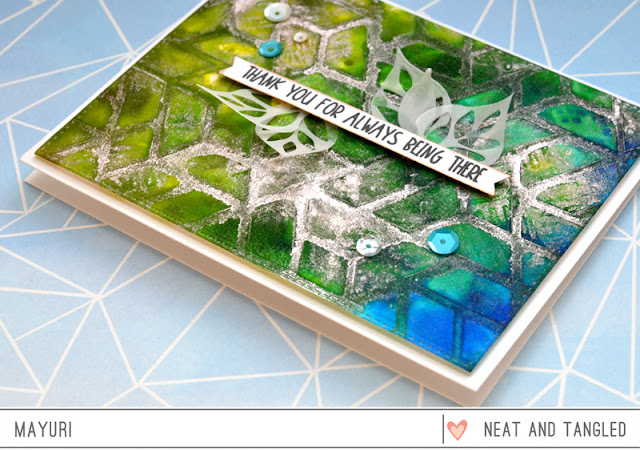
Thank you for always being there

Hello there!

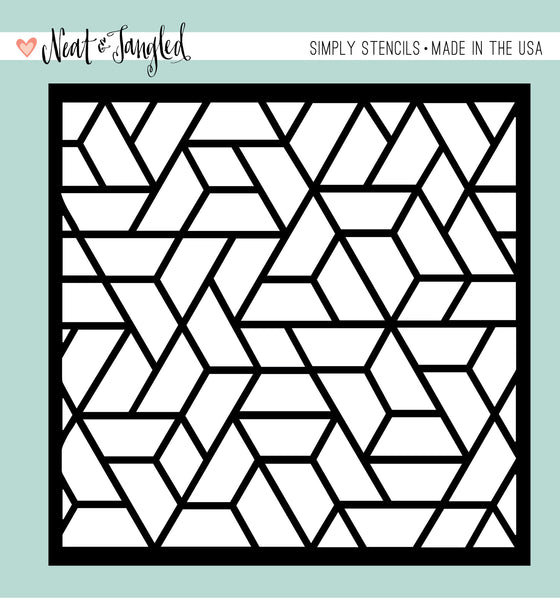
Mayuri here to share a card using the Polygon Stencil ;-)

©Candles in the Garden. Neat and Tangled May 2017 - Polygon Stencil

I took out my Dylusions Ink Sprays and Antiqued Bronze Distress Stain for a cool effect, with minimal effort! I began by adding droplets of blue and green Dylusions to a large acrylic block until the whole things was covered - the more droplets you add, the richer the end result.

©Candles in the Garden. Neat and Tangled May 2017 - Polygon Stencil

I then heavily misted a piece of watercolour paper with water until it was fairly saturated before laying the stencil on top, and stamping the inky acrylic block straight down into the watery puddles. I jiggled the block around a bit to help spread the colour through the stencil.

 ©Candles in the Garden. Neat and Tangled May 2017 - Polygon Stencil

I gently removed the acrylic block and while the stencil was still in place, I smooshed the Distress Stain sporadically through it and onto the damp watercolour piece. I slowly removed the stencil, mopped up any excess moisture and quickly heat set the panel.

©Candles in the Garden. Neat and Tangled May 2017 - Polygon Stencil

Once dried, I trimmed the panel down and foam mounted it to a white card base. I stamped a sentiment from the Scandinavian Prints set with black dye ink onto a strip of white cardstock and foam mounted it to the card front with a few vellum, die-cut leaves underneath. To finish, I added some sequins from the Ocean Waves sequin mix.

©Candles in the Garden. Neat and Tangled May 2017 - Polygon Stencil

Thanks for stopping by!
3

Therese Calvird - Floral Heart Two Ways


Hey everyone!  We're wrapping up the week with our May guest designer Therese Calvird who is sharing her final projects for this month.  She's been providing amazing inspiration all month and today's post is no exception.  Here's Therese:

I am so happy to be back with you this Friday here at Neat & Tangled and today I am playing with one of the most beautiful wreath stamps ever, and it’s called Floral Heart.

I have two cards and a video to share with you, and I wanted the heart to be the focal point so I have kept them both quite clean and simple. My first Floral Heart is watercoloured and I have added a gold die cut Awesome sentiment over the top of the image.


The remainder of my sentiment was from My Favorite Nut and was selectively stamped just above the heart.


For my second card I decided to use some of the beautiful Neat & Tangled sequins to create a shaker. The Floral Heart was stamped directly onto some recycled cardstock and coloured with Copic markers. The sentiments on this design also came from the My Favorite Nut stamp set.


But the best thing is, the Floral Heart stamp has a co-ordinating die which is a very clever design because you can separate it and die cut just the inner or outer portion of the wreath, how wonderful! This was perfect for my clean & simple shaker window


Here is my video showing you how I created both cards.


I can’t believe how quickly this month has flown, I have thoroughly enjoyed my time here as Guest Designer at Neat & Tangled and would love to send out a big thank you to both Danielle and Miriam for asking me, I’ve had a blast!
6

Geometric blooms stencil card with Sveta

Hello everyone!

Today Sveta is here to share a new card. I made this card for a wedding occasion and my first thought was to make something elegant yet eye-catching and shining.

I settled on the Geometric Blooms simply stencil and Nuvo Gold glimmer paste. I'm so in love with this combination and the whole process was really simple and fun. 

I took heavy weight white cardstock and covered the front with the paste making one-layer card.

Such impressive background takes main role so needs just a sentiment to be finished.

 I took Love Notes - Nice and Neat Dies and die cut a sentiment in lavender + white colors. For the matching sentiment I used Big Top Birthday stamp set.

Just look at this gorgeous shimmer!

Thanks for stopping by! Wishing you lots of inspiration!
6

Unicorn Card with Daria

Hello Dears,

Daria here. Thanks for joining us today.

For my today's card I couldn't resist playing with Magical Day Stamp Set from the latest release. It is just so adorable.


So, I colored the unicorn and leaves branches from Magical Day Stamp Set  with alcohol markers and die cut them with coordinating dies.


To create my background, I took light blue cardstock, texture paste and Scalloped Stencil.  And then, adhered it to my card base with a foam tape. I also used a little bit of gold glitter cardstock to place behind the leaves for some shine and interest.

Sentiment is from the same Magical Day Stamp Set, which I've simply stamped and fussy cut.


Hope you liked it and will find some time to create :) Thanks so much for stopping by!

Hugs,
Daria.

Neat&Tangled products used: 
Magical Day Stamp Set
Magical Day Nice and Neat Dies 
Scalloped - Simply Stencil 
6

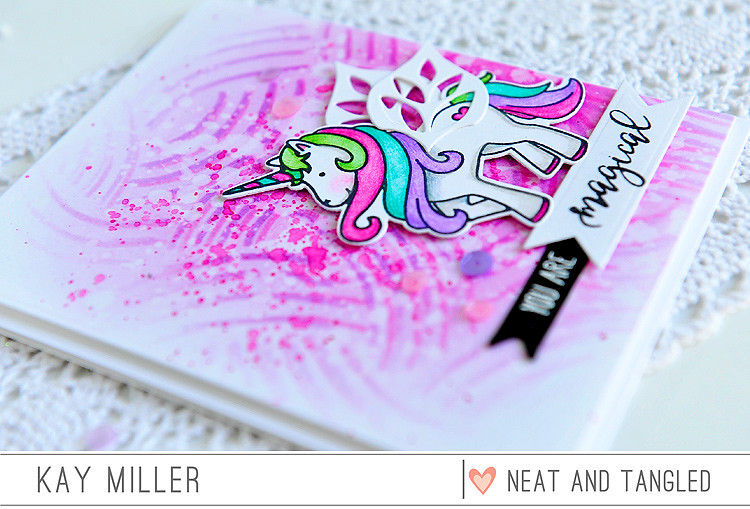
Magical Day with Kay


Hi there! Kay here, and I have a fun card to share with you today using the adorable Magical Day stamp set from Neat & Tangled!


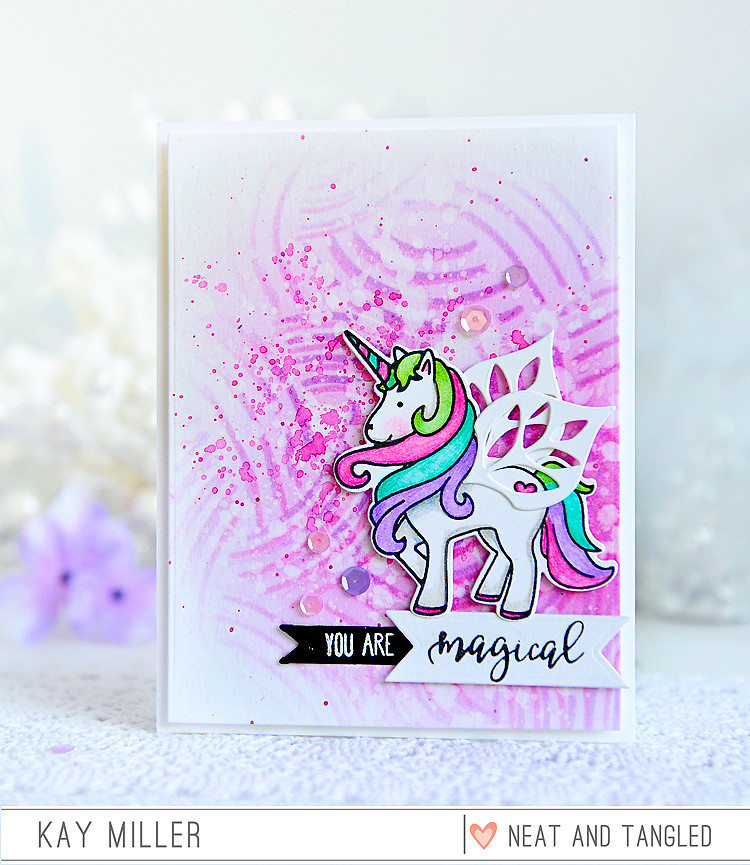
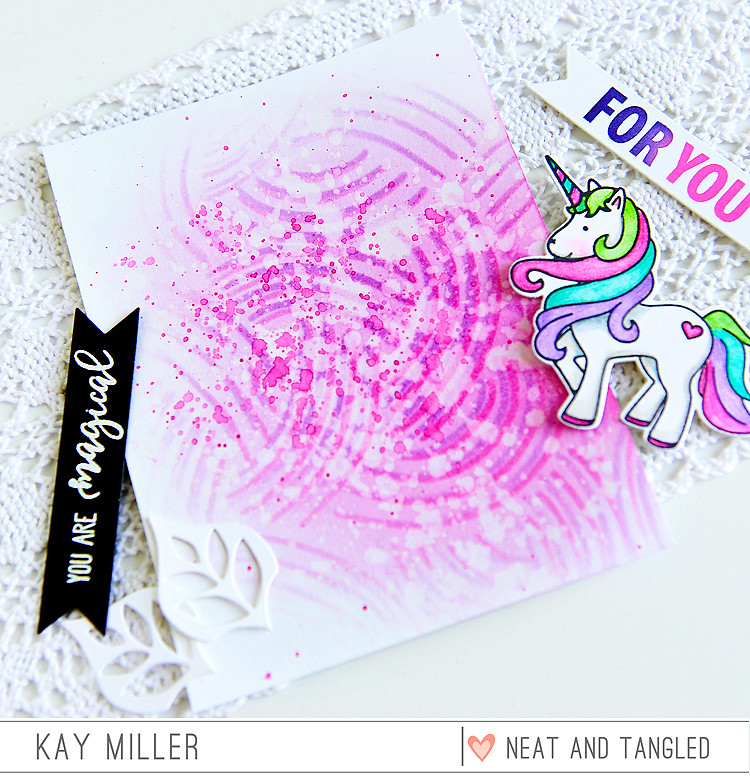
First off I used the Swirly Twirly stencil to create my background. I used Bristol board and Distress inks, and stenciled the Picked Raspberry first, then slightly moved the stencil and stenciled the Wilted Violet. Next I blended some of the Picked Raspberry over the whole thing, then splattered it with water and some more of the Picked Raspberry ink mixed with water.


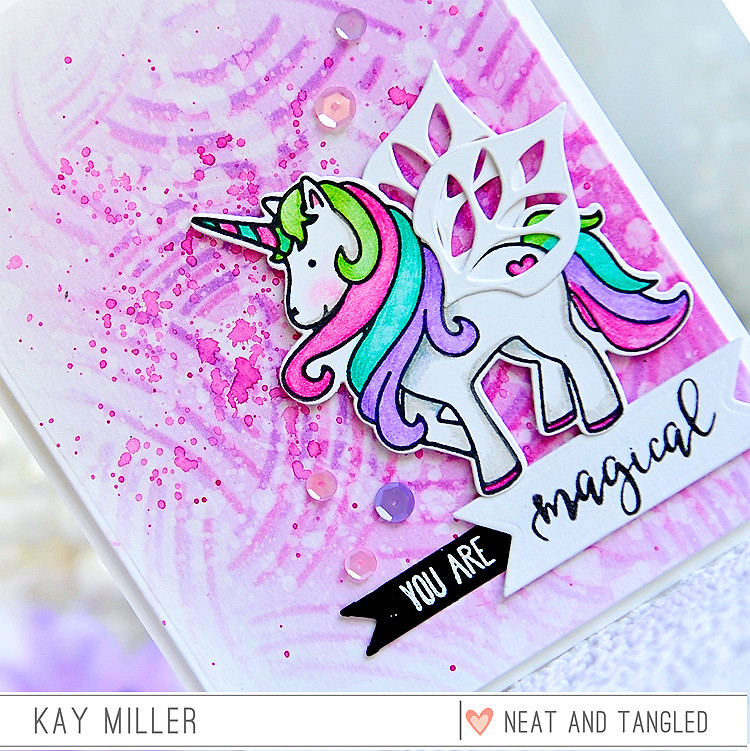
I colored the unicorn from Magical Day with colored pencils, and cut it out with the Magical Day Dies. I then cut two of the flower petals from the Flower Medallion Builder dies and glued those to the top of the Unicorn to make a Pegasus! :)


I heat embossed part of the sentiment with white embossing powder on black card stock and then the Magical part I just stamped in black on white card stock. I cut these both out using the banner dies from Scalloped Dies and and adhered the white one slightly over the edge of the black one.  I added a few sequins from the Fairy Garden Sequin Mix.

I hope you have enjoyed my card today! 
Thanks so much for stopping by!

Kay :)
2

Coffee and Friends | VIDEO with Natalie

To be fair there's nothing quite the same as getting a new stamp set in your hands as you wonder about all the possibilities it holds. But today I'm wanting to change tack a little bit and get you thinking about how you can use some of your older stamps in new ways by mixing and matching various sets you have in your collection.


Although on first impressions it might seems like all the stamps I've used here were made to work together, they actually come from THREE different sets (and their matching dies).
I've used 'Perfect Blend' for the sentiment and the coffee cup, 'Lumberjack Love' for the girl, and 'Floral Heart' for... well...... the floral heart! 


Here's some tips to keep in mind when mixing and matching stamp sets:
  • Start by picking a sentiment that inspires you to create a scene
  • Choose images that work together to build that scene
  • Keep in mind the scale of your different elements - they shouldn't be too disproportionate
  • Sticking with a simple colour scheme helps the images appear even more cohesive


In my video today I'm going to share my process of creating this card from start to finish. Not only will you get an insight into my inspiration and how I built up the idea from there, but you'll also get an peek into my real life such as how I store my stamps, and how I create with my kids around ;-)


Do you mix and match your stamp sets? Which sets have you combined before? Share in the comments because I'm sure we'd all love to check them out!

xx
Natalie
10

Squirrels Can Do Anything


Hey everyone!  We're so happy to be welcoming our May guest designer Therese Calvird back to the blog today.  Her cards today will have you smiling for sure, here she is with all the details:

I’m back today with some of the cutest squirrels on the block, these little fellas are from a fun set called My Favorite Nut which is cuteness overload.

I took the clean and simple road today. For my first design I thought it would be fun to stamp the nut image directly onto some wood design paper.


Then I stamped it a second time onto some white cardstock and coloured the leaves and squirrels with some Prismacolor pencils. Then I fussy cut everything out and basically paper pieced the image back together.

Finally, I used the Tiny Cuts die to cut a heart border and added the You Can Do Anything sentiment die cut in smoke grey and layered onto brown fun foam. (and those tiny red hearts are rescued from the border and coloured with a red Copic marker)


I used one of those cute squirrels from My Favorite Nut and the same You Can Do Anything die to create my second design, but this time the sentiment became my focal point with the help from a little bit of colour smooshing.


I also decided to add some bling from the Peacock Feathers Sequin mix and I have a video here showing you how this card came together.

I’ll be back next week with another video and some fun inspiration, I look forward to seeing you then.
4

Purple Prehistoric | Nancy Damiano

Hi everyone! Nancy here today with a look at the Prehistoric Pals stamp set. I chose the Polygon Stencil for the background because it reminds me of dinosaur scales!

I used the Polygon stencil and Distress Ink in Salty Ocean, Wilted Violet and Mowed Lawn to create the blended ink background. This ink combination makes for a dreamy looking backdrop for our dinosaur pals.

The stamped Prehistoric Pals were colored with Zig Clean Color markers. A sprinkle of sequins from the Fairy Garden Mix lead from the tiniest dines up to the sentiment from the My Favorite Nut Stamp Set

Create pretty cards with hues of purple, blue and green for all of your little dinos!


3

Grey Shading a Rainbow with Kelly

Hello Crafters! 

It's Kelly here and today we are going to be talking about coloring a little differently. 


You know I love my Copic markers. I also realize the investment that they are.  I don't own all the markers and I know most of you don't either. 
Today we are going to talk about how you can get more out of the markers you own. 


Today's card is super simply in both design and shading. While I was at Simon Says Stamp CREATE I did a Create It, Take it showing how to shade your images with only gray markers. It doesn't matter which gray's you use. If you have warm or cool or something in between. Just use what you've got. 

You can see the technique in action in the video below. 


Like I said in the video I used more extreme shading for some variation but you can go as dark or as light as you want with this shading technique. If I was doing a face I'd only use a C1 and maybe a C3 but if you're shading a flower you can go as dark as you want. 


I hope you'll give this technique a try and let me know what you think! 

Thanks for stopping by! 


Supplies: 

Neat & Tangled POLYGON - SIMPLY STENCIL
Shop at:
Neat & Tangled
 Neat & Tangled AWESOME
Neat & Tangled AWESOME
Shop at:
Neat & Tangled
Neat & Tangled CRYSTAL CLEAR MIX
Shop at:
Neat & Tangled
Sakura WHITE GELLY ROLL Medium Point Pens Set
Shop at:
SSS
EK Success WRITING PEN FINE TIP
Shop at:
SSS
Neenah Classic Crest 80 LB REAM Smooth Solar White Paper Pack 250 Sheets
Shop at:
SSS
Fiskars PREMIUM CUT LINE Paper Trimmer 12 Inches
Shop at:
SSS
Tombow MONO MULTI Liquid Glue
Shop at:
SSS
Martha Stewart SCORING BOARD
Shop at:
SSS
3M Scotch DOUBLE-SIDED FOAM TAPE Permanent
Shop at:
SSS
Simon Says Stamp LARGE GRID PAPER Pack Pad
Shop at:
SSS
Precision Heat Embossing Tool Gun
Shop at:
SSS
Tsukineko Versamark EMBOSS INK PAD
Shop at:
SSS
Inkadinkado EMBOSSING MAGIC Powder Bag
Shop at:
SSS
Simon Says Stamp EMBOSSING POWDER WHITE Fine Detail
Shop at:
SSS
Ranger Inkssentials GLOSSY ACCENTS
Shop at:
SSS
Simon Says Stamp Premium Dye Ink Pad BLACK
Shop at:
SSS
ZIG Wink of Stella GLITTER CLEAR Brush Tip Marker
Shop at:
SSS
Sakura WHITE GELLY ROLL Medium Point Pens Set
Shop at:
SSS
EK Success WRITING PEN FINE TIP
Shop at:
SSS
Copic Sketch Marker RV04 SHOCK PINK
Shop at:
SSS
Copic Sketch Marker C1 COOL GRAY
Shop at:
SSS
Copic Sketch MARKER C3 COOL GRAY
Shop at:
SSS
Copic Sketch MARKER C5 COOL GRAY
Shop at:
SSS
Copic Sketch MARKER C7 COOL GRAY
Shop at:
SSS
Copic Sketch MARKER C9 COOL GRAY
Shop at:
SSS
Copic Sketch MARKER 100 BLACK
Shop at:
SSS
Copic Sketch Marker V04 LILAC
Shop at:
SSS
Copic Sketch Marker YR04 CHROME ORANGE
Shop at:
SSS
Copic Sketch Marker Y08 ACID YELLOW
Shop at:
SSS
Copic Sketch MARKER G05 EMERALD GREEN
Shop at:
SSS
Copic Sketch Marker R29 LIPSTICK RED
Shop at:
SSS
Copic Sketch Marker B24 SKY BLUE
Shop at:
SSS
4
Back to Top