Creating Flower with So Very Blessed!

Hello...hello, Joni here to share some projects with you. SO VERY BLESSED sentiment is so gorgeous that I couldn't help but create a flower from it. For this first project I first embossed the sentiment with white embossing powder, then I just eye ball the shape of the petals and used distress inks to create a watercolor image. You can of course create your own shape of flower with this sentiment....its really up to you no restriction :). Once I have created the shape of the petals then I darken each one for a pop of color. As for the stem and leaves I just drew them using distress marker then added water. I also added the Raspberry Red Satin sequins from Neat and Tangled to finish off the card.


Here's the full view.


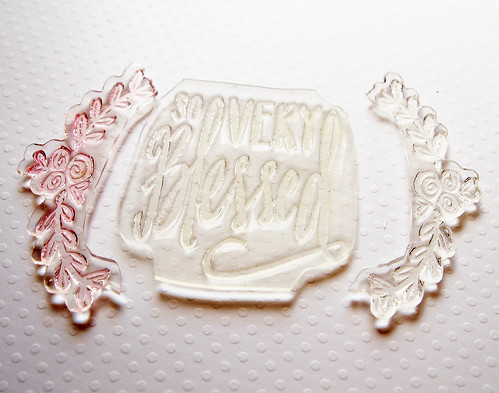
For for the second project, I also white heat embossed the sentiment, but I also drew a pencil mark as a guide to help create a circle using the flower from the set. I separated the sentiment from the laurel image, this does not hurt the stamp it just gives you more flexibility for future projects. Once I am done with the stamping I removed the pencil mark and then proceed with watercoloring the flower images and the center of the flower. The stem and the leaves I drew and watercolored. I also added some splatter from the remaining distress inks on my mat. Finally, I added some Crystal Clear sequins from Neat and Tangled to finish off the card.


Here's the full view.


I hope you enjoyed! 
I hope you will give it a try to create different flower petal shapes using your new SO VERY BLESSED from Neat and Tangled.

Have a Fabulous Week!
Thank you for visiting :)


...........................................................................................


11

Neat and Tangled June Blog Hop!

Hello friends, Danielle here! To kick start your weekend we are having a blog hop with some of your favorite designers! We will be highlighting two stamp sets from our May release: Photo Booth and Sunday School Songs.  Lots of great projects and giveaways so I hope you will join us!

For my card I used Photo Booth. To create this I stamped the film strip a few times and then cut it into pieces so I could use it to create the focal point and the layers.  I picked some papers from my stash along with some vellum to create the layers. A little stitching and I called it a day! It's hard to tell from the photo, but I used a lot of foam dots to give it dimension. 
photoboothhop
For the camera I stamped it in Hero Arts Butter Bar but it seemed a little too one dimensional so I got out some Copics to outline and add a little shading.
phtoboothclose
And we are doing a giveaway!  Two winners will be chosen from comments all along the hop. Winners will have their choice of Photo Booth or Sunday School Songs! Check back here on Saturday July 5 to see if you won!

Your next stop is the incredibly awesome Julie Ebersole!

Here is the full hop order:


Danielle Walls (Neat and Tangled)  www.neatandtangled.blogspot.com
Julie Ebersole http://papertrufflez.com

53

Nice and Neat Dies Blog Hop Winner

Hi friends!

Better late than never...here are the winners from the Nice and Neat Dies Blog Hop! Ladies please email me at danielle@neatandtangled.com with your mailing address!

From the Neat and Tangled blog:
 And from Joni's blog


0

Scrapbook Adhesives by 3L Week Day 5!


Hello friends! We are so excited to be teaming up with our friends at Scrapbook Adhesives by 3L to bring you LOTS of inspiration (and some great prizes) this week! They have amazing products that include 3D foam squares and shapes, Dodz, E-Z Runner tape dispenser, Adhesive Sheets, and tons of other amazing options! After you view the projects here be sure to head over to their blog for even more! In case you missed:


Today we have a card from Amy. She used the 3D Foam Butterflies, and covered them in glitter. Then she trimmed the adhesive sheet to make foam strips to create the shaker portion of the card! Talk about being resourceful! She created the petal pattern by using the shape from Neat and Tangled's You + Me set!


Alright, now head on over to the Scrapbook Adhesives by 3L blog to see more projects!

Be sure to comment on both blogs throughout the week to win a prize pack including a selection of Neat and Tangled's most popular stamps and sequins valued at over $25 as well as a selection of popular products from Scrapbook Adhesives by 3L valued at over $25! That's over $50 worth of awesome product! Two winners will be chosen! 

Be sure to check back soon to see if you were a winner!

31

Scrapbook Adhesives by 3L Week Day 4!


Hello friends! We are so excited to be teaming up with our friends at Scrapbook Adhesives by 3L to bring you LOTS of inspiration (and some great prizes) this week! They have amazing products that include 3D foam squares and shapes, Dodz, E-Z Runner tape dispenser, Adhesive Sheets, and tons of other amazing options! After you view the projects here be sure to head over to their blog for even more! In case you missed:


First up we have this bright beauty from Christine using our Sparkle and Shine set! Don't those diamonds look like they are glowing? My goodness!  She used Scrapbook Adhesives Foam Dots for some dimension, as well as the EZ Runner to adhere all the elements.


And we have this freaking amazing card by Yana :) She used our On the Corner stamps and new die!

Alright, now head on over to the Scrapbook Adhesives by 3L blog to see more projects!

Be sure to comment on both blogs throughout the week to win a prize pack including a selection of Neat and Tangled's most popular stamps and sequins valued at over $25 as well as a selection of popular products from Scrapbook Adhesives by 3L valued at over $25! That's over $50 worth of awesome product! Two winners will be chosen! 

Don't forget to stop by everyday this week for more fun! :)

27

Scrapbook Adhesives by 3L Week Day 3!


Hello friends! We are so excited to be teaming up with our friends at Scrapbook Adhesives by 3L to bring you LOTS of inspiration (and some great prizes) this week! They have amazing products that include 3D foam squares and shapes, Dodz, E-Z Runner tape dispenser, Adhesive Sheets, and tons of other amazing options! After you view the projects here be sure to head over to their blog for even more! In case you missed:


First we have Yana with this super fun card combining Neat and Tangled's A Lot to Say and Thinking of You along with Scrapbook Adhesive's 3D Foam Butterflies. The result is gorgeous! I just love the glitter!


Next Anna has a gorgeous layout for you! She used our Sparkle and Shine and Photo Booth sets for her sentiments. And she put a TON of Scrapbook Adhesives by 3L products to use!  She used the E-Z Runner Strips and medium sized Dodz for most things she adhered. Then she used the 3D Foam Squares along with the Creative Photo Corners for her photo.  
For these gorgeous glittery butterflies she used the 3D Foam Butterflies, and for her gold stars the Adhesive Sheets.

Alright, now head on over to the Scrapbook Adhesives by 3L blog to see more projects!

Be sure to comment on both blogs throughout the week to win a prize pack including a selection of Neat and Tangled's most popular stamps and sequins valued at over $25 as well as a selection of popular products from Scrapbook Adhesives by 3L valued at over $25! That's over $50 worth of awesome product! Two winners will be chosen! 

Don't forget to stop by everyday this week for more fun! :)
39

Scrapbook Adhesives by 3L Week Day 2!


Hello friends! We are so excited to be teaming up with our friends at Scrapbook Adhesives by 3L to bring you LOTS of inspiration (and some great prizes) this week! They have amazing products that include 3D foam squares and shapes, Dodz, E-Z Runner tape dispenser, Adhesive Sheets, and tons of other amazing options! After you view the projects here be sure to head over to their blog for even more! In case you missed:


Today we have Kristen with a card so bright you might want to put on your shades :)  She used our Tiny Triangles set along with On the Corner and our new On the Corner die to create this stunner! To pop up the street sign she used the Foam Mounting Squares.
Any Mayuri put together this layered look with our new A Lot to Say die and sentiment from Photo Booth. She used Scrapbook Adhesives by 3L's Adhesive Sheet to create the foiled pattern on the speech bubble die cut!


Alright, now head on over to the Scrapbook Adhesives by 3L blog to see more projects!

Be sure to comment on both blogs throughout the week to win a prize pack including a selection of Neat and Tangled's most popular stamps and sequins valued at over $25 as well as a selection of popular products from Scrapbook Adhesives by 3L valued at over $25! That's over $50 worth of awesome product! Two winners will be chosen! 

Don't forget to stop by everyday this week for more fun! :)

40

Scrapbook Adhesives by 3L Week Day 1!

Hello friends! We are so excited to be teaming up with our friends at Scrapbook Adhesives by 3L to bring you LOTS of inspiration (and some great prizes) this week! They have amazing products that include 3D foam squares and shapes, Dodz, E-Z Runner tape dispenser, Adhesive Sheets, and tons of other amazing options! After you view the projects here be sure to head over to their blog for even more!

First up we have Joni with two amazing projects! To pull these together she used a combination of 3D Foam Squares, Adhesive Sheets, Dodz, and the E-Z Runner. For her first card she used the sentiment from our Clouds set.
 For this one she used our new A Lot to Say die along with Tiny Triangles to create the focal point of her card.

We also have this soft and stunning beauty from Jocelyn! I love how she used the diamonds from our Sparkle and Shine set!  To make all these lovely layers come together she used the Adhesive Sheets to create her glitter star,  Foam Squares to pop up her diamond, and the Dodz and E-Z Runner to adhere her papers and doily. 


Alright, now head on over to the Scrapbook Adhesives by 3L blog to see even more projects!

Be sure to comment on both blogs throughout the week to win a prize pack including a selection of Neat and Tangled's most popular stamps and sequins valued at over $25 as well as a selection of popular products from Scrapbook Adhesives by 3L valued at over $25! That's over $50 worth of awesome product! Two winners will be chosen! 

Don't forget to stop by everyday this week for more fun! :)


48

New Home

Hi everyone! It's Jocelyn Olson, and today is my first official Neat & Tangled post (Eek!). I wanted to share a housewarming card and a tip.

First up, the card:

Celebrate Home


I really love the Simple Christmas set, and I wanted to use the cute house from the set for a non-holiday card. The laurels are from So Very Blessed set, and if you see on the stamp, I only used a small portion of the stamp.

There are several ways to mask a stamp, but honestly, I always seem to get ink transfer or forget to peel off the washi tape. ;) So what I often do is cut apart my clear stamps:


Celebrate Home


When I cut apart my stamps, I'm careful to trim only them once. Once, I trimmed a little extra to tidy up the edges. Of course, when I did that, the stamps didn't fit back together like a jigsaw. I learned, and now I can stamp the image easily as one image or three.

Here's a close-up of the card:


Celebrate Home


I finished the card with the "celebrate" sentiment from Photo Booth. That set has a great mix of sentiments! I added the pink bow from Crate Paper. With the bow, I almost think the card could be a baby card. What do you think--housewarming or baby card? :)

Here are the sets I used for this card:


Thanks for stopping by! Have a great day!


11

June Guest Designer: Vicky Papaioannou!

Hello friends!  Taking a baby break to pop in and share our last project from guest designer Vicky Papaiouannou

I'm so sad that the month is already over, but so grateful to have had her join us this month with 3 amazing projects AND videos!  Be sure to subscribe to the Neat and Tangled YouTube channel and give us some thumbs up :)

And now for Vicky's project!

For this card she used My Favorite. I love how she made the sentiment the focal point of the card. The white really pops against the pink!

Watch the video to see how it all came together!


Thank you so much Vicky for joining us this month! 
11

Chalkboard Party Toppers

Hello, friends! Today Anna's here and my project for today is toppers with chalkboard effect. Chalkboard technique is still in trend, and I think, even in summer days is perfect for decorating party. Neat & Tangled has at its disposal a huge amount of awesome stamps, which are suitable for this technique. And for this project I used them all! :)


First I cut few figures of the black cardstock using 'A Lot To Say' Die. I am delighted with this new die! It can be used together with a stamp, and without it. I chose the second option. And than I just added a heat embossing on them all with N&T stamps and added the chalkboards effect with white ink pad.

Using small circles paper I glued sticks for barbecue on the back side of my toppers. Stylish decoration for a party is ready!


And a little bit about what stamps I used (full list can be found at the end of the post). Some stamps like 'Dreams' are in itself perfect for chalkboard technique. Other stamps (e.g., set 'Sparkle and Shine') I combined with the flowers of  'So Very Blessed', to achieve the desired visual effect. Thus playing with stamps this way, you can create a lot of interesting combinations!


10
Back to Top