Happy Day! Jill here with my last post for the month! For my card this week, I die cut the Geometric Circles from two different pink cardstocks and one white. I then inlaid all the pieces to create a simple central pattern. I stamped the cutie little monkey from the Wild Ones stamp set, colored him with Copic Markers and fussy cut him out. I then stamped the sentiment from Later Alligator on a cardstock strip. I then added a simple stitched detail and adhered everything down, using foam tape to give the monkey a little lift. Such a sweet card! I plan to give this to a friend because she is moving.
Today I'm back again with another fun twist (pun intended!) on creating some interactive tags that are perfect for a kid's birthday party. Last month I brought you shaker tags, this month I'm doing spinner tags!
The centrepiece of each one is a cute coloured image that is suspended in a little window cut into the tag. That allows him to spin around as though he's doing a little happy dance! I tell you, Judah has not stopped playing with these since I made them so I can vouch that the kids will love them!
I made four different examples to show you today, each with it's own
little variation, because I guess I couldn't stop playing with this idea
either! And I wanted to show you how you can make this work for various
size little creatures.
I started off by making the tag with the dog. He's from Puppy's Favourite Things stamp set and I just love that you can choose from a
number of different objects to tuck into his paws. This time I went with
the cupcake. I also made a little party hat for him, but when I popped
it on his head he was too big to spin around in the circle frame I'd
cut, so it became a decoration over the sentiment instead.
Next
I made the turtle tag, this time knowing his party hat would have
plenty of room! However, what I didn't originally appreciate is that the
turtle (unlike the other images I chose) is a bit unbalanced. Meaning,
his largest area is his shell and birthday cake, but that doesn't run up
the centre of the image, and so if I were to adhere the spinner string
here he might just keep toppling over. But the solution was simple - I
just stuck him onto a smaller disc of cardstock and strung this up
instead. Now it spins perfectly!
Next up was the monkey tag. Both the monkey and the turtle are from the Wild Ones stamp set. The monkey is carrying a balloon which makes him quite a tall image, so instead of cutting a circle window I cut an oval one so he would fit. And since this didn't leave me any room on the tag for a sentiment, I stamped it directly onto the balloon instead!
And lastly there's that cute little monster from the latest release stamp set aptly called Little Monster! In my video today I'll show you how I made this one from start to finish so that you can go ahead and make your own versions! I'll also share my solutions for what to do with the back of the image since you're obviously going to see that when it spins around ;-)
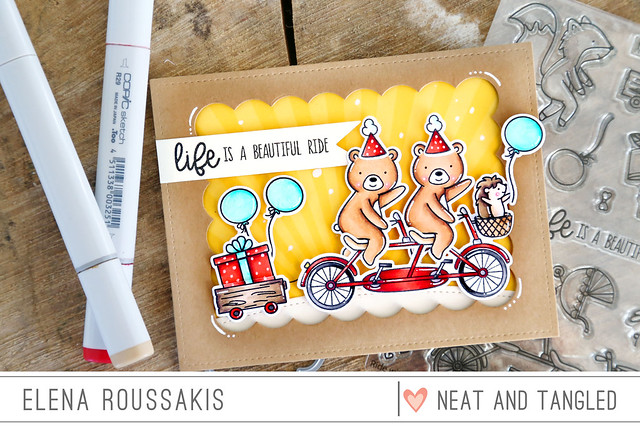
Elena here, with another card featuring the new set, Ride With Me.
I think this set is so fun to work with. I stamped and die-cut a couple of party bears, and chose to work with all bright colors.
I used one of the Scalloped rectangle to create frame for my birthday scene.
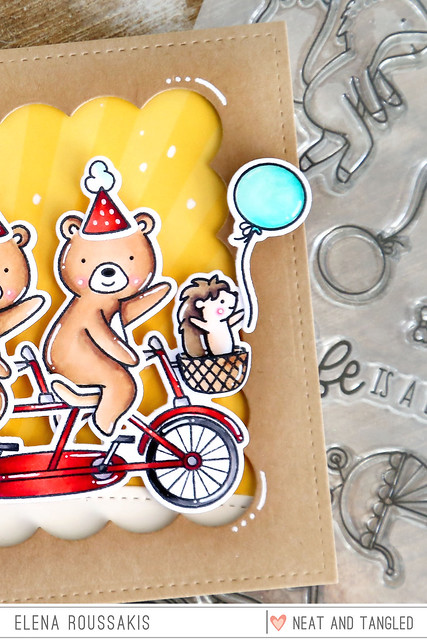
The bears are wearing birthday hats borrowed from Wild Ones. I just love that little hedgehog. He looks like his hair is blowing in the wind. ha.
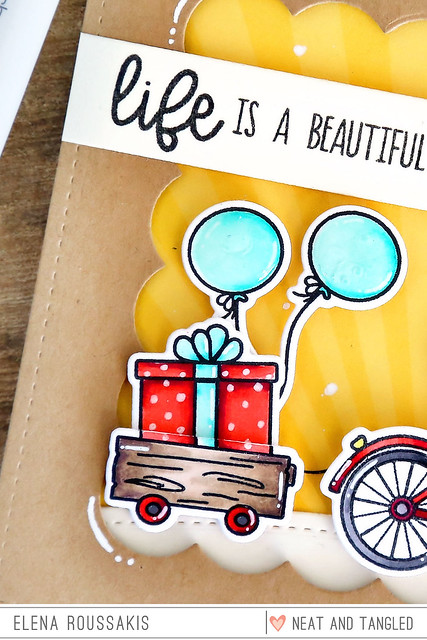
With both the hedgehog and the gift, I added extra black lines with a copic-friendly black pen (here's the one I use - click!) to eliminate the distracting white die-cut border and make the images flow together a little nicer.
Hi friends! It's Keeway and today I'm here to share a birthday card packed full of cute critters! I absolutely adore the koala from the recently Koalifications stamp set and of course I needed to send him over some friends too. So, I picked up a few other buddies from the Wild Ones stamp set so that we can parrrr-taay!
I stamped all of my images in a dark brown hybrid ink, and then colored them with copic markers. I used my handy white gel pen to add some details on the images. Then, I die cut all of them with their coordinating Nice and Neat dies.
With so many critters on the card, I kept the background pretty simple by blending some Broken China distress oxide ink from the edges in, leaving the majority of the center white. Then, with the Peacock Feathers distress oxide ink, I stamped the large 'hooray' from the Hooray mini stamp set in the top right, which easily fills up all the remaining open space. I used my handy white gel pen again to add little detailing to match what I did for the critters.
Now that everything is all colored up, it's time to adhere everything together. I used some thin foam squares and my regular foam tape to vary the depth of the images. For example, the koala sits behind the turtle, so I used the thin squares on the koala, and my regular foam tape which is just a tad thicker on the turtle. Isn't it sweet that the koala in the scene finishes the sentiment? Love that guy!
Thanks for joining me today, and hope to see you next time!
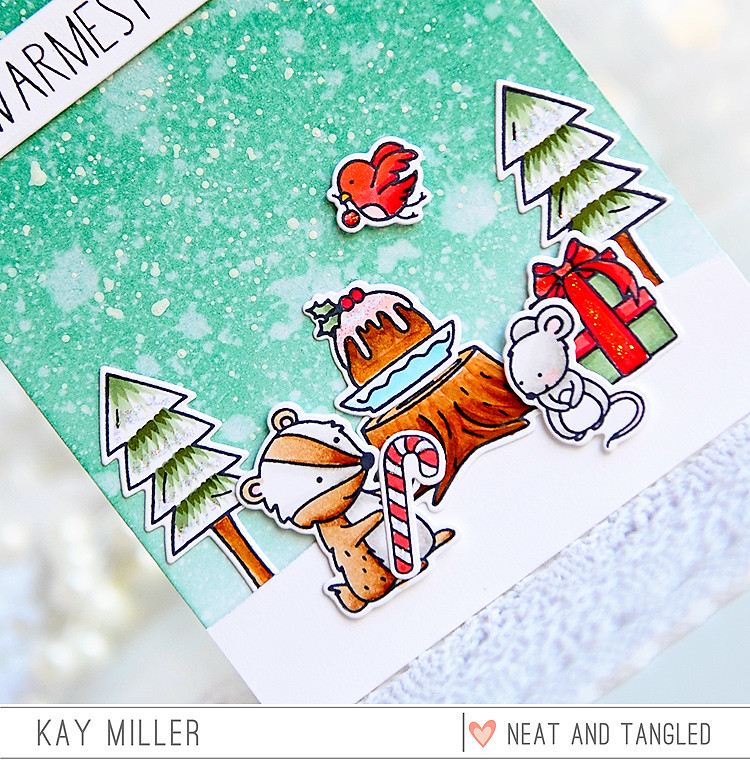
Hello everyone! I hope you are enjoying the holiday season! I have another wintery Christmas card to share with you using some fun stamps and dies from Neat & Tangled. I mixed several different sets here to create this cute scene! I used Merry Kisses, Wild Ones, Lumberjack Love, Holiday Baking, and Into The Woods.
For the background, I used Smooth Bristol Board and blended some Evergreen Bough and Pine Needles Distress inks, then sprinkled with water and white acrylic paint. I added a snowy hill at the bottom, and a sentiment from the Merry Kisses stamp set at the top.
All of the images were colored with Copic markers, cut out with the coordinating dies, and adhered with liquid glue. The two little animals and bird in front, I adhered with foam tape for a little dimension.
I added lots of Stickles to the trees, candy cane, present and pudding, but it's hard to tell in the photo. In real life this card sparkles and shines!
I hope you have enjoyed my card today! Wishing you a wonderful Holiday season!
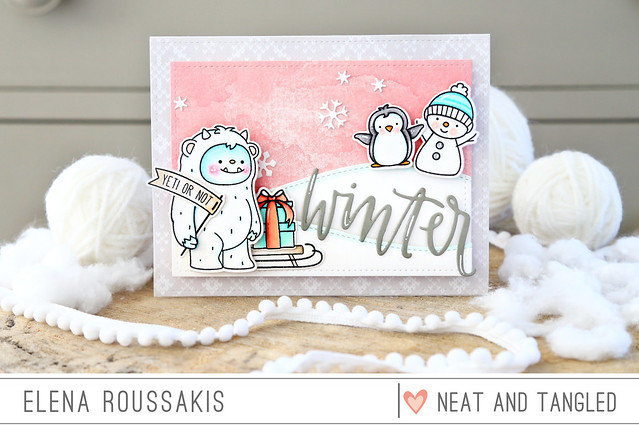
I'm exploring the yeti's softer side today, with this pink and grey and blue card:
Yeti or not.... winter! (fingers crossed we don't get any of that white stuff for another month at least, but I don't mind it on a card!)
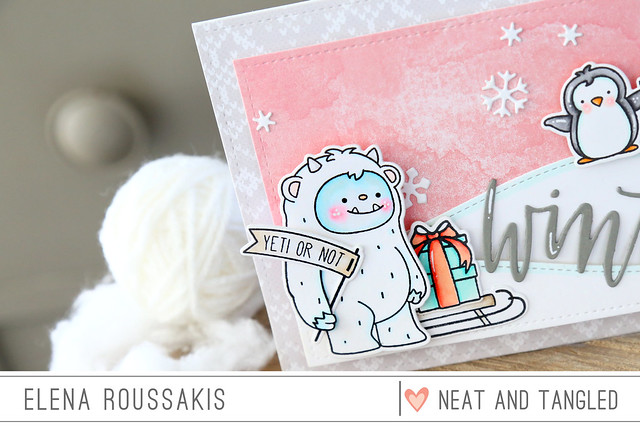
I stamped the yeti and a few of his friends from Get Yeti, and colored them in soft blues and greys with rosy cheeks to fit the theme.
Instead of putting a critter on the sled, I added the present from Wild Ones.
To make the yeti look like he's holding the sign, I stamped a second yeti and cut out just the arm. The sign hides the unsightly seams and it looks cute to have it tucked in there!
The scripty die-cut is from the Hello Winter die set. I love how big it is! I made it kind of follow the curve of the snowbank.
Hi everyone! We're so pleased to Welcome Michelle Short as our guest designer this month. Michelle has a delightful clean and simple style and excels at composition. She has the knack of pulling you right into the focal point of the card and is an amazing colorist. We're so glad to have her this month! Here's Michelle to tell you a bit more about herself and her card for today:
Hello, I’m Michelle Short. I am a part-time nurse, part-time card maker from London, UK. I have been making cards for about 15 years now and I still love it! My style is clean and simple and I absolutely love stamping and colouring. I am so excited to be guest designing with Neat and Tangled, I love their products and I am honoured to be asked to join in for September.
My card today uses the adorable Wild Ones Stamp Set, along with the coordinating Nice and Neat dies. As soon as I saw this set, I knew I wanted to ink it up! It is perfect for birthday cards for all ages. All of the animals are adorable but I decided to use the monkey for my card today.
I started off by stamping the monkey and coloured him in using Copic Markers. He was then cut out using the Wild Ones Nice and Neat Dies. I needed to create a background for him and I thought a subtle grass and sky scene would work well. I blended Distress Inks on to some Bristol cardstock and then splattered over a little water for some interest. Once dry, I stamped the happy birthday sentiment from the Big Top Birthday Stamp Set on it using black ink.
The background piece was added to a white card base with foam tape and then the monkey was added on with foam tape also. To finish off, I added a couple of sequins from the Mermaid Tail Mix, along with one from the Ocean Waves Mix. Lastly, I coated the balloon in shimmer pen and then Glossy Accents for some shine. Thanks so much for stopping by today, see you next week!
Hello everyone! It’s Nina Yang here! I was lucky to join Neat and Tangled design team for a year about 5 years ago! Danielle is one of the sweetest person I’ve met and she has some of the most creative ideas in the industry! I’m delighted to join the celebration with a card I made from the new Wild Ones stamp set and Wild Ones – Nice and Neat Dies!
It’s the giraffe’s birthday and she's hosting a disco party! The monkey is swinging by with his gifts! The new Like Magic Sequin Mix is perfect for making a disco ball for the party scene! So sparkly and fun! I bended the sentiment strip a little for some dimension and movement on my card. All elements are colored with Copic markers.
Katie Gehring here! I am so excited to be here today to help celebrate Neat and Tangled’s 5th birthday!! I have a couple festive cards to share with you featuring the Wild Ones stamp set and matching Nice and Neat dies.
My first card highlights the darling monkey and balloon image. I die cut a panel of white card stock with the Scalloped Nice and Neat dies . I used the Balloon Duo Stencil and Distress Oxide ink to create the balloon background. I stamped and die cut the monkey from the Wild Ones stamp set before coloring the image with Copic markers. The “Celebrate” sentiment is from the Just for You stamp set and a few Crystal Clear Mix sequins to add a finishing touch.
For my second card, I used the Giraffe and bird from the Wild Ones stamp set. I again pulled out the Scalloped Nice and Neat dies and used the middle sized rectangle to cut a scallop background . I stamped lots of the confetti images with red, yellow, and orange ink. I stamped the sentiment, adhered the stamped and die cut images and affixed all the elements to a teal note card.
Here’s a look at both cards together. I am so happy to have a couple of wildly fun cards all ready for the next celebration!
I hope that you enjoyed the cards I shared today. Big thanks and hugs to Danielle for having me back for this reunion! Happy Birthday, Neat and Tangled! Here’s to many more years of clever designs, cutie cute images, fun sequin mixes, and non stop inspiration!
Linda here, and I’m and so excited to be a part of this special blog hop celebration!! I still remember the Skype conversation where Danielle nervously announced to me and a few close friends, that she was starting a stamp company. Without a moment’s hesitation we all broke into exclamations of excitement and support, and I know we all were and still are SO proud of Danielle for being brave enough to begin this new chapter in her life, and how far she’s come.
For my card I really wanted to let the images be the stars of the show, so I coloured them in with my brand spankin new Polychromos Pencils (hello dreamy!), then cut them all out using the coordinating dies, and compiled them into a little cluster-scene. I decided to add some white gel pen details to the images for some extra interest—I’m kinda in love with the furry chest on the monkey and giraffe.
For a final touch I added a splash of white spray ink on the base notecard, a little black Enamel Accents for the eyes, and some glossy accents to the balloon.
I hope you like it and are enjoying the amazing cards being made this month!
Happy Anniversary/braveaversary Danielle and thank you so much for having me!
Hi, everyone! It's been a while since I last blogged but when Danielle asked me to join the Neat & Tangled design team reunion, I couldn't refuse! I spent two amazing years working for Danielle and loved the products she designed, along with Miriam Prantner and Elena Roussakis, so I fittingly used products designed by all three super talented ladies on my trio of cards today.
First, I stamped, watercoloured and die cut the cute little monkey and birthday hat from Wild Ones. While those dried, I used the Balloon Duo Stencil to create backgrounds for the monkeys. I splattered the balloons with shimmer spray and set the panels aside to dry.
Next, I split a sentiment from Happiest Birthday, another Neat & Tangled anniversary set, as well as Journaling Numbers dies to create the custom sentiments. The 'th' is from the sentiment 'throw kindness around like confetti', which I masked and stamped next to the number six.
The glittery numbers were adhered to fun foam to make them pop and my Xyron sticker maker made it very easy to attach the layers together and to the panel itself.
To finish, I cut out coordinating patterned paper panels from a retired paper pad and adhered them to the card base before attaching the stencilled panels asymmetrically.
In the close-up photos below, you can see the effect of the shimmer spray on the balloons. The shimmer acts the same way water does on distress inks, except it leaves shimmer behind which I love!
All images and sentiments were stamped with Versafine pigment ink and clear embossed for added visual interest and easy colouring.
I have three neighbours turning six in the next couple of weeks and, luckily, I had the perfect products for the upcoming celebrations! ;) It's been a pleasure being back on the Neat & Tangled blog for the reunion and I hope you enjoyed today's inspiration.
Good morning everyone! This is Pamela here and I'm so excited to be participating in this huge celebration for Neat & Tangled! Danielle was so generous (and daring!) to bring me onboard for their design team, and I debuted my first stamp design here as well!
I have a fun and simple card to share with you today. Afterall, my signature design was "simple" back in the good ol' days!
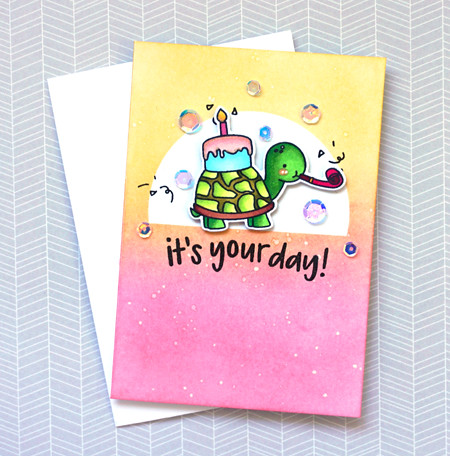
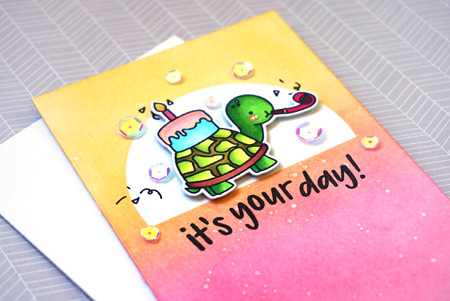
I stamped the adorable little turtle from Wild Ones and paired it with the sentiment from Hooray. Gotta love Danielle's bold sentiments!
And of course, it's not a celebration without sequins! I sprinkled the Like Magic Sequin Mix around the little turtle for a true birthday celebration!
Thanks for stopping by!
Hello Everyone, I am so glad to be here celebrating Neat
& Tangled’s fifth year in the industry of developing products that we all
love and enjoy. I still remembered my days as one of the designers for Neat
& Tangled three years ago, really a fun team to be with.
For my card today I used the cute set Wild
Ones stamp set and Wild
Ones – Nice and Neat Dies. To begin I first stamped all the images I wanted
to use the colored with Copic markers, die-cut and set it aside. Then I created
my background 7 ½ x 4 ¾ white cardstock.
The bottom of the card based was colored with Copic Markers
using gray colors W-0, W-1, and W-3. Then distressed the middle and top part
using Distress Ink pads. Thenstamped
the background with the sentiment from the same stamp set. Then position the
die-cut images on the card and adhered with foam tape for dimensions.
Finally, I added the sequin from Neat and Tangled called
Like Magic
Sequin Mix. I also added some stickles on the balloons, gift and top of the
cake.
I hope you enjoyed ! Thank you so much for joining Neat
& Tangled.