Showing posts with label Yo Ho Ho. Show all posts

My Greatest Treasure with Koren Wiskman


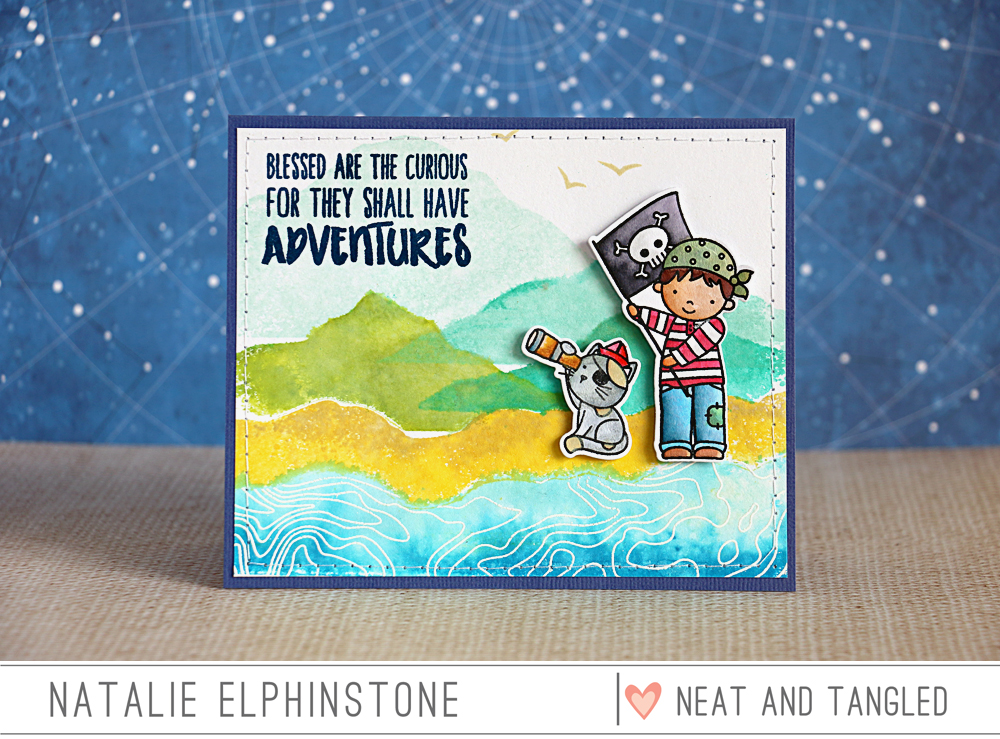
Hello everyone. Koren here with a fun summer sunset-inspired card. I'm using Neat & Tangled's Yo Ho Ho stamp set and coordinating dies. I also have the Making Waves stand alone dies. I really love how this card turned out, so let me tell you what I used to make it.

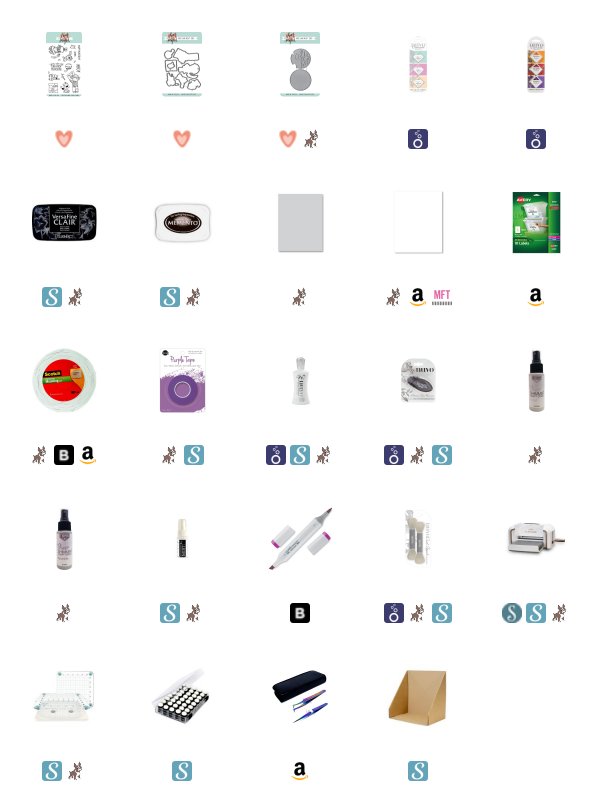
I started with a piece of Neenah 110 lb Classic Crest Solar White Cardstock. This piece measured 4 3/4 by 3 1/2. I also had a piece of Avery repositionable adhesive sheet, also cut down to 4 3/4 by 3 1/2. I used the Neat & Tangled Making Waves die set to cut out the circle aperture, as well as the clouds to create a mask from the repositionable adhesive sheet. I applied the adhesive sheet to the cardstock as perfectly aligned as possible, and I also took a little bit of paper masking tape to mask the bottom half of the circle. I wanted to ink blend a sunset/sunrise and I wanted the water to appear as more of a reflection. This detail ended up being moot due to the fact that I covered most of this effort up with images. It still makes me feel good that I tried.


I used Nuvo Carrot Stick, Lotus Flower, and Royal Plum ink to create the gradient background. Once the top part was dry, I moved the tape to shield the already completed top half to concentrate my inking on the bottom half. I only used Lotus Flower and Carrot Stick for this part because I did want it to appear lighter. At one point, I had even tried keeping it white, so that it would mimic the white caps of waves, but I think it turned out well with some sky tones in it.

Before removing the mask. I grabbed the Imagine crafts Frost and Sparkle shimmer spray as well as the Hero Arts Iridescent White shimmer spray to give the background a healthy dose of shine.

To add to the scene, I cut the Making Waves die from Papertrey Ink Enchanted Evening. I also cut it several times from Neenah 110 lb cardstock. In an effort to give some dimension without losing all of the color in the waves, I used 2 layers of Neenah 110 lb. card stock to give me some lift.  I had hoped that it would appear as if the sun was reflecting upon the surface of the water, but it is really hard to see all of that detail, but giving the die cut two layers of neenah to pop it up was just the right amount. I adhered them together using Nuvo Deluxe Liquid Adhesive. I also used that same liquid adhesive to stick it to the background.


I stamped the images from the Neat & Tangled Yo Ho Ho stamp set in Memento Tuxedo Black ink onto even more Neenah 110 lb. cardstock. I colored the images with my Copic Markers, and also used my Goldfaber Colored Pencil in 273 to add some shading in the darkest areas.

I added the little girl with one layer of Scotch 3M foam tape and the little kitty with 1 - 2 layers depending on if it was touching the background or the girl.

I took the sentiment "you are my greatest treasure" from the some Yo Ho Ho stamp set and loaded it into my We R Memory Keepers Precision Press to center it below the focal point towards the center. I stamped the first part of the sentiment with Versafine Claire Nocturne Ink. For the bottom, I used my Ink daubers and the same inks I used in the background to give the sentiment a little more interest and helping to coordinate it with the rest of the card. I stamped it this way twice to give it great coverage.

To finish off this card I added the white cloud to the background with foam tape and adhered the panel to a Simon Says Stamp Fog card base using Nuvo tape runner adhesive.

I hope my card inspired you to create today.

Koren


1

The Greatest Treasure with Keeway


Hi there! It's Keeway here and I'm sharing a simple and sweet card with you today featuring the Yo Ho Ho stamp set. I love to reach for some older sets in my stash to remind everyone how much fun they are to play with!

The Yo Ho Ho stamp set is one of my favorites! I stamped the pirate girl, cat, and fish bowl in dark brown hybrid ink and colored the images with copic markers. Then I die cut the images out with the coordinating Nice and Neat dies.

I used a simple stitched rounded rectangle frame that I die cut out of smooth white card stock. I blended Shaded Lilac and Worn Lipstick distress oxide inks with the inner piece. I heat embossed my sentiment in the top right area in silver detail embossing powder.

I inlaid the blended background back into its stitched frame and adhered it in the center of a piece of pattern paper. Then I adhered my characters to the card with foam tape. And that finishes the card! Thanks for joining me today and see you next time!

6

Watercoloured Layered Landscape | VIDEO | Natalie Elphinstone

Hi friends!

Today in my video I'm going to share with you how I created this fun and cute masculine card by combining three of my favourite Neat and Tangled stamp sets.


Firstly I'm using one of the new release stamp sets "Layered Landscape" to create a multi-layered background for my card. This stamp set features a number of quite large solid images which you can mix and match to construct all sorts of different scenes like mountain ranges, hills and paddocks, or lakes and water features - there really are a lot of possibilities!


However, I must admit that sometimes I find it a bit tricky with big solid images like this to get a really nice even stamped impression from them. It certainly helps to have a stamp position like the Misti, and to have some good quality pigment inks. But there is an alternative approach!! I call it my watercolour technique and it's all about using dye inks in such a way as to create that lovely loose blended ombre kind of look that you might achieve if you were waterpainting. It tends to hide a multitude of stamping sins, and I think it looks great!


I also used two other stamp sets on this card. "Topography" for the sentiment and the embossed wave patterns in the water, and "Yo Ho Ho" for the cute pirate figures. I think these three stamp sets work extraordinarily well together, even though these other two are from much earlier releases. I love the contrast of the soft watercolour background with the sharp focal images of that boy and his cat, and that embossed water ripple effect is something I want to do again real soon!

You can see the whole card come together in my video!


Have a great week!
2

Design Team Reunion: Francine Vuilleme

Hi everyone! Francine Vuillème here! I’m so excited to join the birthday celebration and the design team reunion! What a wonderful idea! I was a DT member in 2016 and I still remember how happy and excited I was to join the team! 

Thanks so much Danielle for having me for this celebration and HAPPY BIRTHDAY! You are such a kind and beautiful woman (inside and out). I’m proud to be part of the N&T family and I’m honored to guest for you today! Good luck for the next years of this fabulous crafty adventure! 

For this event, I created this card:

I used the pirate set called Yo Ho Ho. I love all characters in this set and I thought the flag would be perfect for a birthday sentiment. I masked the pirate skull on the flag and I then stamped the Happy Birthday text that I found in the Beach Day set. I colored the pirate and cut him out with scissors. I added jeans texture to the pants using a piece of fabric. I sponged the front panel of a top-folded card base with yellow Distress ink using a blending tool. I adhered the image with foam pads to the card base as well as a sandy hill that I die cut from Kraft cardstock. I glued tiny stars and sequins here and there for a festive look. To finish off my card, I added Wink of Stella clear shimmer over the rainbow sweater. 
  
I hope you enjoyed this project! Have wonderful day and happy crafting!

Francine
9

May Guest Designer - Therese Calvird


Happy Friday!  We're so excited to be welcoming Therese Calvird as our guest designer this month.  Therese has a sophisticated CAS style that is both whimsical and refined, and she makes a mean one layer card.  We're thrilled to have her with us this month and we think you are going to love what she's created.  Here's Therese:

Hi, it’s Therese Calvird and I am beyond excited to be here at Neat & Tangled as a Guest Designer. I have been creating cards for about 15 years and love to make many different styles of cards as well as try out new techniques, but if I was pushed, I would have to say that I probably love to stamp and colour the best.

Today I decided to create a video to show you a fun way to ‘Stretch those Stamps’ and the Calathea stamp set was the perfect choice to create my own custom background.


I decided to make two cards and thought it would be fun to have a ‘boy’ and a ‘girl’ version using these fabulous pirates from Yo Ho Ho.


I coloured the images with Copic markers and used the Awesome die to build my sentiment for the boy card.


And the Good Vibes stamp set was the perfect choice for the sentiment on the girl’s card. And I just loved adding the gold sequins from the Peacock Feathers sequin mix to look like some coins were falling out of her treasure chest.


Here is my video showing you how I created both cards.


I look forward to seeing you again next week, where I have another video and a couple more cards to share. Thanks for stopping by!
5

Yo Ho Ho Backgrounds | Nancy Damiano

Ahoy Neat and Tangled fans! Nancy here with a pirate sail card using the new release Yo Ho Ho Stamp and Die Set.


I drew the basic sail shape freehand on smooth white cardstock and cut it out. Then I used the smaller images from the Yo Ho Ho stamp set and very light gray ink to create a subtle background.

A circle punch was used to create the hole at the top of the sail so that the flag could peek through. The thin wooden stick is actually a barbecue skewer repurposed for card making! It gives the sail just a little bit of lift. That completes the base of the card.


I colored in the boy pirate image with Copics and used the Yo Ho Ho steel die to cut him out. To create the sentiment, white embossing ink was used to create the bold title. The little boy pirate was popped up with some foam tape and a handout, red flag was attached at the top of the sail. 


That completes this sail away pirate card!


6

Negative die cutting technique for Ahoy card with Sveta

Hello everyone!

Sveta is here to share an Ahoy card using the new Yo ho ho stamp set and Yo ho ho Nice and Neat dies in dark colors. 
I first prepared my characters: a pirate girl and a cat. I used watercolor paper, water resistance ink and watercolor brush pens. Then I die cut them using the coordinating dies.


Next, I took black cardstock and the Lucky stars Nice and Neat die and used a negative die-cutting technique to create a starry background. Then I used some ink spray for tiny light splashes. 


The next step was to arrange  the focal point background using the Making Waves Nice and Neat Dies: white cardstock for the background circle and the black one for the scene circle.


For the sentiment I die cut a little strip from the Kitty's Favorite Things Nice and Neat Dies from white cardstock and stamped three separate words from the Yo ho ho stamp set making one phrase.


Hope you enjoyed today's card. Wishing you a great week ahead.
16

Yo Ho Ho with Kay Miller


Hey eveyone!  It's Friday and we're thrilled to be welcoming this month's guest designer, Kay Miller, back to the blog!

Hello! I'm back again today with a couple more cute cards I created for my guest spot with Neat & Tangled this month. 

I used the absolutely adorable Yo Ho Ho stamp set and Yo Ho Ho matching dies. Cutest little pirates you've ever seen!


For my background I used Peerless Watercolor, and a wet on wet technique, then splattered with water and added some white dots with acrylic paint. The sandy mound was done the same way but splatted with some darker brown as well.


The cute designs were all colored with Prismacolor Colored Pencils, and cut out with the Yo Ho Ho matching dies. Everything was adhered with foam tape to a white card base.

I stamped the sentiment from the Yo Ho Ho stamp set in black ink and added a few sequins to finish it up!


Well I had to make a card with the little Pirate boy too. Couldn't leave him out :) The background is Salty Ocean Distress Ink blended onto Bristol Board and speckled with water.


Again everything was colored with Prismacolor Colored Pencils, cut out with the Yo Ho Ho dies, and adhered with foam tape.


I had a lot of fun playing with this cute set! I hope you have enjoyed seeing what I've created!

Thanks so much for stopping by!
11

Die Cut Focal Point With Debby Hughes

Die cut focal point birthday card by Debby Hughes. Find out more by clicking on the following link:  http://neatandtangled.blogspot.com/2017/03/die-cut-focal-point-with-debby-hughes.html

Hi Debby here today with a look at creating a focal point from die cuts using the Medallion Flower Builder and Classic Tag 2 dies. 

Die cut focal point birthday card by Debby Hughes. Find out more by clicking on the following link:  http://neatandtangled.blogspot.com/2017/03/die-cut-focal-point-with-debby-hughes.html

I started the card with the Polygon stencil and blended white card with light pink and peach inks. Before lifting the stencil I spritz the card with a fine gold shimmer mist then lifted the stencil and lightly splattered the panel with a gold spray.

Die cut focal point birthday card by Debby Hughes. Find out more by clicking on the following link:  http://neatandtangled.blogspot.com/2017/03/die-cut-focal-point-with-debby-hughes.html

I wrapped twine around the panel and then moved on to create the die cut focal point. I had a set colour scheme in mind so blended various dye inks in to white card so that I had a lime green, dusky coral, dark teal and light blue pieces. I then die cut the Medallion Flower Builder shapes from the ink blended pieces. All except the light blue which I partially cut with a banner die from Classic Tags 2. I also cut a white banner and stamped the Happy Birthday sentiment from the Yo Ho Ho set in black ink. 

I grouped all the elements around the twine using foam adhesive to adhere and give dimension. I love how the colors of the die cuts pop off the shimmery subtle background.

Thanks for joining me today and I'll see you next time

Debby
7

You are my greatest treasure (with Elena)

Hi there!


Elena here, with a little pirate couple from Yo Ho Ho.  I stamped, colored and die-cut the little pirates, and set them against a dark patterned paper backdrop.

To frame the pirates, I die-cut a rectangle from the Scalloped die set, and then used a smaller rectangle die to cut an opening. I love how this separates my 2 patterned papers!


I thought a wood-plank paper would be perfect on the card-base;  the whole walk-the-plank, swab-me-deck kind of vibe.

As I often do, I cut apart the sentiment to be able to stamp it in 3 places. One, at the top in the rounded banner (from the now unavailable Stamptember collaboration, Nuts About You.) I then heat-embossed the rest on banner flags from Scalloped.

I hope you like it! Thanks for stopping by!

♥. 
9

March 2017 Release Day 1: Introducing Yo Ho Ho + Giveaway

Hello friends!

It's our favorite week of the month- release week! Welcome to day 1 of our March 2017 release! This month we have some amazing products for you - stencils, stamps, and dies! All new products will be available on Friday, March 10th at 8am EST. Be sure to stop by here everyday this week for lots of fun, inspiration, and giveaways!

And now for the new goodies!Today Elena Roussakis is taking us on an adventure with her newest illustrations in our Yo Ho Ho stamp set! Get ready for adventure with this 4x6 set, filled with the most adorable pirates and their first mates!

And now for some inspiration! Be sure to head to each design team members blogs for details by clicking on the photos, and for a chance to win a $25 gift certificate! One person will be chosen from among comments on the design team members blogs!

We will start a a video from Kelly!


I don't know about you, but I'm ready to set sail!


Would you like to win the new Yo Ho Ho products? To enter:

1. Be a follower and leave a comment! Who is your greatest treasure?
2. Follow us on Facebook and share about release with your friends! (leave another comment)
3. Follow Neat and Tangled on Twitter and tweet about our release, use @neatandtangled! (leave another comment)
4. Follow Neat and Tangled on Instagram and repost about our release! Use #neatandtangledrelease (leave another comment)

See you back here tomorrow for even more fun!


And a quick reminder - we are hosting our first in person card making event on March, 26th - tickets can be purchased by clicking the photo below!  
SaveSaveSaveSaveSaveSaveSaveSave
SaveSave
SaveSaveSaveSave
143
Back to Top