Showing posts with label Birthday. Show all posts

Soft Palette Floral Frame Birthday with Cheiron


Hi crafty friends. It's Cheiron here sharing a birthday card with the Floral Frame set. I don't know about you, but my stash of birthday cards is getting pretty low. I thought it would be great to design a card that I can reproduce easily. This Floral Frame is so fun to color, and once I have my color palette nailed down, I can stamp a bunch of frames and pack my markers for some on the go coloring of a bunch of these images, a perfect way to build up my stash again.


For this card, I wanted a soft pretty palette so I picked some peachy pinks and purples to color my image and adhered it to a panel cut from Distress Watercolor paper. I blended some Tattered Rose Distress Oxide onto the panel. Then I figured out where I wanted to place my frame.


I used the negative die cut (the inside of the frame piece) as a mask to mask off where the sentiment was stamped.  I scribbled the Tonic Midas touch pen onto my glass media mat and picked up with a paintbrush and flicked it onto my background to add some gold splatter before I glued the frame into place.

SUPPLIES:
3

Happy Happy Birthday

Hi there! It's Cheiron here with my monthly post. Today I have a fun birthday card featuring the Balloon Duo Stencils. For this card, I wanted to keep the colors simple with some fun and elegant pink and gold balloons and lots of sparkle.


I inked through the Balloon Duo Stencils with Tattered Rose and Antique Linen Distress Oxides, then I used a Tim Holtz Distress Blending Brush to create shading on the edges of the balloons with Warm Lipstick Distress Oxide and Delicata gold ink. Then I misted the entire panel with Sparkle Sheer Shimmer Spritz and gave it a light splatter of Gold Shimmer Spritz using a paintbrush to create small drops. Once it was dry, I added a bunch of Light and Luminous Sequins.


I stamped and embossed the sentiment from the So Many Sentiments set with white embossing powder to complete the card.


SUPPLIES:
9

Neat and Tangled's 4th Birthday Celebration!

Hi friends!

Danielle here popping in with a very exciting announcement!

Did you know Neat and Tangled turns 4 next week?  I can't even believe it! And we are so excited to party with you!

I do hope you will join us next week, starting Monday August 8th, for a week long blog hop with some of our very special friends! There will be a mini-release of new products, tons of inspiration and some really fun giveaways!

Have a great day!
Danielle
16

Happy Birthday Donuts


Hello and Happy Monday!  Haven't you all been enjoying the May Release?!  So many FUN new products!  I would be the first one to tell you that many aspects of 'the circus' scare me...clowns?  Oh my, I'd still hide from them but I have to tell you that the new Big Top Birthday is ABsolutely cuteness overload.  

What's not to love about a cutie pie clown with a donut balloon?! That certainly puts a smile on my face.  I've teamed up Big Top Birthday with Say Yes to Donuts!

With a smidge of masking, I was able to incorporate a trio of friends to wish a special person Happy Birthday wishes!

I've definitely been into freestyle watercoloring...non-precise and fun.  I popped up the sentiment for a bit of interest by using the Big Top Birthday Nice and Neat dies.


This card accompanied by say, a dozen donuts, would make any Birthday Girl/Boy happy!

Thanks so much for stoppin' by! 


10

Kraft & Gold Happy Birthday

Hey Neat & Tangled fans! It is Rachel here today sharing a quick birthday card for when you need something in a pinch. I love simple cards with elegant color schemes and it doesn't get much better than white, gold & kraft for me.


I created a subtle background using a variety of stamps. The solid circles are the reverse side of the sequin & button stamps from Crafting is My Jam, Everyday Circles  and the back side of the ball of yarn from Meowww. The flower and large circle are from Dala Horse, the heart is from Jump Start my Heart and the tiny stars are from Blog Planner.

The lovely sentiment is from the Photo Booth set. The kraft panel is mounted onto a piece of white woodgrain paper for a little touch of something extra. 

That is all from me today. I hope you're inspired to flip over your stamps and get the most out of the solid side as well - it gives them a whole new life! Have a great day!


6

Quick & Simple Birthday Card

Hey Neat & Tangled fans! Rachel here today with a super simple birthday card when you need something in a hurry (story of my life!). Patterned paper is my favorite go-to when I'm short on time.

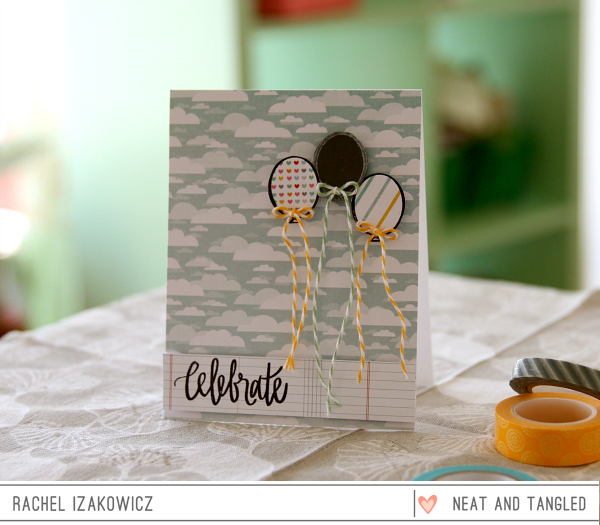
I love a clean and simple card, but gorgeous papers add a touch of whimsy and interesting detail in no time at all. I knew I wanted some free-flying balloons for this card, so I chose a cloud patterned paper to provide a subtle background. To make life even easier, I kept all the paper accents from the same paper pad (Hello Sunshine from Pink Paislee).

Celebrate_24.6.15

Using the Just For You stamp set, I fussy cut 3 balloons - 1 from solid grey and 2 from coordinating papers. I layered them on the card at different heights and adhered them with foam tape. I added some twine bows and left the strings long and loose to give them card a bit of movement. I stamped the sentiment, also from Just For You, onto another sheet of paper from the same paper pad and created a banner along the bottom of the card.

There you have it - a professional looking card sure to brighten someone's birthday - ready in less than 10 minutes! Thanks for stopping by today - be sure to visit again tomorrow for more inspiration from the design team!

4

Simple Birthday Card

Hi everyone! Yana is here sharing a Birthday Card idea. I needed to create several simple Birthday Cards last week so I reached for my all time favorite set from Neat & Tangled; 15 minutes later I had this simple unisex card design on hand. 


These balloons images are just the cutest! I used two shades of yellow ink and stamped them repeatedly on a white A2 card. I overlapped some of them and tried to make it look like they were floating in the air. 


For my sentiment I used the Everyday Labels set and stamped Happy Birthday in black, cut out with my scissors leaving a small white border and adhered those onto my card using foam adhesive. 


To tie the black sentiment with the rest of the card I also stamped several black starts and various sizes. As a one final touch I adhered several sequins. 

You can easily turn this into a girly card by stamping balloons ink pink or a boy card by stamping them in blue. Here's a link to another Birthday Card I shared on Neat & Tangled blog several month ago using the same balloons. 


11

Wishing You a Happy Birthday. Video

Hi everyone! This is Yana sharing another Birthday Card idea with you. 

For this project I was inspired by a photo of a carpet (yes, that's right, a carpet) I found on Pinterest and I decided I wanted to try to create that color blocked look on a card.


7

Lets Celebrate Card

Hi everyone! This is Yana sharing a masculine birthday card (or an invitation) with you today! 

For this card I experimented a bit with different types of inks - I started out with some dye inks and stamped a couple of balloons. I than moved onto pigment inks and stamped some more balloons overlapping the dye-ink stamped ones. I really like the end result - I was able to achieve a bit of a translucent effect, or I guess I was able to make my balloons a bit more realistic and somewhat see-through.


3

Celebrate! You Are Awesome!

Hello everyone! This is Yana sharing a sweet birthday card with you today. I have to be honest with you, I'm really stuck on the whole chalkboard thing. Lately, not a single card of mine is done without it. 

So here it is - my new Birthday card using some of the most cutest Neat & Tangled stamps! 


To create this card I used balloons from the Just for You stamp set as well as a sentiment from the same set. I heat embossed both images and created a chalkboard look for the sentiment. 

I also used the You Are Awesome sentiment from You + Me set for the banner. 


Finally I added a few sequins here and there and the card was done!


Thats it for today, thank you for stopping by!
5

Celebrate Banner Card

Hello everyone! Nina here again to share a simple card created using some new stamp sets from Neat and Tangled latest release.

 nina-yang-celebrate-card

First, I used the curved line stamp from Merry and Bright to create a few masks from thin printer paper.

nina-yang-nt-celebrate-card-creating-mask

I stamped the round ornament stamp (also from Merry and Bright) multiple times along the curved masks to create the banners.

nina-yang-nt-celebrate-card-stamp-banner

Then I ran a thin layer of liquid glue along the lines to adhere the twine.

nina-yang-nt-celebrate-card-adhere-twine

And some sequins to finish it up! Sentiment is from Just For You.

nina-yang-celebrate-card-closeup

Thank you for stopping by! I hope you are inspired to use masks in your next project. Happy Crafting!
3

Happy Birthday Background


Hi all! Happy Friday!

Katie Gehring here today. We have been celebrating Neat and Tangled's first birthday all this month and I brought a birthday card using Everyday Circles to the party to share with you!

dsc_0308

Using the "birthday" sentiment from Everyday Circles, I built a background by stamping the word repeatedly in 3 ink colors. Next, I die cut a circle in the bottom third of the card and mounted the stamped panel onto a piece of black cardstock with foam tape.

I stamped the solid "Happy" circle onto a scrap of cream cardstock and punched it out with a 1/2" circle punch.  I centered it inside the die cut circle and secured it with some adhesive.

dsc_0309

I love how the black mat forms another border around the circle.  As a finishing touch, I added a few black sequins.  

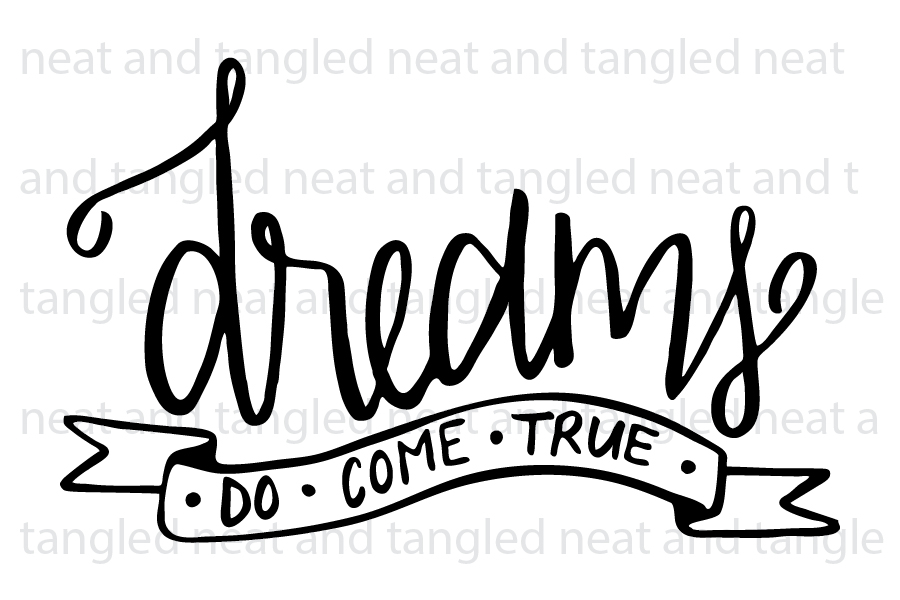
Since you can't have a party without presents, Danielle is including this sweet little 3 x 2" set called Dreams with all stamp orders placed this month.  With only a little over a week left in the month, be sure to place an order and to claim yours! 


I hope you have a great weekend!
Katie 


10

Birthday Bash!


Happy Monday and Happy Birthday Neat & Tangled!!! 
Amy K. here sharing a bright and sunshiny birthday card perfect for anyone!  I've stamped the Sunburst background and layered a stamped circle from Everyday Circles.  The fun thing about these circles is that they are easily punched with a circle punch! 
 
Sunshine birthday  
 
Have you see this??  It is a mini stamp (3x2) called Dreams that will be included with all stamp purchases this month!


Have a wonderful day and we'll see you back here tomorrow with more BIRTHDAY celebration!!!


7

Neat and Tangled 1st Birthday Bash! + Introductions!


Hello friends.  I am here, filled with a whole lot of good emotions, to kick start Neat and Tangled's 1st Birthday Bash!  It is hard to believe that just one year ago I took a big leap, and now here we are!  I am so grateful for everything the past year has brought: new friends, new challenges, growth, tons of laughs, a little less sleep, and just a lot of fun :)

This month is going to be jam packed with fun projects, awesome guest designers, and lots of giveaways.  You also HAVE to stop by Little Tangles (the official Neat and Tangled Challenge Blog) daily because there will also be some very special guests and even more giveaways! Just a whole month to party :)

As part of the celebration,  I have invited 2 more designers to join the Neat and Tangled family! So I'd like you all to give them a warm hello! Read a little about them below, and head to their blogs to leave some love and get an idea of all the wonderfulness coming your way!
Heather Hoffman
My name is Heather, and I blog over at Houses Built of Cards. Here is a little about me: I have been married for 13 years to the man of my dreams, and have two sweet daughters age 10 and nearly 9 that I homeschool. I absolutely LOVE making cards – and also enjoy scrapbooking memories of my family. I lived my entire life up until about a year ago in Northwestern Washington State, and now live in a very small town in Wyoming. While we are still adjusting -especially to the cold winters – it has been nothing short of an adventure for us all, with the normal ups and downs of missing our family and friends back home. If you aren’t familiar with my blog name, then let me explain a little! When I started card making, I quickly found that I was making WAY more cards than I could possibly use. Thanks in part to my daughters and something they both cared deeply for, I decided to direct all the proceeds from the sales of my cards to the building of houses for widows and their children in Burundi, Africa, through a ministry called Sister Connection. Building one house is amazingly just $600!!! I just earned enough for my 3rd house, and am working on a 4th one now. I’m so excited to be joining the Neat and Tangled Design Team! Cute and amazing stamps, and beautiful sequins – what’s not to love?


Yana Smakula
My name is Yana Smakula, I’m 26 years old and I’m from Ukraine. I’ve been married for a little bit over a year now, no kids but we do have two black cats and we can’t live without them! I love to travel across the world and meet new people, discover new cultures and just explore. So far together with my husband we’ve been to a few places in Europe, Africa, Asia and USA. Our next dream destination is Madagascar, I hear the nature there is simply breathtaking! I enjoy scrapbooking and I mostly scrapbook about our travels. My other passion is cardmaking – I enjoy trying new products and techniques, experimenting and creating in different styles. I’m very much into stamping although I never really though I was until I took a closer look at my cards and noticed almost all of them use stamps! I'm thrilled to be a part of the Neat and Tangled design team! Thank you so much for inviting me to join! Visit Yana's blog HERE.

I am so excited to be having these girls join team!  

Be sure to come back tomorrow for a look at a little freebie that will be included in each order this month! And maybe some special sequins too ;)

xo
Danielle


17

Star Confetti Birthday Card

Hello everyone! Nina here to share a star confetti birthday card!


There are various star sizes in the Sparkle and Shine stamp set - perfect for creating a confetti look. I used 3 ink colors and tried to stamp them in triangles for a random look. 


Then cut a slot to insert the craft pin:


Bling it up with some sequins from Neat and Tangled store: Mermaid Tale 


Thank you for stopping by! Happy Crafting!
5
Back to Top