Showing posts with label Sunburst. Show all posts

Magical Day with Koren Wiskman

Hello everyone. Koren here today with a card project using the Neat & Tangled Making Magic stamp set. This set features a little boy dressed like a magician and an adorable little girl as his assistant. As soon as I saw this image, I wanted to make a card using him. I imagined a magic orb floating above his hand and that is what i'm attempting to pull off today.

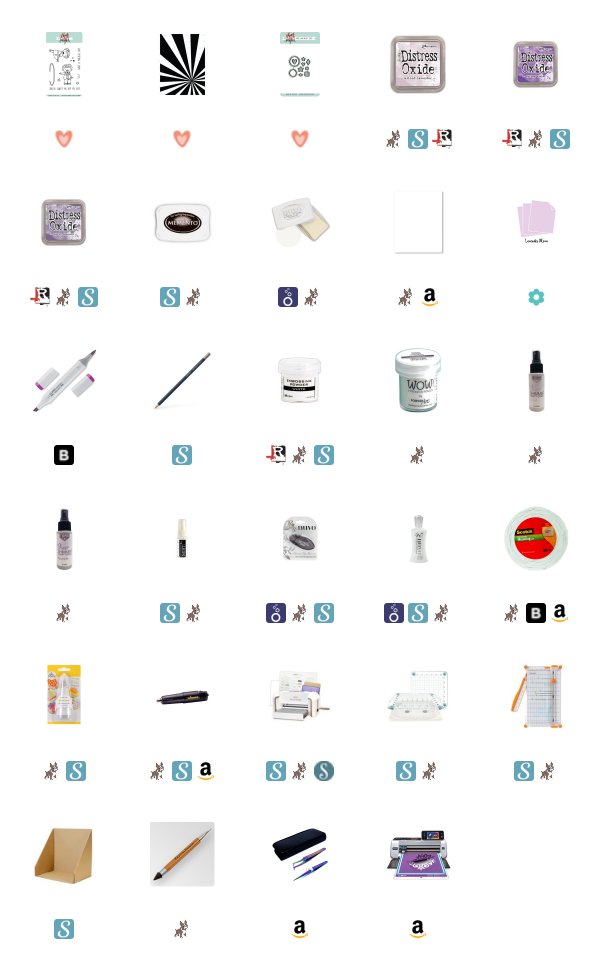
I started with the background. Using the Neat & Tangled Sunburst background stamp and Nuvo Clear Mark embossing ink I stamped it onto a piece of Papertrey Ink Lavender Moon cardstock. I used Wow embossing powder in White Pearl Super Fine and my heat tool to heat emboss the lines of the sunburst. Then I used my Nuvo Blender brushes to blend on some deeper purples in Distress Oxide Dusty Concord and Wilted Violet around the outside edges of the lavender cardstock. Trying to keep a lighter spot where I knew my focal image would be.


I sprayed this piece with Imagine Crafts Frost and Sparkle shimmer sprays as well as Hero Arts White Iridescent Shimmer spray. I love the combination of these three sprays.

Around the center of the sunburst I wanted to create my orb. I used an Amazon Make up brush, one of the very smallest, to blend on some Distress Oxide in Milled Lavender and Wilted Violet. I feel like the Milled Lavender got a little lost in all of the other purples. I also stamped the cluster of three solid star images from the same Making Magic stamp set by Neat & Tangled. I stamped them in the Wilted Violet Ink, but I had this to do again, I would choose something darker that stands out more.

I added a little drop of Nuvo Deluxe adhesive to the very center of the sunburst and added a little clear droplet. The Liquid adhesive behind it changed the color of the inks that were added in that spot and it makes the orb appear even more magical.


Now because the background is oriented as such, I needed to stamp the little boy image from the Making Magic stamp set backwards. To do that, I stamped him onto a piece of silicone that I bought from Amazon with Memento Tuxedo Black Ink. After stamping the image I placed a piece of Neenah 110 lb cardstock on top of the silicone image. This transfers the image in reverse. You can then go back over some of the line work of the image if needed, but I am usually able to transfer it cleanly using this method.

I then colored my reverse image using Copic Alcohol Markers. To cut out the image, I could have lined up the coordinating die on the opposite side using my Cricut Bright Pad, but ultimately decided that I would just send it through my Brother Scan N Cut 2. I was so nervous that my Scan N Cut would make a mistake, but thankfully, it didn't. I popped him up onto the background with Scotch 3M foam tape. I placed him so that his hand was just under the orb.


For the sentiment, I stamped the "Have A Magical Day" stamp onto Avery Elle Sugar Plum, which is no longer available but it is a dark purple (you can find something similar at most craft supply stores). I heat embossed it using Ranger White embossing powder. I cut it down using my Fiskars Wire Guide paper trimmer and popped it up using the same foam tape. I framed the entire panel using the same Sugar Plum cardstock only I treated it with those shimmer sprays that I used on the lavender panel. I love how shiny it is.

I used the Neat & Tangled Little Bits dies to cut some small stars to add to the sentiment strip. I cut them from the Lavender Moon cardstock I used on the background. I popped up the one star and then adhered the rest flat. All of this was added to a Neenah 110 lb card base in A2 size landscape orientation.

I hope you were inspired to create something magical today.

Koren
2

Hosannah - new and old


Hey everyone!  Miriam here today sharing a card using some new and old Neat & Tangled.

I thought that the Sunburst stamp would be a perfect background for a card featuring Easter Journaling 

I first inked up the Sunburst stamp several times using my MISTI and several shades of yellow ink.

Then I stamped the sentiment with Memento ink, and colored in the letters with a red Copic marker.  I also added a bit of Wink of Stella over top for some sparkle.


On the card base I stamped a few of the clouds from the aptly named Clouds set in white pigment ink.  It's a subtle way to soften the background.  I added a few mats as well as some clear sequins from the new Crystal Clear mix.  I love that you get small, medium, and large sequins in the mix!

Thanks so much for stopping by today!
4

You are a blessing (video)

Hello, dear readers!

 Sveta is with you today sharing new card and first ever English speaking video. I'm little bit nervous about it, so hope you will support me!

In this video I will share the process of making this pretty card made with Little Angel Stamp set and Little Angel coordinating dies along with Sunburst background stamp and some of Lucy Little Tangles sequin mixes.
 For coloring I chose Akashiya Sai color brush pens, but you also can go with Zigs or other color pens or just watercolors.


 Hope you will enjoy my video below or on the Neat & Tangled YouTube channel!

Stay tuned for our up-coming January Release week - we have a lot to surprise you!
Have a great day!
Yours, Sveta.

17

A stamped scenic card. Video

Hi everyone! This is Yana and today I have a fun scenic card to share with you. After Neat & Tangled releaser their first dies, those being the On the Corner and A lot to Say I immediately started playing with them. 

I have already shared my first cards with you here and today I wanted to show you another card that I made using the new die. I also used a ton of stamps from Neat & Tangled and created a scene behind my street sign. 

12

Sunburst

Happy mid-week!  It's Pamela here with a very simple card that can be used for many occasions.  Sometimes I don't like having sentiments on the front of the card as I like to be flexible with who and for what I give the card for.

I used the Sunburst stamp set and embossed it in clear.  I then blended several colours together to coordinate with the washi tape I used on the sides.  If you find it difficult to apply different ink colours to each ray, you could try embossing it in clear or white and then blending the ink into the negatives ^_^

Sunburst

I finished the card off with a little girl stamp, a big resin ribbon for her and some wood veneer stars!

Sunburst - Close Up

This card could be given out for many occasions - birthday's, thank you's, congratulation's and many more!

--- Pamela
11

Distress Marker sun rays

Hey everyone, Mayuri here!

Today I'm sharing the card that I've prepared for my monthly post here on the Neat & Tangled blog, and I've used one of my all time favourite stamps - the Sunburst. I have to say, this image is so versatile and I haven't even experimented with it anywhere near as much as I'd like to. Until now...

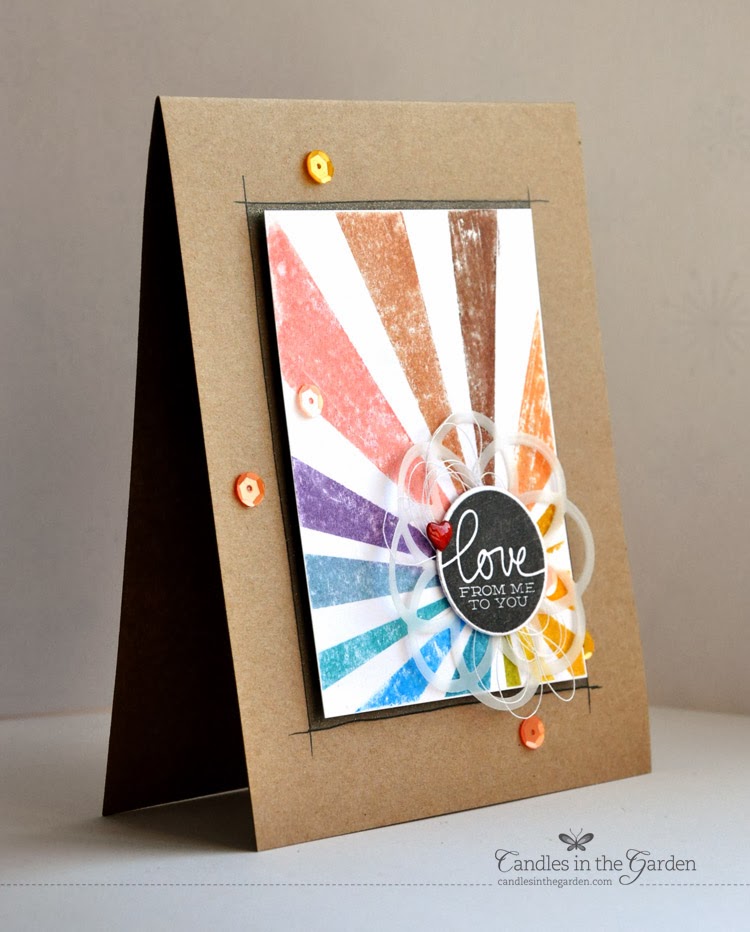
©Candles in the Garden. Neat and Tangled DT Post. Distress Marker sun rays.

I began by colouring up each of the sun rays in various Distress Markers, in a sort of rainbow effect. I misted lightly with some water and stamped onto some white cardstock. I loved the result of the distressed look and that you could see some of the streakiness caused by the markers!

©Candles in the Garden. Neat and Tangled DT Post. Distress Marker sun rays.

On a kraft card base, I drew a frame slightly bigger than the stamped panel and filled with Silver Wink of Stella - the glitter effect is really subtle but enough to stand out behind the foam mounted white cardstock.

©Candles in the Garden. Neat and Tangled DT Post. Distress Marker sun rays.

I die-cut the large Geometric Rose by Clearly Besotted from some vellum and stuck down with some Glossy Accents before adding some white string and a sentiment from Mama Elephant's Confetti stamp set. There's also a healthy scattering of some Neat & Tangled sequins!

Thanks for stopping by!

8

Thank You Speech Bubble Shaker

Hey everybody! Happy Friday! It's Taheerah here with my first post for Neat & Tangled - woo hoo!

I've been loving light, bright, fun and pretty cards lately and that's exactly the kind of card I'm sharing with you today! We're in desperate need for some Spring weather, wouldn't you say? And bright fun cards can be like a ray of sunshine while we wait!

I pulled together some of my favourite sets - A Lot To Say, Everyday Labels and Sunburst, and created this fun sequin shaker:


I love how bright and happy this is!!


To create the rays on the acetate front, I stamped the rays from Sunburst with Versamark ink and heat set with some semi-dull embossing powder with some glitter sprinkled on! This gave such a pretty effect! I also lightly stamped it with a rainbow of pigment inks spritzed with Perfect Pearls mist to give a soft hint of colour!


The shaker is filled with lots of yummy sequins sandwiched between the front layer and another layer of acetate. I also snuck in some sentiments from Everyday Labels so that the message is a shaker too!


I stamped the rainbow sunburst again onto some white cardstock and backed the shaker panel onto that. The whole shaker element was then adhered to a card base, and the front is of course the speech bubble from A Lot To Say, stamped with black ink then neatly trimmed out inside the lines using a craft knife.


I hope this card brought some sunshine to your day! Thanks for stopping by!
8

Awesome Together. A pink + black valentine

Everyone seems to be going crazy about chalkboard and to tell the truth I'm no exception. Thus sharing a pink plus black (and a little white) valentine card. 


I used the Sunburst stamp for the chalkboard background. I wanted to get a really messy look for this card so I used an old embossing inkpad with almost no ink inside. I really like the way it turned out.

For the little hearts I picked the You + Me stamp set and heat embossed a few on pink ombre paper from My Mind's Eye. 

Finally I heat embossed the "awesome together" sentiment on a chipboard arrow from Blue Fern Studios. Added a little peg and a few sequins and my card was done! 


Happy Valentine's Day!
xoxo,
 Yana
7

Shopping for inspiration- the holiday edition

Hello Neat and Tangled lovelies!

Katie Gehring here.  It's no secret that I love shopping for inspiration when I am out and about, and I am popping in today to share a card I made inspired by holiday decorations at (my favorite store, like, ever) Target!

Last weekend, I was picking up the items on my Target list and somewhere between the kids clothes and shoes departments I looked up and saw this.


Those colors, the circles, the shine!  I was inspired!  I snapped a picture with my iphone trying not to look too conspicuous.  When I returned home, I pulled out some of my Neat & Tangled stamps to make a card based on this Target decor, and here's what I created... 

dsc_0082

I stamped Sunburst with green ink on green cardstock and punched out the center of the image with my circle punch.  Party Dots was stamped with gold ink, and I punched a couple of small circles from the larger stamped image.

dsc_0080

The stars from Merry and Bright accent the red circles and the sentiment is from Simple Christmas. A few circles punched from bronze shimmer cardstock added some depth and shine.

I think this card is pretty on Target with the inspiration (pun intended), and it's flat for easy mailing!  Next time you are out and about in all the hustle and bustle of the holiday season, don't forget to look around. Your next spark of inspiration could be hanging from the ceiling!

Thanks for stopping by!
Katie :)

7

Holiday Cards Using Non-Holiday Stamps

Hello everyone! Nina here with two quick and easy holiday cards using non-holiday stamps from Neat and Tangled.

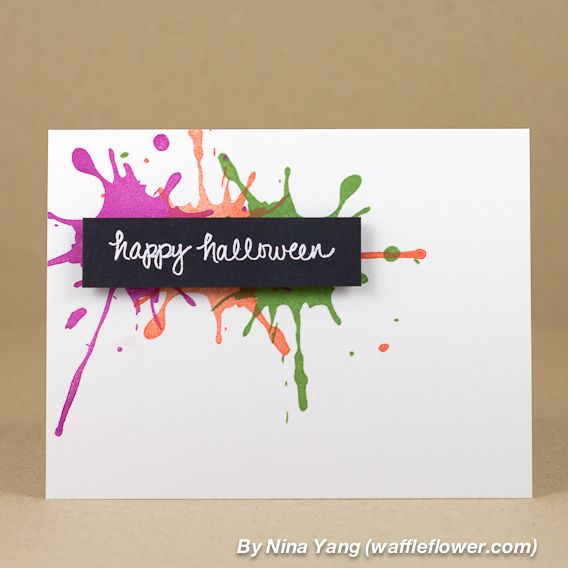
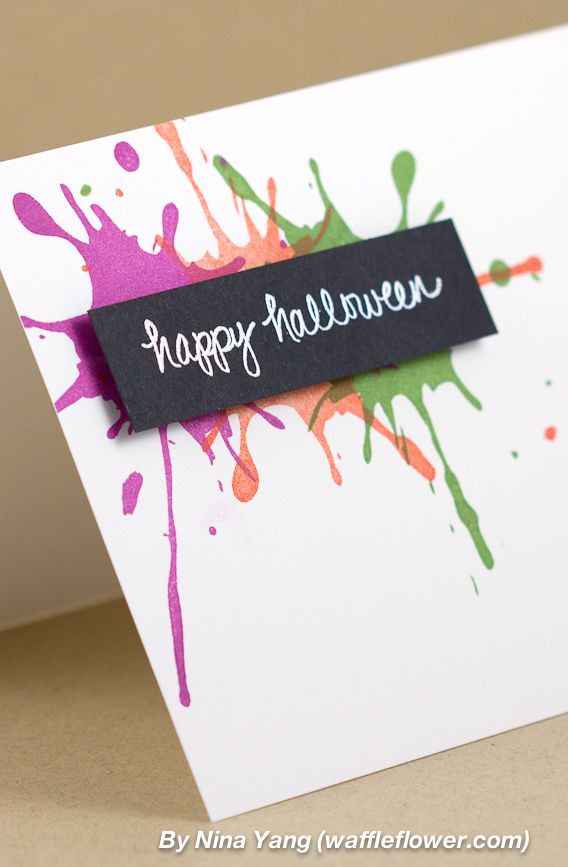
First one up, a Halloween card using Ink Splash.


I used halloween colors to quickly create the background. I heat embossed the sentiment from Halloween Scene on black cardstock, cut to size and adhered with foam adhesive.


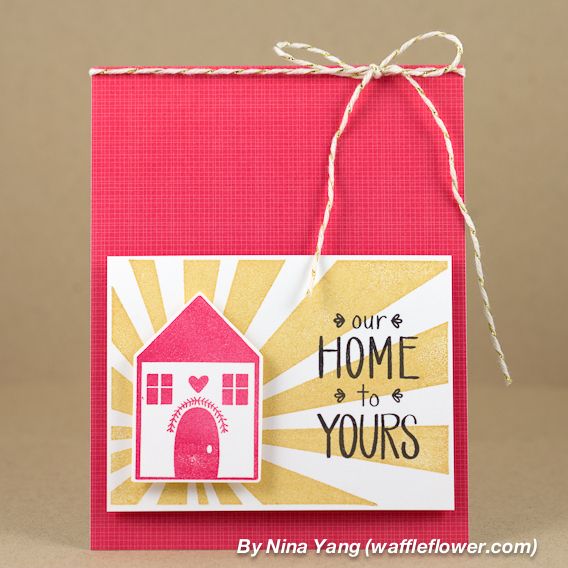
Second,  a Christmas card using Sunburst.


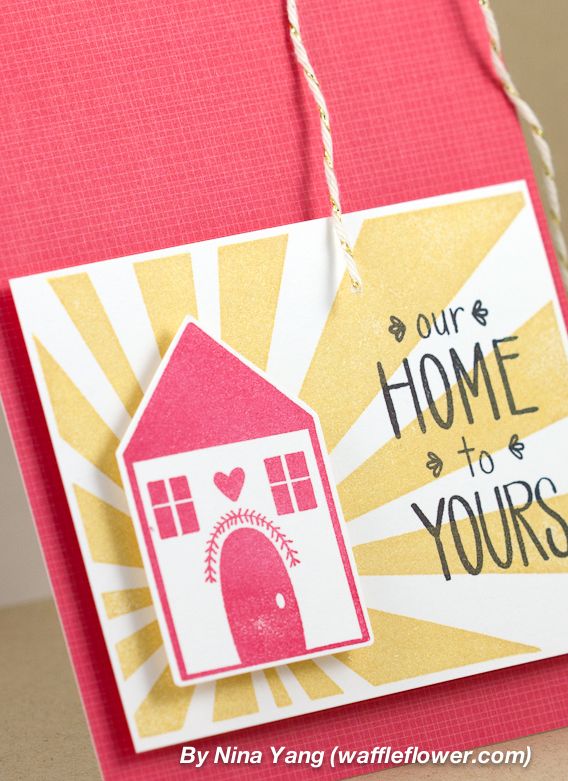
This is a great set to create a scene with a warm feeling. It also helps emphasize the focal. Home and sentiment stamps from Simple Christmas.


I collect basic, background building pattern stamps and think these two from Neat and Tangled are must-haves. I hope that you are inspired to use more of your pattern stamps on your holiday cards this year? 

Thank you for stopping by! Happy Crafting!

7

Dreams Do Come True - Masked Sentiment


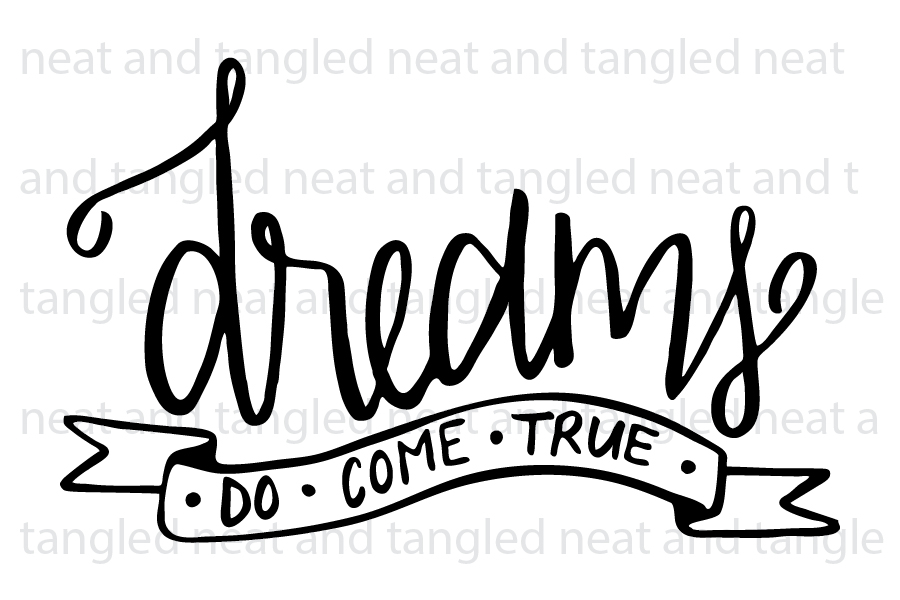
As part of this month's birthday bash, I created a card combining the the new Dreams stamp (free with all orders place in August), with one of the birds from the My Heart Sings set and the Sunburst stamp. 

To begin, I stamped the sentiment with Versafine ink. I then stamped the sentiment on masking paper, which I cut out and placed over the sentiment. I stamped the Sunburst over the masked sentiment using a pigment ink. 

The bird was stamped with Versafine ink and heat embossed with clear powder. I colored the bird with a combination of Festive Berries and Picked Raspberry Distress Inks. The beak is colored with Hero Arts Butter Bar. The cloud background paper was created with a Hero Arts digital stamp.

7

Birthday Bash!


Happy Monday and Happy Birthday Neat & Tangled!!! 
Amy K. here sharing a bright and sunshiny birthday card perfect for anyone!  I've stamped the Sunburst background and layered a stamped circle from Everyday Circles.  The fun thing about these circles is that they are easily punched with a circle punch! 
 
Sunshine birthday  
 
Have you see this??  It is a mini stamp (3x2) called Dreams that will be included with all stamp purchases this month!


Have a wonderful day and we'll see you back here tomorrow with more BIRTHDAY celebration!!!


7

ABNH Week - You Are My Light Card

Hello everyone! Nina here to share a card using both Hero Arts and Neat and Tangled products for our collaboration week with A Blog Named Hero!


I was thrilled to see Danielle come up with this cool Sunburst stamp. I immediately wanted to pair it with the Starburst Background stamp by Hero Arts. 

Inspired by Pamela's card here, I cut the starburst (red) out and mounted it to card with some foam adhesive. I used the Lemon Sequins from Neat and Tangled store to emphasize the dimension.


Don't forget to check out A Blog Named Hero for more inspiration! Happy crafting!
10

Seize the Birthday Sponsor + Card

Hello friends, Danielle here!

I am happy to announce that Neat and Tangled is sponsoring the next challenge over at Seize the Birthday! If you aren't familiar with this challenge blog it's really neat! It's aim is to help you get birthday cards done for both him and her!

Here is the current challenge sketch, this week it's for "her"

And here is my take at the sketch
Happy Birthday Stars
 I am pretty bad with sketches, so I went for a pretty literal interpretation :) I die cut the stars and then stamped them with Sunburst, and used the sentiment from Sketchy Cupcakes. I also chose a nice feminine color combo of yellow, teal and pink.

I do hope you'll join in the challenge - a Neat and Tangled stamp set of choice is up for grabs!

xo
Danielle

12

Shine Bright!

I'm back with a card using another Neat and Tangled's mini stamp sets!  This time, I am using Sunburst and Sparkle & Shine, two stamp sets that was just released this month.

I stamped the sunburst on one side of the card and cut out the white spaces, leaving only the stamped portion on the card.  I then stamped the light bulb, coloured and cut out and adhered it to the sunburst with some foam tape.  Then I finished the card off with a sentiment from Sparkle & Shine and embellished it with some rhinestones.

Shine Bright!

Little Tangles is having an Embellish It! Challenge, so go ahead and join in the fun using your favorite embellishments - from sequins, rhinestones, chipboard... anything!  The challenge runs until Sunday, May 26th at 11:59 EST, so don't hurry up and link up your creations!

--- Pamela
10

May 2013 Release Day 2: Sunburst + Giveaway!


Hello, hello! Back again for Day 2 of May Release. If you missed Day 1 go HERE.

For May release we have 3 new stamp sets and 4 new sequin colors! Yay! Each day 1 set and some sequins will be revealed, with all sets and sequins being available for purchase in the SHOP on Wednesday May 8 (TOMORROW!), at 8am EST. Also, all sequin colors and styles will be restocked at the same time :)

Another something new: A few of our older sets will be on sale for $11 through Friday! (Fresh Blooms, Little Tangles, Little Bear, Swirly Twirly Tags, My Heart Sings)

Today I am here to introduce you to Sunburst! Shine on with this stamp! It is a single stamp that is just under 3x4, so great as card focal point, or perfect for your Project Life journaling cards! Coordinates so well with many of our other sets like Sparkle and Shine, Kindness Matters, Just Thinking of You, Swirly Twirly Tag...okay, so maybe all of them ;)


And now for some inspiration!

By Laura Bassen
_DSC0003
By Suzanne Dahlberg
nina-yang-diamond-shine-card
By Nina Yang
Sunburst1-JM
By Jean Manis
Sunburst2-JM
By Jean Manis
dsc_0835
By Katie Gehring
dsc_0840
By Katie Gehring
may-2013-release--sunburst-01-mary-dawn-quirindongo
By Mary Dawn Quirindongo
Neat & Tangled: Sparkle & Shine and Sunburst
By Pamela Ho

Now for today's giveaway!

To enter to win Sunburst + Sequins:

1. Be a follower and leave a comment here!
2. Follow us on Facebook and share about our release week! (leave another comment)
3. Follow us on Twitter and share about our release! (leave another comment)

See you tomorrow!
74
Back to Top