Showing posts with label Painted Hello. Show all posts

Painting Watercolor Backgrounds with Nina-Marie


Hi Friends!  We're welcoming our April guest Nina-Marie Trapani back to the blog today.  This is her last post for the month and we're sad to see her go!  We've so enjoyed having her back visiting on the blog and we know you have too!

Happy Friday everyone! Today I am excited to share another video featuring Gansai Tambi watercolors and Neat & Tangled products! Last week, I shared a video featuring these same products in a no-line coloring technique. This week – since the Gansai Tambi paints are a newer watercolor palette for me – I wanted to explore them a bit further and see how they did in creating backgrounds.


Watercolor backgrounds are something I greatly enjoy creating. The abstract feel of the watercolors, combined with how they layer and blend simply appeal to me. They are relaxing to make and allow me to have some “playtime” without having to worry about staying inside of lines or trying not to let colors mix. Backgrounds for the most part allow you to be free.

The Gansai Tambi watercolors worked beautifully for creating vibrant, layered backgrounds. I used all blues for these backgrounds, but you could definitely work with other colors. When I was working on painting these, I was in the mood for using blue tones; they make me think of the ocean.


In some of the backgrounds, I did use a bit of white metallic, which is included in the 36 set of Gansai Tambi watercolors. If you don’t have the Gansai Tambi paints – or do not have the 36 set – and would like to incorporate a metallic like this into your artwork, I recommend the Gansai Tambi Starry Colors set. This set of metallic watercolors are the same consistency and feel of the metallics included in the Gansai Tambi 36 set and include a few extra golds too!

I ended up creating a total of five backgrounds – which I then turned into cards – with the help of the Neat & Tangled Succulent Journaling Card die. This die coordinates with the beautiful Succulent Journaling Card stamp set. I did not use the stamps from the set today however; just the die.


The die is recessed into a coordinating blue cardstock frame. For a sentiment, I stamped the word “hello” in blue ink and heat embossed it with clear powder. To embellish the card, I used a few Sparkling Clear mix and 3mm sequins from Pretty Pink Posh.

These cards all look different and unique, which is the look I was going for. When I painted the backgrounds, I made sure to put the colors down differently on each watercolor paper panel. By varying up the paintings, I was able to make a set of cards that match, but each have their own character.


I hope today’s post has inspired you and gave you some ideas for working with watercolor backgrounds behind a die cut such as the Succulent Journaling Card, to create a pretty card set.


And a BIG, BIG thank you to my dear friends Danielle and Miriam from Neat & Tangled who allowed me to come guest with them this month; I had so much fun!
2

Neat & Tangled / Et Cetera Papers Collaboration - Day 1

Hi Friends!  We're teaming up with Et Cetera Papers today through Thursday.  Et Cetera Papers produces specialty real wood papers and products, and we'll be showing those off for the next several days.

The Et Cetera Papers team will also be working with our products, so you'll want to stop by their blog as well.  At the end of the week we'll be drawing a winner from comments on our collaboration posts for prizes.  We'll be drawing a winner here on the Neat & Tangled blog for the $25 prize pack you see below (which consists of adhesive backed real wood cherry and birch veneer papers and as well as real wood envelopes), and Et Cetera papers will be drawing a winner for a $25 Neat & Tangled store credit.

No automatic alt text available.

OK, let's take a look at today's projects.  First up is Daria:

Hi everyone, Daria here! Happy to join this fun collaboration with Et Cetera Papers.


Self-adhesive sheets are very easy to use and ideal for all kind of die-cutting.  Before die-cutting, I glued it to some foam sheets and then to stick it adhesive sheets. It made it very easy and fast to assemble adding a little bit of fun dimension.


I went with simple, yet elegant no-stamping cards. I used some of my favorite dies from Neat & Tangled: Punchinella and Celebrate Dies for one card and intricate Hooray die for the second. All of them cut just perfectly.


For my today's cards I used Rustic Cherry Wood adhesive sheets from Et Cetera Papers.
I think it pairs perfectly with light blue cardstock. Variation in color in wood pattern looks awesome in real life and adds so much to the design.


Next up is Stephanie:


Hey friends! Stephanie Gold here with a little project in collaboration with Etc. Papers! I am working with these incredible Cherry wood veneer envelope and tape sets and oh my are they pretty!! Since they are perfectly coordinated already, I decided to make them even more so by creating a matching card and envelope.


I started by placing the tape on a diagonal and then using the Tiny Cuts dies to cut dashes in between each wood stripe. I whipped out a couple of older stamp sets to create the focal point of my card. Ornate Frames stamps and dies were used to create the hollow frame and my sentiment was created using Painted Hello.


I wrapped a vibrant green hemp cord on the diagonal and tied it into a bow. The wood tape looks so beautiful next to the bright colors of the ink and twine.


For my envelope I used a pink shipping tag and stamped one of the hollow Ornate Frames and adhered it to the center. I wrapped more of the green hemp cord around the envelope, tied it into a bow, but also secured it to the envelope using a Tiny Attacher. This helps keep it in place while in transit. :)


That's all for today, be sure to leave a comment here and stop by the Et Cetera Papers blog as well.  We'll be back tomorrow with some more beautiful collaboration projects to share. See you then!
27

Cosmo Cricket Week - Day 4


Here we are on Day 4 of our Cosmo Cricket collaboration week!  Each day this week we're sharing projects featuring Cosmo Cricket and Neat & Tangled.  We hope that you are enjoying the projects as much as we have been enjoying the products!

Every good collaboration need a couple prizes, right?  We've got a great bundle of Cosmo Cricket goodies to share with one of you.  Just leave a comment on each post this week and we'll pick a winner and announce them next week.

Cosmo Cricket also has a prize to share, so be sure to stop by and check them out on Facebook and Instagram.

Today Nina-Marie, Taheerah, and Mayuri are sharing with us.  First up is Nina-Marie:

Hi friends, it's Nina-Marie here with you, sharing a fun set of cards that feature the gorgeous Cosmo Cricket Art Deck papers, along with some of the newest Neat & Tangled stamps and dies!

I created three different cards using the Art Deck papers and I even have a video tutorial for you, showing how I did it! Each card shares the same technique, which is shimmer watercoloring with Distress Inks.

In the video below, I'll be showing you how I created my own shimmer watercolors to paint over the emboss-resist patterns that are printed onto the Art Deck papers.

This first card features this stunning flower, which looks amazing once colored in with the watercolors.


I paired the flower with the new Doily Tag die and a sentiment from the Celebrate stamp set (both new products from Neat & Tangled).

My second card showcases the fun "dream big" constellation-styled sentiment that had a ton of gold dots surrounding it. This immediately made me decide I needed to create a galaxy background for this paper.

I paired this paper with the Scored Shapes dies from Neat & Tangled... the dimension of these stars popping off the galaxy looks fabulous! 

My final card features this encouragement quote that has some beautiful gold foiling on some of the letters. 


To see how all of these cards came together, be sure to watch the video below! If you enjoy, please give it a big thumbs up and subscribe to our channel for more inspiration!  For a complete supply list, please stop by my blog.  


Now it's over to Taheerah for a quick and easy card featuring one of the pieces from the Art Deck Papers, paired together with stamps from Painted Hello and Faceted:


Some very quick watercolouring and splatter over the LOVE panel brought it to life, and then I stamped the solid hello sentiment with Versafine ink.


The card base also got some love to match it with the letters. I stamped the base with the large facet stamp from Faceted, heat embossed it with white embossing powder, then watercoloured it with watered down gold mist for a complimentary finish that doesn't distract from the main panel.


But check out that shimmer! :)

And last but not least, Mayuri has a project to share:

The Pixie Paint bottles of coloured powder pack a huge punch and I had so much fun playing with them:


I began by creating a fun background panel - firstly, I spritzed a piece of lightweight watercolour paper with water, then laid down the Geometric Blooms stencil on top before tapping out some of the Harbor coloured Pixie Paint.


The paint reacted beautifully with the stencil and the water - I removed the stencil and spritzed a little more water to move the paint around a bit more, and heat set the panel when I was happy.


I trimmed the panel down and foam mounted to a white card base before stamping the skunk from the Little Stinker set with Versafine Onyx Black ink, all ready to colour in!


I used some ZIG Clean Color Real Brush Pens to colour in the little animal, stamped a sentiment from the same set, trimmed him out and foam mounted him to the card front. To finish off, I added some sequins from the Gold Mix selection.

So much wonderful inspiration today!  

Be sure to leave a comment and come back tomorrow for the final day in our collaboration.  At the end of the week one lucky commenter will win a Cosmo Cricket prize pack!
47

Ellen Hutson Mix it Up Challenge!


Hi friends! Danielle here and I am so excited to be joining in this month's Essentials by Ellen Mix it Up Challenge!

I've had my eye on the Essentials by Ellen Bohemian Garden Stamps for quite some time because I thought it would pair perfectly with our Painted Hello set! They both have a similar feel and I envisioned something really bold graphic happening when I mixed them together!

I created two versions of the same card because I couldn't make up my mind! Ha
For the first I created a bright and bold focal point with some of the flowers and leaves from the Bohemian Blooms stamp set, coloring them in with Copics. I layered the stamped and die cut Painted Hello sentiment on top of the flowers.
For the second card I created the same flower/sentiment focal point, but also created my own patterned paper by stamping the "hello" repeatedly in black on my card base. To sort of tone it down a little I put a piece of vellum over top.

What a happy hello :) Thank you so much for taking a look! I do hope that you will play along! A random challenge participant will receive a $50 gift certificate to the Ellen Hutson store! To be eligible you must use Neat and Tangled AND Essentials by Ellen products for your entry. 
And don't forget to check out all our July release week fun! You can check out Day 1, Day 2 and Day 3 - and there is still time to enter all the giveaway!


SaveSave
3

February Guest Designer: Kelly Latevola

Hello Crafters! 

It's Kelly here and this is my last post as the February guest designer. I'm so sad it's over! I had such a wonderful time visiting here. Thank you so much for having me. 


For today's card I started with a 4 x 5.25 card panel and stamped the Painted Hello all over the background in a pale aqua ink. Next I used Peacock Feathers  distress ink to add some ink blending to just the bottom right hand corner. I stamped the sweet girl from Lumberjack Love on a separate piece of white and colored her with Copic markers. I used a black multiliner to outline the image and add a bit of detail to her shirt. I also used my white gel pen to add some polka dots to her skirt. Once the detailing was done I fussy cut her out and outlined my edges with a Memento Tuxedo Black marker. The sentiment from the same set was heat embossed in white on a strip of black paper. I hunted up some black and white chevron paper to anchor the whole thing to my background. A few gold sequins finished the card off. 

I also have a card over on the MarkerPOP blog today using some Neat and Tangled so be sure to head over and check it out! I mixed some old (Fresh Blooms) and new (Painted Hello and Wholehearted Cover Plate)!

Huge thanks again to Danielle for the invite!
Kelly
10

January Release Day 4: Ornate Frames + Painted Hello

This month we have some truly amazing products for you - lots of sequins, stamps and dies! All new products will be available TOMORROW Friday, January 22, at 8am EST. Be sure to stop by here everyday this week for lots of fun, inspiration, and GIVEAWAYS! Winners will be announced tomorrow at 7am EST!

In case you missed:

Today we have 2 more stamp and die combinations for you! Both help you to achieve really in depth looks through multi-layer stamping!


Orders will include a helpful stamping guide

And now for some inspiration!  Don't forget to head over to their blogs for more details and to leave some love, just click the photo! One winner will be chosen from comments on the design team blogs to win a $25 gift certificate!
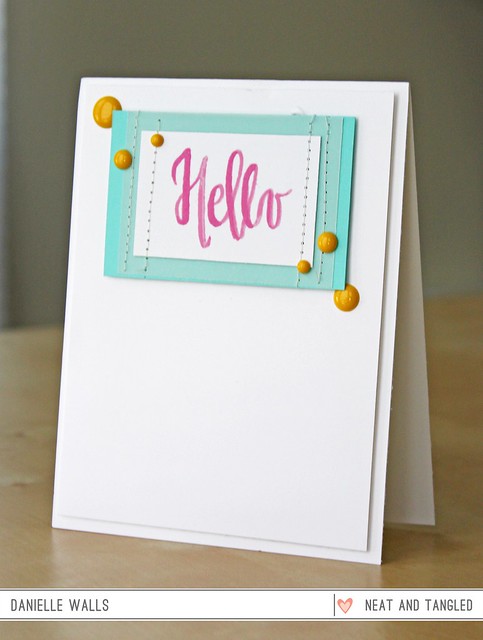
paintedhello


Would you like to win Ornate Frames and Painted Hello for yourself? To enter:

1. Be a follower and leave a comment! 
2. Follow us on Facebook and share about release with your friends! (leave another comment)
3. Follow Neat and Tangled on Twitter and tweet about our release, use @neatandtangled! (leave another comment)
4. Follow Neat and Tangled on Instagram and repost about our release! Use #neatandtangledrelease (leave another comment)

86
Back to Top