Showing posts with label Hello You. Show all posts

Hello You with Hearts with Cheiron Brandon

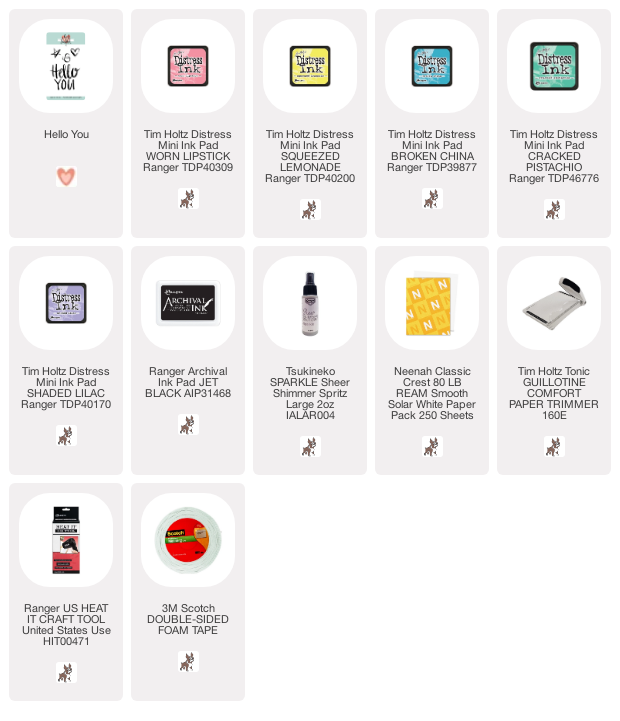
Hi there crafty friends, it's Cheiron here with a fun little Hello You card filled with love! Today, I revisited a classic Neat and Tangled set, Hello You (which is now on sale with a bunch of other amazing stamps while they last).  I took the heart from the set and stamped in over and over in different colors of Distress Ink to make a background panel. I don't know about you, but this kind of stamping is so relaxing for me.


I worked my way from the left to the right side of the panel in rainbow order (of course) and then spritzed the entire panel with some Tsukineko Shimmer Spray in Sparkle and dried the panel with a Ranger heat tool.


Once the panel was dry, I put it in a stamp positioner and stamped the Hello You greeting in Jet Black Archival Ink. A fun a simple card and an easy way to send a hello card with a lot of heart. There are some other shapes in this set too (stars, bubbles) so you could mix it up and have different color combos for anyone on your list :)


SUPPLIES: 
11

Hello You, Inspired by Sveta


Hi all!  It's Miriam, and today I'm sharing a fall card featuring my Calathea set.

It's actually my take on this card from Sveta.  Sveta used the Calathea set to create a light, bright, tropical look, but I'm in the mood for fall, so I went with fall colors and used more of the fuller leaves.

I used Altenew inks and a mix of first generation, second generation, and rock and roll stamping.  To add a little more drama/focus on the center I also did some light inking on the edges of my panel with Antique Linen Distress Ink.


The sentiment is from the Hello You mini and was stamped with the help of my MISTI.  I didn't use the MISTI for the leaves because for this look some irregularity is not a big deal, plus it's faster.

That's all for me today, thanks for stopping by!
4

Hello You!

Hi there! It's Cheiron here with a fun Hello card featuring a Distress Oxide Background. I have been making a lot of these fun colorful backgrounds lately to experiment with all of my new ink colors. I have a stack of them on my studio table now.  I always make them, and never know what to do with them. 

I've found that these are the perfect type of backgrounds to turn into cards with bold sentiments. The Hello You set allowed me to use all of the backgrounds I made to turn these backgrounds into cards to send to friends. 

Just add your sentiment, and a bit of detail and you are pretty much done. For this card, I stamped the Hello You over my colorful background, then also stamped the heart from the same set in the same inks that I used to create the background to add some interest.

Thanks for stopping by!

6

Masking stamping for tropical card with Sveta

Hello everyone!

Sveta is here and I'm happy to share with you my new card. I really love this tropical trend that has won the hearts of lot of people. Are you among those?
I thought that Calathea stamp set was perfect to achieve a tropical look for my card. First I made masks of the leaves to create layers in my border stamping. I used outline images at the beginning, and then filled them with the colored layers.


For some leaves I used white pigment ink before or after (doesn't matter really) the main color inking to achieve a more soft tone. I think that the grey-green-pink color combo for the tropical design works really well.


For the bright big sentiment in the center of the card I chose the Hello You Stamp set. I stamped it in black ink and then in grey with a little displacement to make a shadow. For the final touch I added sequins from Neat & Tangled sequins mixes: Crystal Clear, Pearl and Lime.


Hope you enjoyed today's tropical walk into the stamp jungles!
19

Hello You!

Hello there!

Mayuri here to share a card using the gorgeous Scandinavian Prints Christmas set from the November Release!

 ©Candles in the Garden. Neat and Tangled December 2016 - Scandinavian Prints Christmas.

I used all of the solid triangle images from the set to create this random background, concentrating the stamping mostly towards the bottom of the panel. I began by stamping the images with lighter colour inks, and then with darker colours to create a sense of depth.

 ©Candles in the Garden. Neat and Tangled December 2016 - Scandinavian Prints Christmas.

I left enough of a clear space on the upper part of the panel for a sentiment - this one comes from Hello You and was stamped with Versafine Onyx Black ink.

©Candles in the Garden. Neat and Tangled December 2016 - Scandinavian Prints Christmas.

To finish up, I added some Gold Mix and Merlot Mix sequins.

Thanks for stopping by!
2

July Release Redux Cards by Taheerah

Hey everyone, happy Thursday! It's Taheerah here today to share some cards featuring the July release!

The wicked postman held my release package captive earlier this month so I didn't get a chance to join in with the other talented DT ladies - but that just means I've got the limelight to share them with you now!

Let's start with the first card:


For this one I used the sentiment and star image Hello You to create a bold, chalkboard look.


I did a bit of shadow stamping, with the help of my MISTI, to create a chalky look, and heat embossed the main images!


Next up, a couple of cards featuring the Succulent Journaling Card stamp set and die!


I die cut the journaling card from patterned paper and lightly coloured some of the pieces, before paper piecing them back in. The sentiment is from Square Thoughts!


Such pretty details!

And here's its alternative version:


This one is more subtle, but just as pretty!


Next up, Mermazing:


This one might be my favourite of the lot, just because of all the clever details!


I partially inked up the mermaid, and then stamped the shell to be her bikini and drew in her waist!


And just check out those waves! I used a combination of glue and ink to create dimensional froth which I then heat embossed!


Check out that dimension!

And finally, Kitty's Favourite Things:


I die cut a circle using the Making Waves dies and then wound a lot of twine round in, before inking and misting the twine to change its colour!


I coloured my kitty with Copics, trimmed him out and adhered him behind the giant ball! The sentiment banner was die cut using the Kitty's Favourite Things dies, and I added a heat embossed vellum heart using one of the stamps from Hello You. The background was created by misting, using both the Geometric Blooms and Pentagon stencils, placing them on top of each other before misting. I think it mirrors the ball of wool effect. :)


I hope you loved these release projects as much as I loved creating them! The July release seems to have been very popular, with a few of the new products out of stock currently - so make sure you sign up to notifications for your favourites to know when they're back in stock! Thanks for stopping by!

4

July Release projects

Hello there! Mayuri here to share some cards for the July Release - there's a great selection from this month's release, and I've experimented with a few techniques that I hope will inspire you! I've seen the watercolour trend showing up more in more in the card making world, and so I wanted to try a technique using Distress Inks and water.

For this first card, I stamped the shapes from Hello You in Picked Raspberry, Festive Berries, Shaded Lilac, Peacock Feathers and Salty Ocean all over a panel of white cardstock. I left a blank space in the centre for the sentiment.

©Candles in the Garden. Neat and Tangled July 2016 Release.

I then took a damp brush and went over the stamped areas with water, sometimes using a light touch and sometimes slightly heavier. I liked how quickly the water seemed to dry in some areas, allowing me add more colour and more water to create a sense of movement.

©Candles in the Garden. Neat and Tangled July 2016 Release.

I heat set the panel and then stamped the large sentiment from the same set with Versamark Onyx Black ink in the centre. I trimmed the panel down to the same size as my card base and adhered it straight down.

©Candles in the Garden. Neat and Tangled July 2016 Release.

I added a few sequins and some gold splatters to finish up. For my second card, I took the speech bubble die from Square Thoughts and die-cut it several times from a panel of white cardstock.

©Candles in the Garden. Neat and Tangled July 2016 Release.

I held on to all the centre pieces that get cut out with the die so that I could adhere them all back in place. First, I took an inky panel from my stash and adhered it down to a white card base, and then I foam mounted the die-cut panel in place.

©Candles in the Garden. Neat and Tangled July 2016 Release.

I also die-cut the fractal heart shape using the Heart of Gold die and adhered that to the front of the card. The sentiment comes from the matching Square Thoughts stamp set and was white heat embossed onto a strip of black cardstock before being foam mounted to the front.

©Candles in the Garden. Neat and Tangled July 2016 Release.

For my last card, I took the Geometric Blooms stencil, laid it onto a panel of white cardstock and swiped through some embossing paste. While the stencil was still in place, I also spritzed some Funky Fuschia Dylusions Ink spray.

©Candles in the Garden. Neat and Tangled July 2016 Release.

I removed the stencil and set the panel aside to dry while I worked on the focal element. I stamped the cat from Kitty's Favorite Things onto a piece of white cardstock and coloured him in with Copic markers.

©Candles in the Garden. Neat and Tangled July 2016 Release.

After my embossed panel had dried, I trimmed it down and foam mounted it to a card base. I die-cut the cat out using the matching die and also foam mounted it to the card front. I had added a little slit beneath his right paw so that I could tuck the sentiment banner underneath.

©Candles in the Garden. Neat and Tangled July 2016 Release.

The sentiment banner was die-cut using the die from Kitty's Favorite Things and a sentiment from Succulent Journaling Card was heat embossed in white. To finish, I added a few gold sequins.

Thanks for looking!

:-)
4

July 2016 Release Day 1: Introducing Hello You + Succulent Journaling Card + Giveaway!

Hello dear friends! It's that time again! Welcome to our July 2016 release week! 
This month we have some truly amazing products for you - sequins, stamps and dies! All new products will be available on Friday, July 8th at 8am EST. Be sure to stop by here everyday this week for lots of fun, inspiration, and GIVEAWAYS!

Today we have 2 new stamps and a die for you!

First up is Hello You. A fun 3x4 stamp set with some of Danielle's brush lettering! Perfect for sending a big, bold hello!
And we also have a great new stamp set and die designed by Miriam Prantner. Succulent Journaling Card is a 4x6 stamp set with so much versatility and a great variety of sentiments. The large stamp image is just shy of 3x4, so great for pocket journaling, or for making a focal point on a card! 
And if you love our Gardenia Blooms Journaling Card die, you will certainly love our new Succulent Journaling Card die!  This set of 2 dies has limitless opportunities to showcase your creativity! The succulent rectangle die is just shy of 3x4 and fits inside your pocket journaling books.  The larger rectangle allows for layering to achieve some great looks!
Let's see these new goodies in action! And now for some inspiration from the design team.  Be sure to head to each design team members blogs for details by clicking on the photos, and for a chance to win a $25 gift certificate! One person will be chosen from among comments on the design team members blogs!

Simply amazing work by the design team!

Would you like to win the new Hello You and Succulent Journaling Card Stamps? To enter:

1. Be a follower and leave a comment! 
2. Follow us on Facebook and share about release with your friends! (leave another comment)
3. Follow Neat and Tangled on Twitter and tweet about our release, use @neatandtangled! (leave another comment)
4. Follow Neat and Tangled on Instagram and repost about our release! Use #neatandtangledrelease (leave another comment)

SaveSaveSaveSave
165
Back to Top
