Showing posts with label stamping. Show all posts

Stamping reflections on water with Bibi + Later Alligator stamp set


Hello everyone,  It's Bibi here and today I'm sharing a video -post with easy tips to stamp images reflected on the water.

You can use the technique explained in the video below to stamp images under the water and with the tips in the video, you will also be able to stamp images reflected on any glossy surface by swapping the colour of the background.

For today, I'm using sweet images from Later Alligator Stamp set and I also used Snake Scales Stencil from the July release by Neat and Tangled.

To colour the card I used water-based products such as markers ( Zigs) and Distress Oxide inks and coloured pencils to add darker or lighter areas and to apply colours to tiny parts of the images.


I hope you like it !

Many hugs  and happy crafting 
x
Bibi

6

Stamped Cover Plate with Stephanie Gold


 Hey friends! Stephanie Gold here today and I am sharing a fun and super colorful card I made using a few of March's new release products. :)


First I stamped out a few fun flower designs using the Medallion Flower Builder stamp set by Miriam Prantner. I used a total of 5 different bright colors to make it really interesting and eye catching.


Then to add even more texture, I die cut the design using the new Polygon Cover Plate. It ends up being a subtle and fun added accent. And finally, I used one of the big, bold sentiments from the Medallion Flower Builder set to finish my card off. I seriously love this set. :)

Thanks for joining me! Have a wonderful week!

Xo, Stephanie

Follow me: MY BLOG // FACEBOOK // INSTAGRAM // PINTEREST
8

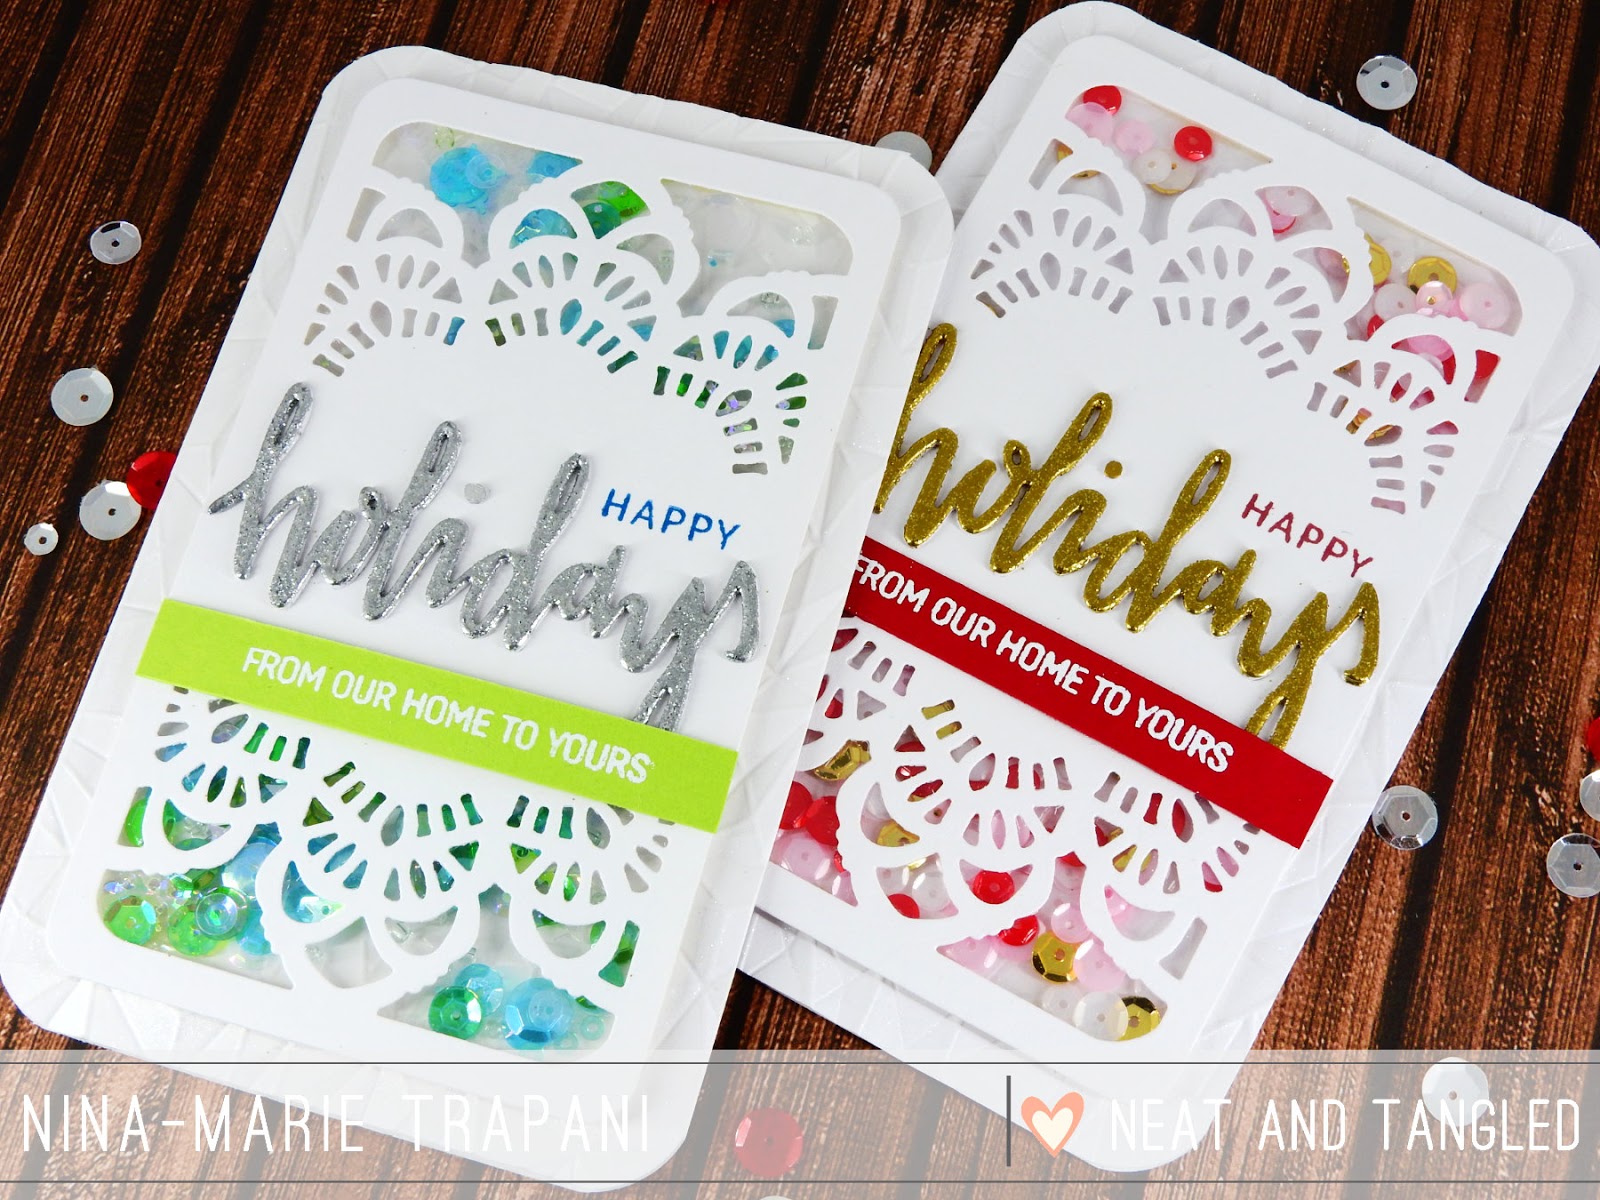
His & Her Holiday Cards with Nina-Marie


Hello crafty friends, it is Nina-Marie here with you today, sharing a set of cards that are perfect for that special him or her on your Christmas list this year!

Most card designs can be adapted to fit either a feminine or masculine feel, and this set is a great example of how simple that can be.

I love making shaker cards, and our Doily Tag die is a perfect window to put in front of an assortment of pretty sequins, don't you think? I started off by die cutting the tag from white cardstock and applied a piece of acetate behind it to be my window. I then cut small strips of foam tape to place around the outside edges of the doily tag die; this creates the shaker well for all the sequins I place inside.

The sequins I used for the shaker are from the Phosphorescence and Caribbean Dream mixes from Lucy's Cards, and also the Full of Love mix and Gold sequins from Neat & Tangled.

I popped the shaker up off of a white card base that I embossed with a faceted We R Memory Keepers
embossing folder; the texture on the white card adds the right amount of detail without being distracting.


On both cards I die cut the word "holidays" from white cardstock four times and adhered them together to be more dimensional. For some color and sparkle, I heat embossed them with silver and gold embossing powders from Tonic Studio's Nuvo product line. The holidays die cut and the coordinating sentiments are from Neat & Tangled's Happy Holidays stamp and die set.

To fit the two different genders, I used a red and pink color scheme for the feminine card and green and blue for the masculine version.


Finally, I used some Wink of Stella clear glitter and added it over top of the white card base... the extra shimmer is an optional detail but I think it really adds that perfect finish to the card.


I hope this has inspired you to see how easy it is to switch colors around on a card to make it fit for either a guy or a girl! Thanks so much for spending some time with me today and I will see you again very soon!

SUPPLIES


10

Watercolor Text Background Stamping

Hi friends! It's Nina-Marie here with you today sharing some inspiration using a couple of Neat & Tangled's newest stamp sets! Today I have used both the Celebrate and Little Stinker stamp sets.

I love the sweet skunk image from Little Stinker and thought it would be dun to pair up with the big, bold greetings from the Celebrate stamp set.


I wanted to also use the words from Celebrate to add texture to the watercolor I have behind the skunk. To do this, I used my Zig Clean Color markers to "ink" my sentiment stamp (which says "just because"); I applied the color from the markers onto the face of the stamp and then spritzed the ink-covered stamp with a light amount of water to get the color moving.

I stamped the sentiment onto the watercolor paper and repeated the ink-applying process multiple times until I had a few "just because" sentiments on the background.


I then watercolored over the words with the same two markers I used for the stamping. I applied the color this time by scribbling areas of color onto the paper and then blending everything out with my water and brush. I also colored in the skunk with Zig markers and die cut it out with the coordinating Little Stinker dies.


I love how bright and bold the colors are on this card. The colors allow the dark colored skunk and strong sentiment to pop and stand out beautifully! I also really love how the texture of stamping the text into the background of the watercolor really adds some great interest to the overall design.


I hope this has inspired you to try not only stamping with Zig Markers, but also gave you ideas for using the Little Stinker and Celebrate stamp sets from Neat & Tangled!

Thanks so much for stopping by and spending your Thursday with me... I'll see you again very soon!


SUPPLIES


3
Back to Top