Showing posts with label paris. Show all posts

Partial In-Laid Scalloped Plate with Daria

Hello Dears,

Daria here. How is day or morning?

I love the in-laid technique, and I think that our new Scalloped Cover Plate is just perfect for it.  The pieces are rather big and easy to puzzle in. Moreover, partial in-laid in different colors makes it more dynamic and gives endless possibilities for different looks.


I have decided to pair it with some of our older stamp sets: Paris Stamp Set, which is now on sale, yay :) I placed my sentiment on a banner shaped pieces, made with Scalloped Nice and Neat Dies.


Sequins are perfect to add some shiny finishing touches.
Hope you liked the partial in-laid technique and will give it a try :)

Hugs,
Daria.

Neat&Tangled products used: 
Scalloped Cover Plate
Paris Stamp Set
Scalloped Nice and Neat Dies
Crystal Clear Mix Sequins

6

Neat & Tangled / Hemptique Collaboration, Week 1


Hey everyone!  We're excited to be teaming with Hemptique this month!  While you are probably familiar with their very popular twine, they also have a number of other products that we'll be featuring this month including hemp paper and bookmarks.

Each Tuesday this month design team members will showcase projects that combine Neat & Tangled and Hemptique products.  Be sure to leave comments on these posts as we'll pick a lucky commenter to win a Hemptique prize pack at the end of the month.

Today Nina-Marie, Emily, and Miriam are sharing their creations.  First up is Nina-Marie:

Hi everyone! I'm sharing what I call a "watercolor collage", using stamps and dies from Neat and Tangled, as well as products from Hemptique.


Hemptique has some beautiful handmade papers available in their store, which I have used here on this card. I love the rough texture of this paper; much like watercolor paper, but a lot softer in feel.

I stamped images from the My Heart Sings Neat & Tangled set onto the paper with Versafine Black Onyx ink; I also gold stamped my sentiment using the Paris stamp set (also by Neat & Tangled) and Delicata Golden Glitz ink.

For watercoloring, I used Tim Holtz distress inks; Spun Sugar, Worn Lipstick and Picked Raspberry. I also watercolored some hearts and added a bit of shimmer using a Wink of Stella glitter brush.


I decorated my panel using a mixture of sequins and beads from Lucy's Little Things and Neat & Tangled; I also tied a length of hemp around the bottom portion of the panel and adhered a gold, wooden heart on top. The wood heart was created by die cutting a piece of wood veneer with a heart die from Neat & Tangled (included in the Hand Stitched die set); I colored it gold by smooshing it into my Delicata Golden Glitz ink pad.

To finish things off, I layered my watercolored panel onto a pink striped card base with some yellow pattern paper.

Next we have Emily:


Hi, everyone!  I've been a long-time fan of their hemp cord and have it in so many colours! I love the vibrant colours and quality of the cord.


For my card, I created a cute little scene using Better Together stamps and coordinating dies. I also used the Turkey Talk dies to create a speech bubble shaker. I created an anchor for the scene by looping black Hemptique cord, twisting it a couple of times and adhering it to the front panel with a tiny attacher.


Both the card base and front panel are scored along all four edges. There are a lot of details in my card but I've kept the layout clean and simple. Please visit my blog for a full supply list. :)

Finally, Miriam has a pair of cards to share:


Hi guys!  I was so excited to receive some hemp paper to try in my package.  It's a beautiful paper with a wonderful texture, and I wanted to see how it would work with my dies.

I used the Gardenia Blooms Journaling Card die, and I was really happy with how well the paper held up since it's a little bit softer than regular cardstock.  I also loved how well the embossed lines show on the paper.

To create some textural contrast, I also cut the card from some insulation pink cardstock.  Leaving the pieces intact (in the insulation pink cut), I colored the inlaid pieces with Copics and then transferred them into my hemp paper die cut.


I stamped the sentiment, from the Gardenia Blooms Journaling Card stamp set, and then adhered it to the card over a cardstock and then vellum mat.  I love how the vellum softens everything.

Then I figured I would put all those negative pieces from my hemp paper die cut to good use.  I inlaid them into a steel gray cut, adding a sentiment from the Maple Leaves Journaling Card stamp set.


I love the dramatic look and again the contrast between the regular cardstock and the hemp paper.  This one is super CAS, just popped up on my base.


Hope you all enjoyed today's projects.  We'll be back next Tuesday with another set of projects featuring Hemptique as well as another chance to win!  If you don't already, be sure to like Hemptique's Facebook page and tell them we sent you.  There just might be a giveaway over there towards the end of the month.  ;)
26

Oh La La! with Julia Stainton


We have so enjoyed having Julia Stainton as our guest this month.  She's sharing one final card today, and it is just so lovely.  Here's what she has to say about it:

Watercoloring is hands down my favorite coloring technique right now. There’s so many great watercolor products on the market and Neat & Tangled has so many beautiful images that are perfect for enjoying this technique. Today I’m going for a springtime in Paris look with watercolors and the Paris stamp set. I adore the French sentiments, the lovely images and the darling whimical eiffel tower. So sweet!


To feature three of these images I decided to create three panels to stamp on. This makes a pretty layout for the design and is a great way to visually break it up.Each of the images is stamped in Archival Black Ink and then watercolored with watercolor brush markers. Some of the colors in the combo are pulled out from the patterned paper backgrounds and others to round out the spring look.


I love stamping sentiments on banner layers. They are easy to create by cutting a long rectangular strip with your paper cutter. Just notch the end with scissors and it looks great.

Thanks so much Neat & Tangled for having me guest design for the month of March! It was a joy and honor to create with your beautiful product line.

Thank you Julia!  It was our pleasure!!!
3

Hello!

Hello, Neat & Tangled fans! This is Yana sharing my very last post as a Design Team Member for this wonderful company. Its always very hard for me to say "Goodbye" and believe me, the decision to step down hasn't been easy. 

So instead of saying "Goodbye" in this post I thought I'd say "Hello" one last time. 

Supplies used: Hello There die and Paris stamp set


So hello! I'm Yana Smakula and I have been with Neat & Tangled for a little less than 2,5 years and I can say that this journey has been incredibly fantastic! I loved every single month, every release, every blog hop and more. Neat & Tangled has been my stamping "home" for a long time. 

I wanted to say a huge thanks to Danielle, to our DT coordinator Miriam and to all the incredibly talented ladies on the team. Thank you! Its been a pleasure and an honor to be a part of this amazing group. 


6

sending hugs


Happy Monday!

I hope you had the chance to join in the birthday festivities last week!  It's Amy here with a quick 'thinking of you' card:


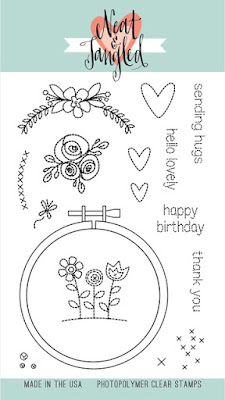
I've been a long time fan of embroidery hoops and was thrilled when Neat & Tangled introduced their Hoop Nice and Neat die!   I combined the Hand Stitched and Paris stamp sets.

I finished off my project with a bit of watercoloring and a small heart wood veneer.

Thanks so much for stoppin' by and I hope you have a super week!

Remember, if you come across a product that is currently out of stock, please select "Email Me when Available".

hoop
hoop nice and neat die


hand stitched
hand stitched


paris
paris

36

Noticed By Neat and Tangled

We've been out and about checking out your work and love what we're seeing!

If you've been noticed, please proudly display this badge!

Hello Summer! This card by Judy using our free digital stamps is pure perfection!

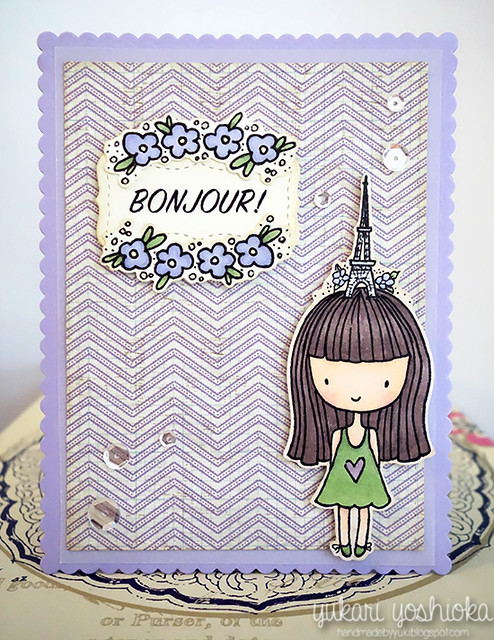
 Yukari created this sweet card using our Paris stamp set! I love the soft colors and touch of sequins!
"Bonjour" Card featuring Neat & Tangled

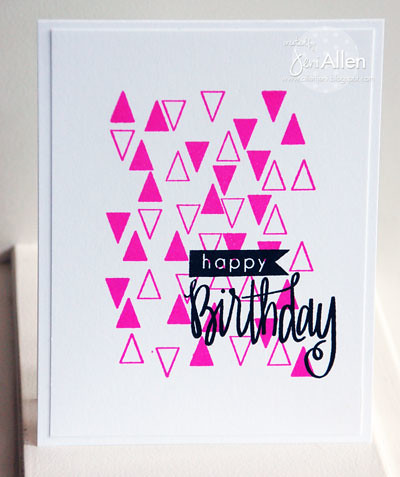
Get ready to party with Jeni! Who would love this birthday card using Tiny Triangles and Just for You?
april-15

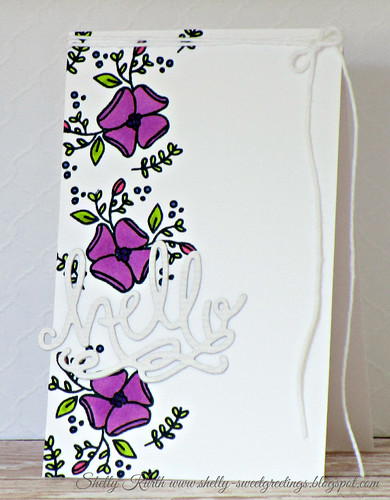
Shelly linked this up for our last Little Tangle challenge.  Can't go wrong with Send Pretty Mail and Hello There die!
IMG_4557

Lynnda's card using Gifts for You and Birthday Tag dies is party ready! I love all the little elements that add so much interest!
Happy Birthday

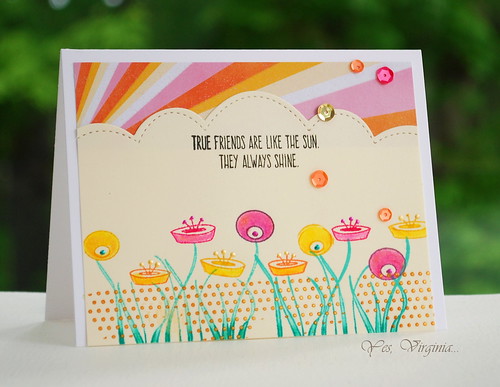
The colors on this card by Virginia are some of my favorites! Love how she built her own little flower garden using our Scandinavian Flower set!
true friends

 Shona framed our sentiment from Kindness Matters perfectly with those florals!


Thank you so much for using Neat and Tangled for your projects!

If you use Neat and Tangled and would like to be noticed make sure to play along with our Little Tangles challenges, add cards to our Flickr group, or share on our Facebook page!
6

Guest Designer: Kathy Racoosin

We made it to Friday! Yay!

We've got a colorful card for you today from our super sweet and incredibly talented friend, Kathy Racoosin! She used our Paris stamp set and worked her marker magic!


If that didn't brighten up your day I don't know what will! :) And now I'm off to grab a cup of tea!

Hope you all have a great weekend!
Danielle
3

Neat & Tangled / Freckled Fawn Collaboration Day 1


Hey everyone!

We're so excited to be hopping with Freckled Fawn this week. Founded in 2012, Freckled Fawn specializes in designing and manufacturing scrapbook embellishments as well as curating and a monthly Embellishment Kit Club.

Both blogs will be sharing projects and inspiration each day this week.  Be sure to check back each day and leave comments as there are prizes up for grabs.  Freckled Fawn is giving away a June OHDEERME Embellishment Kit on their blog and Neat & Tangled is giving away a $25 credit from one of the comments left this week.

First up today is Danielle:

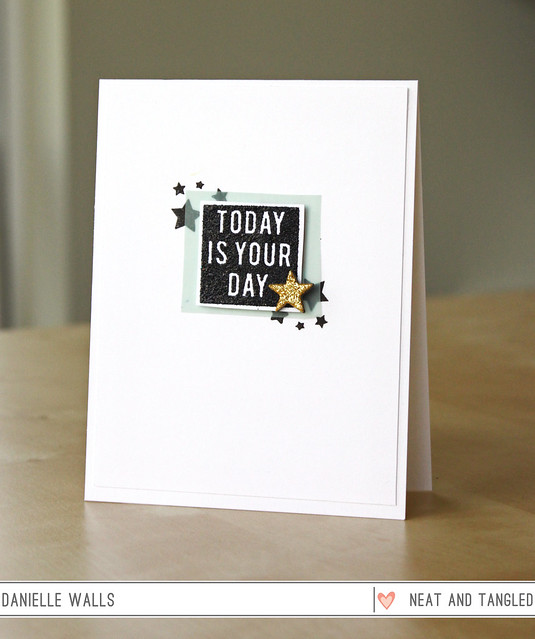
todayisyourday

For my card I paired up our Planner Blocks stamp set with Freckled Fawn's Glitter Chipboard Stars for the perfect encouragement card.

Some things never change, I still love a lot of white space, vellum and gold!   I black heat embossed the "today is your day" sentiment and cut it out. Then I stamped those little star clusters on my card base.  I cut a small square of aqua vellum just larger than my sentiment and adhered it all to the card.  That perfect gold glitter star finished it off!

Next up is Yana:


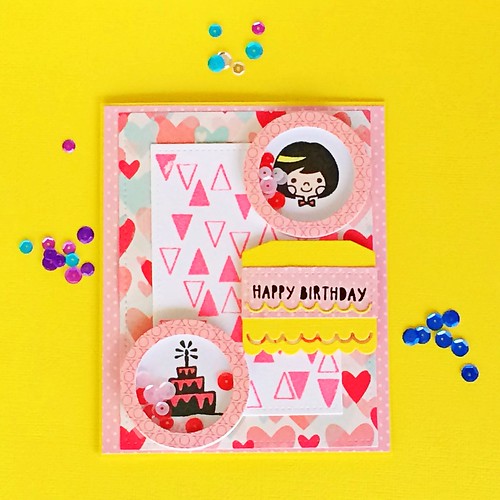
I used a Paris stamp set from Neat & Tangled to stamp this adorable little girl. I heat embossed her using gold embossing powder and lightly colored using Copic markers. 


I added a fun star-shaped paper clip to this project and a few enamel dots from Freckled Fawn.


Gorgeous projects right?  Be sure to stop by the Freckled Fawn Blog to see what their team created and check back each day this week. You won't be disappointed!
42

Summer Coffee Lovers Blog Hop: je t'aime


Hello!  It's Amy here!  Did you know that we're in the midst of the Summer Coffee Lovers Blog Hop?  Neat & Tangled is a Super Sponsor, I'll have more on that in a smidge.  First up, here's my card for today:


I absolutely ADORE the new Hoop Nice and Neat Die!  There are so many possibilities for this awesome product.  

hoop die
hoop die

For today's project I cut cork with the die and kept the green as the hoop and flipped over the interior circle {trimmed off the top notch} and stamped directly on the natural cork side.

I used the sweet Paris set, how can you resist those images?!

paris
paris

The stacked tea cups have been colored with various alcohol based markers.


Neat & Tangled is one of the FABulous Super Sponsors for the Summer Coffee Lovers Blog Hop that is going on right now!  You have until 11:55 pm pacific on Friday, June 12th to link up a newly created coffee, tea &/or cocoa project to be eligible to win a Super Prize!

Check out the SWEET mug that Danielle of Neat & Tangled designed as a giveaway for the Summer Coffee Lovers Blog Hop!  


The coffee & crafting mug is also available as a pre-order in the Neat & Tangled shop!

33

Warm Wishes / combining stamp sets

Hello there!
Mayuri here to share a card that uses the whimsical images from a couple of stamp sets combined with the versatile sentiments from another. This is such a fun way to truly stretch your stamps!
©Candles in the Garden. Neat and Tangled Monthly Post MAY2015. Warm Wishes and combining Stamp Sets.

I began by stamping the macarons and the teacups from 
Paris with a pale blue pigment ink straight onto a white card base. I then stamped the Eiffel Tower image and some of the smaller images from Dala Horse with black dye ink for a bit of contrast.
©Candles in the Garden. Neat and Tangled Monthly Post MAY2015. Warm Wishes and combining Stamp Sets.

I also flicked some Tarnished Brass Distress Stain over the card base for some interest. I die-cut the embroidery hoops using the Hoop die first from some dark brown pattern paper, and then from some kraft cardstock for stability. I adhered the two pieces together to create a thicker embellishment and then adhered that onto the card front around the Eiffel Tower, trimming off the excess.

©Candles in the Garden. Neat and Tangled Monthly Post MAY2015. Warm Wishes and combining Stamp Sets.

For the sentiment, I turned to another versatile stamp set - Winter Wishes. I partially stamped a sentiment with black dye ink onto some scrap pattern paper and then trimmed into two strips before foam mounting to the card.


©Candles in the Garden. Neat and Tangled Monthly Post MAY2015. Warm Wishes and combining Stamp Sets.

To finish, I embellished with a few sequins from the Mermaid Tail mix. I hope you'll have a go at combining stamp sets that you own to see how far you can stretch them!

Thanks for stopping by ;-)
4

Be Joyful Always

Hello! Anna is here to share my card 'Be Joyful Always'. I like white color in cardmaking, I like, when card is done almost of only whate cardstock. It feels so soft and light. And I like some touches of bright spots on such cards, so I wanted to create something like it this time.


Another idea was to use cover plate die cut, but only partially. I cut off the top and bottom parts of the die cut such way that it has become the height of four and a quarter inches. And than sticked with the foam tape on the white background. Alsomst ready! Just need some final details, that gived the pretty look to the card.


I stamped the sentiment from the Gardenia Blooms Journaling card on one of the negative parts from the die cut and pur it on the foam tape too. And as colored details - some flowers and sequins.


Supplies:


2
Back to Top