Showing posts with label jump for joy. Show all posts

Sending Love with Koren Wiskman


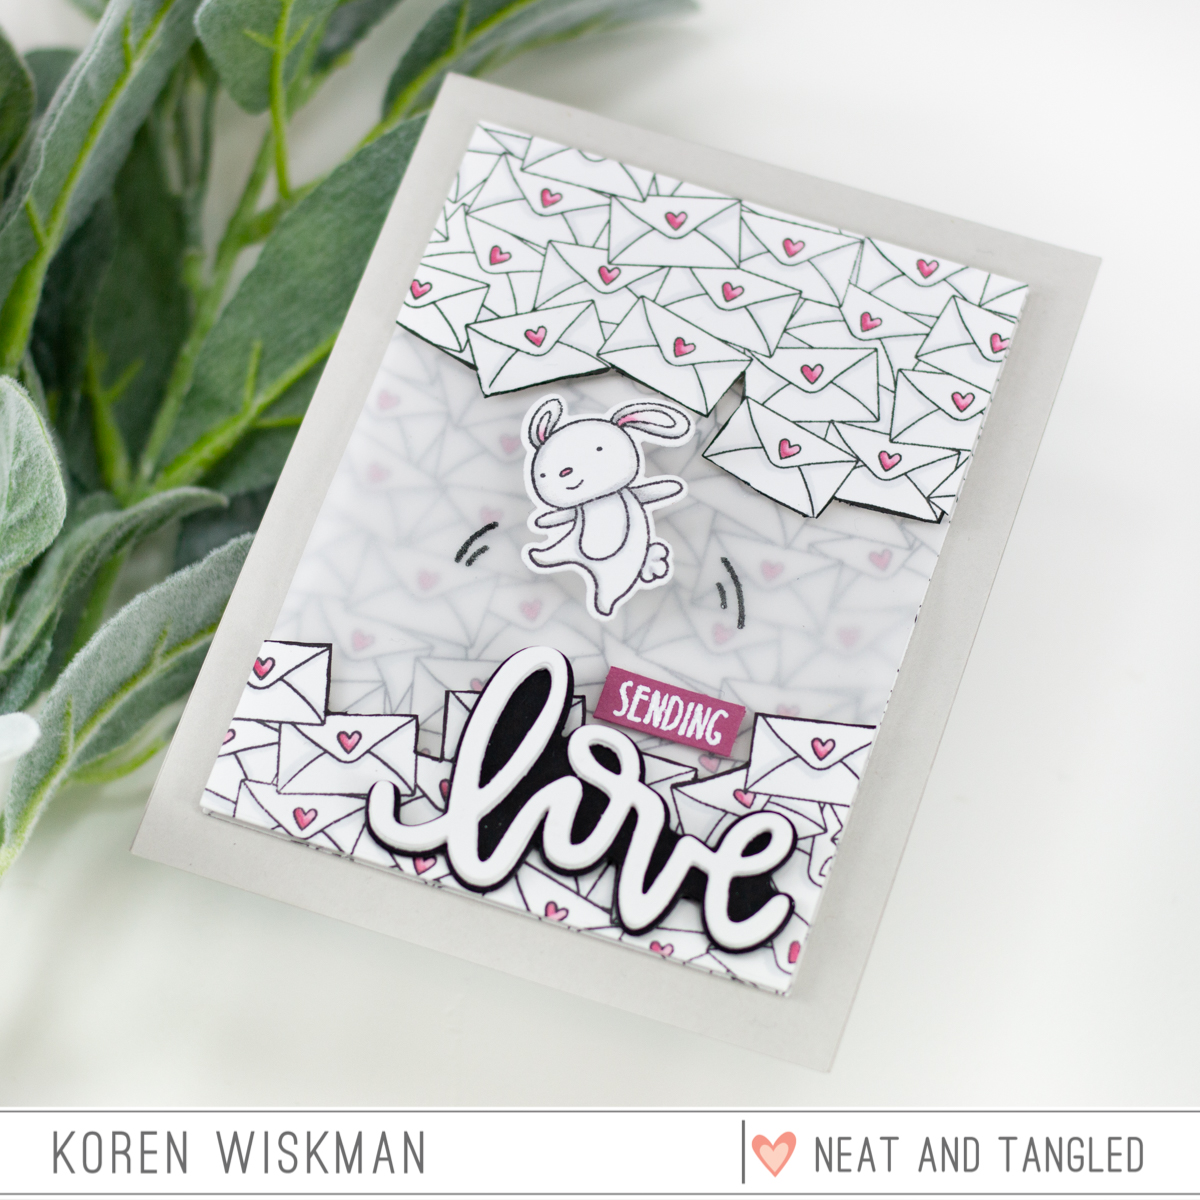
Hello everyone. Koren here today. I have another love card for you. I always say, "love ins't just for February". We should spread love all year long. So that's what I'm doing today, with the Neat & Tangled Mail Background stamp, Love Notes, and Jump for Joy stamp sets.

I started with a piece of Neenah 110 lb. Solar White Classic Crest cardstock cut to size 4 1/4 by 5 1/2. I loaded it and the Neat & Tangled Mail Background stamp into my Original MISTI. I stamped the background onto multiple panels to have extra to cut apart. I then cut the panels down to 3 1/2 by 4 3/4.

I traced with a thick black marker onto the panel that I used to cut the bottom and the top pieces from. I took one background and decided where I wanted to cut to create and interesting background for my focal image to be in. I wanted it to feel like he was jumping, sliding, playing, whatever you think of, inside the pile of love mail.

Once the two parts where traced out, I simply used my scissors to cut them out. I then went back in with the same black marker to brush the edges of the cut out pieces with black ink.

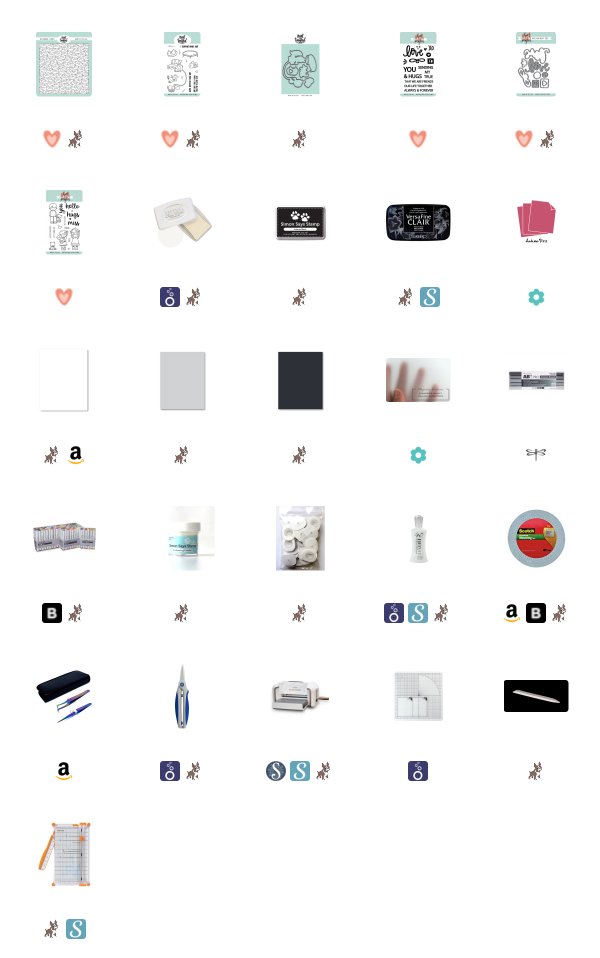
Before adhering the pieces together I used my alcohol markers to color them. I have listed the markers used on this card below in the color map.


To create the background I used one full mail background, then a piece of vellum to dull the intensity of the color. On the vellum piece, I stamped the motion lines onto the vellum layer using black pigment ink and heat embossed it with clear embossing powder. Then I added the top and bottom cut out pieces with foam tape to pop them up.

The sentiment was cut using the "love" die from the Neat & Tangled Love Notes Dies, cut from black and white cardstock. I cut the "love" word die four times and layered them together with liquid adhesive. Then placed them on the black shadow using the same adhesive. The "sending" sub-sentiment was stamped with embossing ink and white heat embossed. I used my paper trimmer to cut it down into a strip.

The bunny was popped up using an action wobble within the action marks previously embossed on the vellum.

I hope that I've inspired you to share some love in a creative way.

Koren

5

Jump For Joy Holiday Card

I love stretching my stamps to turn a non-holiday stamp set into a Christmas card like this card I made with Jump For Joy!
This card was easy to put together, with no complicated masking techniques. All I needed to change the stamp into a holiday card was a white pen & scissors!

Here's a quick video of how I put it together...


Copic Colors...
Raccoon - BV0000, BV000, BV00, BV02 & BV04
Turtle - BG0000, BG10, BG11, BG13, BG15 & BG32
Pom Pom Ornaments - RV04, R35, YR16 & BV02
Cheeks - RV00 & RV10

Thanks so much for stopping by!
Carly

Supplies:
Jump For Joy stamps & dies
Get Yeti stamps (for sentiment)
Distress Oxide Cracked Pistachio
Copic Markers BV0000, BV000, BV00, BV02, BV04, BG0000, BG10, BG11, BG13, BG15, BG32, RV00, RV10, RV04, R35 & YR16
Purple Tape
White Uni-Ball pen
Glue Dots
3

May 2019 Guest Designer | Jill Hawkins


Hello friends!

I am so excited to introduce you to our May 2019 guest designer, Jill Hawkins!  :)


Hello fellow Neat & Tangled Fans! I’m Jill Hawkins and my crafty little heart is exhilarated to be joining you here as the Neat & Tangled Guest Designer for May! My family and I live in Chicagoland (land of Chicago, not an amusement park), and my background is in Architecture. AKA: An amazing education I’ll never make enough money to pay off  I started making cards as my creative outlet to give friends. Then, I entered a weekly challenge once and won! Well, that was that. A decade + later, I still spend most  nights happily making cards for friends, challenges, a magazine and fabulous companies in this crazy talented industry! One of my favorites is Neat & Tangled, due in no small part to my friend Miriam’s brilliant graphic oriented designs. I am WAY excited and SO grateful to Danielle for having me along! Thank YOU! 

I am such a fan of her work, be sure to follow her blog and Instagram for even more inspiration!

And now for her projects for today!
___________

My first card this month features Elena Roussakis’s cutie little set, Jump for Joy! When I saw this squirrel, I swear my heart leaped with delight!  He is just the stinkin’ cutest! I absolutely had to use him straightaway this month.

For this card, I wanted to keep things simple. I masked off half the card to blend on some green and yellow Distress Oxide inks. Then I flipped the mask to create a bubbly cloud sky. I colored these cuties with Copic Markers and die cut them out, adhering them to the card base with foam adhesive to make them pop leap flip off the card! And that sentiment, don’t even get me started on that adorability! I finished off the card with some stitching and plan to give this cutie card to our son. He’s going to love it! 


Thanks for having me along for a few minutes of your day! :)
Jill
1

Jump For Joy with Action Wobbles

Action Wobbles are little, self-adhesive plastic springs for paper-crafting projects and they pair perfectly with the Neat & Tangled Jump For Joy set!

How fun is it to add a little interactive movement to these adorable jumping critters?! After coloring and die cutting my critters, I mounted them to a card with the trampoline stamped off the edge. For the bunny & hedgehog I used foam tape and for the little squirrel, I used a mini action wobble.

A few tips for using Action Wobbles...
  • Reinforce the die cut you want to wobble with a few extra layers. For my little blue squirrel, I adhered 2 plain cardstock die cuts to my colored squirrel to add strength and keep the edges from getting roughed up when wobbling.
  • Trim the edges of the wobble spring to fit die cuts. That blue squirrel is a little guy so I cut the spring down just a bit before adhering.
  • I have the best results putting the "thin" plastic side of the wobble to my die cut and the "thick" plastic to my card. It seems to shake a little more that way. Just make sure to press that wobble onto the card and secure that adhesive before wobbling.


Thanks so much for stopping by! Crafty hugs!
Carly

Supplies:
Copic Markers R21, R22, E11, E13, E35, E37, E47, C1, C3, C4, B0000, B000, B00, B01, B02, BV00, BV02, BV04 and BV08

4

Jump for joy (with Elena)

Hi there!

Our newest release hit the store this past Friday, and I have another card to share using a brand new set, Jump For Joy. It features images that I illustrated, and some of my favorite sentiments ever.


I kept this card very clean and white, with the only pops of color coming from the critters and the grassy hills (made using the Stitched Slopes dies). I positioned the jumping hedgehog so that he is having a sweet moment with the raccoon. I just think they are too cute like this!


I created a chunky outer frame for my card and stamped the sentiment at the bottom, just like a picture frame. The tiny little heart place between the raccoon and hedgie reinforce the sentiment perfectly. 

I hope you like it! Thanks for stopping by!

♥.

5

February 2019 Release Day 2: Jump for Joy + Giveaway!

Hello friends! Welcome back for day 2 of our February release! Each day we are showing off some new products, providing lots of inspiration, and even having a giveaway!

In case you missed it, be sure to check out Day 1: Mail Background + Love Mail Dies!

Today we have a new stamp and die set designed by Elena Roussakis.  Jump for Joy is a 4x6 set sure to make your heart skip a beat! Filled with cute critters flipping for you!

And now for some incredible inspiration! Be sure to head to each design team members blogs for details by clicking on the photos, and for a chance to win a $25 gift certificate! One person will be chosen from among comments on the design team members blogs!


These cards certainly make my heart jump for joy!

Would you like to win our new Jump for Joy products? To enter:

1. Be a follower and leave a comment! Did you jump rope as a kid?
2. Follow us on Facebook and share about release with your friends! (leave another comment)
3. Follow Neat and Tangled on Instagram and repost about our release! Use #neatandtangled (leave another comment)

117
Back to Top
