Hi there crafty friends! It's Cheiron here and today I have a fun and easy card that's made even more special with a glitter panel I created using the Geometric Blooms and blended glitter paste. You could make one big glittery panel and cut it up to use on a few cards!
To make the glittery panel, I placed the Geometric Blooms stencil down onto a piece of paper, and then placed a small dab of Golden Crystal paste in the center of each bloom and spread it out a bit. Then I place a bigger dab of Peridot Green paste around each bloom and spread it with a palette knife so the two colors blended. I made sure to wash my stencil right away to get the paste off. I let the panel dry overnight, then cut it to fit my card. I topped it off with the mermaid from the Mermazing set and a coordinating sentiment. The panel is a quick and easy addition to the card, and it adds SO much sparkle and texture.
Can you believe we are already at the end of our week-long collaboration with Tonic USA? All week we have been sharing projects featuring N&T and Tonic products on both the Neat & Tangled and Tonic USA blogs, there are also two big prizes to be won.
Here at Neat & Tangled we'll be selecting one lucky comment from our collaboration blog posts to receive a $75 credit to spend at Tonic. AND, Tonic will select a commenter from their blog to win a $75 credit to the Neat & Tangled store. We'll announce the winner on Monday, so you still have time to get your comments in.
Today, Daria and Keeway are sharing with us. First we have Daria:
Hello Dear Friends, happy to join this fun collaboration today, and to see you here.
I've wanted to try out gilding flakes for some time. SO, when I've got a chance, I came up with to backgrounds and two cards.
I free painted a heart for one and just scribbled for another one with a Nuvo Glue Pen. Combined with Gilding Flakes in Gold they became a perfect background for my projects. You probably know how much I love gold accents...
Look at all the shine...
I used the Geometric Circles cover plate to make two flowers for one, and I used just a part of the die-cut cover plate for the other. Love from the Love Notes die took a central part as a sentiment.
Next is Keeway:
Hi! Its Keeway and I made a fun AWESOME card for our collaboration with Tonic Studios. I personally use several of Tonic products including their embossing paste, embossing powders, and their stamping platform in so many of my projects frequently, but this is my first time trying out the Nuvo Embellishment Mousse and I have to say I absolutely LOVE it!
I knew that I wanted to use something out of our stencil collection, so I picked one of my all-time favorites, the Geometric Blooms, to work with. I started my project by blending a bright and warm background with Candied Apple and Spiced Marmalade oxide inks. Then, I laid my stencil on top of my blended background and spread the Mother of Pearl mousse with a palette knife. I made sure the mousse filled out the open areas from the bottom but gradually lessened the amount the mouse as I worked upwards.
The mousse was so easy to work with! The hardest part was letting it sit and dry since I was so eager to complete the project. But, I was patient, and I came back to my project in less than 30 min. For my sentiment I heat embossed a sentiment picked out of the So Many Sentiments stamp set in white onto a peach/pink card stock I found in my scrapbox. Then I replaced the word 'awesome' in the sentiment with the large die cut 'Awesome'. I die cut the word 4 times, and the backing once out of red card stock. The strong colors really bring out the word even with such a shiny and bright background. Hope you have an awesome day!
And that's a wrap! We really hope you enjoyed this collaboration, our designers definitely did! Remember you have through the weekend to leave comments on this week's posts to be entered to win a $75 credit to the Tonic store. Don't forget to leave comments on the Tonic USA blog too to be entered to win the $75 credit to the N&T store.
Hi Friends! Welcome back for Day 2 of our collaboration with Tonic USA! Each day this week we will be sharing projects featuring N&T and Tonic products on both the Neat & Tangled and Tonic USA blogs, there are also two big prizes to be won.
Here at Neat & Tangled we'll be selecting one lucky comment from our collaboration blog posts to receive a $75 credit to spend at Tonic. AND, Tonic will select a commenter from their blog to win a $75 credit to the Neat & Tangled store.
Today Kay and Danielle are sharing with us. First we have Kay:
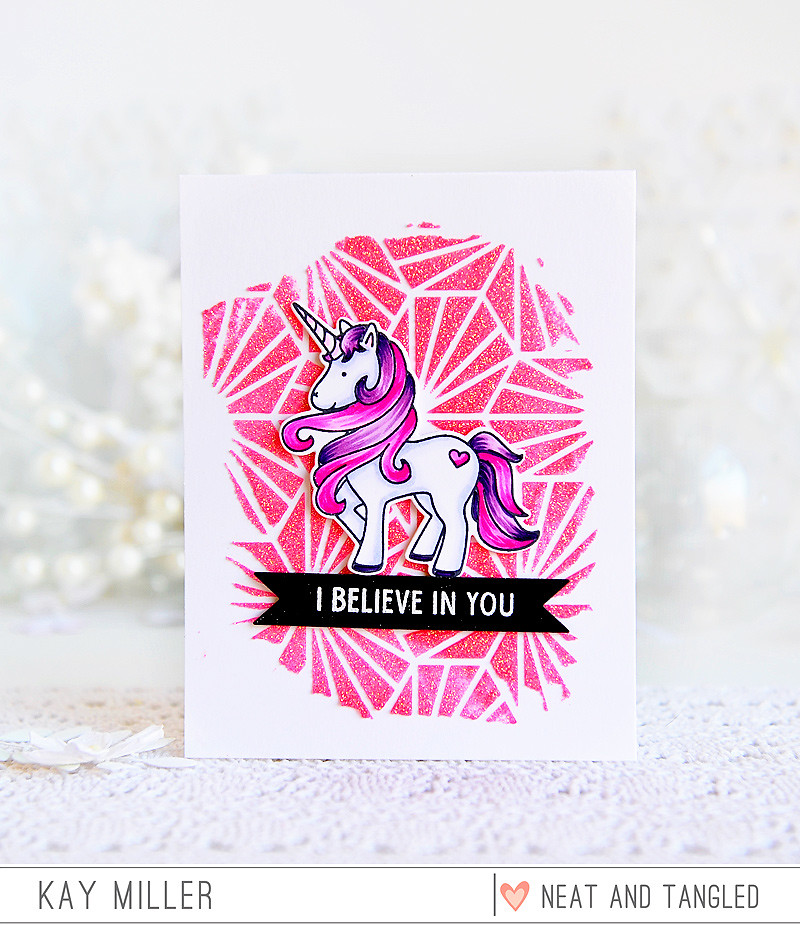
This is my first time using the Glimmer Paste and let me tell you, I want to run out and buy one of every color now! That stuff is so fun! I also had the pleasure of using the Tim Holtz Stamping Platform for the first time. I love it!
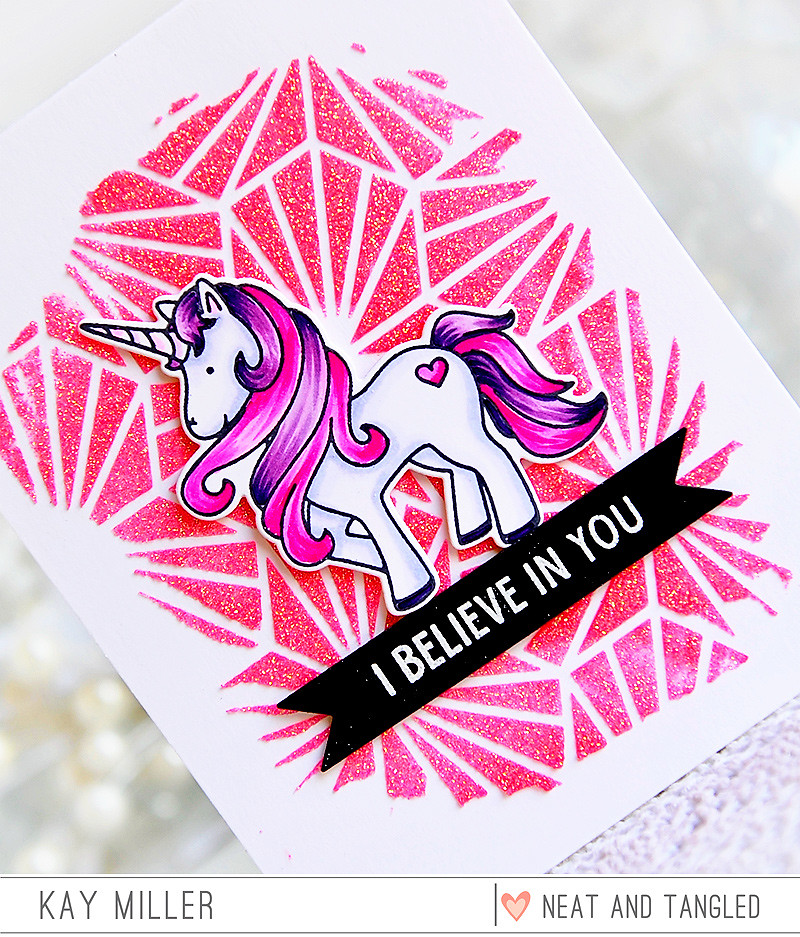
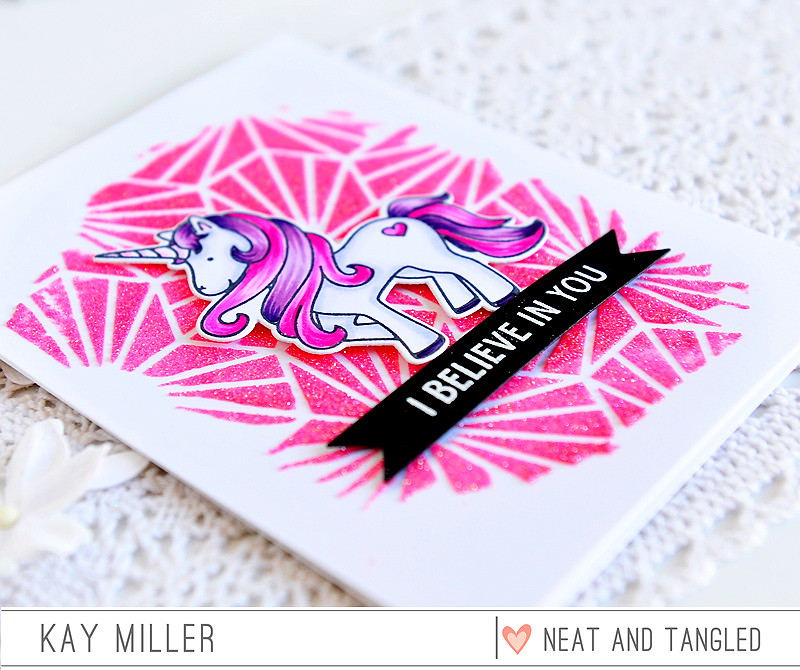
I colored the unicorn with Copic Markers and cut it out with the coordinating die. I stamped the sentiment from So Many Sentiments stamp set onto black card stock. It was heat embossed with white, then cut out with the banner die from Scalloped Dies. I adhered the unicorn and the sentiment with foam tape to the beautiful sparkly Glimmer pasted background!
Really such a fun and easy way to fancy up a card! I'm hooked! :)
Next up is Danielle:
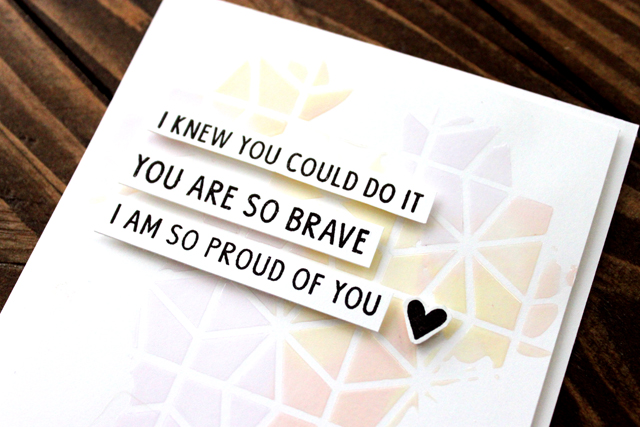
Hello friends! I am absolutely obsessed with the Nuvo Jewel Drops - these dry with a translucent finish which are gorgeous! I typically use them to create droplet like embellishments on my cards, but I wanted to do something different for today!
I took out my Geometric Circles stencil and placed it over my card front. I squirted three pretty big blobs of Nuvo Jewel drops (in Limoncello, Pale Periwinkle, and Rose Water) around the middle of the stencil, and used a plastic card to scrape it across the stencil to make it smooth. I didn't worry about neatly covering the whole front, as I wanted a more free form look to the pattern. I also didn't worry about the colors mixing, as I was hoping they would blend together a bit. You can see the results below!
I love how soft and lovely this turned out! I then finished it off with some sentiments from the So Many Sentiments stamp set.
Because of how the Nuvo Jewel Drops are designed, they dry with the most dreamy translucent, shiny finish!
I hope this inspires you to use your products in new ways!
Hi there! It's Cheiron here and today I'm sharing some fun cards that I created with one of my favorite products, stencils. For these cards I used a technique that I learned from Tim Holtz called Distress Oxide Glazed Resist. When I make background panels and play around with inks, I find it best to make multiples since I already have all of the supplies out on my table.
To do this technique you will need your favorite Neat and Tangled stencils and some Ranger Distress Glaze. I used the Geometric Blooms, Polygon, Swirly Twirly, and Star Simply Stencils. I wanted a round shape as well to add some variety, so I cut the Punchinella die out of Yupo Paper and used it as a stencil. You will put some of the glaze onto a foam blending tool and dab it off onto your craft mat before applying through a stencil onto some Mixed Media Heavystock paper. You want just a very thin layer of the glaze...a little goes a long way! Be sure to clean your stencils with rubbing alcohol when you are all done to remove the glaze from your stencil.
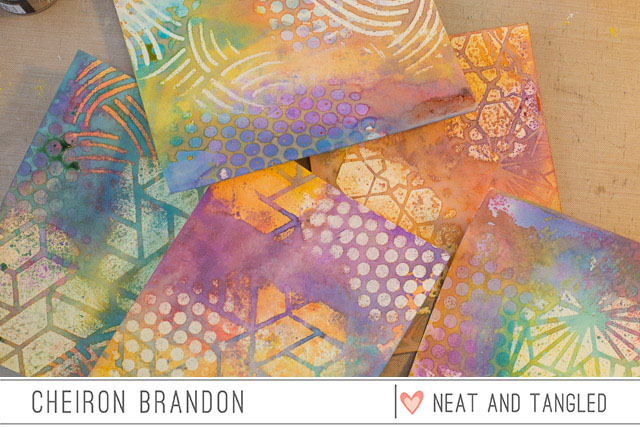
Here are a few first layers that I made using warmer colors. You can see the glaze I put through the stencil resists the ink.
Here is another version of my first layers using cool colors.
Once you are done, pick a different stencil and add another thin layer of Distress Glaze. Then add another layer of Distress Oxides (I went opposites this time and added cool colors onto my warm and vice versa). You can stop here or continue to build more layers using this technique until you get the desired result.
Once I was done with all the panels, I die cut the words from the Awesome die set and stamped each card with a different message form the Awesome stamp set to create an entire set of Awesome cards. This one used the Swirly Twirly stencil and Punchinella die.
This one was made using the Star stencil and Punchinella die.
I hope you have enjoyed these colorful cards and this fun technique. I always like playing around with new techniques and finding other ways to use my supplies and I hope you will try it out too. Have a great week!
Today Sveta is here to share a new card. I made this card for a wedding occasion and my first thought was to make something elegant yet eye-catching and shining.
I settled on the Geometric Blooms simply stencil and Nuvo Gold glimmer paste. I'm so in love with this combination and the whole process was really simple and fun.
I took heavy weight white cardstock and covered the front with the paste making one-layer card.
Such impressive background takes main role so needs just a sentiment to be finished.
Hello there! Keeway here today with a sweet revisit of the Better Together stamp and Geomtric Bloom stencil. I love blending colors with stencils, and Neat & Tangled is never short of fun, unique stencil designs to add a fun and beautiful detail to your cards.
I started with blending a soft pink, purple, and blue ombre across the top and bottom of my cards, leaving the center white, and then added a touch of splatter as a finish. I then stamped my sentiment from Better Together stamp set: first hugs in blue, and then the remaining parts of the sentiment in dark brown.
Next, I stamped my images in copic friendly hybrid ink and colored them up with copic markers. I then started adding stitching patterns with my white gel pen on everything! First, the little girl's dress, then the teddy bear, and even the sentiment 'hugs'. It added such a cute touch!
Once all my pieces were complete, I then added them to my card with foam tape. Just a little stitching adds so much more to the card! Hope this inspires you to get creative with a white gel pen and add some fun details to images and sentiment.
Here we are on Day 4 of our Cosmo Cricket collaboration week! Each day this week we're sharing projects featuring Cosmo Cricket and Neat & Tangled. We hope that you are enjoying the projects as much as we have been enjoying the products!
Every good collaboration need a couple prizes, right? We've got a great bundle of Cosmo Cricket goodies to share with one of you. Just leave a comment on each post this week and we'll pick a winner and announce them next week.
Cosmo Cricket also has a prize to share, so be sure to stop by and check them out on Facebook and Instagram.
Today Nina-Marie, Taheerah, and Mayuri are sharing with us. First up is Nina-Marie:
Hi friends, it's Nina-Marie here with you, sharing a fun set of cards that feature the gorgeous Cosmo CricketArt Deck papers, along with some of the newest Neat & Tangled stamps and dies!
I created three different cards using the Art Deck papers and I even have a video tutorial for you, showing how I did it! Each card shares the same technique, which is shimmer watercoloring with Distress Inks.
In the video below, I'll be showing you how I created my own shimmer watercolors to paint over the emboss-resist patterns that are printed onto the Art Deck papers.
This first card features this stunning flower, which looks amazing once colored in with the watercolors.
I paired the flower with the new Doily Tag die and a sentiment from the Celebrate stamp set (both new products from Neat & Tangled).
My second card showcases the fun "dream big" constellation-styled sentiment that had a ton of gold dots surrounding it. This immediately made me decide I needed to create a galaxy background for this paper.
I paired this paper with the Scored Shapes dies from Neat & Tangled... the dimension of these stars popping off the galaxy looks fabulous!
My final card features this encouragement quote that has some beautiful gold foiling on some of the letters.
To see how all of these cards came together, be sure to watch the video below! If you enjoy, please give it a big thumbs up and subscribe to our channel for more inspiration! For a complete supply list, please stop by my blog.
Now it's over to Taheerah for a quick and easy card featuring one of the pieces from the Art Deck Papers, paired together with stamps from Painted Hello and Faceted:
Some very quick watercolouring and splatter over the LOVE panel brought it to life, and then I stamped the solid hello sentiment with Versafine ink.
The card base also got some love to match it with the letters. I stamped the base with the large facet stamp from Faceted, heat embossed it with white embossing powder, then watercoloured it with watered down gold mist for a complimentary finish that doesn't distract from the main panel.
But check out that shimmer! :)
And last but not least, Mayuri has a project to share:
The Pixie Paint bottles of coloured powder pack a huge punch and I had so much fun playing with them:
I began by creating a fun background panel - firstly, I spritzed a piece of lightweight watercolour paper with water, then laid down the Geometric Blooms stencil on top before tapping out some of the Harbor coloured Pixie Paint.
The paint reacted beautifully with the stencil and the water - I removed the stencil and spritzed a little more water to move the paint around a bit more, and heat set the panel when I was happy.
I trimmed the panel down and foam mounted to a white card base before stamping the skunk from the Little Stinker set with Versafine Onyx Black ink, all ready to colour in!
I used some ZIG Clean Color Real Brush Pens to colour in the little animal, stamped a sentiment from the same set, trimmed him out and foam mounted him to the card front. To finish off, I added some sequins from the Gold Mix selection.
So much wonderful inspiration today!
Be sure to leave a comment and come back tomorrow for the final day in our collaboration. At the end of the week one lucky commenter will win a Cosmo Cricket prize pack!
Hey everyone, happy Thursday! It's Taheerah here today to share some cards featuring the July release!
The wicked postman held my release package captive earlier this month so I didn't get a chance to join in with the other talented DT ladies - but that just means I've got the limelight to share them with you now!
Let's start with the first card:
For this one I used the sentiment and star image Hello You to create a bold, chalkboard look.
I did a bit of shadow stamping, with the help of my MISTI, to create a chalky look, and heat embossed the main images!
I die cut the journaling card from patterned paper and lightly coloured some of the pieces, before paper piecing them back in. The sentiment is from Square Thoughts!
I die cut a circle using the Making Waves dies and then wound a lot of twine round in, before inking and misting the twine to change its colour!
I coloured my kitty with Copics, trimmed him out and adhered him behind the giant ball! The sentiment banner was die cut using the Kitty's Favourite Things dies, and I added a heat embossed vellum heart using one of the stamps from Hello You. The background was created by misting, using both the Geometric Blooms and Pentagon stencils, placing them on top of each other before misting. I think it mirrors the ball of wool effect. :)
I hope you loved these release projects as much as I loved creating them! The July release seems to have been very popular, with a few of the new products out of stock currently - so make sure you sign up to notifications for your favourites to know when they're back in stock! Thanks for stopping by!