Showing posts with label On the Strip 2. Show all posts

Masculine Birthday Card | Stephanie


Hey everyone! Stephanie here and I am SO EXCITED to be here for my first post
on the Neat & Tangled blog!

I put together a masculine birthday card for you today because honestly, I find them the absolute hardest cards for me to make haha. I am terribly feminine in my creations which typically suits me well but when it comes time for me to give a card to a "manly man" (aka my gigantically bearded husband) I almost never have anything on hand. So here is what I came up with!


I started by creating the wreath and hooray sentiment using the Hooray Die. I die cut it twice - once from green cardstock and once from blue cardstock - and then I trimmed the wreath away from the  blue one. I layered them on top of each other with some adhesive and lined the back of the wreath with a bit of vellum.


I used the Succulent Journaling Die to create a journaling card which I repeatedly stamped with the wood stamp from the On the Strip 2 set. I'm going for earthy here can you tell lol? ;) And for my card base I stamped a light colored ink with the "celebrate" sentiment from the Just For You set

I finished my card off with some stitching at the top of the journaling card and I just couldn't help myself and added some sequins as well haha. I made sure to use simple iridescent ones (that I grabbed from the new Sugar Plum set) to not be too girly.


What do you think? Do you have trouble creating masculine cards?
Thank you so much all! Much love!

Xo, Stephanie

Catch up with me here: Instagram > Facebook > My Blog

10

Dreams do come True

Hello, everyone! Anna is here today with you and i want to share my new card. Recently, I took the idea of imitation wood in cards, I still had no such experience. So it was time to use On the strip 2 set, in which there is a strip of wood texture.


I did shtamping by gray inks on gray cardstock and cut out few "boards". Then I connected them on the back of the piece of washi tape and made ​​embossing with white powder with a phrase from the Dreams set. Also cut out a hole in the shape of tiny heart.


Then I gathered the "fence" from the "boards", so it looks like a phrase on the fence. Even brads in the form of screws found their places. Added grass and blue sky.


And than added accents of sequins from Pixie Dust set.


Wish you all a great days!
10

Colour Block Pop!

Hey everybody! Happy weekend! It's Taheerah here with a post-release pick-me-up!

Colour Blocking is a great way to add bold blocks of colour to a project. This fashion trend is easy to tailor to masculine or feminine cards, and can totally change to fit the mood or recipient too!

For my card today I really wanted some bright, fun colours in a striped arrangement. Enter some of my favourite sets - On The Strip 2, Across The Card and even a touch of Santa's Tags too!


I love how bright and happy this is!!


I absolutely *love* using the reverse of strip stamps - it instantly doubles your options and widths! I stamped the reverse of the largest strip from On The Strip 2 some bold bright inks from Hero Arts - in fact I even double-stamped the teal and the pink for a bolder colour pop!


I interspersed this with thinner yellow and aqua lines, pulling out the shorter line stamp from Santa's Tags to give the desired width! The (true) side of one of the thinner lines from On The Strip 2 provided that bold pop of fuchsia!


All that done, it was time to add a sentiment. What better stamp to go with a colour block look than one of the strips from Across The Card? This married perfectly with the striped look and provided a great contrast to break up the colours!


Just one last, quick note! I run a weekly challenge on my own blog called Cure For The Monday Blues. The inspiration photo this week is full of magnificent pops of colour and even some colour blocking close to this card, totally by coincidence! I'd love it if you submitted an entry for it. The current challenge ends tomorrow at 5pm EST!

I hope this card brought some sunshine to your day! Thanks for stopping by!
4

You are awesome.


I am really enjoying using stripes lately.  Trendy?  yes.   Fun?  yes.  I've been seeing stripe patterns everywhere that I can't wait to try out.  I believe I saw this pattern a while back on a decorative pillow so I thought I'd give it a try using On the Strip 2 from Neat & Tangled.

I started by randomly stamping the first stripe and used that as my building block for the pattern.  I found that if you get the stripe stamp perfectly straight on your block (I use a Martha Stewart footed block) then stamping these stripes is a breeze!  

2.26.14

Thanks so much for stopping by today!  xx

6

January Guest Designer: Laurie Willison

Hi friends! Here today to share a card made for you by our January designer, Laurie Willison. This is a perfect card for anyone to receive on Valentine's Day! Her combination of On the Strip 2 and You + Me is pure perfection :)
IMG_1168


Thank you so much, Laurie for joining us this month! 

4

Holiday Memories Album Project

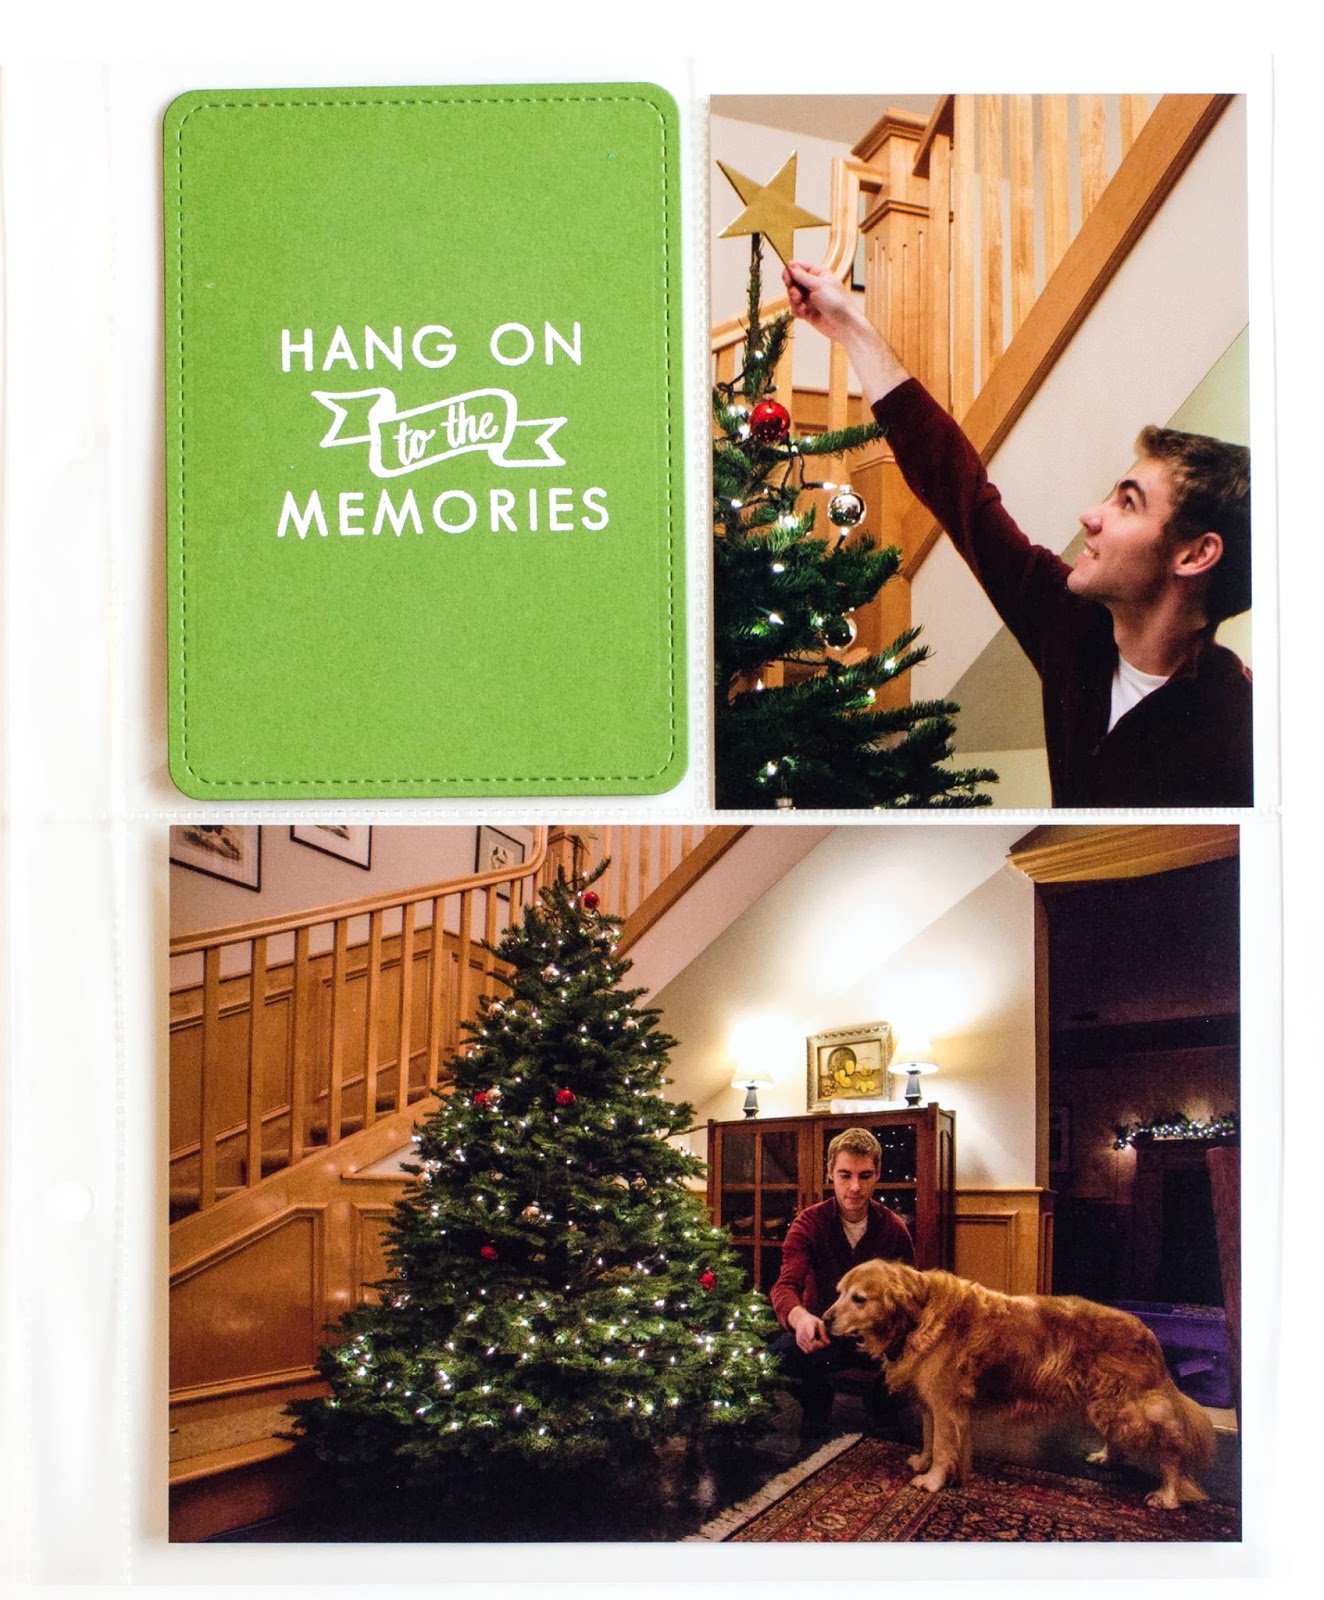
Happy December! It’s Jean sharing a Holiday Memories Album project. Whether you plan to document the December holidays on a daily basis or only the month’s key events, there are lots of Neat &Tangled stamp sets with which you can create original 3” x 4” filler cards. I’m sharing cards I created, along with a bit about my Holiday Album.

PLCardsSpread

Approach to project: I’m focusing on time-honored traditions with my Holiday pocket-page album, rather than documenting December on a daily basis. While my sons are now “grown,” we still have traditional events that I photograph and journal about during the holidays. With those traditions in mind, which include watching a local parade, decorating our tree, visiting a local nursery to see their poinsettia “tree,” and sitting down to our Christmas dinner, I created album insert cards using sentiments and images from several Neat &Tangled stamp sets.

Album Foundation: I wanted to keep this album simple, which for me means limiting the number of embellishments I use and picking a color scheme that’s easy for me to mix and match. I’m using the Simple Stories SN@P! binder with their photo protector inserts, along with patterned papers from Echo Park’s ’Tis the Season.

Album

Creating the Cards: I cut my 3” x 4” cards with the Lawn Fawn Stitched Journaling card die from Stampin’ Up cardstock, which I already owned in shades of green and red that matched the Echo Park papers. I heat-embossed the Neat &Tangled sentiments and images with Hero Arts white embossing powder. I really like the look of the white embossing on the solid cardstock. For the journaling cards, I heat-embossed the tops of lined Project Life cards with Hero Arts silver embossing powder and Stampin’ Up powder.

Here’s a look at a few of my page spreads. I'm using photos from last year’s December album for illustrative purposes. The Neat &Tangled stamp set(s) used to create the filler card(s) are listed below each spread.

Neat &Tangled Merry and Bright
Neat &Tangled On the Strip 2 and Fresh Blooms
Neat &Tangled Santa’s Tags
Neat &Tangled Merry and Bright
Neat &Tangled On the Strip 2 and Sweet Home

ADDITIONAL EMBELLISHMENTS: It’s easy to add embellishments to the filler cards, such as sequins, die cuts, washi tape and wood veneer pieces.

The idea is to make your project work for you and your family. Because I tend to overthink things, I appreciate having certain decisions made ahead of time. That way I can focus on capturing the memories through my photos and journaling, rather than worry about details that ultimately won’t be memorable. The absolute last thing I worry about is the cover. In fact, I might not even embellish the cover, as the interior pages matter the most to me. But that’s me.

Have you made a December Holidays album before? What’s your strategy? Have you created your own filler cards?


8

Happy Thanksgiving!

Hello Neat & Tangled friends! I know many of our US friends are getting ready to celebrate Thanksgiving. What a wonderful time it is to just reflect on what we are so grateful for! Included among all the things I am so thankful for this year, I must include all of you, my Neat and Tangled family.   You're continual excitement and support warm my heart, and I wish I could find some way to let you know how much I appreciate all the joy you bring to Neat and Tangled.  It doesn't even begin to express my gratitude, but please enjoy this sale beginning Thursday, November 28 at 8am EST! It will run through Sunday, December 1st. No need to enter a coupon code. Usual free shipping rates also still apply! 

And Mary Dawn created a sweet card for you all :) 
Happy Thanksgiving from all of us at Neat & Tangled! 


1

Neat & Tangled in Week 41

Hello everyone!  It's Pamela on the blog today to share one of my favorite Project Life spread using my Neat & Tangled stamps.

I used Scrap Circles and stamped "Live" "Laugh" and "Love" onto a piece of acetate using white stazon ink.  I love how the white looks when I slip this filler card into my pocket!

I stamped my favorite sentiment from Merry & Bright onto one of my journaling cards and coloured the little banner with a stardust pen.  This sentiment is just perfect for my project life!

Week 41

Oh!  And did you notice that I used On the Strip 2 on one of the journaling cards?  I stamped the stripes in grey on both right and left side of my last journaling card instead of using a solid stripe.

How are you using your Neat & Tangled stamps?

--- pamela

Supplies:

2

Birthday Bash Party Crasher: Rylee Willison!


Hello, hello!  I am here today with a VERY special party crasher! You all are familiar with my awesome friend Laurie Willison of Soapbox Creations. Well, today her daughter, Rylee is guest designing with us! I've seen Laurie share photos of her daughter getting crafty, especially during the latest Online Card Class, and I just had to have her make an appearance here! I bet there are lots of Neat and Tangled fans with daughters, granddaughters, nieces, friends, etc. that love to get crafty and would love to see other kids crafting too!

So, here is Rylee's card to help us celebrate! Be sure to leave her some love!


I love how she paired On the Strip 2 with Everyday Circles. It's clean, simple, and perfectly balanced! I think we've got some future Stamping Royalty on our hands! :)

Thank you so much Rylee for joining us as a guest designer! You are welcome back anytime!

Be sure to stop back tomorrow for more
13

Faux Washi Look - Shine Bright Card

Hello everyone! Nina here with another one layer card and a fun technique.


Stamps: (speech bubble from A Lot to Say, diamond and sentiment from Sparkle and Shine, strips from On the Strip 2) Neat and Tangled.

Quick and easy masking with a Post-It note torn in half.


I'm very excited to share another card I made using the same technique and was published in Paper Crafts July/August 2013 Issue! I used the hello strip from On the Strip.


I hope that you are inspired. Don't forget to join us for the July release starting tomorrow!! Thank you for stopping by! Happy Stamping! 


5

Plaid Stamping Tutorial

It's Pamela here again!  I know there are probably tons of plaid stamping photo & video tutorials out there, but a few people have asked me to do a tutorial on my previous post, and so I did :)

It's my first one so pardon my video editing and some of the useless things that I say.  You also get a sneak peak of an upcoming stamp set for July!

Plaid Stamping

Turn the volume up to hear my squeaky voice :) I was having some troubles setting up the camera so I just improvised with the tripod that I have on hand. Unfortunately, this meant that it had to be filmed from the side facing me so everything is upside down.


A few tips mentioned in the video:
» Stamp a plaid sample on scrap paper first to see if the colors work well together.

» I prefer dye inks over pigment/chalk inks for plaid because dye inks overlap better. When blue dye overlaps with yellow dye, you get green dye. When blue chalk overlaps with yellow chalk, you get... blue chalk.

» If you don't want gaps or too much overlaps, you can use post-its to mask the prior stripe. This way, eyeballing will be soooo much easier!

Supplies


-- Pamela
9
Back to Top