Showing posts with label Maple Thanks. Show all posts

Introducing our October Guest Designer - Ardyth Percy-Robb


We are so pleased to welcome Ardyth Percy-Robb as this month's guest designer at Neat & Tangled.  Ardyth has a wonderful bold, CAS style.  Ardyth's designs are eye-catching and approachable - she's a wonderful educator - her videos make recreating her pieces easy to achieve!  We love seeing her use our products and are so excited to share her work with you this month.  Here's a little more about her:

I live in Toronto, Canada, with my husband and 2 teenaged children. I started cardmaking in 2006, at a Stampin' Up! Party and have never looked back. I created my blog, MASKerade in 2012 to share my work and become part of this amazing community! I am active in the stamping community and work on various Design Teams and Challenge blogs.

I love clean, graphic design with bold colours and lots of white space. My favourite cards are the ones where stamps are used in unexpected ways to create something fun!

I'm thrilled to be a Guest Designer at Neat & Tangled this month - I hope you will be inspired by something you see in my posts!

Today is my first post and I decided to make a warm, autumn thank you card using this beautiful Maple Thanks stamp (and matching dies!)


I started by stamping the leaf twice on a panel of white cardstock, using Copic-friendly black ink. I coloured the leaves with 5 colours, making sure to get a good mix over each leaf. Then, I put the panel back into my MISTI and restamped the leaves with Versafine Clair Nocturne ink before embossing them with clear embossing powder. This gives these leaves a stained glass look. I coated them lightly with Diamond stickles for some sparkle and set them aside to dry.

I cut a tag using the Classic Tag 1 die and stamped a bold thanks sentiment from the Medallion Flower Builder set with a light gray ink for a tone-on-tone look. I used the grid on my Mini MISTI to help me move the tag so that my stamping was precise.  I used another sentiment from So Many Sentiments to complete the thought, and stamped it along the edge of the tag with dark brown ink.

I placed the die on each end of my panel and cut about half of each leaf. This allowed me to get a square die under the cut edges of the leaves to trim the panel to fit onto my 4.25x4.25 inch square card. If partial die-cutting isn't your thing, you could get a similar look by fully die-cutting the leaves and adhering them to  a full square white panel. I glued my panel directly to the card base, but popped up the edges of the leaves for some dimension. The tips of the leaves hang over the edge of the card, but it will still fit into a standard A2 envelope for mailing.

I used foam tape to pop up the tag in the centre of my card and added some more glitter glue along the scored lines in the tag. 

Here's a video:

5

Merry & Bright Leaves with Yoonsun Hur

TGIF!  Today our October guest designer, Yoonsun Hur, is back with us showing us how you can stretch your fall sets to cover other occasions.  Take a look:


Hello crafty friends, Yoonsun here and I am happy to be sharing another Christmas card using the Maple Thanks stamp set and the Merry and Bright Nice and Neat die. Maple Thanks is technically an autumn set, but we can also use it for Christmas projects too. Why not?


Before stamping, I tore the top & bottom part of the watercolor panel. I then stamped maple leaves from the Maple Thanks set onto the panel using Antique Linen Distress ink, and coloured the stamped leaves with some Distress markers: (Red) Candied Apple, (Green) Crushed Olive & Lucky Clover. The background was coloured with Tumbled Glass Distress ink and a wet paint brush.


Once the panel was dry, I heat embossed the maple leaf images over each of the 4 coloured leaves in white – I didn’t do white heat embossing before coloring on purpose. I just wanted to make snow-covered leaves.


For the sentiment, I die cut the word “Merry & Bright” from kraft card stock five times, and then stacked them up using a fine tip glue pen. Finally, I mounted the background panel on a side-folded kraft card base using double-sided tape first, and then added the sentiment die cuts using foam tape.


Thank you so much for stopping by. Have a wonderful weekend!!
6

NT / Benzie Design Collaboration Day 3

Hi there! Welcome back for day 3 of our collaboration with Benzie Design!  Benzie specializes in felt, with 90 colors available in their house wool blend and 36 colors of homemade felt pom poms, but they have lots more to share including various 'felt-fetti' die cut shapes, kits, felt notions/tools and more.  This week (Monday - Thursday) we'll be sharing some projects featuring Benzie products.

There are also giveaways!  We'll be picking one lucky commenter to win the Carnation Collection felt pack and Atomic Pom Poms pictured below.  Be sure to also stop by the Benzie blog as they'll be posting on Monday and Tuesday and will select one lucky commenter to win a $25 credit to the N&T store.  Winners will be announced over the weekend.


Today we have both Elena and Miriam with us.  Up first, Elena is sharing with us a quick and easy holiday packaging idea:


When I saw the Felt-Fetti Holly kit in their store, I knew I could whip up some very festive Christmas packages!

I used a trio of red and white striped gift bags that I had on hand, the Felt-Fetti Holly shapes, the Neat and Tangled Merry and Bright die, and our Classic Tag 2 shape.


If you don't enjoy hand-stitching you could easily used a hot glue gun to put it all together, but I think it added so much cuteness to the simple tag!

I adhered it to the top of the tag, added the beautifully handlettered Merry and Bright sentiment, and finished off the tag with a strip of green paper to balance out the green holly leaves.


To attach the tag to the bag, I opted for a really homespun look: I folded the bag and clipped it closed with a tiny red clothespin. I love that look.

Next up is Miriam:

Hey everyone!  I had so much fun creating with Benzie felt.  I created two cards today, for the first card, I selectively cut the large flower from the Succulent Cover Plate from three shades of green.  Before I die cut the pieces, I backed them with white cardstock.  This adds reinforcement and allows you to adhere the pieces easily to your card.


I also cut the flower from cardstock and used the webbing as a guide to get my pattern started.  Once I had the first few pieces in though, I just eyeballed the space between the pieces.


Even though the cardstock does add a lot of reinforcement, the tiny pieces can still be a bit tricky, so you need a die that has large enough pieces, the petals for the succulent were a perfect size.  The only tricky bits were those teeny tiny pieces in the center.  I just needed to be very careful with those and used craft tweezers to adhere them.

The sentiment is from the Gardenia Blooms Journaling Card set and it was stamped on one of the banners from the Scalloped Dies set.


My next card features the Maple Thanks and Oak Leaf Dies.  I cut the solid shapes from felt and the webbing/detail dies from cardstock and woodgrain paper.

The solid felt shapes were stitched to the card itself along the center line.  Then I used spray adhesive to attach the webbed pieces.


The sentiment, also from the Gardenia Blooms set was stamped on one of the skinny tags from the Classic Tag 2 die set and was then trimmed down and stitched on as well.

I thought it would be fun to dress these cards up a bit, so I cut a Doily Envelope wrap from felt for each of them.


Caveat, this is beautiful, but these doily pieces are very delicate in some sections and so you have to be very careful with them or you'll get some tears.  The felt cuts well, but I think because of static cling the pieces need a little help coming out.  I used a largish needle to just poke the pieces out and that worked pretty well.


I love how pretty the details look in felt!


OK, be sure to leave a comment to be entered to win the Benzie prize and then head over to the Benzie blog where you can leave a comment to be entered to win a $25 store credit to Neat & Tangled.  Come back tomorrow for our final collaboration day!
39

Design Team Reunion: Jocelyn Olson

Hi everyone! When Danielle asked me to join the Neat & Tangled DT reunion, I had to come out of blog retirement to join the fun. I loved my time on Neat & Tangled! Danielle is such a talented, sweet, and thoughtful person. Last month, Miriam Prantner and I got together, and Danielle sent stamps and dies with her to give to me. Even though I haven't been sharing projects on social media, Danielle sent them anyway--just because. She is a generous and kind person...the kind of stamp company owner I love to support. :)

In the spirit of fall and thankfulness, I decided to make a fall-themed card:

The patterned paper is graphic, and I wanted to play off of the angles. I die-cut the Maple Thanks die twice out of white woodgrain cardstock. These dies are gorgeous! They cut nicely (no hanging chads), but the die-cuts are delicate. Next, I stamped the sentiment from the Maple Thanks stamp set.

I finished the card with some Like Magic sequins. The sequins look clear, but they also have a cool iridescence. They add just a little shine to a card, as you can see below:

I hope the card puts you in the mood for fall. :) Thanks again to Danielle for having me today! Have a great day!


6

Thankful Autumn with Kay


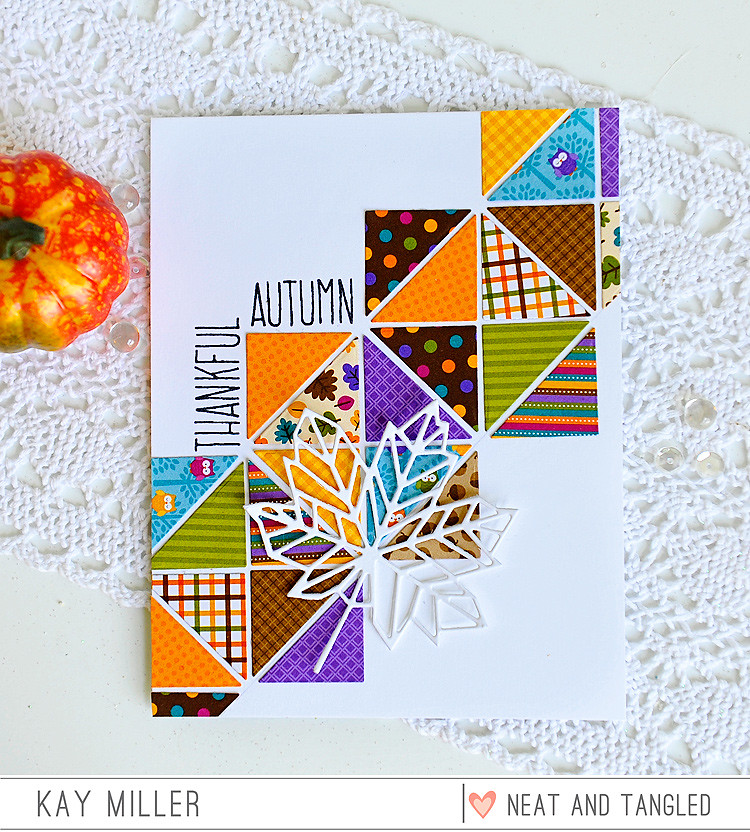
Hello! I'm here to share a card with you that I did with some fun Neat & Tangled products! I know, I know, it's another fall card. I figure if people can make Christmas cards all year, then I can make fall cards all year too :) Besides, it seems like Christmas sneaks up on us so fast, that Fall kind of gets squished out and left behind. Can't have that now!


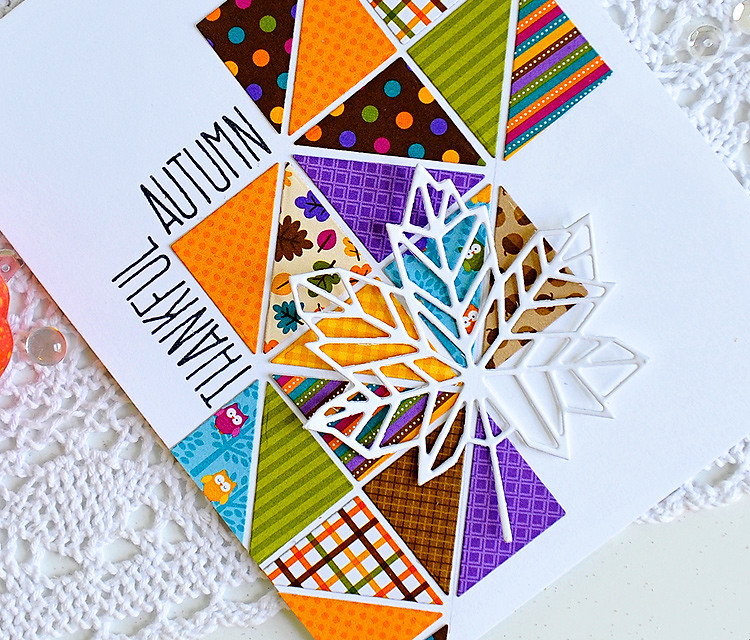
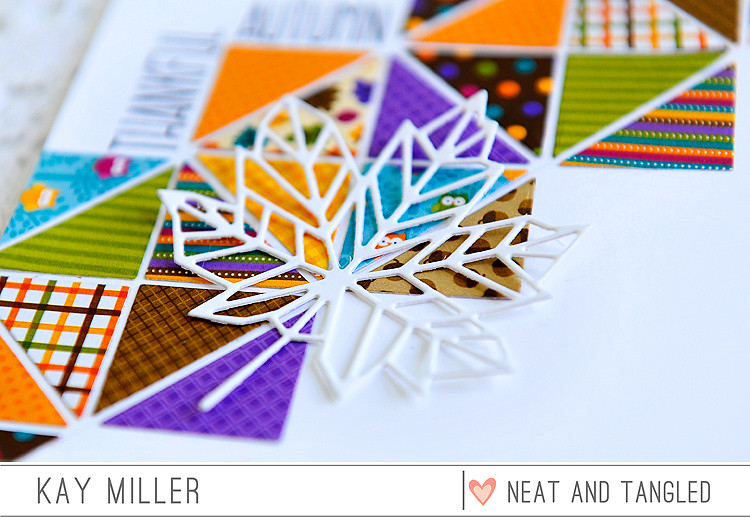
For this card, I'm using the Triangle Patterned Builder diesMaple Leaves Journaling Card, and Maple Thanks. The paper is from Doodle Bug Design.


I started by cutting  a lot of the smallest triangles from the Triangle Pattern Builder Dies,  out of the fall colored patterned papers. I then drew a diagonal line across my white card base, and started piecing my quilt design. Once I had one row down against the line, lining up the other pieces by eye was a chinch!


After I got all of my pieces glued down, I stamped the sentiments from the Maple Leaves Journaling card along the edges of some of the squares. Then I cut the Maple Thanks die out of white card stock and glued that down at an angle.

Thank you so much for stopping by today! I hope you have enjoyed my card!

Kay :)


6

October 2016 Release Day 1: Into the Woods + Maple Thanks + Scalloped Dies + Giveaway!

Hello dear friends! It's that time again! Welcome to our October 2016 release week!
This month we have some truly amazing products for you - sequins, stamps, stencils and dies! All new products will be available on Friday, October 14th at 8am EST. Be sure to stop by here everyday this week for lots of fun, inspiration, and GIVEAWAYS!

We have some amazing products for you today! First up is a stamp and die set designed by Elena Roussakis. Into the Woods is a 4x6 set sure to fill your projects with woodland happiness! From cute critters to thoughtful sentiments this set has it all!


We also have another stunner designed by Miriam Prantner. If you love our Fractal Cloud and Heart of Gold products, than you will definitely want Maple Thanks! This 3x4 set is perfect for any time you want to express thanks, especially fall! With it's bold geometric maple leaf, the creative options are endless!

Today we will also show you Maple Thanks Dies.  Delicate and detailed! This set contains 2 dies - an intricate maple leaf, and a larger open leaf outline. You can use the larger open die to cut out the leaf from the Maple Thanks stamp set!

Miriam has also designed a must have die set. Scalloped is a set of 6 dies that will work for any project!


And now for some inspiration! Be sure to head to each design team members blogs for details by clicking on the photos, and for a chance to win a $25 gift certificate! One person will be chosen from among comments on the design team members blogs!

http://www.taheerah-atchia.com

Simply amazing work by the design team!


Would you like to win the new Into the Woods and Maple Thanks stamps? To enter:

1. Be a follower and leave a comment! 
2. Follow us on Facebook and share about release with your friends! (leave another comment)
3. Follow Neat and Tangled on Twitter and tweet about our release, use @neatandtangled! (leave another comment)
4. Follow Neat and Tangled on Instagram and repost about our release! Use #neatandtangledrelease (leave another comment)

195
Back to Top