
Today I have a project featuring the NEW Heart Duo Stencil. This card is super simple but packs a major punch.
If you haven't noticed, I am in love with the NEW "love you" word die from the Love You Nice and Neat die set. I have used it on many of my projects recently and today is not exception.

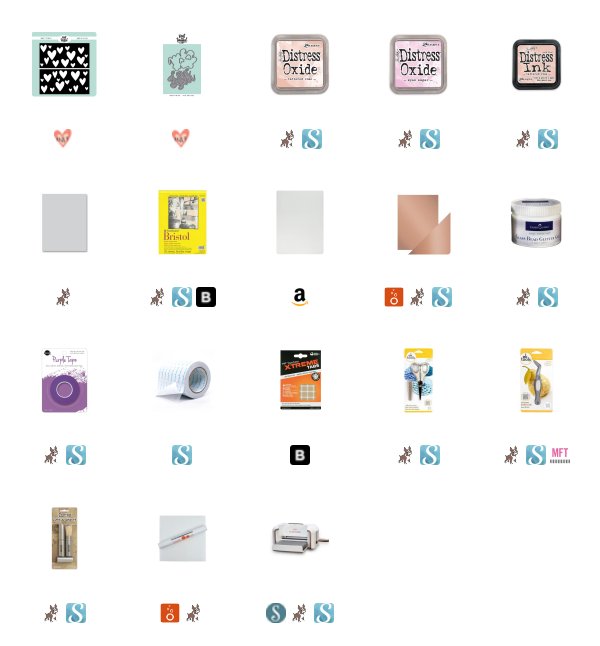
I started with a piece of Strathmore Bristol Smooth White Cardstock. I used some low tack adhesive tape to gently tape it down to my Tonic Studios Easy Clean Craft Mat. I laid one of the stencils from the Heart Duo on to my paper and taped it down as well. This makes it easier to ink blend, which is what I'm about to do. Using Distress Oxide in Tattered Rose and Spun Sugar, I blended on small amounts of ink, slowly building up the color trying to stay on the left side of each heart blending up towards the right side. I wanted the hearts to have a little dimension and this technique works for me. To blend the inks I used Ranger's blender brush which is small enough to stick to one side of the hearts cut into the stencil.
After ink blending the two shade of Oxide ink, I also used the original Distress Ink also in Tattered Rose to add a little more depth. The original ink is a bit brighter than it's oxide counterpart and almost acts as a deeper shade of the same color. I removed the the first stencil and added the second stencil being sure to place it where I could see some overlapping of hearts. I did the exact same technique with the second stencil as I did with the first. Once I filled up my entire card front, I set it aside to dry.

The hearts looks beautiful just as they were, but I wanted to had a bit of shine to them as well. This could be done in many ways. I chose to use Faber Castell Glass Bead Glitter Gel. To do this. I placed the same stencil onto my background to cover some of the hearts that I had just ink blended. I made sure to tape it down again. I don't want my stencils to shift and move while applying the gel. I used a ranger stencil spatula to add a generous, but even amount of paste onto my panel. I did this twice, making sure the first application was completely dry before arranging my stencil a second time. Let me tell you, this stuff is gorgeous! It shines like diamonds when it's dry. I couldn't stop staring it at, much like a diamond ring, you want to move it and watch the light reflect off of it for way too long.

I couldn't bear to cover up this gorgeous background, but I needed to add a sentiment. So, I decided to cut the "love you" word die from the Love you Nice and Neat Die Set from Tonic Studios Burnished Rose Cardstock. This cardstock is a beautiful rose gold foiled cardstock the adds even more shine. I cut it four times from the same rose gold cardstock and layered them together using Lawn Fawn Glue Tube Liquid Adhesive. To adhere it to my panel, I used the Tombow Extreme Adhesive Tabs in clear so that you would not be able to see the adhesive. These tabs don't have a ton of dimension but enough for this application.

The background was trimmed down to 3 1/2 by 4 3/4 and placed onto a Simon Says Stamp Fog Cardstock card base. It is popped up using white craft foam and Scrapbook.com double sided adhesive.
I hope you enjoyed my project to today and that it inspires you to create your own sparkly valentine for someone you love.
Koren


This is such a gorgeous card! I love how you ink blended the hearts and also added some glittery hearts. :)
ReplyDeleteSo elegant. Gorgeous card. I wish we had this kind of die cuts in Slovene language.
ReplyDeleteSoft and beautiful card!!
ReplyDeleteSoft and gorgeous! Love it!
ReplyDeleteGorgeous hearts!!
ReplyDeleteexcellent information, i dont know how to thank you more.
ReplyDeletemakanan tambahan untuk ibu mengandung , create website malaysia , tanda-tanda covid