Showing posts with label parquet stencil. Show all posts

Lovely Lotus


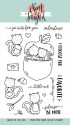
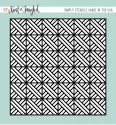
Hi all!  Miriam here sharing a card featuring the Lovely Lotus stamp set and Parquet stencil.

I started by stamping my images with Fairy Dust ink from WPlus9.  It's a very light gray which is great for no line coloring.  In this case you still see a bit of the gray though because the colors I used for my coloring were so light (RV000, RV00, RV10 and YG01, YG61, YG63, along with the colorless blender).

Because the gray still showed a bit, I figured I would fight fire with fire and added some accents in gray using an N1 marker.  

Once my coloring was done, I die cut the images, and then arranged them over top a panel I created by misting the Parquet stencil with some white Dylusions spray over a very dark gray cardstock piece.  


The front most flower was popped up with some adhesive foam.  Since it was so close to the bottom of the panel, I could trim off the bottom of the stem and use that to double as the stem for the first flower.

The sentiment is also from the Lovely Lotus set and was popped up over the florals with two layers of foam tape.

That's all for me today.  Thanks so much for visiting!
2

Floral Wreath with Daria [VIDEO]

Hello-hello,

Daria here. So glad you are joining us today, as I have for you not one, but two cards with video.

I am playing with Friendly Florals Stamp Set, and I am just keeping making more and more cards with it.  I think it is ideal for making all sorts of floral wreath, half wreath to surround a sentiment or critter, or even just to make a floral line on your card.


For my first project, I started with making a background with Parquet Stencil. At first, I blended in some Distress Oxide in Peacock Feather. Then, I added a little bit of Nuvo Glimmer Paste in Gold. I die cut all of the floral pieces of the stamp set, using coordinating dies, and then stamp them. I have arranged the second biggest cluster in a circle and then played with the placement of a smaller pieces. I adhered everything with the foam tape to make it dimensional. To unite my wreath with the background, I added some leaves in gold glitter cardstock.


Sentiment is from So Many Sentiments Stamp Set, heat-embossed with Hero Arts Gold embossing powder.  Here is a video to show you how it was done:


Another card, I have made for my sister. This card features a half wreath made with the same stamp set and dies. But this time, it is only one floral branch from the set.  I also used one of my mostfavorite stamp sets - You Are Pretty.


I like clean and simple feel of it. And it is very easy and fast to make.


You can watch the process here:


I wanted to show that you can use as well as only one piece from the set (like a floral cluster I used for a card above), or all the different bits and pieces. You may go with a full wreath, or just a half of it, or even may be just make a line that goes through all the card.  For example, like this one (I was simply playing with different ideas for the wreaths): 


I hope you liked that simple ideas and will give them a try. Be sure to tag us in social media. It is always so rewarding to see what you create. 

Hugs, Daria. 


Neat&Tangled Products used: 

Card #1 

Card #2 
Friendly Florals Stamp Set
You Are Pretty Stamp Set
Crystal Clear Sequins Mix

For a full supplies list please visit my blog. 
2

Nutty Little Valentine | VIDEO | Emily Leiphart


I'm so excited to be sharing this squirrelly Valentine's Day card using the My Favorite Nut stamp set and coordinating dies! I also used the Parquet Stencil to create the cityscape on the main panel. Here's how it all came together:


All of the images were stamped with black pigment ink and heat embossed with clear embossing powder. Then I watercoloured the images with distress inks. The background was also created with distress inks. I used the same greens on the acorns to splatter the background.


I used multi-medium matte to shape the balloon string. The knot was adhered to the acorn using a micro glue dot and the tail was adhered to the background panel using multi-medium matte. All of the images were adhered to the card base using foam tape.


Please visit my blog for a full supply list. Thanks so much for stopping by!


6

July 2016 Release Day 4: Pentagon Stencil + Parquet Stencil + Geometric Blooms Stencil

Hello friends! It's that time again! Welcome to our July 2016 release week! 

This month we have some truly amazing products for you - sequins, stamps and dies! All new products will be available TOMORROW Friday, July 8th at 8am EST. Be sure to stop by here everyday this week for lots of fun, inspiration, and GIVEAWAYS!

In case you missed:
Day 1: Succulent Journaling Card + Hello You
Day 2: Kitty's Favorite Things + Mermazing
Day 3: Square Thoughts + Falling Circles

Today we will show you the last of the new products - and it's all about stencils! Miriam Prantner has designed 3 awesome new stencils for you this month! These stencils are made in the USA and measure 6x6! Just wait till you see what the team has created!
Geometric Blooms Stencil
Parquet Stencil
 Pentagon Stencil
And now for some inspiration from the design team.  Be sure to head to each design team members blogs for details by clicking on the photos, and for a chance to win a $25 gift certificate! One person will be chosen from among comments on the design team members blogs!


Would you like to win ALL of these new stencils for yourself?


1. Be a follower and leave a comment! 
2. Follow us on Facebook and share about release with your friends! (leave another comment)
3. Follow Neat and Tangled on Twitter and tweet about our release, use @neatandtangled! (leave another comment)
4. Follow Neat and Tangled on Instagram and repost about our release! Use #neatandtangledrelease (leave another comment)
SaveSaveSaveSaveSaveSaveSaveSave
101
Back to Top