Showing posts with label just for you. Show all posts

Masculine Birthday Card | Stephanie


Hey everyone! Stephanie here and I am SO EXCITED to be here for my first post
on the Neat & Tangled blog!

I put together a masculine birthday card for you today because honestly, I find them the absolute hardest cards for me to make haha. I am terribly feminine in my creations which typically suits me well but when it comes time for me to give a card to a "manly man" (aka my gigantically bearded husband) I almost never have anything on hand. So here is what I came up with!


I started by creating the wreath and hooray sentiment using the Hooray Die. I die cut it twice - once from green cardstock and once from blue cardstock - and then I trimmed the wreath away from the  blue one. I layered them on top of each other with some adhesive and lined the back of the wreath with a bit of vellum.


I used the Succulent Journaling Die to create a journaling card which I repeatedly stamped with the wood stamp from the On the Strip 2 set. I'm going for earthy here can you tell lol? ;) And for my card base I stamped a light colored ink with the "celebrate" sentiment from the Just For You set. 

I finished my card off with some stitching at the top of the journaling card and I just couldn't help myself and added some sequins as well haha. I made sure to use simple iridescent ones (that I grabbed from the new Sugar Plum set) to not be too girly.


What do you think? Do you have trouble creating masculine cards?
Thank you so much all! Much love!

Xo, Stephanie

Catch up with me here: Instagram > Facebook > My Blog

10

Neat & Tangled / We R Memory Keepers Day 2

We hope you have been enjoying our collaboration with We R Memory Keepers this week.  The DIY Party collection, has so many great items, we're really just scratching the surface!

Today Taheerah is sharing a couple of fun cards with a great mix of supplies!

For today's projects I used the DIY Party Fringe Tape in Sunrise:


And the WRMK Fuse Tool:


My first card combines the WRMK DIY Party Fringe Tape with the Dala Horse Nice & Neat dies to create an obvious match made in Heaven:


Fun, right?!


The WRMK DIY Party Fringe Tape comes in several different colourways, but if your supplies are limited don't let that stop you! Here I used Copics to colour the pale yellow fringe tape from the Sunrise Tape pack in a variety of colours to suit my piñata design! I adhered all my tapes to a card panel and then die cut my horse. Isn't he awesome?!


I used stamps from Happiest Birthday and Just For You to stamp all the confetti and streamers, stamping in gold and silver, and also using Versamark and covering with Perfect Pearls for some subtle detail!


Now, no piñata should be static, right?! That's why mine is attached to my card panel using cord, but is free to move and rock - check it out!


Fun, right?!


My second card features a fun shaped shaker, which gave me the chance to pull out my WRMK Fuse Tool:


Love how this turned out!!


I used the large irregular circle die from the Perfect Blend Nice & Neat dies to create my little shaker shape from a stamp pocket. I filled it with some glitter and a fun mix from Lucy's Little Things! I was then able to use the same die to cute the shape out of my card panel and freehand draw a large balloon for my cute little animals to hang onto!


The little cuties are of course from the amazing Big Top Birthday set. I coloured them with Copics, and added the little flag from Cute Chicks for the little bear to hold. I also used the clouds from this set to 'trace' the shape using my palest blue Copic so I could create no-line clouds in my background! The banner is from Big Top Birthday too - I stamped just half of it, then rotated my block, lined up and stamped it again! Just like that that banner image takes on a different shape and is much more versatile! I built the sentiment with stamps from Better Together and added my banner with Pinflair Glue Gel for some dimension.

I had so much fun playing with items from this collection, and with my Fuse Tool - I really hope you love what I've shared with you today! Thanks for stopping by!
18

Noticed By Neat and Tangled

We've been out and about checking out your work and love what we're seeing!

If you've been noticed, please proudly display this badge!

Hello Summer! This card by Judy using our free digital stamps is pure perfection!

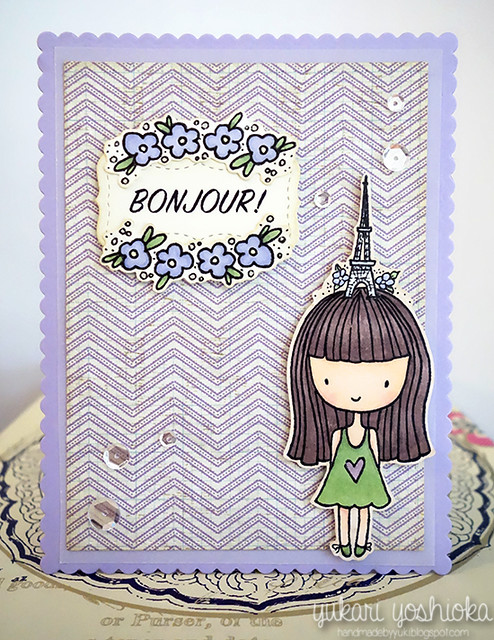
 Yukari created this sweet card using our Paris stamp set! I love the soft colors and touch of sequins!
"Bonjour" Card featuring Neat & Tangled

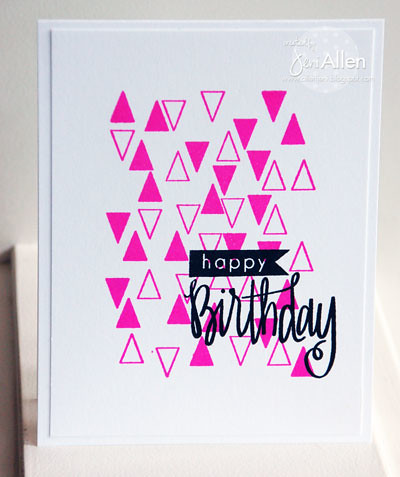
Get ready to party with Jeni! Who would love this birthday card using Tiny Triangles and Just for You?
april-15

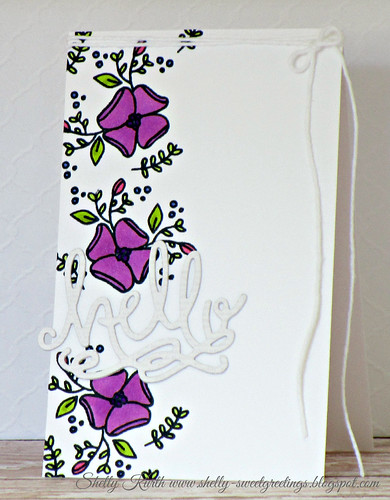
Shelly linked this up for our last Little Tangle challenge.  Can't go wrong with Send Pretty Mail and Hello There die!
IMG_4557

Lynnda's card using Gifts for You and Birthday Tag dies is party ready! I love all the little elements that add so much interest!
Happy Birthday

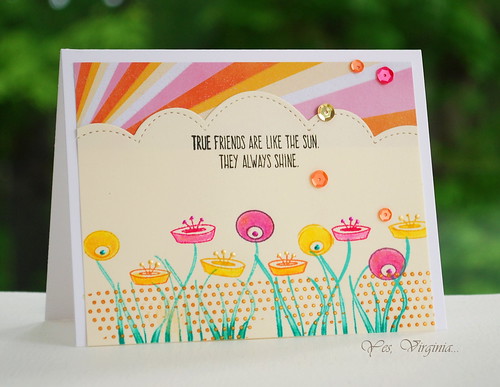
The colors on this card by Virginia are some of my favorites! Love how she built her own little flower garden using our Scandinavian Flower set!
true friends

 Shona framed our sentiment from Kindness Matters perfectly with those florals!


Thank you so much for using Neat and Tangled for your projects!

If you use Neat and Tangled and would like to be noticed make sure to play along with our Little Tangles challenges, add cards to our Flickr group, or share on our Facebook page!
6

Quick & Simple Birthday Card

Hey Neat & Tangled fans! Rachel here today with a super simple birthday card when you need something in a hurry (story of my life!). Patterned paper is my favorite go-to when I'm short on time.

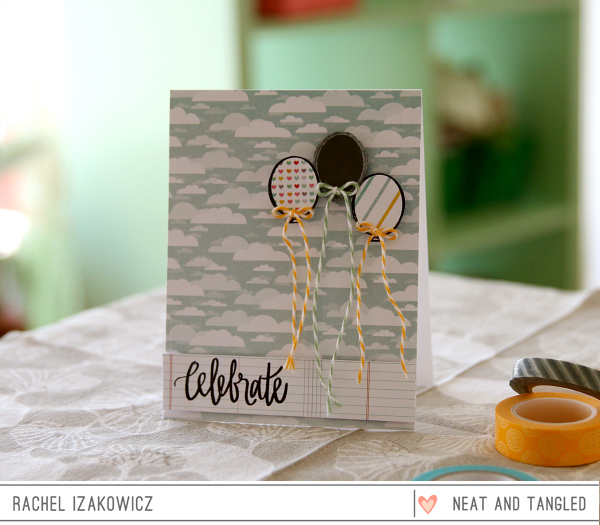
I love a clean and simple card, but gorgeous papers add a touch of whimsy and interesting detail in no time at all. I knew I wanted some free-flying balloons for this card, so I chose a cloud patterned paper to provide a subtle background. To make life even easier, I kept all the paper accents from the same paper pad (Hello Sunshine from Pink Paislee).

Celebrate_24.6.15

Using the Just For You stamp set, I fussy cut 3 balloons - 1 from solid grey and 2 from coordinating papers. I layered them on the card at different heights and adhered them with foam tape. I added some twine bows and left the strings long and loose to give them card a bit of movement. I stamped the sentiment, also from Just For You, onto another sheet of paper from the same paper pad and created a banner along the bottom of the card.

There you have it - a professional looking card sure to brighten someone's birthday - ready in less than 10 minutes! Thanks for stopping by today - be sure to visit again tomorrow for more inspiration from the design team!

4

Happy Birthday Cards by May

Hey everybody! It's May here today sharing one layer birthday cards. I wanted to create my own stamped background using various images from Photo Booth, and here are what I came up with: 


I started by stamping the sentiment from Just for You with black pigment ink. Next, I heat embossed it with clear embossing powder. After making off the edges of my card base with sticky notes, I stamped the images and words from Photo Booth, and then filled in the gap with tiny confetti images from Just for You and Falling Flakes.


I made another card using different color combination. Which one do you like? Hope you loved my cards and got some inspiration. Thanks so much for stopping by! Happy crafting!


6

March Guest Designer: Katie Gehring!

Happy Friday!

I'm here today to introduce our March guest designer, Katie Gehring! Does she seem familiar? Most of you probably remember her as one of our design team members! She is so sweet and talented and I'm thrilled to have her join us this month!

She used the Just for You stamp set to create a simple and fun birthday card.  On a 3x4” rectangle, she stamped ‘celebrate.’ Then she stamped the balloon with pale aqua ink and stamped the balloon string as an extension of the letter ’T.’ She placed a post-it note over the sentiment to ensure that she didn’t get any stray ink on the sentiment.  Next, she stamped a heart from the Gifts for You stamp set with red pigment ink so that the heart would keep it’s bold hue.  She adhered the stamped panel to a card base that she covered with some patterned paper and washi tape.  A few black sequins add a finishing touch!


Super cute, right? 

Hope you all have a great weekend, and don't forget March release starts on Monday, March 9th!

xo
Danielle
4

Simple Birthday Card

Hi everyone! Yana is here sharing a Birthday Card idea. I needed to create several simple Birthday Cards last week so I reached for my all time favorite set from Neat & Tangled; 15 minutes later I had this simple unisex card design on hand. 


These balloons images are just the cutest! I used two shades of yellow ink and stamped them repeatedly on a white A2 card. I overlapped some of them and tried to make it look like they were floating in the air. 


For my sentiment I used the Everyday Labels set and stamped Happy Birthday in black, cut out with my scissors leaving a small white border and adhered those onto my card using foam adhesive. 


To tie the black sentiment with the rest of the card I also stamped several black starts and various sizes. As a one final touch I adhered several sequins. 

You can easily turn this into a girly card by stamping balloons ink pink or a boy card by stamping them in blue. Here's a link to another Birthday Card I shared on Neat & Tangled blog several month ago using the same balloons. 


11

Happy Birthday, Dad, with Paper Cut Flowers


Hi, it's Emily here, with a birthday card I made for my Dad whose birthday was this weekend. Since he's an avid gardener, I often make floral cards for him. In fact, he prefers them over masculine cards. ;) This was the perfect opportunity to use Paper Cut Flowers again. I stamped and heat embossed them in various colours on vellum and tucked them into the negative space of a frame created with the A Lot To Say die.


To create the sentiment, I used "Happy Birthday" from Just For You. I spelled "Dad" by masking and selectively stamping letters in the "One of a Kind" sentiment from Paper Cut Flowers. Since red is an important colour for happy occasions in the Chinese culture, I added an enamel heart to complete the visual triangle of reds.


Thanks so much for stopping by!

Sources:

6
Back to Top