Showing posts with label embossing. Show all posts

Heat Embossed Calathea Print Card with Cheiron


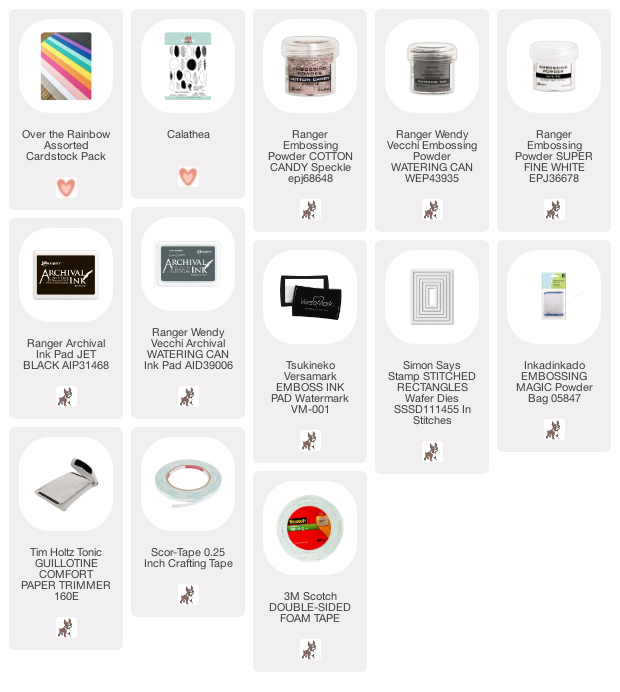
Hi there crafty friends, it's Cheiron here and today I have a fun Calathea patterned card for you featuring multiple colors (and some multiple layers) of heat embossing. I have not used my Calathea set in a long time, and I thought it would be fun to use it to make a pattern in non traditional colors.
For this card, I used a panel of the light pink card stock from the Over the Rainbow Cardstock pack.
I stamped the leaves in black and grey ink and embossed some of them in white to create the first layer of my pattern.


Once I filled the panel with the a pattern of the big leaves, I added layers of embossing powder in Watering Can, White and Cotton Candy Speckle on top of the solid leaves. To do the embossing, I went over the entire panel with an Embossing magic pouch and embossed each color separately. So I embossed all the leaves I wanted white, then heat set them. Then I did the same thing for the grey and heat set them, then embossed the pink. It does take a bit of time to do each layer, but I think the end result is work the effort, and gives it a totally different look than the green leaves we normally see.


I definitely dove into my stash for this one, and used some of those fun colored embossing powders that I forgot about! I hope you will take some of your favorite layering stamps and try this out for yourself using your favorite colors.

SUPPLIES:
1

Golden Foliage Frame Thank You with Cheiron


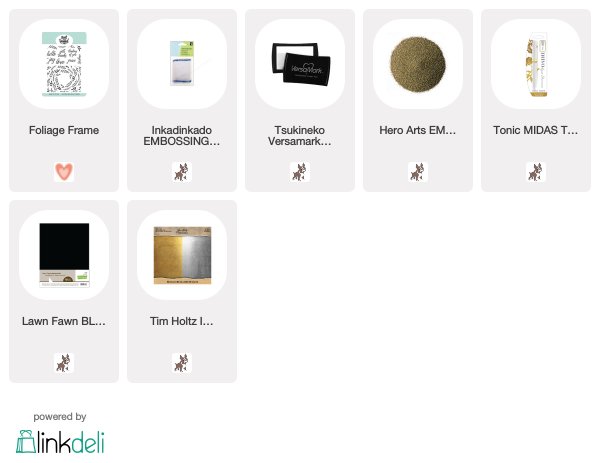
Hi there crafty friends! It's Cheiron here with a simple yet elegant card using the new Foliage Frame stamp. This card was so easy to make and it would be easy to make a bunch of them at once. To start, I cut my panel of black cardstock to 4 x 5 1/4. Then I used my embossing magic pouch over the entire panel to make sure I got rid of all the static. Once that was done, I stamped the Foliage Frame using a stamp platform and embossed it using Hero Arts Gold Embossing Powder. Then I stamped and embossed the sentiment. 


To add the little dots of gold, I used a Nuvo Midas Touch Aqua Shimmer Pen. I have been using this pen on everything, especially for splatters. To splatter with it, I scribbled the liquid from the pen onto my glass mat, picked it up with a paintbrush and splattered it over my panel. Once the panel was dry, I added it to a gold mat and then to an A2 card.


That's all there is to this quick and easy card. No matter how many times I do it, embossing still creates a card that is sure to impress, and I love the elegance of the black and gold combination. I hope you will try this look out for yourself!

SUPPLIES:
4

I like you ever so much

Hello there!

Mayuri here to share a card using the Geometric Circles stencil, the Get Yeti stamp set and the So Many Sentiments stamp set ;-)

©Candles in the Garden. Neat and Tangled April 2018

I began by stamping the yeti image from the Get Yeti set with Versafine Onyx Black ink on to a piece of white cardstock, and then coloured him in using some ZIG Clean Color Real Brush Pens.

©Candles in the Garden. Neat and Tangled April 2018

I then fussy-cut him out and set him aside to work on my card base. I laid down the Geometric Circles stencil onto a white card base and roughly passed some embossing paste through it onto the surface. I lifted the stencil away to reveal the lovely pattern and before the embossing paste dried, I quickly flicked some gold paint onto the card base for some added interest.

©Candles in the Garden. Neat and Tangled April 2018

I stamped a sentiment from So Many Sentiments onto a strip of black cardstock, and foam mounted it and the yeti to the card front.

©Candles in the Garden. Neat and Tangled April 2018

To finish off, I adhered a mixture of sequins from the Like Magic Sequin Mix and the Mermaid Tail Sequin Mix.

©Candles in the Garden. Neat and Tangled April 2018

Thanks for stopping by!
4

July Release projects

Hello there! Mayuri here to share some cards for the July Release - there's a great selection from this month's release, and I've experimented with a few techniques that I hope will inspire you! I've seen the watercolour trend showing up more in more in the card making world, and so I wanted to try a technique using Distress Inks and water.

For this first card, I stamped the shapes from Hello You in Picked Raspberry, Festive Berries, Shaded Lilac, Peacock Feathers and Salty Ocean all over a panel of white cardstock. I left a blank space in the centre for the sentiment.

©Candles in the Garden. Neat and Tangled July 2016 Release.

I then took a damp brush and went over the stamped areas with water, sometimes using a light touch and sometimes slightly heavier. I liked how quickly the water seemed to dry in some areas, allowing me add more colour and more water to create a sense of movement.

©Candles in the Garden. Neat and Tangled July 2016 Release.

I heat set the panel and then stamped the large sentiment from the same set with Versamark Onyx Black ink in the centre. I trimmed the panel down to the same size as my card base and adhered it straight down.

©Candles in the Garden. Neat and Tangled July 2016 Release.

I added a few sequins and some gold splatters to finish up. For my second card, I took the speech bubble die from Square Thoughts and die-cut it several times from a panel of white cardstock.

©Candles in the Garden. Neat and Tangled July 2016 Release.

I held on to all the centre pieces that get cut out with the die so that I could adhere them all back in place. First, I took an inky panel from my stash and adhered it down to a white card base, and then I foam mounted the die-cut panel in place.

©Candles in the Garden. Neat and Tangled July 2016 Release.

I also die-cut the fractal heart shape using the Heart of Gold die and adhered that to the front of the card. The sentiment comes from the matching Square Thoughts stamp set and was white heat embossed onto a strip of black cardstock before being foam mounted to the front.

©Candles in the Garden. Neat and Tangled July 2016 Release.

For my last card, I took the Geometric Blooms stencil, laid it onto a panel of white cardstock and swiped through some embossing paste. While the stencil was still in place, I also spritzed some Funky Fuschia Dylusions Ink spray.

©Candles in the Garden. Neat and Tangled July 2016 Release.

I removed the stencil and set the panel aside to dry while I worked on the focal element. I stamped the cat from Kitty's Favorite Things onto a piece of white cardstock and coloured him in with Copic markers.

©Candles in the Garden. Neat and Tangled July 2016 Release.

After my embossed panel had dried, I trimmed it down and foam mounted it to a card base. I die-cut the cat out using the matching die and also foam mounted it to the card front. I had added a little slit beneath his right paw so that I could tuck the sentiment banner underneath.

©Candles in the Garden. Neat and Tangled July 2016 Release.

The sentiment banner was die-cut using the die from Kitty's Favorite Things and a sentiment from Succulent Journaling Card was heat embossed in white. To finish, I added a few gold sequins.

Thanks for looking!

:-)
4

Party Time

Hello everyone! AmandineC here today, how are you doing?

I am delighted to share with you a card in which I had fun altering the TURKEY TALK set.


I stamped the image twice on the same paper, and then I cut the tail to create a crazy hat for my turkey.

The speech bubble is also from the Turkey Talk set, and I used a sentiment from PHOTO BOOTH, as well as some sequins on a background created using distress inks as watercolors.

Have you ever played with your images to create new ones?  I'd love to see!
9

Watercolor Pink

Hello everyone !

Amandine here, I hope you are well, you can enjoy holidays or your families.

I just share with you today my first post on the blog Neat & Tangled, and I am excited to show you my creation !

Among the techniques that I like, there's one that has a special place : it's the technique of watercolor ! I fell in love with this technique ! In addition, as it is very hot right now in France, it's a good time to play with a little water !

So it was with this technique that I realized the card I reveals today.


For this card, I simply created a background with the technique of watercolor, all in pink on which I embossed the wonderful stamp "My Favorite".


I then used some sequins "Iridescent White Sparkly Shaker Mix". What I love about this set is that depending on what angle you look at the card, the color changes and gives further effect to our card !


To finalize my card and give it another dimension, I simply stuck my background watercolor on a base pink bazzil.


I hope this card can make you get started in this technique, or just to use it more often. Thank you for taking the time to read, we find ourselves very soon :) 

6

Gettin' Bossy with ABNH

*Today is the LAST day for Free Shipping on all Neat and Tangled orders, use code LABOR DAY at checkout*
- - - - - - - - - - - - - - - - - - - - - - - 
Hello, hello!

I am over at A Blog Named Hero today with a fun card I made to play along with their current challenge, which is embossing.

Here is a little peek for ya :)   I actually did some embossing with water...curious to see how it turned out? Head over to the blog to see the whole project!
Make sure you play along for your chance to win

3

Lawnscaping Challenge 34: Embossing!

I know, it's Monday, but at least that means it's time for another Lawnscaping Challenge!

This week is all about embossing, dry or heat. 

And the winner of the challenge will receive a stamp set of their choice from the always generous Lawn Fawn

So here is my layout for this challenge.  This is one of my most treasured photos. It is of me at around age 2 with my Dzadzi (Polish for Grandpa). It was also taken by my cousin Stephen, who at the time was probably 12. Seriously a prodigy. Needless to say, he is now a professional photographer. 

My Dzadzi was my first best friend. Even though I was young when he passed away (about 6), I still am able recall so many wonderful memories. Likely because they were so special and filled with love. And every time I smell pipe tobacco I think of him :) Not that I come across that smell often lol. 

That's the really lovely thing about scrapbooking. It allows you to go back in time and reflect on moments in your life.  I'm not the best at putting together layouts, but it doesn't matter, because for me it's about the enjoyment I get from taking the time out to just remember. And speaking of remembering, the kraft envelope behind the photo holds a piece of paper on which I've written down some of my favorite memories of him.

I hope you're inspired :)

Supplies

5
Back to Top