Showing posts with label butterfly beauties. Show all posts

Hello Mail Card with Daria Grushina

Hello-hello dear people,

Daria here. Hope your weekend has a good start, as I have a card for you to share in case you plan some time for crafting.   This time, I've decided to play with Mail Background Stamp. It is quite versatile one. It could be both a focal point, or a nice background. You even may cut off small envelopes or your design.


I started with heat-embossing the background in white, then add some color using smushing technique and different distress inks.

When my panel was ready, I took my circle dies from Simon (that's a basic set, you may use any circle die sets you have on hand) and die cut a circle from it. I also made a bigger circle from silver glitter paper and more bigger one from light blue cardstock.  I used our Over The Rainbow Assorted Cardstock Pack.

All these circles made a nice backing for the one with lots of envelopes.  I also decided to use woodgrain embossed paper for the background. But you may skip this step. I glue everything with double-sided tape and foam tape.


To finish the card, I added three little envelopes made from different paper with Love Mail die set. A little banner from Skinny Strips die set and a tiny Hello nicely picks from the lower envelope. The sentiment is from Butterfly Beauties stamp.  Two of three little envelopes are glued with foam squares. It gives more variation in dimension. I just love how cute these little die-cut envelopes. 


That's it, hope you like it and may be will give a try. 
Thanks so much for stopping by, and see you next time,

xoxo,
D.

ps: I also made another background with the same Mail Background Stamp. It is picking on one of the photos. But, I still haven't decided how to finish it up. But I will try to show it next time. 
2

Negative Die-cutting for Layering with Daria Grushina

Hello-hello Awesome People!

Daria here. Today, I am again playing with Grateful Heart stamp and Butterfly Beauties die.  This card was inspired by my previous project, that you can ind here. I used negative die cutting for a card with patterned butterfly. Then Kelly Latevola transformed  this idea into four amazing projects. 
You may find Kelly's post and video is here. So, it was Kelly, who inspired me and made me thinking, may I change it further. 


I was watching her video and had a thought: what if to use the same idea in reverse and to colour not the peaking part but the whole front panel. 


So, I took the little flower bud from Grateful Heart stamp set and stamped in over a panel of white cardstock to make a patterned look. I added a few dots here and there to fill the space in between the images. for this matter, I used these stamp sets: 


Then, I coloured all the buds with watercolour pencils and added some Wink of Stella marker to blend it out. I die cut butterfly using Butterfly Beauties die from my panel and also from light blue cardstock from Over The Rainbow Assorted Cardstock Pack and from Gold metallic cardstock.  I am using negative parts of the die for my project. I cut the negative parts from blue and gold paper in two pieces and then adhered them behind the coloured panel. I used foam tape to make layers and dimension with peeking effect. 


The sentiment is from the Grateful Heart stamp set. After stamping a sentiment, I cut off little parts from my negative die cut to make the sentiment more readable. As a finishing touch, I have added a few sequins in gold. 

That's it. Hope you liked it.  Thanks so much for stopping by, and see you next time,
xoxo,
D.

3

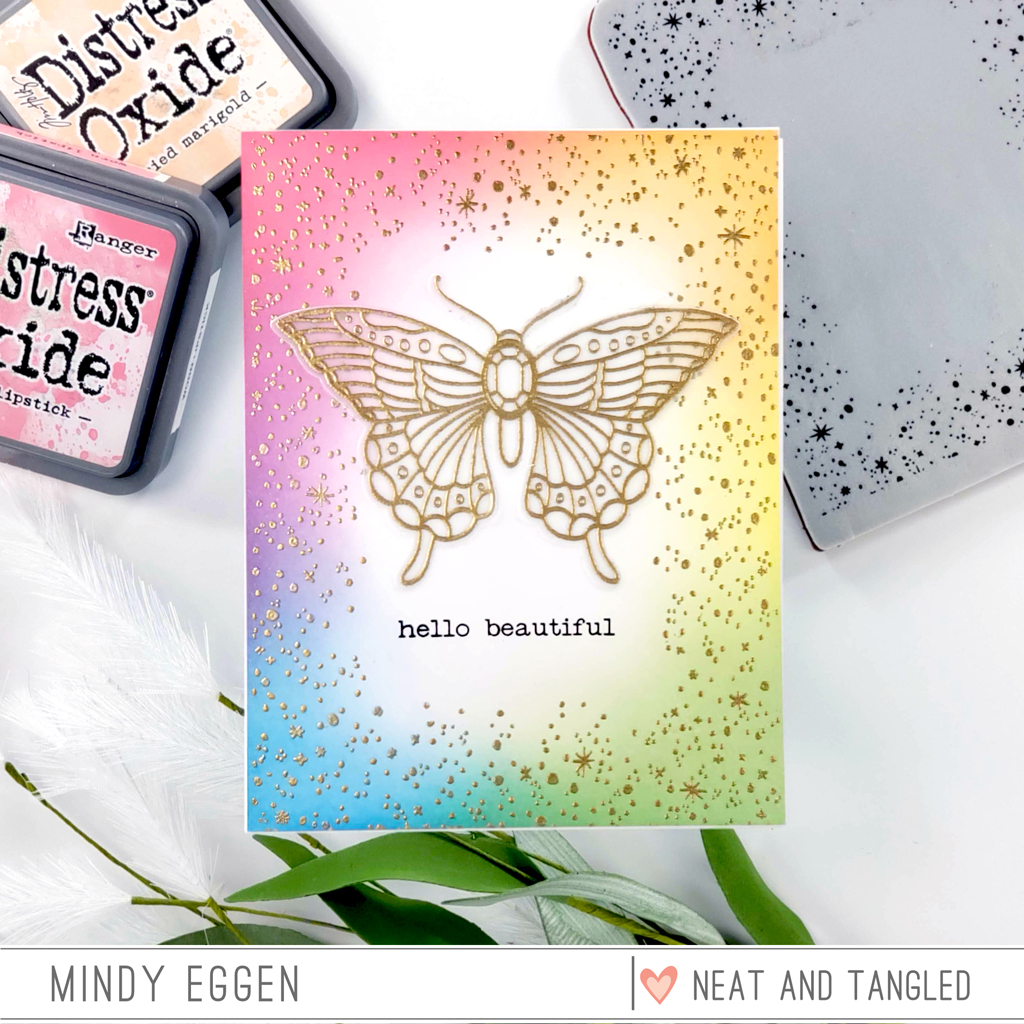
Rainbow Sky with Mindy Eggen

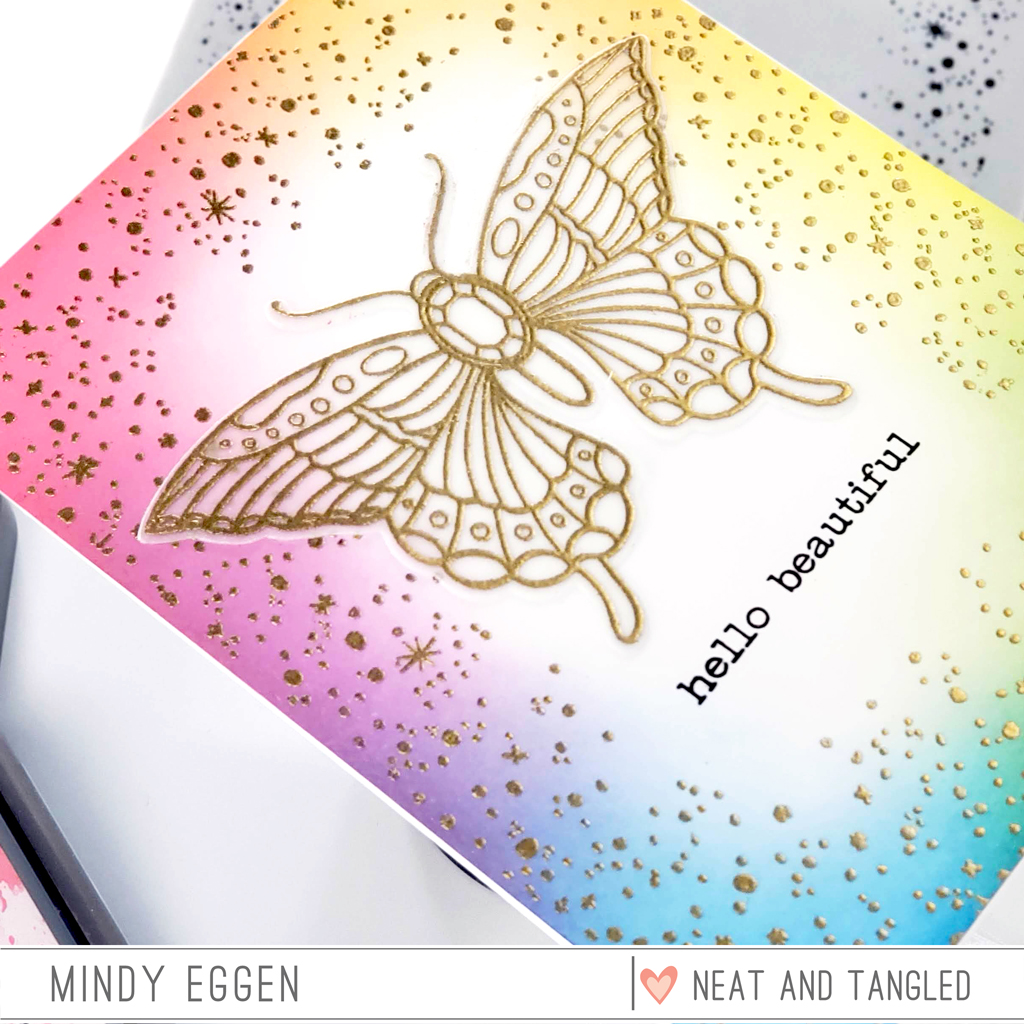
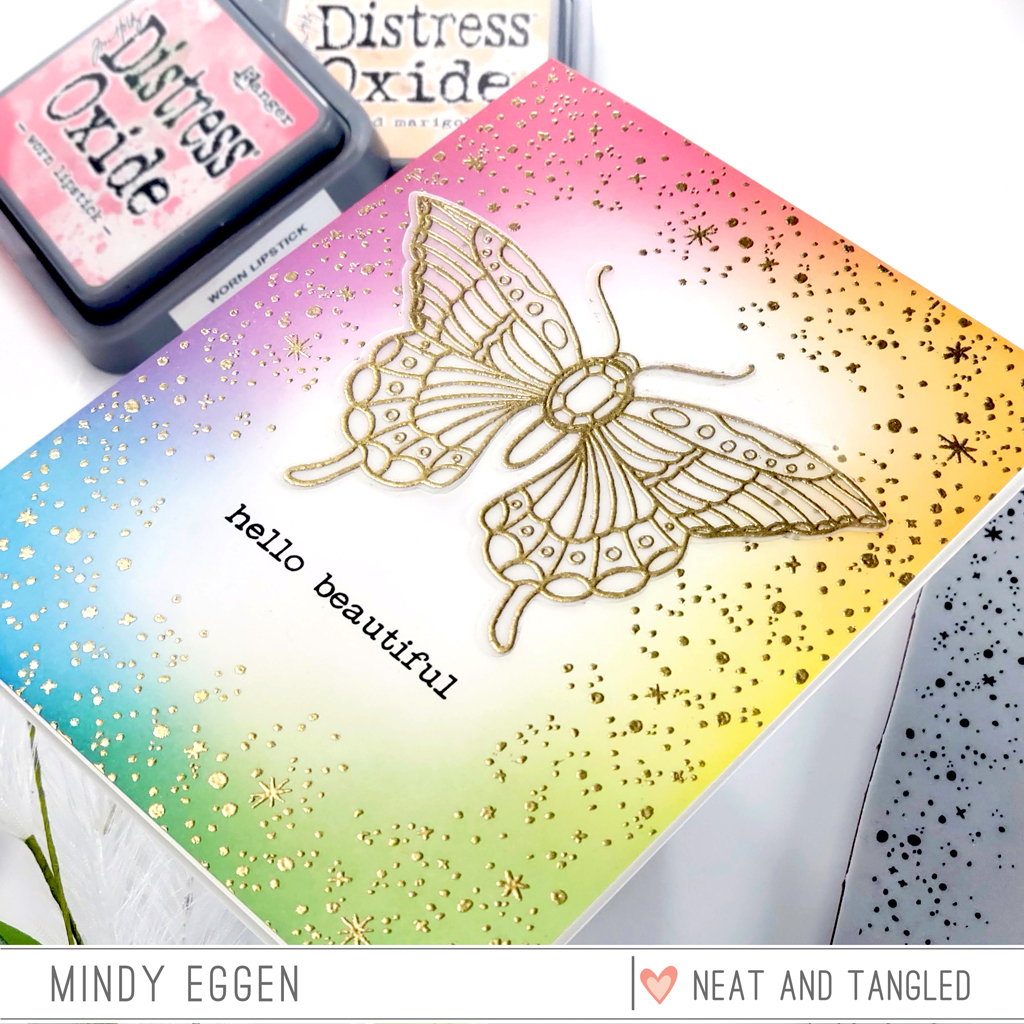
Welcome everyone! I had an idea hit me that I couldn't wait to try out! The Starry Sky background from Neat & Tangled is definitely one of my favorite background stamps but Instead of creating an actual sky with it, I wanted to see how a rainbow would look.

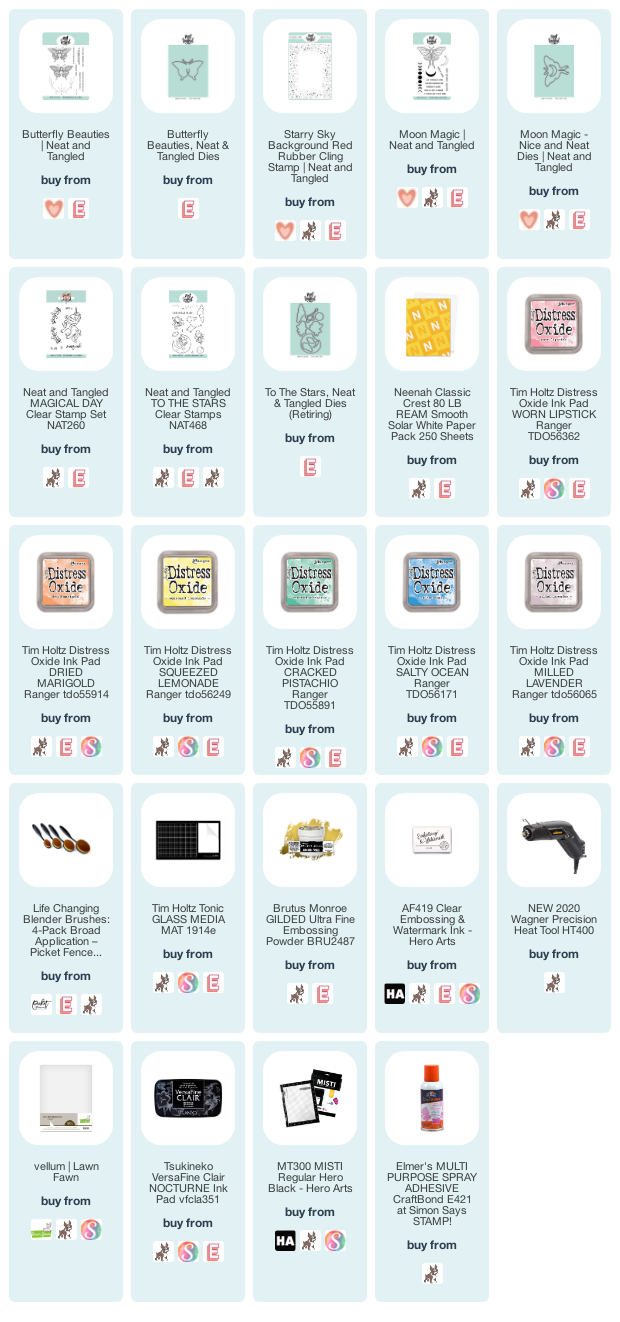
I start with creating the background first. I ink blended Worn Lipstick, Dried Marigold, Squeezed Lemonade, Cracked Pistachio, Salty Ocean and Milled Lavender onto Neenah Solar White 80lb cardstock. I used my Life Changing Blending Brushes when blending for a nice soft look around the edges.


Once that was completely dry, I heat embossed the Starry Background in Gold embossing powder using my Misti tool and clear ink. That background alone was amazing! So many possibilities with it. Do you have the Magical Day stamp set? Or maybe the To The Stars stamp set? Those would look amazing with this!

Even adding a die cut word to the center would be a great addition.

I opted to use the Butterfly Beauties but the Moon Magic set would work too.


I heat embossed the image onto Vellum with Gold embossing powder to tie into my background. Then used the coordinating die to cut it out. I could not find my sticker maker, so I used spray adhesive on the back of my image. Other then me over-spraying and having a little bit of the glue seep out, it worked really well. I just used a Mono Sand Eraser to remove any of the gunk the seeped out.


I finished off the card by stamping the sentiment from Butterfly Beauties in Black ink. I adore the font on these sentiments.

I'm pretty crazy happy with how this turned out. I hoped you enjoyed it too!

If you find any of these supplies out of stock, please be sure to click the "Email Me When Available" link on the website.

SUPPLIES


Below you will find links to the products used. Click the icon to start shopping. Compensated Affiliate links are used at no additional cost to you. Your support helps me to keep bringing you new projects and videos. Thank you!


3

A Friend Like You with Koren Wiskman


Hello everyone, Koren here with a vibrant card today, featuring several of Neat & Tangled's products. This card really pops and it's a fun way to use your floral stamps without coloring them.

Background:
I started with two pieces of cardstock both cut to 4 3/4 by 3 1/2. I used the pink and teal colors from the Neat & Tangled Cardstock Assortment Pack.  I loaded one panel at a time into my Mini MISTI with the largest floral stamp, from Neat & Tangled's Grateful Heart stamp set, aligned within it. I stamped it twice, once on the pink panel and again on the teal panel, both in the exact same spot.

I took the teal panel and the Neat & Tangled Butterfly Beauties Die, and aligned the die to be cut towards the upper right center of the teal panel. Once the butterfly was cut into the teal panel I adhered a piece of Judikins Heat Embossable Window Plastic directly behind the panel with Nuvo Liquid Deluxe adhesive.

To create the window pocket for the sequins to live in, I added thin strips of foam adhesive all along the body of the butterfly. Doing this helps the sequins stay within the confines of the window where you can see them. I added the same adhesive to the rest of the panel.


The sequins used on this card are from Simon Says Stamp. They are called Flowering Clover and have beautiful tones of pink and greens to go well with this cards color palette. Once the sequins were added I stuck the pink panel to the back to enclose all of my beautiful sequins.

Sentiment:
To create the cluster of sentiments I have arranged here on my card, I took the hot pink color cardstock from the Neat & Tangled Cardstock Assortment Pack and stamped "a friend like" and "is rare" both from the Neat & Tangled Moon Magic stamp set. I stamped it with Nuvo Clear Mark embossing ink and heat embossed it with Simon Says Stamp white embossing powder. I then used my paper trimmer to cut it down into small strips. This is actually all one sentiment but I masked the parts of the sentiment that I didn't want to stamp with a short piece of tape (or you can even use scrap paper to mask it).

The "you" word die is from Neat & Tangled's Just because word die set. I cut is using several of the same colors already used on the card plus one very bright green that I pulled from my stash. If you look closely, you can see different color layers in the side of the word die.


The strips were popped up using foam tape and the word die was adhered using liquid adhesive. To finish off the card I used a few of the Flowering Clover sequins on the outside of the shaker pocket surrounding the sentiments.

I hope that I have inspired you to create something today.

Koren


1

Bouquet Card with Daria Grushina [VIDEO]

Hello-hello Awesome People!

Daria here. Today, I am playing with Heartfelt Thanks stamp and die. I've signed up for Online Card Classes, and although I am not using any of the technique from the class today, it always inspires me to watch other people creating. So, I wanted to create one card and it turned out completely different, but I liked it.  I am big fun of heat embossing, and I am kind of rediscovering it for myself lately. 

I have a video process for you. You may watch down here, or at our YouTube channel:


And some more close-up photos:


I started with heat-embossing. I heat embossed a flower bouquet from Heartfelt Thanks stamp  set in white over craft and over white card-stock.  


Then, I spent some time colouring over heat-embossed image onto white cardstock. For colouring, I scribble some color with watercolour pencil into my image and then go over it with alcohol markers. It gives a nice variation in color and depth. 

When I made a decision about placement, I cut my coloured piece in two and adhered it with foam squares. The sentiment is from Butterfly Beauties stamp set and stamped over a banner shape made with Skinny Strips die setAs a finishing touch, I have added a few sequins in gold. 


Thanks so much for stopping by, and see you next time,
xoxo,
D.


Supply list:

Heartfelt Thanks, Neat & Tangled Clear Stamps ---- https://shrsl.com/28qy1
Heartfelt Thanks, Neat & Tangled Dies ---- https://shrsl.com/28qy4
Desert Storm - 25 pk, Neenah Environment Cardstock ---- https://www.ellenhutson.com/a3-cardstock-neenah-environment-desert-storm-25-pk/#_a_115
Solar White Heavyweight 110 lb - 25 pk, Neenah Classic Crest Cardstock ---- https://www.ellenhutson.com/neenah-cardstock-neenah-heavyweight-classic-crest-solar-white-110-lb-25-pk/#_a_115
Skinny Strips, Neat & Tangled Dies ---- https://shrsl.com/1gzp0
Butterfly Beauties, Neat & Tangled Clear Stamps ----https://shrsl.com/250w7
Gold, Hero Arts Embossing Powder ---- https://www.ellenhutson.com/hero-arts-embossing-powder-gold/#_a_115
White, Hero Arts Embossing Powder ---- https://www.ellenhutson.com/hero-arts-embossing-powder-white/#_a_115
Powder Tool Adhesive Deactivator, EK Success ---- https://www.ellenhutson.com/powder-tool-adhesive-deactivator/#_a_115
VersaMark Ink Pad ---- https://www.ellenhutson.com/versamark-ink-pad/#_a_115
VersaFine Ink Pad, Onyx Black ---- https://www.ellenhutson.com/versafine-ink-pad-onyx-black/#_a_115

0

Light as Butterfly with Daria [VIDEO]

Hello-hello Awesome People,

It is Daria. Here, In Russia, we are all also staying at home and hoping for a soon walk around.

And I've got to say, it is quite a challenge to make a video with a young baby around, but I've managed and very proud of myself (lol). So, it turned out to be a very simple, easy and fast to make card. Hope you'll like it. Here is a short video process for you:


And some more close-up photos:


I really wanted to create an effect off a super light and tender butterfly that flies in and sits on a flower, showing her wings under the sun...


So, I heat-embossed the butterfly from Butterfly Beauties in gold embossing powder from Hero Arts over a vellum from the latest Over the Rainbow Assorted Cardstock Pack.

I coloured the flower cluster from Grateful Heart stamp set with alcohol markers in light shades of lilac.  Then I used coordinating dies to cut out both the butterfly and the flowers.


For the background, I've choose Woodgrain Paper. Sentiment is from Butterfly Beauties stamp set stamped over a banner made with Skinny Stripes die set.


That's it. Very simple, yet elegant card to make.
Hope you like these simple idea and will give it a try. 

xoxo
D.

4

Patterned Butterfly Card with Daria

Hello-hello Awesome People!

Daria here. Today, I am playing with Grateful Heart stamp and Butterfly Beauties die. And I have a very simple to make yet brightful card. 


I started with stamping a small bud from Grateful Heart stamp set. Then, I coloured it with pencils and markers.


I die cut a butterfly on a white panel using a Butterfly Beauties die, added a sentiment and foam mounted the panel on top of my colouring. The sentiment is from the same Grateful Heart stamp set. I like the font. 


This simple design can give you so many different looks. You may add any type of small stamp inside for colouring, or even use a background stamp. To make it even faster, just add a pattern paper behind the die-cut butterfly.


Hope you like this simple idea and will give it a try. 

xoxo

D.
6

Alcohol Lift Ink with Mindy Eggen

Welcome everyone!


I did a little playing one weekend with alcohol inks and had a bunch of backgrounds. I took one of those backgrounds, and stamped the new Butterfly Beauties onto it with Alcohol Lift Ink.


After dabbing away the lift ink from the background, I'm left with this ghostly image and it's so beautiful!


I trimmed the panel down to 3 3/4" x 5" and added to a white card base.


This was really a quick card to put together but has amazing results.


Below you will find links to the products used. Click the icon to start shopping. Compensated Affiliate links are used at no additional cost to you. Your support helps me to keep bringing you new projects and videos. Thank you!

https://linkdeli.com/widget.js?1559654439292
2

No Line Colored Pencil Butterfly Beauties with Kelly Latevola

Hello Crafters! 

I've really been feeling the colored pencils lately. 
They are still a little bit of a struggle for me but it's getting better with practice. I decided to tackle no-line coloring with them since it's been so long. 


I started with the butterfly on the left. I stamped that one in black ink and colored it the same way. Coloring the image with lines first helped build up my confidence before I tried it with no lines. 


I stamped in Fadeout Ink and then got to work. A few tips I picked up along the way. First things first, keep your tips sharp. It seems silly but trying to get good blending in small areas requires sharp tips and it's much easier to color in small areas. I recommend starting with them. Instead of doing the entire wing do one segment at a time. 


I try to keep the lines intact as much as possible. What do I mean? 
When I'm coloring segments I try not to do two right next to each other until I'm more comfortable. For example, when I did the wings I skipped segments in between so it wouldn't get blobby and cause me to lose my lines. 

Whether it was this black outline one or the no line butterfly I colored the same way. Use a light hand with multiple layers of color. I like starting with my lightest color, working out to my darkest color, then back to my lightest. The goal is to fill in the fibers of the paper with color to get a smooth blended result. 

You can see the entire process in the video below 


Which butterfly do you like better the no line or the black outline? 
I love how different they look. Makes those coloring possibilities absolutely endless! 


I hope you'll try this technique soon. 
Thanks so much for stopping by! 


Supplies:

Affiliate links are used
OVER THE RAINBOW ASSORTED CARDSTOCK PACK
Shop at:
NT
Neat & Tangled BUTTERFLY BEAUTIES
Shop at:
NT
BUTTERFLY BEAUTIES Nice and Neat Dies
Shop at:
NT
Neat & Tangled GEOMETRIC
Shop at:
NT
GEOMETRIC Nice and Neat Dies
Shop at:
NT
Tombow MONO MULTI Liquid Glue
Shop at:
SSS | SB | HB

Neenah Classic Crest 80 LB SMOOTH SOLAR WHITE
Shop at:
SSS | SB | HB
Neenah Classic Crest 80 LB REAM Smooth Solar White Paper Pack 250 Sheets
Shop at:
SSS
Fiskars PREMIUM CUT LINE Paper Trimmer 12 Inches
Shop at:
SSS | SB
3M Scotch DOUBLE-SIDED FOAM TAPE Permanent
Shop at:
SSS
Simon Says Stamp LARGE GRID PAPER Pack Pad
Shop at:
SSS
Precision Heat Embossing Tool Gun
Shop at:
SSS | SB | HA | HB
Tsukineko Versamark EMBOSS INK PAD
Shop at:
SSS | SB | HB
Inkadinkado EMBOSSING MAGIC Powder Bag
Shop at:
SSS | SB | HB
Simon Says Stamp EMBOSSING POWDER WHITE Fine Detail
Shop at:
SSS
ZIG Wink of Stella GLITTER CLEAR Brush Tip Marker
Shop at:
SSS | SB | HB
MISTI PRECISION STAMPER Stamping Tool Kit
Shop at:
SSS | SB
MINI MISTI PRECISION STAMPER Stamping Tool Kit
Shop at:
SSS | SB
Ranger Studio Paint ARTIST BRUSHES
Shop at:
SSS | SB
Silver BLACK VELVET Brush Size 2 Round
Shop at:
SSS | DB
Silver BLACK VELVET Brush Size 8 Round
Shop at:
SSS | DB
We R Memory Keepers TRIM AND SCORE Board
Shop at:
SSS | SB
Prismacolor PENCIL SHARPENER
Shop at:
SSS | DB
Prismacolor 150 PREMIER COLORED PENCILS
Shop at:
SSS | DB
Prismacolor PREMIER COLORED PENCILS 72 Set
Shop at:
SSS | DB
Spellbinders PLATINUM 6 DIE CUTTING AND EMBOSSING MACHINE
Shop at:
SSS | SB | Spellbinders
Hero Arts Black Ink Pad
Shop at:
SSS | SB | HA
Inkon3 FADEOUT Ink
Inkon3 FADEOUT Ink
Shop at:
SSS
Therm O Web PURPLE TAPE
Shop at:
SSS
0
Back to Top