Showing posts with label Sophisticated Enamel Dots. Show all posts

Good Vibes Only with Cheiron


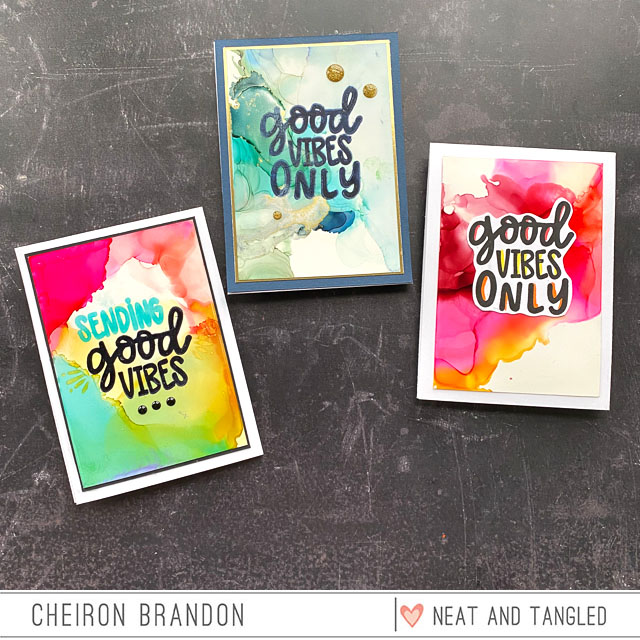
Hi crafty friends! It's Cheiron here, hope you are all keeping healthy and safe. I have been working from home the past two weeks and cooking A LOT 😉I've also been cleaning and organizing in my studio a bit each day, and while I've been going through my stamps, I've pulled out a few sets I have not used in a while, so I can show them some love. Today I have a trio of cards that I made using Alcohol Ink backgrounds. I've been experimenting with them a ton this week, and love trying out different color combos. I've combined these backgrounds with one of my favorite Neat and Tangled sets of all time, Good Vibes. For me, this sentiment says it all - it can be for an occasion (thinking of you, under the weather) or no occasion at all. All I know is we could all probably use some good vibes right about now!


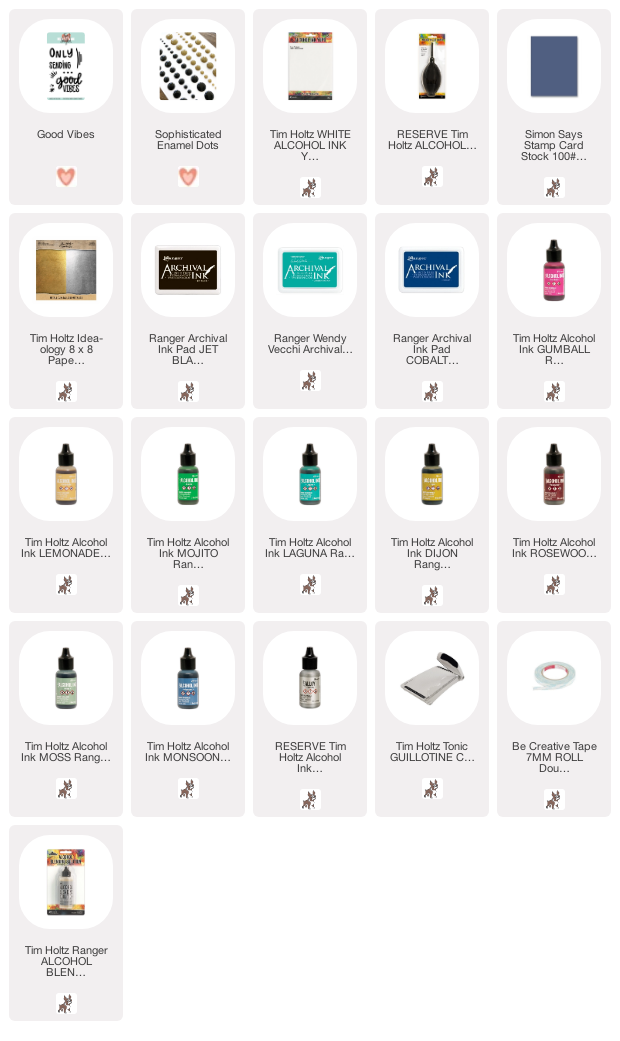
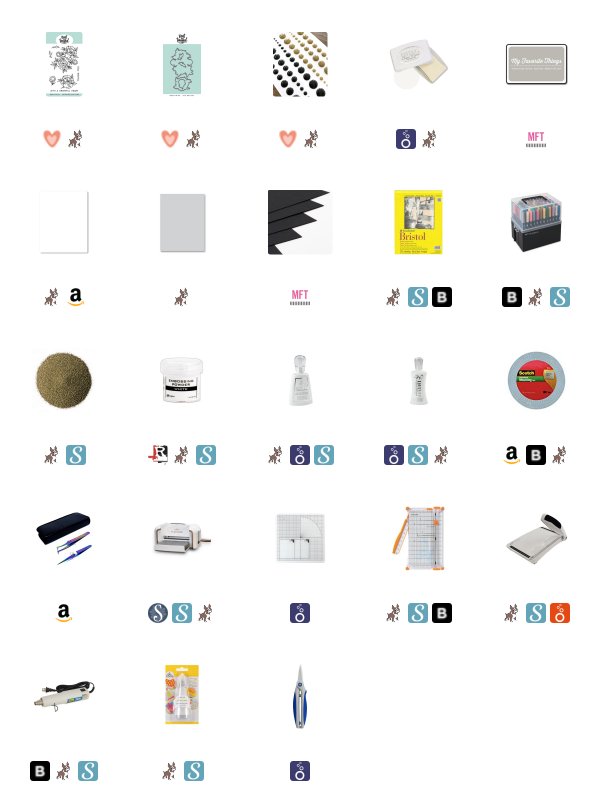
To make these cards, I cut sheets of 5 x7 Ranger Yupo paper in half (3 1/2 x 5) and created a bunch of backgrounds. The finished size of these cards is 4 x 5 1/2. For the first card, I created a very light Alcohol Ink Background that covered the entire panel using Gumball, Lemonade, Mojito and Laguna Alcohol Inks. I put the inks on my glass mat, added some Alcohol Ink Blending Solution and swiped the panel through. Once the panel was dry, I stamped the 'sending' in Garden Patina Archival Ink and the 'good vibes' with Jet Black Archival Ink. I mounted the panel onto a black mat, then onto a white card then added 3 Sophisticated Enamel Dots to the bottom of the card.

For my second card, I wanted to leave some white space. I started by putting some blending solution directly on my Yupo paper then added Alcohol Inks one at a time and using an Alcohol Ink Air Blower before adding the next color. I used Dijon, Gumball and Rosewood for this one. I stamped and fussy cut the sentiment and added some coordinating colors to the letters with a waterbrush.

This last one is probably my favorite of the set. I used the same technique as the second card, using Moss, Monsoon, and Laguna Alcohol Inks, using the Air Blower in between each color add and the Foundry Alloy which I feel is a wonderful mix of silver and gold. I stamped the sentiment in Cobalt Archival Ink, mounted it onto some gold cardstock, then onto Soft Navy cardstock and added a few Sophisticated Enamel Dots.

These types of cards would be easy to replicate with any colorful backgrounds- Distress Ink, watercoloring, pattern stamping...I hope you give it a try and get some Good Vibes of your own in the mail!

SUPPLIES: 
3

Video: A look at the February Release and a Card Using Butterfly Beauties


Hello everyone. Koren here today, and I have a new video for you. In this video, I take a look at the NEW February release and make a beautiful card using the new supplies. I use the NEW Neat & Tangled Butterfly Beauties stamp set and coordinating die, as well as the Delicate Dots background stamp.

I started with the NEW Cardstock Assortment Pack to create an A2 size card front and stamped the Delicate Dots background stamp using black pigment ink.


I cut two camouflaged butterflies from the background using the coordinating die for the Butterfly Beauties stamp set and seated them back into their negative spaces, and popped them up using black craft foam.

The main focal image is also from the NEW Neat & Tangled Butterly Beauties stamp set  and was colored using some of my favorite colored pencils.

I hope that you will feel inspired to create with this wonderful NEW release. I also have a Color Map for you using Faber Castell Polychromos Colored Pencils.


Thank you so much for spending time with me today.

Koren


4

Stacked Just Because with Koren Wiskman


Hello everyone. Today I have a cute high-contrast card that brings attention to the details. I'm using the Neat & Tangled Just Because stamp set and coordinating dies, as well as the Mail Background stamp.  I also threw in a little Sophisticated Enamel Dots to finish it off.

To start, I loaded the Mail Background red rubber stamp into my Original MISTI. I do this because I like the security of a stamp positioner when stamping my background stamps. I almost always stamp them twice to get good coverage. The MISTI is my go-to stamp positioner. I stamped it with a light gray hybrid ink that works with alcohol markers. I didn't want the background to be too busy so I wanted to attempt to color this with light lines. I used my alcohol markers to color the hearts read and to lightly shade the areas where the envelopes are just so you can tell that they are back there.

Once the background was colored I trimmed it down to 3 1/2 by 4 3/4.  To subtly increase  the appearance of the background on the card, I cut a piece of vellum to the same dimensions to go over the top of the background. In-person the background is nicely represented, which is kind of hard to capture on camera.


The Just Because stamp set and its coordinating dies are one of my favorites. I love the big bold "love you" word die and it's companion shadow die. Together they fill a card front nicely and it makes my job designing them very easy.

For this card, I wanted to stack the layers of my word die to have striped layers of black and white. I cut the shadow first from black cardstock and then the word die itself. The "love you" is actually made up of three separate sections. The "L" is one section the "ove" is another and then finally "you" is one of its own. I cut the word die five times two from black cardstock and three from white cardstock. Starting with the black base of the shadow I then stacked them in alternating layers white, black, white, black, and finally white on the top. I used liquid adhesive to layer them together allowing a little time for it to dry with an acrylic black resting on top to keep them flat and snuggled nicely together.

The entire word die was then added to the vellum using liquid adhesive. This gave me a great area to add adhesive to the vellum and attach it to the background. To keep the adhesive hidden only add the adhesive behind the word die. This gives it plenty to hold on to and it looks nice.

As for the sub-sentiment "xoxo" I stamped the smaller of the two xoxo's included in the Just Because stamp set onto some bright red cardstock using clear sticky embossing ink. I then heat embossed it using white embossing powder. I cut it down to a strip using my paper trimmer and added it to the card panel using a double layer of foam adhesive. I had to double the foam to get over the height of the stacked word die and nestle it nicely under the "you".


I then cut the two hearts also from the Neat & Tangled Just Because coordinating die set in two shades of red, a light, and a dark red. I thought this would give it a little more interest.

I added a sprinkling of Sophisticated enamel dots in black to really set of the black and white contrast.

I added the card panel to a light gray card base cut to size A2 and scored in top-folding portrait orientation. I used white craft foam and tear tape adhesive to stick it on and give it a little dimension as well.

I hope you like my card project today and that I've inspired you to create using these fun love-themed products from Neat & Tangled.

Koren

1

Crystal Glazed Floral Card with Koren Wiskman


Hello everyone. Koren here with yet another card using the Neat & Tangled Grateful Heart Stamp Set. Have I told you how much I love this set? I just can't get enough.

I started with a piece of heavyweight white cardstock cut to 3 1/2 inches by 4 3/4 inches. I then used an old embossing folder from my stash, which is just a dotted background. I'm sure you can find something similar, but this one in particular, doesn't seem to be available anymore. I ran the piece of white cardstock through my die cutting machine in the embossing sandwich to create this subtle background for our flowers to live on.

After creating a low key background I figured I would make super shiny flowers for my focal images. I stamped the two smallest images of flowers from the Grateful Heart stamp set in a light gray hybrid ink. I used my stamp positioning tool to stamp them and once they were stamped, I left the stamp in the same place in the positioner to come back later and stamp it once more in the exact same spot. I knew that I wanted to cover up these lines with gold embossing powder so I stamped it just once and enough so that I could see to color them in. I used a hybrid ink so that I could use water-based markers to color them. I used one blue and one green marker. I used a blender pen to blend out the color from the shadows. These images were colored three times letting one layer dry completely before adding another.


Once the images were completely dry and cut out using their coordinating dies, I put them back in my stamp positioning tool and stamped directly on top of the colored images using clear sticky embossing ink. Make sure you let your coloring dry completely before doing this or you will get embossing powder everywhere you don't want it. A heat tool on a low setting can help dry your images faster. I heat embossed them with gold embossing powder twice. I stamped and heat embossed them twice to get a very thick gold edge. I was inspired to create this card from an image I saw on Pinterest of a beautiful glass rose trimmed with gold.

To make them super shiny I coated them with crystal glaze to make them appear porcelain or glass similar to my inspiration photo. I let them dry overnight before adhering them to the white card panel.  I used liquid adhesive to adhere to the largest of the three images directly to the white embossed card panel. Then I used foam tape to pop up the two smaller images.

I stamped the "thank you" sentiment from the same Grateful Heart stamp set in sticky embossing ink and I heat embossed it using white embossing powder. I cut it down into a strip using my paper trimmer. It was added to the card panel using foam tape.


The entire card panel was added to a piece of white craft foam using tear tape adhesive. I then stuck it to a light gray card base in size A2 scored in atop folding portrait orientation.

To give the card even more flair I added some Sophisticated enamel dots also by Neat & Tangled. These self-adhesive enamel dots make it easy to add a little something extra to your projects.

I hope that I've inspired you to create something today using Neat & Tangled products. Thank you for spending your time with me.

Koren

3

Fall Floral Frame with Cheiron


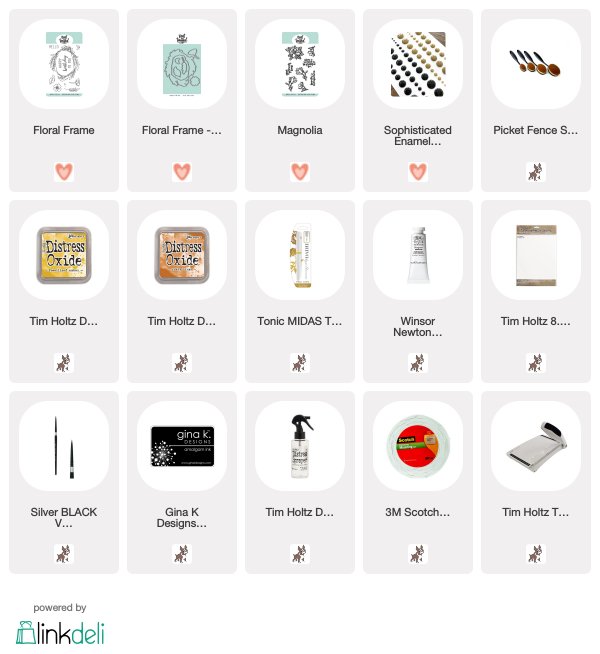
Hi there crafty friends! It's Cheiron here and today I have a simple card for you using the Floral Frame stamps and dies in a palette perfect for fall. To create my card today, I did some ink blending on the background using a Blender Brush and Fossilized Amber and Rusty Hinge Distress Oxides. Then I added some splatter in the same colors, plus white gouache and gold (from my Tonic Midas Touch pen).


Once my background panel was dry, I stamped the sentiment from the Magnolia stamp set, which I think is just perfect to go with the fall theme. I colored the Floral Frame stamps in with some fall colors of Copics and added some gold Sophisticated Enamel Dots to give the card a finished look. I love how easy it is to change the entire look of this stamp by simply choosing a different color palette!


SUPPLIES:

2

Little Flower Patterns with Daria

Hello-hello Dear Friends,

Daria here. Today, I am playing with Grateful Heart stamp set and Delicate Dots background. 


Here you can find a little how-to video.


I had a couple of loosely water-coloured panels and decided to use those.

I took the small flower from  Grateful Heart stamp set and it in black all over the coloured panels I had. I tired to oriented it as leaves are on the greens and flower is on the pinks. I believe it is the fastest colouring possible.


I die cut the flowers with  coordinating dies, and placed them on stamped with Delicate Dots card-base.  As I predicted, I can't stop using the new rubber background stamp Delicate Dots. It's just perfect and love it.  

I also added a sentiment from  Typed Sentiments stamp set and placed on a banner from Skinny Stripes dies.


For my second card, I went with vertical design. I arrange the flowers, added a few leaves die-cut from gold glitter paper, and adhered everything with foam tape.


For the sentiment, I again took Typed Sentiments stamp set along with Skinny Stripes dies. A few enamel dots  from Sophisticated Enamel Dots set became a perfect finishing touch.

And there is a video for second card too. It will be available at our IGTV on Instagram.  Click here to find it.


Thanks so much for stopping by, hope you've liked those ideas and will give them a try.
Have a wonderful day,
D.
4

Subtle Images with Big Sparkle from Koren Wiskman


Hello everyone, Koren here today with a card project using the NEW Grateful Heart Stamp set. I wanted a subtle image that almost stays in the background to really allow some sparkle up front and I think I did that for this cute “thank you” card.

I also used the NEW Sophisticated Enamel Dots to spruce up the shine factor a bit more.

I started with my biggest focus on this card and that was the subtle background image. I originally wanted to paint this image with gouache but after several attempts I abandoned that medium and decided to go with some Faber Castel Polychromos Colored pencils instead. I just need more practice with painting before I tackle this image again with the gouache.

The colored pencils did the job for me though. I used hot pinks and greens on the images. I have created a Color Map for you to see the exact pencils I used but really I just picked shades that were similar and it worked out just fine. I tested each color on a spare piece of blue cardstock in order to make sure they would look ok.


I stamped the image using Versafine Clair Nocturne Ink, and I like how the images are subtle but still defined by the black lines.  This would also look great as a no line coloring.

Once the image was colored I took it to my Original MISTI and loaded it in along with the “thank you” sentiment from the same Neat & Tangled Grateful Heart Stamp Set. I stamped it with Nuvo Clear Mark Embossing Ink and used Nuvo Glitter Embossing Powder in Gold Enchantment to heat emboss it in the top center of my card panel. This embossing powder is so shiny. It has huge flecks of gold glitter in it that really makes it shine in person. I also love the texture that it gives the embossing powder. It looks great.

I loved that embossing powder so much that I decided to add more. I used a Ranger Embossing Pen to add sticky ink to the pistles inside my flower. I then used the same shiny gold embossing powder to enhance the image with a little heat embossing.


To add even more gold, I used a little bit of the Gansai Tambi Starry Nights watercolors set to flick gold splatter onto the panel. My splat box helps me contain a mess like this.

Once it was completely dry, I used the NEW Sophisticated Enamel Dots to bring out even more gold.  I guess to me when I look at the card, I see the pollen from the flower floating up to spell the sentiment. Maybe, I’m crazy, and thats ok too.

I added my panel to a Simon Says Stamp Fog card base cut to size A2 and scored in a top folding portrait orientation.  The panel is popped up using gray craft foam and Tonic Tear Tape Adhesive.

I hope I have inspired you to maybe try to combine subtle with a little pizazz. Sometimes the right combination of the two makes for a great time.

Koren


4

August 2019 Release Week Wrap Up!

Hello friends!

I can't believe it's already Friday, and the last day of our August 2019 release!

Thank you all so much for your excitement and positivity this week - from welcoming our new illustrator, Robbie Bryant, to celebrating our new products and new format!

Also don't forget to see if you were a giveaway winner this week, that post can be found HERE.

We have one final new card for you today from Mindy.


And a last look at all of her cards from the week. I love how it shows just a few of the possibilities using these new products


All of the products are available in the shop now! And here is one last look at them up close:

Delicate Dots Background Stamp

Grateful Heart Stamp Set

 Grateful Heart Dies


 Sophisticated Enamel Dots

Wel also do have some more of the August 2019 Bundles in stock - these sold out fast! It's a great way to get all of the coordinating products from this month in one click and at a 20% discount!

Be sure to share when your new goodies arrive, and of course what you create with them!

Have a great weekend!
Danielle
9

August 2019 Release Day 4!

Hello friends!

It's hard to believe it's already Thursday, day 4 of our new August release! In case you missed day 1day 2, and day 3 be sure to go see those blog posts for inspiration and giveaways!


Today we have even more inspiration from the design team using our new Grateful Heart stamp set, Delicate Dots background stamp, and Sophisticated enamel dots!

Now for what the design team has for you today! Click the photo to head to each of their blogs for details on their cards. Be sure to comment because one winner will be selected from the design team blog comments to win a $25 gift certificate!


So much beauty!

Don't forget to stop by tomorrow to see a wrap up of the week, and the giveaway winner's announcement!


Would you like to win the entire August 2019 release collection?

1. Be a follower and leave a comment!
2. Follow us on Facebook and share about release with your friends! (leave another comment)
3. Follow Neat and Tangled on Instagram and repost about our release! Use #neatandtangled (leave another comment here)
58
Back to Top