Showing posts with label Scandinavian Prints Dies. Show all posts

Scandinavian Prints Tags with Rebecca Luminarias


Happy Friday!  Our May guest designer Rebecca Luminarias is back with us today sharing a set of beautiful tags.  Here she is with all the details:

Hi everyone! I'm so happy to be back guesting for Neat & Tangled again on this TGIF! Today I have a set of tags that I made using the Scandinavian Prints dies.

The concept is fairly straightforward; I arranged the dies to make a flower (or 2) on the tag, then cut it out. I made 2 tags with the negatives and 2 tags from the pieces I cut out.


They're both very simple, but I love the folk-inspired outcome. They almost remind me of my mom's quilts.


For the tags where I used the negatives, I added some patterned paper behind the tag. It's a pink and navy blue floral print and offers a bold contrast against the white cardstock.


On this tag, I chose a pink ink to stamp "thank you" (from the Sweet Treats Sentiments set), with the little flourishes stamped in blue. I also added some lace and glitter elements, finishing off with navy blue seam binding.


The next tag is similar, but I used a different flower shape and a different "thank you," this one included in the Scandinavian Prints stamp set. While there are the textural elements, I chose to keep the tags minimal otherwise so that the focus would be the cut-out flowers themselves.


After completing those 2 tags, I took the white cut out pieces and made two more tags with them. I actually really liked the plain white shapes against the plain white stock, but in the end, I decided to add in some color. I stamped each flower bloom with a matching stamp in pale pink. I tested out the darker pink ink, too, but in the end, I just liked the soft pink better against the backdrop of navy tulle.


I did keep the stems and leaves plain white in order to draw more attention to the blush blooms. I stamped "thank you" again and cut it down to a small strip of paper, which I adhered to the tags using 3-dimensional foam dots.


It's always fun to use the dies in a slightly unexpected way. When I started this project, my idea was to cut out a bunch of flowers and piece them together to make the tags, not unlike the last two tags. But almost by accident, I cut out the single flower just perfectly to inspire the cut-out tags. Adding the paper behind them really made them pop, too, and this project took a slight detour. But you know what they say about the road less travelled...


Thanks for having me again today! Happy making!
3

Pink for Christmas with Daria

Hi Dear friends,

Daria here. I didn't had any specific idea or plan for this card, just wanted to make something pretty and girlish... So, when I was playing at my craft table I diceded to use some patterd paper; and I don't do it very offen, but still can't resist buying it.


I die cut some tree images using cordinating dies for Scandinavian Prints Christmas set from Pink Parsley Ce La Vie paper pad and one from glitter cardstock. I think glitter always add that a little bit of festivity :)


I've blended in some distress ink in Picked Raspberry using blending tool to create backing for my trees scene. Sentiment comes from Happy Holidays stamp set. I placed it on a banner shaped piece made with die from Scalloped Nice and Neat dies.


I liked the way it turned out, hope you too. Try using some non traditional colors  - it will make you project look fresh and unique.  What do you think about pink for Christmas?

Thanks for stopping by and have a great day!
Daria.

Neat and Tangled products used:

Happy Holidays stamp set
Scalloped Nice and Neat dies
Scandinavian Prints Christmas - Nice and Neat Dies


6

Scandinavian Prints with Suzy Plantamura

Hello! It’s Suzy back today with the last of my August guest blog posts! Today I will be showcasing the beautiful floral set called Scandinavian Prints. I’ve done another “one stamp, five ways” post, so I have five cards to share with you.


This card was made with a striped watercolored background using blues and purples. I stamped the three flowers with black ink on white cardstock and colored them in with Copic markers. I added 


I stamped the sentiment on a watercolored banner using black ink. I attached it to the bottom of the card and then attached the flowers with stems and leaves above the sentiment. I finished the card with some sequins. 


For this next card, I stamped all of the images randomly on watercolor paper using black ink. I then painted over the images with watercolor paints and added some shading with watercolor markers.


I stamped the sentiment on a black banner with Versamark Ink and embossed with white embossing powder. I attached the banner to the bottom of the card and added some sequins around the watercolored background.


I started this card with a white card base. I die-cut a stitched rectangle out of watercolor paper and then painted the top of it (diagonally) yellow and the bottom of it pink leaving the center white.


I stamped the solid image stamps with colored inks and the outlines stamps with over these to add details. I colored the outline stamps with Copic markers and shaded the solid images with Copics as well. I die cut the images using the matching dies and attached them over the card. I added a banner with a stamped sentiment and some sequins.


This card shows another way to do a random stamped background using no line stamping. This time I stamped the images with Distress Inks in the colors I wanted them painted in. For solid images, I pressed just the stamps edges on the ink pad and then used a paintbrush to move the color to the inside. For the outlines, I stamped them and then added color with Distress Inks and a paintbrush.


I die-cut this piece and attached it to a card base. I die-cut a banner and watercolored it blue to match some of the flowers. I then stamped the sentiment with Versamark Ink and embossed with white embossing powder. Last, I added some small colored sequins around the background.
Insert Photo “Hello Friend”


I started this one by watercoloring a stitched die-cut with red paint. I splattered it with water and more paint to add texture. I then die-cut a smaller stitched rectangle and painted that one with yellow stripes. I stamped the sentiment “hello friend” over and over on this piece.


I stamped the flower inside and outside and the leaves on white cardstock with black ink. I colored them in with Copic markers. I attached them on the bottom right side of the yellow striped rectangle. I added some twine around the bottom and some sequins around the flowers. I attached this to the red painted rectangle.

Well, that’s it from me this month! Please visit my blog for detailed steps for each of these cards and “one stamp, five ways” posts each week. Thank you so much to Neat and Tangled for letting me be their August guest! Suzy Plantamura

We want to send out a HUGE thanks to Suzy for all of her work this month!  What a treat it has been to see these 'five ways' posts every Friday!  We so appreciate Suzy sharing her talent with us!

10

Flower Stenciling with Scandinavian Prints


Hi Dear Friends!

Daria here, and for today's post I again played with Scandinavian prints stamps dies. I just can't get enough of them.

I made a card, and then decided to show you how it all came together, so I have made similar one , but in other color and shoot it all on a video.  I really like how modern and graphic they turned out.


I have also made a video showing how it all come together, but, unfortunately, my laptop failed on me... I hope to fix it really soon, and show you the process. Meanwhile, here is a step by step explanation:

1. Die cut flower shaped die from Scandinavian Prints Nice and Neat Dies several times from heavy-weight cardstock to create your own stencil
2. Apply ink usink applicator and any time of ink you like (I choose Distress ink in Picked Raspberry and Peacock Feathers colors)
3. Stamp flower centers and leave shape from Scandinavian Prints Stamp Set in contasting black ink.
4. To finish up, die-cut asentiment using Awesome Nice and Neat Dies (I am seriosly in love with these two dies, we definitely need more of this kind (wink); and foam monted it on a card.

Easy? Hope you liked it :)


Little update: I've finally managed to work it out with the video, so you can watch it below or on our Youtube Channel:)


Thank you so much for stopping by.
Sending hugs your way. And don't forget: You are Awesome!

xo,
Daria.

Products used:
Scandinavian Prints - Stamp Set
Scandinavian Prints - Nice and Neat Dies
Awesome - Nice and Neat Dies

4

Scandinavian Prints with Daria

Hi friends,
Daria here, and for today's post, I couldn't resist playing with My Favorite stamp, again.... I decided to pair it with flowers from Scandinavian Prints stamp set...
To say the truth, I hardly ever use patterned paper. But this time, I tought it might work nice. I took some old patterned paper from my stash (I believe it is Fresh Cuts by Basic Grey), stamped some flowers from Scandinavian Prints - Stamp Set and die-cut them with coordinating dies from Scandinavian Prints - Nice and Neat Dies. Basicallly, all you need is just the shapes, which you can decorated with any stamps from the set. 
I arrange my flowers around the sentiment using glue dots and foam adhesive. I also added petals made from glitter cardstock. I think it dresses up the card and makes it more interesting. 
I just love how glitters paper catches the sun and sparkels! 

 Hope you liked it and got inspired to create something.
Thank so much for stopping by and see you soon :)
Daria 

Products used:
My Favorite Stamp
Scandinavian Prints - Stamp Set
Scandinavian Prints - Nice and Neat Dies

11

Neat & Tangled / Hemptique Collaboration, Week 3

It's Week 3 of our collaboration with Hemptique!

Each Tuesday this month design team members are showcasing projects that combine Neat & Tangled and Hemptique products.  Be sure to leave comments on these posts as we'll pick a lucky commenter to win a Hemptique prize pack at the end of the month.

We've got quite the line-up for you today, Amy, Elena, and Laura are sharing their projects.  First up is Amy with a project using the Hemptique Handmade Hemp Paper and Orange Hemp Cord:

I've combined it with the Hello from the Better Together stamp set.


I finished my card off with Crystal Clear Sequins.  The Handmade Hemp Paper adds great texture to the overall design.  It reminds me of watercolor + mulberry paper.

I had so much fun with the collaboration, I also have a different project up on my blog!

Next we have Elena, with a card using the Hemptique handmade paper and grey hemptique cord.


I stamped images from Better Together, and mounted them onto a rectangle of torn Hemptique paper. The texture is so great! I also ran some of that same paper through the die-cutter and then stamped the sentiment onto a banner flag. The Hexastar die created the perfect backdrop for the images, and I finished everything off with the dark grey hemp twine.

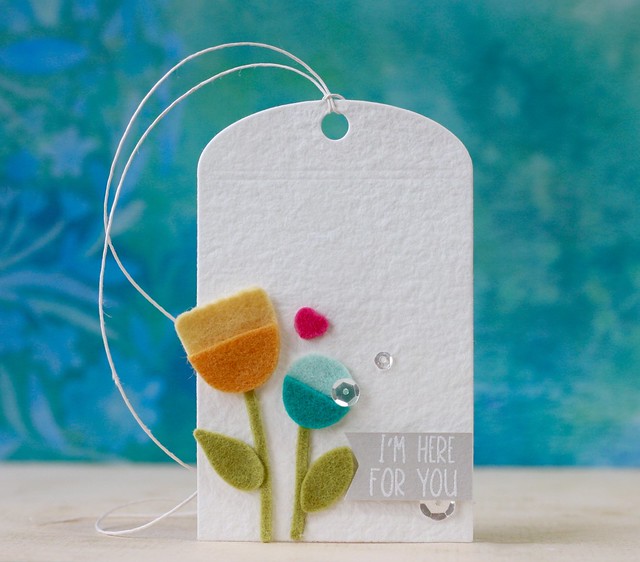
And finally, Laura who created this wonderfully texture tag using the Scandinavian Prints stamps & dies, our Classic Tag 1 Die, and of course Hemptique paper & twine.

Neat & Tangled-Scandinavian Prints & Hemptique 

We'll be back next Tuesday with some more projects featuring Hemptique as well as another chance to win!  If you don't already, be sure to like Hemptique's Facebook page and tell them we sent you.  There just might be a giveaway over there towards the end of the month.  ;)
31

Simon Says Stamp Feature

Hello friends! Happy Friday! Today Danielle has a post over on the Simon Says Stamp blog featuring some of our newest March release! Be sure to head over to see the project in full!

Have a great weekend!

3

A Trio of March Release Cards by Taheerah

Hey everyone, happy Wednesday! It's Taheerah here today to share some cards featuring the March release!

The wicked postman held my release package captive earlier this month so I didn't get a chance to join in with the other talented DT ladies - but that just means I've got the limelight to share them with you now!

Let's start with the first card:


For this one I used one of the irregular circles from Scandinavian Prints to create an irregular polka dot background! I used Distress Inks and Distress Stain to give it a watercoloured, almost ombre look.


I combined it with the starburst from Scandinavian Prints and a sentiment from Better Together for a bold, fun hello!


Next up, a sweet card featuring Itty Bitty Welcoming Committee!


I decided to watercolour *outside* of the image, using a mix of pale pink and gold. It's a fun change of pace to show that you don't always have to colour!


I stamped out just the banner again then trimmed out the banner pieces and adhered them on top for some dimension. I did the same to add that cute pink bow! I couldn't resist using another sentiment from Better Together too!


Last but not least, probably my favourite of the trio:


I loved combining several products for this one! I used the Hexastar Cover Plate to impress my background, and added a piece of vellum die cut with the Punchinella die. The flowers were created with Scandinavian Prints, using the accompanying Scandinavian Prints dies to cut the flower heads.


I customised my sentiment by adding the 'extra' - I think this card deserves to go to someone extraordinary!


I hope you loved these release projects as much as I loved creating them! The March release seems to have been uber-popular, with many of the new products out of stock currently - so make sure you sign up to notifications for your favourites to know when they're back in stock! Thanks for stopping by!

Supplies:
5
Back to Top