Showing posts with label Say Yes To Donuts dies. Show all posts

You are the Sprinkles on my Donut with Lexa Levana

Hello everyone! Lexa here today to share a lovey dovey card with adorable images from the Say Yes To Donuts stamp set. I choose two donuts with a boy and a girl peeking, aren't they the cutest?


I stamped all my images with black Versafine ink and watercolor them using Distress Markers. I picked some matching patterned papers and played with the layout for today. I personally think this pink and brown color combination goes really well with the theme, sweet! I die cut the Heart of Gold die in the middle, through the card base, so it created a heart shaped hole.
Inside the card, I layered the outline of geometrical heart on top of the same pink cardstock I used on the fishtail banner. I white embossed the sentiment on a piece of vellum and adhered it with some glossy accents over the heart. That's how I added some texture and dimension to this card.


To finish my card I added some of pretty pink sequins in various sizes. I really hope you like today's card and inspiration. I will see you next week. Thank you so much for stopping by today. I hope you all have an amazing day!
4

Have a Great Birthday!


Hello and Happy Tuesday!  It's Amy here with a card that was inspired by the latest Little Tangles challenge:


I brought in the chevron and the raspberry color into my card design.  Now that I'm thinking of it, I'm surprised that there isn't a smidge of green!  Love the Say Yes to Donuts stamps + coordinating dies!


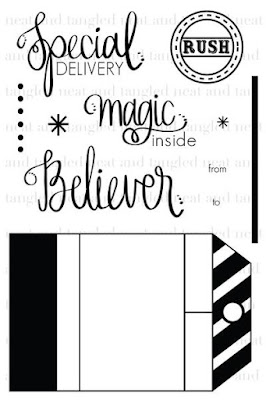
The tag is from a much earlier release.  The set is called, Santa's Tags..it's filled with fun images and LOVE the sentiments!

say yes to donuts

say yes to donuts dies


santa's tags

The Little Tangles Challenge is open until Thursday, July 28th.  I can't wait to see how you're inspired!


11

Neat & Tangled / We R Memory Keepers Day 3

Hey everyone!  Are you enjoying our special Neat & Tangled and We R Memory Keepers DIY Party week?  Today Elena and Miriam are here to share:

Hi there! Elena here, for another day of WRMK inspiration! I was lucky enough to work with the WRMK Party Fringe and Score Board - it is perfect for making those trendy tassle party garlands that are everywhere on Pinterest.

I decided to show you 2 ways you could use the Fringe board to make cards. My first card features my favorite donut girl with some party fringe:


I stamped, colored and die-cut the girl from Say Yes to Donuts, and stamped a sentiment from the set to frame the donut top. It's so easy to bend and manipulate sentiments to get a whole new look!

To ground the donut girl image, I folded a few sheets of blue tissue paper so that I had 3 tiers. Then, with one quick pass of the blade, I had the entire fringe piece, ready to glue onto the card front.


In order to hide the top part of the fringe (which I had stapled together since I am a lazy crafter!) I cut an extra white panel the same width of the card front and tied some twine around it.

My second card uses the Fringe Board in an even easier way:


I used the girl from Better Together, and created a little square shaker behind her. With a quick pass of the fringe blade, I had strips of pink tissue paper that I cut into little squares with a set of paper snips.

Next up is Miriam:


I was thrilled to receive one of the Alphabet Boards as well as some of the special 3x5 paper packs designed to work with the board.  This board is fast becoming a family favorite!  The girls have been asking for letters to use in their projects around the house, and I know it's going to get a lot of use for school projects too.

I used the board to punch out a B for a Boy/Baby card.  Then I added some images from Itty Bitty Welcoming Committee.  Super sweet and that big B packs a big punch.  


I'm quite sure that the Alphabet Board and I have some birthday cards in our future, especially since the board also cuts numbers!  

I've got a bonus Alphabet Board project on my blog today, so stop by to take a look.  Here's a little sneak peek:


Thanks for stopping by, come back tomorrow for some more inspiration!
14

Stronger Together


Hi, everyone! Today's card combines all three of Elena's sets from the May 2016 Release. I really love how easy it is to mix and match these sets! I used the strongman and little accent marks from Big Top Birthday, extra faces from Say Yes To Donuts, and a sentiment from Big Bold Brew.


Since the original strongman's head is slightly bigger than the kids' heads, I had to leave the top white edge in place to cover the existing stamp. If I were to re-create this, I would mask off the strongman's head so I would have less of the original stamp to cover up. I used a Copic multi-liner to draw in where the arms would be to make it seamless, a trick I learned from Elena herself. ;)


Complete supply links are on my blog.  Thanks so much for stopping by!

Sources:
4
Back to Top