Showing posts with label Nina-Marie Trapani. Show all posts

Design Team Reunion: Nina-Marie Trapani

Hello everyone! Nina-Marie here! I am so excited to be guesting today for Neat & Tangled’s 5th Birthday celebration! I cannot believe it’s been five years already since Danielle started one of my favorite stamp companies.

For their birthday, Neat & Tangled released a bunch of awesome new products, which I am using on my cards today. I wanted to use my Distress Inks to make a layered background behind a full-card shaker. Full-card shakers are a really fun card style; have you ever tried it?


The Distress Inks were fun to pair with the Balloons Duo stencil in making my background. I used Picked Raspberry, Spiced Marmalade and Mustard Seed for the colors. To make the background, I started by ink smooshing a layer of the colors onto watercolor paper. Then I took the same three colors and watercolored in the balloons of the stencil. Because the Distress Inks are translucent, you get a really unique blend of colors.

For my sentiment, I used the new Hooray stamp set. I wanted to make the “hooray” word stand out from the colorful background, so I triple heat embossed the sentiment for a cool, dimensional effect! It’s hard to capture on camera, but in real life the difference is noticeable.

Inside the shaker is filled with the Like Magic mix of of sequins, which are SO awesome. These are a unique sequin because they pick up the colors they are paired with. I love how gorgeous they look!

I hope you will check out the video below to see how this card came together! Thank you SO MUCH to Danielle from Neat & Tangled for letting me come back and guest for your 5th Birthday Celebration!! CONGRATS on this HUGE milestone!!!
And thank YOU for stopping by and visiting with me today! Enjoy your Tuesday!
9

Painting Watercolor Backgrounds with Nina-Marie


Hi Friends!  We're welcoming our April guest Nina-Marie Trapani back to the blog today.  This is her last post for the month and we're sad to see her go!  We've so enjoyed having her back visiting on the blog and we know you have too!

Happy Friday everyone! Today I am excited to share another video featuring Gansai Tambi watercolors and Neat & Tangled products! Last week, I shared a video featuring these same products in a no-line coloring technique. This week – since the Gansai Tambi paints are a newer watercolor palette for me – I wanted to explore them a bit further and see how they did in creating backgrounds.


Watercolor backgrounds are something I greatly enjoy creating. The abstract feel of the watercolors, combined with how they layer and blend simply appeal to me. They are relaxing to make and allow me to have some “playtime” without having to worry about staying inside of lines or trying not to let colors mix. Backgrounds for the most part allow you to be free.

The Gansai Tambi watercolors worked beautifully for creating vibrant, layered backgrounds. I used all blues for these backgrounds, but you could definitely work with other colors. When I was working on painting these, I was in the mood for using blue tones; they make me think of the ocean.


In some of the backgrounds, I did use a bit of white metallic, which is included in the 36 set of Gansai Tambi watercolors. If you don’t have the Gansai Tambi paints – or do not have the 36 set – and would like to incorporate a metallic like this into your artwork, I recommend the Gansai Tambi Starry Colors set. This set of metallic watercolors are the same consistency and feel of the metallics included in the Gansai Tambi 36 set and include a few extra golds too!

I ended up creating a total of five backgrounds – which I then turned into cards – with the help of the Neat & Tangled Succulent Journaling Card die. This die coordinates with the beautiful Succulent Journaling Card stamp set. I did not use the stamps from the set today however; just the die.


The die is recessed into a coordinating blue cardstock frame. For a sentiment, I stamped the word “hello” in blue ink and heat embossed it with clear powder. To embellish the card, I used a few Sparkling Clear mix and 3mm sequins from Pretty Pink Posh.

These cards all look different and unique, which is the look I was going for. When I painted the backgrounds, I made sure to put the colors down differently on each watercolor paper panel. By varying up the paintings, I was able to make a set of cards that match, but each have their own character.


I hope today’s post has inspired you and gave you some ideas for working with watercolor backgrounds behind a die cut such as the Succulent Journaling Card, to create a pretty card set.


And a BIG, BIG thank you to my dear friends Danielle and Miriam from Neat & Tangled who allowed me to come guest with them this month; I had so much fun!
2

Flower Medallion Builder with Nina-Marie


Happy Friday!  We're welcoming our April guest Nina-Marie back to the blog today.  Today she's showing us how to watercolor with solid images.  Here's Nina-Marie

Happy Friday everyone! I am excited to be bringing you a new watercolor video for you today which features a technique I am calling no-line layered watercolor.

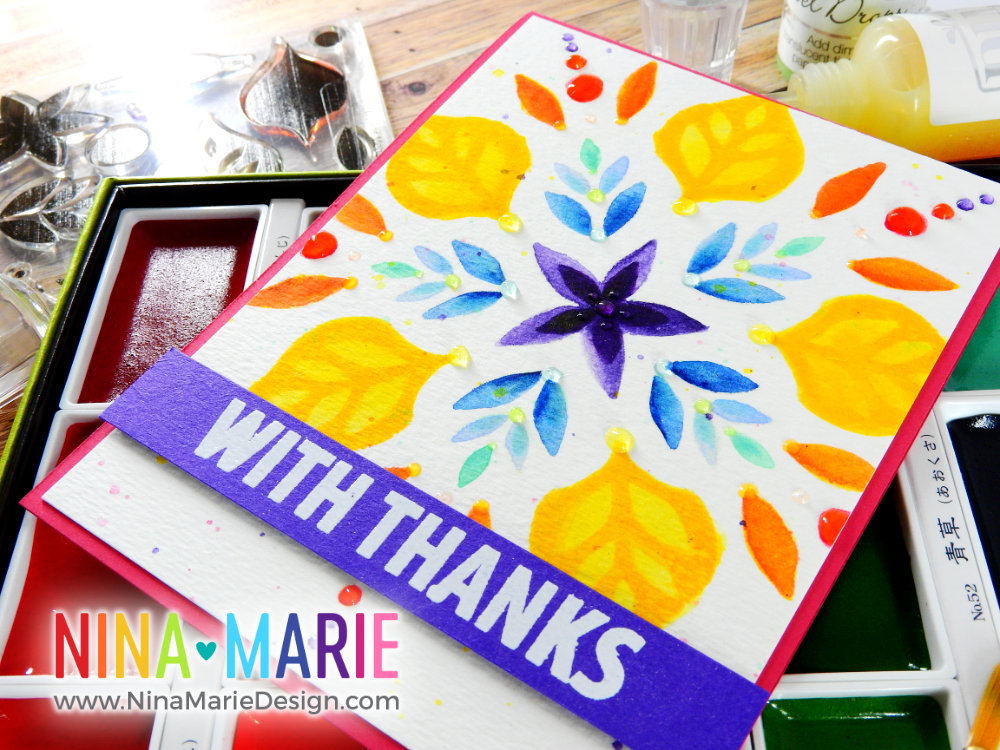
I wanted to use Neat & Tangled’s new Flower Medallion Builder stamp set for this card and I also wanted to do some watercoloring. But… the images in this set are solid, not outlines. Did that stop me from watercoloring? Nope; let me tell you what I did to get around that.

I love that you can build your own custom medallion designs with this set; very unique and a lot of fun! I’ve seen tons of examples from other artists that used different colors of ink to make their own designs. The result is definitely striking. However, like I said before, I wanted to watercolor. And by taking a very light ink, I was able to stamp the images into the design I wanted and then color over top of that ink to create the watercolor look. The ink I used for stamping was Simon Says Stamp’s Barely Beige ink.

This technique is very easy; especially with bold, clean lined shapes, such as these stamps in the Flower Medallion Builder set.

For watercoloring the images in, you could use any watercolor medium you prefer. In this card, I used the Gansai Tambi watercolor palette (36 colors). This was my first time using it and so far have been happy with the results it gives.


One thing to note, as with many pan watercolors, is that you need to get the colors working in the palette with quite a bit of water. Some palettes and pans need more water than others. With the Gansai Tambi set, I found by misting the entire palette with a bit of water and allowing that to seep in, that it got the colors softened a little for me while I worked on other things.

Then, when I was ready to actually color, I dropped a little puddle of water – about the size of a penny – into the pans I wanted to use. If the colors are not saturated enough with water, they have a chalkiness to them. I prefer them to be smoother and creamier, so I am generous with the amount of water I use.


To embellish my watercolored medallions, I used Nuvo Jewel Drops in all the colors except for the gray. Because I had a rainbow of colors in my medallion, I wanted to make sure that they were embellished with the same colors in the Jewel Drops.

I am a big fan of the jewel drops because they create such a gorgeous, translucent dot of color. They almost have a “magical” feel! Check out the great dimension you get once they dry…


I hope you enjoy today’s video and see how much fun it can be to create a no-line watercolor effect with solid stamped images!


Thanks for spending some time with me… I’ll be back again very soon with a new tutorial for you!
1

April Guest Designer - Nina Marie Trapani

Hey everyone!  This month's guest designer is no stranger to Neat & Tangled. Nina-Marie was part of our Design Team last year and we're thrilled to have her back visiting with us this month.


Here's a little more about Nina-Marie:

I am a fun, quirky girl in my mid-twenties. I grew up my whole life by the ocean, along the coast of the Mid Atlantic and New England. I have been making cards since 2007, perfecting my skills and techniques every day. Whenever I’m asked to define my style, I simply say “eclectic”. I do not follow a set design style; rather, I simply design whatever my mind feels like creating at that time. My favorite types of cards to make though are critter cards… I cannot resist the cuteness! :)

You're going to love Nina-Marie's cards today, and she also created a video to share.  Take a look:


Hello friends! Background dies are becoming fairly popular of late, and I wanted to share a technique that you can do with certain background dies to create inked backgrounds!
Certain background dies are open in the areas between the cutting lines; other dies are solid-backed. Depending on the die, you can use this technique with background dies you already have. Or you can use the die I’ve used today, which is the Neat & Tangled PolygonCover Plate die.
With some Distress Inks, I was able to create ink blended backgrounds through the open areas of the die, which gave me the same effect as if I had used a true stencil! The result looks awesome and is a great example of how you can stretch the use of your supplies even further with a little out-of-the-box thinking!
I did not have any trouble using the die as a stencil and the die did not stain with the use of the Distress Ink. I cleaned up the die by using a damp baby wipe and all the ink was easily removed. I have not tried this technique with all inks, so keep in mind that using a different ink could lead to potential staining (particularly alcohol-based inks). However, most water-based dye inks should clean up just fine.


I hope you will be checking out the video below to see how these cards came together! I will be back again next week with another guest video for Neat & Tangled, so stay tuned for that!
1

A Fond Farewell

Hi friends!  We hope that you had a wonderful Christmas.  It's hard to believe, but in less than a week, it will be 2017!  We have many exciting things planned for the new year, but sadly we are saying goodbye to some very dear members of our team as well - Amy Tsuruta, Nina-Marie Trapani, and Taheerah Atchia.  Today we want to send them off in style.

Amy has been with Neat & Tangled for quite some time, she's been a great advocate and wonderful teammate.  Here are some of our favorite Amy projects from over the years:


You can keep up with Amy here:

Next is Nina-Marie.  She's a wonderful teacher, and we've enjoyed all the videos she has shared with us.  Here are some of her favorite projects from her time on the team:


You will want to be sure to continue to follow Nina here:

And finally, Taheerah, another long term N&T member whose clever, out-of-the-box concoctions have delighted us over the years.  Here are some of our favorites:


We are so thankful to have had these ladies with us, and we continue to be huge fans of theirs!
9

His & Her Holiday Cards with Nina-Marie


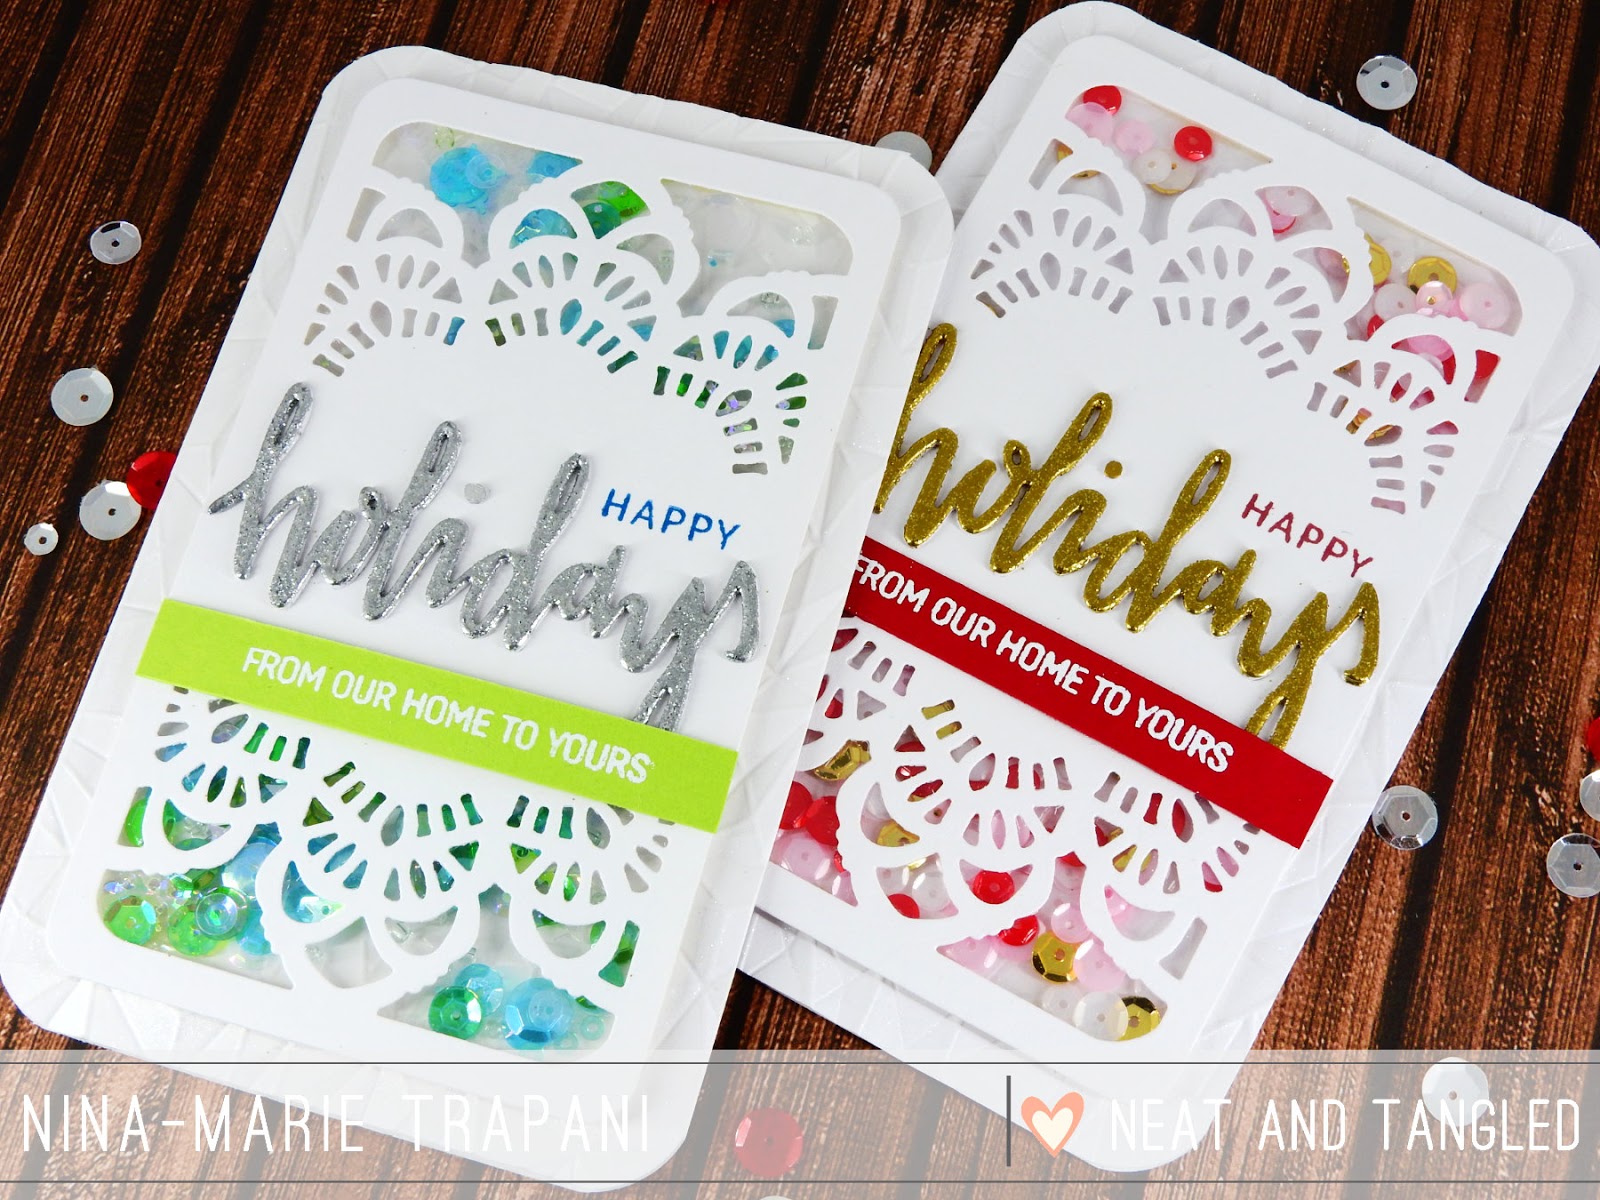
Hello crafty friends, it is Nina-Marie here with you today, sharing a set of cards that are perfect for that special him or her on your Christmas list this year!

Most card designs can be adapted to fit either a feminine or masculine feel, and this set is a great example of how simple that can be.

I love making shaker cards, and our Doily Tag die is a perfect window to put in front of an assortment of pretty sequins, don't you think? I started off by die cutting the tag from white cardstock and applied a piece of acetate behind it to be my window. I then cut small strips of foam tape to place around the outside edges of the doily tag die; this creates the shaker well for all the sequins I place inside.

The sequins I used for the shaker are from the Phosphorescence and Caribbean Dream mixes from Lucy's Cards, and also the Full of Love mix and Gold sequins from Neat & Tangled.

I popped the shaker up off of a white card base that I embossed with a faceted We R Memory Keepers
embossing folder; the texture on the white card adds the right amount of detail without being distracting.


On both cards I die cut the word "holidays" from white cardstock four times and adhered them together to be more dimensional. For some color and sparkle, I heat embossed them with silver and gold embossing powders from Tonic Studio's Nuvo product line. The holidays die cut and the coordinating sentiments are from Neat & Tangled's Happy Holidays stamp and die set.

To fit the two different genders, I used a red and pink color scheme for the feminine card and green and blue for the masculine version.


Finally, I used some Wink of Stella clear glitter and added it over top of the white card base... the extra shimmer is an optional detail but I think it really adds that perfect finish to the card.


I hope this has inspired you to see how easy it is to switch colors around on a card to make it fit for either a guy or a girl! Thanks so much for spending some time with me today and I will see you again very soon!

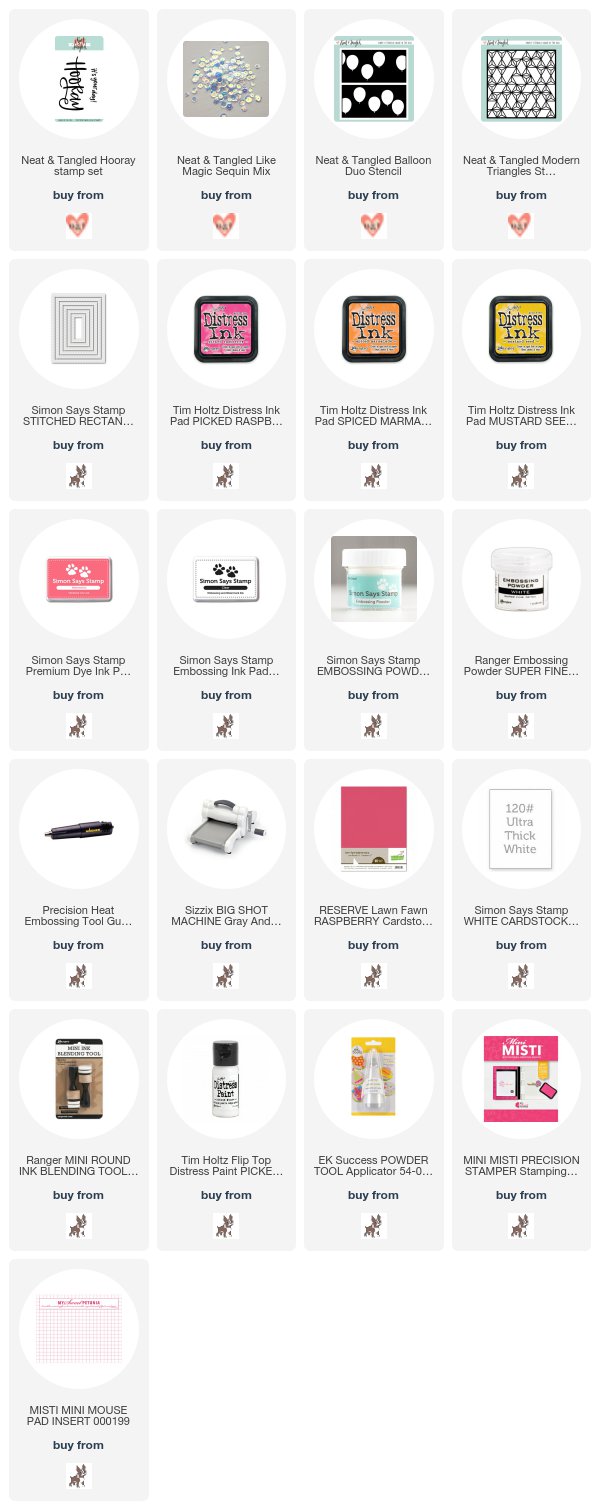
SUPPLIES


10
Back to Top