Hi friends! Can you believe it's already December? We're kicking off our last Throwdown of the year, and it's aimed at helping you prepare for the holidays.
This month we're asking you to create a gift wrap ensemble. There is an extra special prize involved (you'll have to read to the end to get to that), and we have a very special guest to get you inspired as well!
Happy December! I'm Rebecca Luminarias and I'm thrilled to be a guest for the Neat & Tangled Challenge this month! It's all about gift wrapping, which is my most favorite kind of paper craft!

I have some easy and fun projects for you today, beginning with stenciled gift bags. I used the Fa La La stencil from November's release as the main ingredient in almost all of my projects. I was going to use it in conjunction with plain white wrapping paper, but then I decided to stencil muslin bags instead and I love the results!

If you want to do it, too, you'll need a few things to get you started:
- Fa La La Simply Stencil (or any Neat & Tangled stencil!)
- Muslin bag (The main size I used was 4" x 6" but any size works.)
- Ink colors of your choice
- Blending tools
- Washi or painter's tape
*I'm using muslin bags, but this tutorial is good for any medium, from paper to fabric.
To begin, I placed my bag on a scrap piece of paper to protect my work surface. I used thick washi tape (about 2" wide) to tape the stencil in place over the bag. I wanted to vary the colors of the falalas so I used thinner tape to cover certain sections of the text. When I'm done applying the first layer of ink, I'll go back and apply a different color to the taped off sections.

With an ink blending tool, I filled in the stencils with pink ink. The bag is thicker than plain paper or cardstock so it moves around easier. You'll want to be careful of this and use your free hand to firmly hold it in place.

I lift the stencil up every so often to be sure it looks okay. Once the first color is finished, take a look for any missed sections (unintentional, of course!) and add a bit more color.

Before moving onto the second color application, you'll want to wipe the pink ink off of the stencil. I didn't want to move my bag so I folded a paper towel into quarters and placed it under the stencil to protect the bag. I wiped it clean with a baby wipe, and then dried it with another paper towel.

To apply the second coat of ink, I did it section by section, instead of covering the entire stencil with tape all at once. I used green ink as an accent to the pink. It didn't take too long at all to do it this way.


Once it was done, I removed the tape and stencil, and admired my colorful FaLaLa-lovely gift bag!

The best thing is that there are all kinds of variations you can do with the stencil--do the entire bag in one color, apply a different color to one whole row, alternate the rows with colors, or use an entire spectrum of hues for a rainbow of prettiness! For Christmas, I stayed with red, green, and pink, but I encourage you to experiment and have fun!

I used dye inks in bolder, more saturated tones for the bags because paler colors don't show up as well. You might try acrylic paints, as well.

Happy December! I'm Rebecca Luminarias and I'm thrilled to be a guest for the Neat & Tangled Challenge this month! It's all about gift wrapping, which is my most favorite kind of paper craft!


If you want to do it, too, you'll need a few things to get you started:
- Fa La La Simply Stencil (or any Neat & Tangled stencil!)
- Muslin bag (The main size I used was 4" x 6" but any size works.)
- Ink colors of your choice
- Blending tools
- Washi or painter's tape
*I'm using muslin bags, but this tutorial is good for any medium, from paper to fabric.
To begin, I placed my bag on a scrap piece of paper to protect my work surface. I used thick washi tape (about 2" wide) to tape the stencil in place over the bag. I wanted to vary the colors of the falalas so I used thinner tape to cover certain sections of the text. When I'm done applying the first layer of ink, I'll go back and apply a different color to the taped off sections.

With an ink blending tool, I filled in the stencils with pink ink. The bag is thicker than plain paper or cardstock so it moves around easier. You'll want to be careful of this and use your free hand to firmly hold it in place.

I lift the stencil up every so often to be sure it looks okay. Once the first color is finished, take a look for any missed sections (unintentional, of course!) and add a bit more color.

Before moving onto the second color application, you'll want to wipe the pink ink off of the stencil. I didn't want to move my bag so I folded a paper towel into quarters and placed it under the stencil to protect the bag. I wiped it clean with a baby wipe, and then dried it with another paper towel.

To apply the second coat of ink, I did it section by section, instead of covering the entire stencil with tape all at once. I used green ink as an accent to the pink. It didn't take too long at all to do it this way.


Once it was done, I removed the tape and stencil, and admired my colorful FaLaLa-lovely gift bag!

The best thing is that there are all kinds of variations you can do with the stencil--do the entire bag in one color, apply a different color to one whole row, alternate the rows with colors, or use an entire spectrum of hues for a rainbow of prettiness! For Christmas, I stayed with red, green, and pink, but I encourage you to experiment and have fun!

I used dye inks in bolder, more saturated tones for the bags because paler colors don't show up as well. You might try acrylic paints, as well.

I dressed up the bags with some trims, and even added some yarn pom poms, choosing trims that feel warm and cozy. I also tied on a couple of skinny tags from the Classic Tag 2 die set and I stamped "From Me to You," found in the Wishing You Love set. I then added a gold glittery foam alpha to each bag, which acts as a monogram for my recipient.

These gift bags are so convenient for giving small trinkets, gift cards, baked treats, and candles (or certain stamp and die sets for crafty friends!). I use them all the time for giving gifts and I'm so excited to use them with the Fa La La stencil this holiday season. Every year I make a set of cards and gift tags for my husband's side of the family and this year, they'll be housed in these.

Another fun item you can put inside of these bags is a handmade card. I made one with the Classic Tag 2 die and the Wishing You Love stamp set.

I liked the idea of creating a folded card from this large tag so I taped the die to a folded card with the top of the die set just above the fold in order to preserve it.

After running it through my die cutting machine, I had a folded card in the shape of a tag.

I then heat embossed the large sentiment on it with gold embossing powder--large messages like that are so nice for mass producing cards at Christmastime!

I embossed and die cut some of the small stars that come with the stamp set, too, arranging them in the white space around the sentiment. They are adhered with a 3-D foam dot to lift them off of the card.

The card needed just a bit more at the top so I used one of the accompanying dies from the Classic Tag 2 set to cut the mint gingham top piece. After adhering that to the card, I ran bits of lace, seam binding, and fuzzy yarn through the hole in the tag and tied them in place with some gold thread.

The card fits perfectly inside the 4" x 6" gift bag and the bag is a nice way to deliver handmade greetings like the card. If you're giving money or gift cards, it's also a great way to keep it safe and it's a little more personal and meaningful when it's being given in this manner.

Speaking of gift cards, I have one more thing to show you before I let you go to get creative. The best part is, you can use all 3 of these ideas together to create a 3-piece gift ensemble!

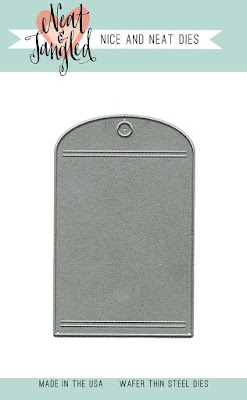
Gift cards are practical, easy, and often much appreciated presents during the hectic holidays. I always love to come up with fun ways to hold them, and I used the Fa La La stencil and the Classic Tag 1 to help me out with that part. I got the tag die with the intention of making an actual tag with it, but when I took it out of the packaging, it suddenly screamed 'gift card holder' at me and I had to oblige!

I cut out two tags and used the stencil to decorate one of them. I only wanted to cover a certain portion with the stencil so I taped off the outer edges to avoid applying color there.

Next, I stitched the 2 tags together, back to back, using a gift card as a guide--it wouldn't be very good if I'd gotten all done and the card didn't actually fit, right? I'm a hand-stitcher so I paper-pierced and sewed that way, but it'll be a lot quicker if you machine-stitch the tags together.


When I was finished sewing, I slipped the gift card inside and added my requisite trims, which were a pom pom, red seam binding, and pink fuzzy yarn. I added a glitter 'A' as the final step and I've got another gift in the books!


I hope you are challenged to create some fun (and easy!) gift wrap this year. It's my favorite time of year for wrapping presents and adding handmade touches to all of them. The Fa La La stenciled gift bags will become a permanent fixture in my holiday wrapping-repertoire, how about yours?
Thanks so much to Rebecca for her fantastic sample ensemble! Now for the challenge details:
1) Create a gift wrap ensemble that includes at least THREE different elements, and submit it through the Inlinkz tool below. When linking, please link to the specific blog post, not your entire blog.
2) Link back to the challenge blog and display the challenge graphic in your post.
3) Neat & Tangled products must be the focal point of your project. You can use products from other companies, but Neat & Tangled products should be the star.
4) You may enter as many times as you would like.
5) You have until Thursday, December 27th at 11:59 EST to enter
6) Winner will not be chosen at random, but rather will be judged based on creativity and execution.

These gift bags are so convenient for giving small trinkets, gift cards, baked treats, and candles (or certain stamp and die sets for crafty friends!). I use them all the time for giving gifts and I'm so excited to use them with the Fa La La stencil this holiday season. Every year I make a set of cards and gift tags for my husband's side of the family and this year, they'll be housed in these.

Another fun item you can put inside of these bags is a handmade card. I made one with the Classic Tag 2 die and the Wishing You Love stamp set.

I liked the idea of creating a folded card from this large tag so I taped the die to a folded card with the top of the die set just above the fold in order to preserve it.

After running it through my die cutting machine, I had a folded card in the shape of a tag.

I then heat embossed the large sentiment on it with gold embossing powder--large messages like that are so nice for mass producing cards at Christmastime!

I embossed and die cut some of the small stars that come with the stamp set, too, arranging them in the white space around the sentiment. They are adhered with a 3-D foam dot to lift them off of the card.

The card needed just a bit more at the top so I used one of the accompanying dies from the Classic Tag 2 set to cut the mint gingham top piece. After adhering that to the card, I ran bits of lace, seam binding, and fuzzy yarn through the hole in the tag and tied them in place with some gold thread.

The card fits perfectly inside the 4" x 6" gift bag and the bag is a nice way to deliver handmade greetings like the card. If you're giving money or gift cards, it's also a great way to keep it safe and it's a little more personal and meaningful when it's being given in this manner.

Speaking of gift cards, I have one more thing to show you before I let you go to get creative. The best part is, you can use all 3 of these ideas together to create a 3-piece gift ensemble!


I cut out two tags and used the stencil to decorate one of them. I only wanted to cover a certain portion with the stencil so I taped off the outer edges to avoid applying color there.


Thanks so much to Rebecca for her fantastic sample ensemble! Now for the challenge details:
1) Create a gift wrap ensemble that includes at least THREE different elements, and submit it through the Inlinkz tool below. When linking, please link to the specific blog post, not your entire blog.
2) Link back to the challenge blog and display the challenge graphic in your post.
3) Neat & Tangled products must be the focal point of your project. You can use products from other companies, but Neat & Tangled products should be the star.
4) You may enter as many times as you would like.
5) You have until Thursday, December 27th at 11:59 EST to enter
6) Winner will not be chosen at random, but rather will be judged based on creativity and execution.
And what is the prize? The winner will receive the entire January release as well as a $25 Amazon gift card. We cannot wait to see what you guys create!