Showing posts with label halloween scene. Show all posts

Happy Halloween!

 
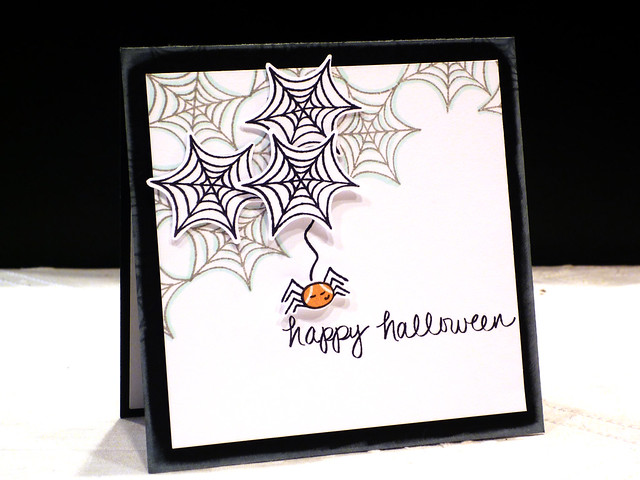
Hi everyone!  Since Halloween is just over a week away, I thought I'd share another card I made this season.  This is a spooky "cute" Halloween card using stamps from Neat & Tangled
 
I enjoy the polaroid look because it narrows down the creative space you have when creating a scene.  Here I simply stamped my scene onto white cardstock and layered it on a black panel.  Layering your stamped panel onto a bright colored background really makes the panel standout. 
 
HappyHalloween 10.23.13  
 
Graveyard Shift
Graveyard Shift
 
Halloween Scene
Halloween Scene
 
 
{Happy Halloween}
Stamps:  Halloween Scene, Graveyard Shift (Neat & Tangled)
Paper:  White, True Black (PTI)
Pattern Paper:  Halloween Parade (Doodlebug Design)
Ink: Versamark, Onyx Black (Versafine)
Misc:  Copic, Foam Adhesive, White Embossing Powder

3

Holiday Cards Using Non-Holiday Stamps

Hello everyone! Nina here with two quick and easy holiday cards using non-holiday stamps from Neat and Tangled.

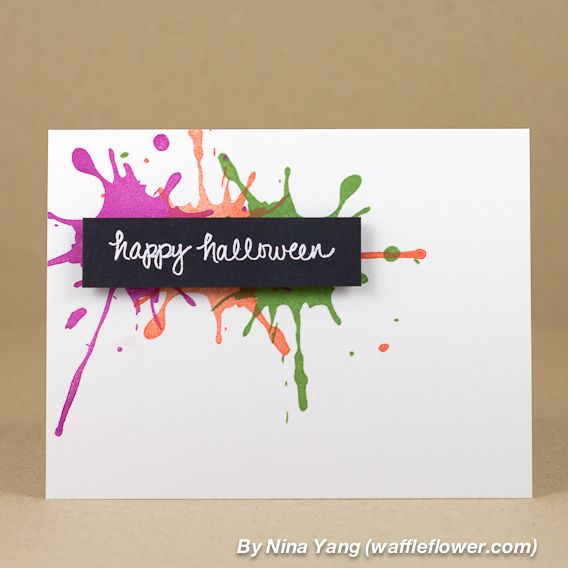
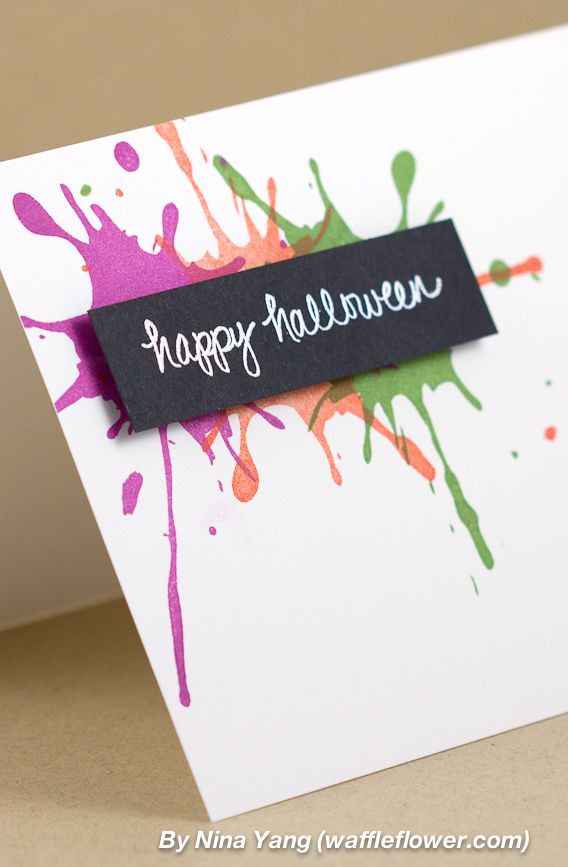
First one up, a Halloween card using Ink Splash.


I used halloween colors to quickly create the background. I heat embossed the sentiment from Halloween Scene on black cardstock, cut to size and adhered with foam adhesive.


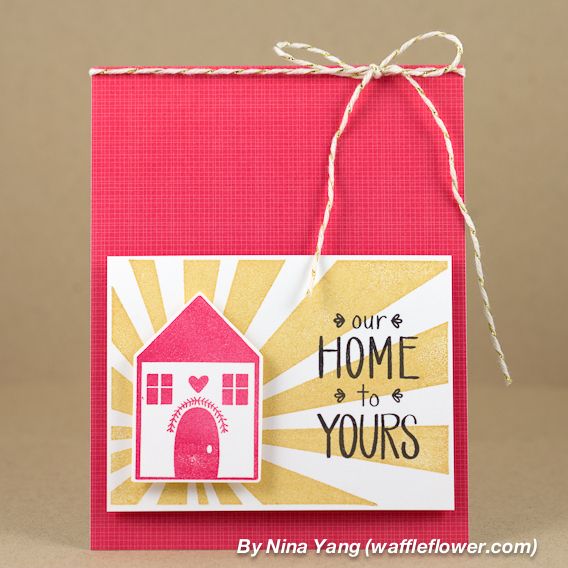
Second,  a Christmas card using Sunburst.


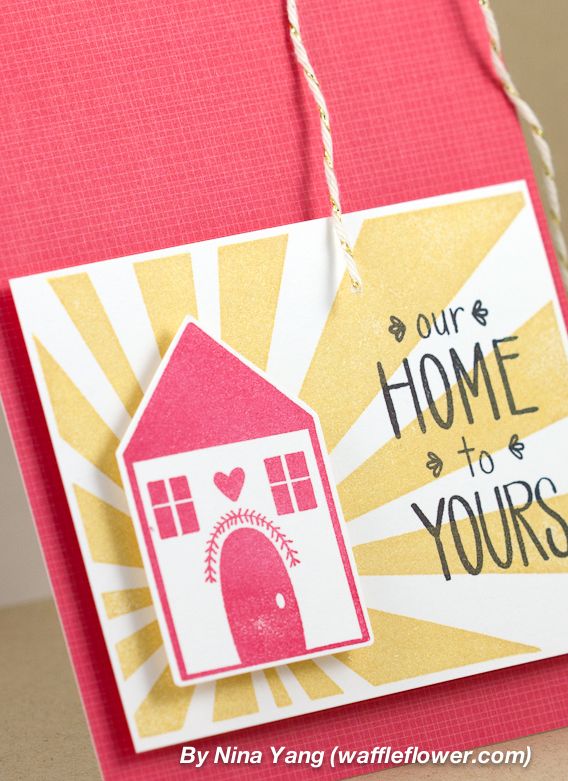
This is a great set to create a scene with a warm feeling. It also helps emphasize the focal. Home and sentiment stamps from Simple Christmas.


I collect basic, background building pattern stamps and think these two from Neat and Tangled are must-haves. I hope that you are inspired to use more of your pattern stamps on your holiday cards this year? 

Thank you for stopping by! Happy Crafting!

7

Halloween cards with Katie

Hello Neat and Tangled lovelies!

Katie Gehring here to share a couple of Halloween cards I made with the super cute Graveyard Shift and Halloween Scene stamp sets.

First up, I tried my hand at the chalkboard technique using Halloween Scene.

dsc_0569

I embossed the images with white embossing powder and added some sketch marks with a white pencil.  A few smudges of white ink enhance that chalkboard look. 

My second card features Graveyard Shift.  

dsc_0565

I covered a black card base with patterned paper.  Next, I stamped the super cutie skeleton on white cardstock and trimmed it with scallops.  I die cut a bracket edge from orange patterned paper wrapped it with twine and adhered it to the card.  I stamped the sentiment on a die cut banner and affixed it to the card. A candy corn button was added as a finishing touch. 

Well, that's all for me today!  Have a great weekend!

Katie


5

Curtain Call Challenge Sponsor!

Hello, hello! Happy first day of October! I am here to share a card and let you know that Neat and Tangled is sponsoring the current Curtain Call Challenge, and it's a fun one! My kids love Halloween, so this helped me get a jump on making some spooky cards for them :)


Such a great inspiration photo!  Here was my spooky little scene:

Haunted House
I took the house, moon and cloud from Halloween Scene and did a little coloring. Next I die cut a circle, added some faux stitching, and popped everything up on foam dots on my card base. Super simple, but the spooky house stamp is my son's favorite so I wanted to to really pop!

Be sure to play along at Curtain Call for a chance to win some Neat and Tangled!

7

Happy Halloween!

 
Hi sweet Neat & Tangled fans!  Amy K. here with a start to my Halloween cards this year!
 
I found some time to play with an older Neat & Tangled set called Halloween Scene.  I need several Halloween cards this year for the kiddos in my family......so, check one more to-do off my list!
 
I pulled out some vellum to stamp my ghosts on to and trimmed them out.  The "Happy Halloween" sentiment is one stamp so 'Happy'  was selectively inked onto one part of a die cut banner and then again with the word 'Halloween' on another part of a banner.
 
Happy Halloween  
 
 
7

Little Bear's Christmas

Hello everyone! This is Pamela here with a card featuring Little Bear with a combination of various stamp sets.

I took Little Bear one step further to give it a little Santa Hat from Hey Cookie stamp set by using a simple masking technique. I made a Christmas tree for Little Bear with a star from Halloween Scene.

N&T: Little Bear's Christmas

I cut out two slopes from vellum and stitched it onto some patterned paper. By leaving the top of the slopes open, this gives me a little pocket where I can slip in a gift card for the recipient. How perfect is it to be able to integrate the gift card onto the card!

N&T: Little Bear's Christmas - Close Up

This will be entered into Moxie Fab World's Paper Crafting Tips & Tricks: Stitching.

-- pamela
6

Halloween Hoop-Dee-Do!

Good morning friends!

Katie Gehring here to share a little home decor project I created with Neat & Tangled's Halloween Scene.

dsc_0162

I love using embroidery hoops with my paper projects for so many reasons.  First of all, hoops are cheap and plentiful; you can pick them up at any craft store for under a dollar for the smaller sizes to a few dollars for the larger sizes.  Hoops also lend to greater flexibility in your designs because you can add dimension without worrying about your project fitting behind glass. I also think hoops add a certain charm to your projects, and it's just fun to play with circles!

dsc_0160

I started with a 4" hoop and cut my patterned paper to fit the hoop.  I then stamped and cut out the house, ghost and bat.  The haunted hill was a piece of green cardstock that I trimmed using my circle cutters and adhered to the patterned paper background.

I stamped the tree, then adhered all the other elements using foam tape on the bat and ghost for a little more dimension. I stamped "boo" on a tiny tag and tied it to the top of the hoop with a bit of twine.  A little orange ribbon finished off the hoop.

That's all for me today!  Thank you so much for stopping by!  If you are celebrating Halloween this weekend, I hope your celebrations are safe and fun!

Katie

Project supplies

  • Cardstock: Ripe Avacado and Rustic White- Papertrey Ink; Gray- Bazzill
  • Patterned Paper: Lily Bee Designs
  • Stamps: Halloween Scene
  • Ink: Versafine Black
  • Fibers: Orange Ribbon- SU!, Twine- May Arts
  • Tools: Tag die- Papertrey Ink; Circle Cutters- Creative Memories
  • Embroidery Hoop- Jo Ann's stores
8

Boo!

 Hi everyone!  Amy here again with more Halloween goodness!  I don't know about you but Halloween is one of my favorite holidays.  Something about the costumes, the haunted houses, the FUN.  Today I have a CAS card to share using Halloween Scene and Little Tangles.

CASology--Night
 

I've added a few elements "popped" off my card to add dimension to an otherwise CAS design.  I love how it turned out!   Who wouldn't think that bat is cute??  Anyway, thanks so much for joining me here today on the blog! 


{boo}
Stamps: Halloween Scene, Little Tangles (Neat & Tangled)
Paper: Smokey Shadow, SS White, Harvest Gold (PTI)
Ink: Fresh Snow (PTI), Charcoal Palette
Dies: Circles (Spellbinders)
Misc: Prisma Glitter, Foam Adhesive

9

A Halloween Hello!

Hi everyone! Amy Kolling here to share a card today with you using some of the Halloween stamps from Neat & Tangled! These are just too cute! I could create LOTS of Halloween goodness with these! Just sayin'! Here I've used Graveyard Shift and Halloween Scene.

Happy Haunting

The first thing I thought to do with this skeleton image was to make him wave. It was so easy to do! A little fussy cutting and giving him 2 right arms....was all it took!

Happy Haunting  

I've also used the fence image to add some popular arrows to show off that wonderful handwritten sentiment! I hope you've enjoyed this as I had so much fun making it!

{happy haunting}
Stamps: Graveyard Shift, Halloween Scene (Neat & Tangled)
Paper: Lemon Tart, SS White, True Black (PTI)
Ink: Versamark, True Black (PTI)
Designer Paper: Haunted Hallows (Teresa Collins)
Dies: Fabulous Frames (PTI)
Misc: Black Twine, Prisma Glitter, White Filigree Embossing Powder (PTI), Foam Adhesive
6

Halloween Journal Page

Hello there! It's Kasia here today! While waiting for stamps from October release to arrive I've been keeping myself busy playing with earlier sets. Today I'd like to show you a little art journal page made using Halloween Scene and Graveyard Shift!

wicked1

I made this page because I really wanted to make something with Halloween twist. I picked a photo from a costume party we went to few years ago and played with my usual layers of papers, old book pages and masking tape covered with some gesso and paints. Once my background was dry the fun with stamps started!

wicked4

I used these cute, little bats from Halloween Scene and scattered around stars from this same set- I love that they come in variety of sizes, it was so much fun to incorporate them in my background!


wicked3
Than I added a spider and some spiderweb's from Graveyard Shift and stamped few halloween sentiments on my page.

wicked2

Maybe it's hard to see on the photos, but bats and spiders in here are gently sparkling with glitter! To get this look I grabbed my glitter gel pen (the one which you can get for cheap from stationery store!) and a wet brush, I traced over the stamped image with pen and then smeared the color by brushing over it. I think it couldn't get simpler (or cheaper!).

So that's all for me today! Thank you for stopping by!

Kasia


8

Halloween Weekend Day 2!

Hello, hello!  Welcome back for 2 day of our mini-Halloween showcase!  We are spotlighting both the Halloween Scene and Graveyard Shift sets to help inspire you to get spooky :)

There is a giveaway so be sure to go HERE to comment to enter!

I am so excited to be sharing these amazing projects with you! I'll tell you, these girls really out did themselves the past 2 days!

20120921gs
By Kasia Tomaszewska
20122109halloween
By Kasia Tomaszewska
HalloweenLayout
By Jean Manis
Happy Halloween
By Amy Kolling
_DSC0008
By Suzanne Dahlberg
N&T - Graveyard Shift Release
By Pamela Ho
GraveyardShift
By Chari Moss
Halloween PL spread
By Linda Trace
Custom Halloween journalling card 1
By Linda Trace
journalling card 2
By Linda Trace
journalling card 3
By Linda Trace
journalling card 4
By Linda Trace
I hope you have enjoyed the past two days!  I can't wait to see what you all create for this fun time of year! Be sure to add your projects in our Flickr group and share on our Facebook page!

I'll be back tomorrow :)
7

Halloween Weekend Day 1 + Giveaway!

Don't forget! Today is the last day for FREE SHIPPING in the Neat and Tangled shop!
FALLFUNSALE
Hi friends here today for a spooky little celebration! Be sure to read all the way to the bottom for the giveaway details!

I had mentioned earlier this week how much I love Fall, and part of the reason is  Halloween! I don't know why but I have always thought it was just a fun thing to celebrate. I have a million memories  of getting dressed up, parties, haunted houses, hayrides and more!

With October fast approaching the girls thought it would be fun to show off some Halloween themed cards using Halloween Scene and the new Graveyard Shift set! They are all so fun!! I love all the different ways they used the skeleton! Hope this inspires you to make some spooky cards of your own :)
dsc_0155
By Katie Gehring

dsc_0158
By Katie Gehring


Graveyard Shift
By Jean Manis
mary-dawn-003
By Mary Dawn Quirindongo
graveyardshift1
By Jean Manis
Happy Haunting Card
By Nina Yang

mary-dawn-002
By Mary Dawn Quirindongo

To win both Halloween Scene AND Graveyard Shift:
1. Be a follower and leave a comment telling me your favorite Fall activity!
2. Follow us on FB (leave another comment!)
3. Spread the word (tweet, FB, blog, whichever! leave another comment)

You have until 11:59pm on Sunday, September 23 to enter!

Stop by tomorrow for some more frightening fun! :)

72

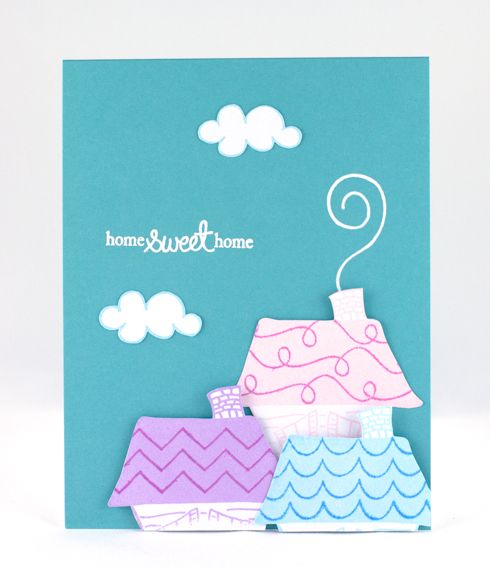
Home Sweet Home Card

Hello stampers, Nina here again!


Stamps:
houses, clouds - Halloween Scene
patterns on house - Little Tangles
sentiment - Sweet Home
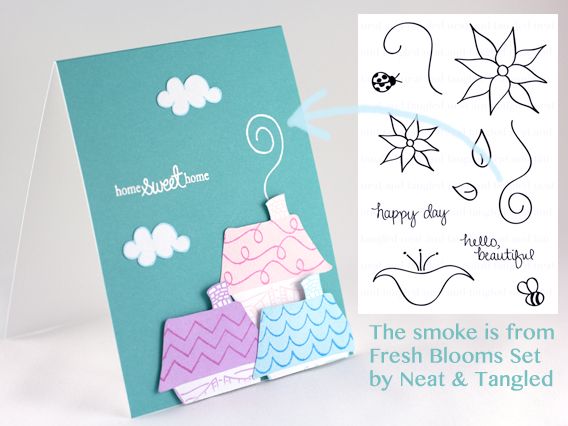
smoke - Fresh Blooms

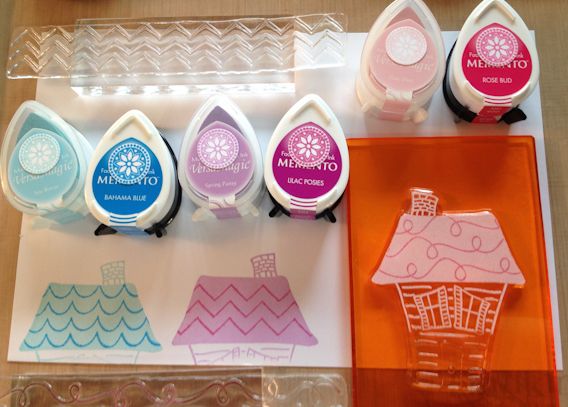
Stamp Kissing Technique
I prefer to use a light color pigment ink on the solid image and a darker dye ink on the detailed stamp for this technique.


The smoke is from Fresh Blooms set. Sentiment was heat embossed in white.


You can find all the cute stamps here!

Thank you for stopping by. Happy crafting!
15
Back to Top