Showing posts with label Star Cover Plate. Show all posts

You are Magical Star Background Card with Cheiron


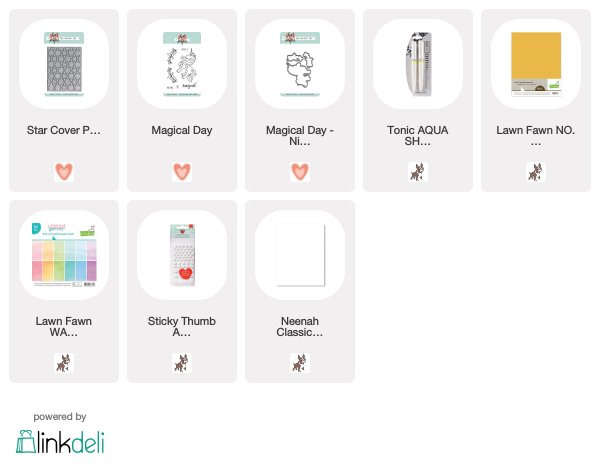
Hi there crafty friends! It's Cheiron here and today I have a fun and magical unicorn card for you using the Magical Day set and the Star Cover Plate. This is a super easy card to create.


I cut the star background out of white and yellow card stock. I layered a piece of blue watercolored patterned paper behind the white piece and popped up each of the yellow stars with foam tape. I colored all the stars with a Nuvo Aqua Shimmer Pen. The little bit of added dimension gives such a fun look and makes your card super special!


I stamped the sentiment onto a strip and then stamped and colored the unicorn and gave it a bit of sparkle with the Nuvo pen too and placed it on top on the sentiment strip. It's as easy as that, and now I'm ready to send a little magic off in the mail :)

SUPPLIES:


3

Merry & Bright Homespun Christmas Card


Hi friends!  Miriam here today to share a card using some older N&T holiday products. 

This card features the Star Cover Plate.  This design can be very modern, but can also take on a homespun, quilted feel.  Today I chose to go with the latter.  

I pulled out a very old 6x6 pad (Pink Paislee's Merry & Bright collection), and picked out a couple more neutral prints - one with small sprays of flowers/leaves and one with a sheet music background.  I also chose an almost solid red print, with some quilted looking stars on it, and cut the cover using each of these patterns.

Just like with quilting, you can get very different looks just based on which prints you choose to use in each part of your pattern.  Since I wanted a more neutral look, I used the red print in the center stars since that's the shape that gets used least.  

The pieces were inlaid into my 'webbing'.  This part is a little fiddly, but the results are so pretty it's worth it. 


I had inlaid all the pieces into the webbing from the print with the little sprays of flowers, but I thought the design wasn't standing out enough.  To remedy the situation, I cut the cover again from some white cardstock that is a bit thinner than my normal card base cardstock.  This was adhered over top of the inlaid design.  To really make sure it was adhered well, I ran the entire piece through my Big Shot between the cutting plates.  This is one of my go-to trips when creating inlaid cards as it helps to make sure everything is tightly adhered.  As you can see, you can't really tell that I added that extra layer of cardstock webbing.


For the sentiment, I used the Merry & Bright sentiment dies.  I love these.  When it comes to holiday cards, if I've got a really pretty background that I don't want to cover up too much of, this is what I reach for.

The sentiment was cut from red cardstock and adhered to the sentiment outline piece cut from white cardstock.  The entire piece was then popped up over my background.

Since there are plenty of pieces of patterned paper left after creating this card, you could definitely crank out two more...that is if your dog hadn't decided to take a stroll through your workspace (the floor) scattering pieces everywhere....

That's all for me today.  Thanks for stopping by!
5

Dream Big with Cheiron


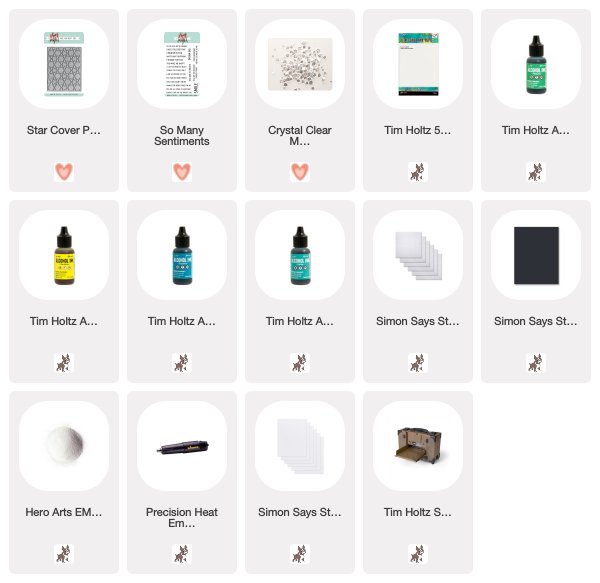
Hi there, it's Cheiron here with my monthly post. Today I have created a card for you with my favorite sentiment set, So Many Sentiments...this set has just about every sentiment I need for the cards I always send.  For me the easiest way to use these is to stamp them on black cardstock and emboss them in white and put them on a bright background. I used one of the alcohol ink backgrounds from my stash, and cut a Star Cover Plate die from white cardstock. Then I cut in again from glitter cardstock and added the glitter stars back into the empty spaces.


Once that was done, I added the sentiment on top. These cards would be great to make as a do it yourself set for a gift by boxing up a bunch of colorful backgrounds, cover plates and pre-stamped sentiments for the recipient to mix and match. Even if they are not a card maker, they could still create some super fun cards :)

SUPPLIES:
7

Amy Sheffer December Finale


Happy Friday!

Sadly, our Guest Designer Amy Sheffer is sharing her final projects with us today.  It's been such a pleasure to have here with us this  month, and I know you're going to love what she's prepared today.  Here's Amy with the details:

I'm excited to be back today for my last week as guest designer. A big thank you to Neat & Tangled for having me!


For my first project today, I've paired the sweet cats from Purrfect with the Big Hugs Nice and Neat die. One of my favorite parts in the card-amaking process is adding in all the extra details that make a card extra special. This card is pretty basic and simple, but I've still included a lot of my favorite details.


First, I did some ink blending on the sentiment for an ombre look, leaving the top white. Along the bottom of the letters, I added irregular, random white dots of paint for a whimsical look.


Next, the hearts have been painted with a clear Wink of Stella for some sparkle. One of my favorite ways to add subtle texture is with vellum. Here, I've added a strip of torn striped vellum to the lower border. I also love to add stitching. It's so subtle, but can really make a difference. I had fun coloring these two kitties -- especially the Siamese!


My next card is a quilted take on the Star Cover Plate. I cut five of these -- one in white card stock and the other four from coordinating patterned papers. 


Then I inlaid the various patterns in the star centers and the star points in a quilt fashion. To make the process go a little quicker, I used spray adhesive on a base panel, rather than trying to glue each individual piece. I can't wait to try this in different colors for different seasons and occasions! 


Once I was done with the background, I added a two-layer sentiment using the Merry & Bright dies. To help the sentiment stand out a little more, I added a narrow strip of vellum behind the sentiment. 


And last, I stamped a kraft envelope using the Please Deliver stamp set. I love how easy it is to transform your envelopes into something special with just a few impressions!

Once again, thank you Neat & Tangled for having me as your guest!
5

December Guest Designer - Amy Sheffer


Happy Friday everyone!  Today we get to introduce this month's guest designer, Amy Sheffer.  Amy has a beautiful layered style that's a somewhat CAS shabby chic.  She has a wonderful eye for detail and we know you are going to love her creations this month.  Here's Amy to share a little more about herself as well as her first project:

Hi all, I’m Amy Sheffer, and I’m super excited to be guest designing for Neat & Tangled! I live in Virginia with my husband and our three children, ages 16, 13, and 9. I’ve been dabbling in various arts and crafts since I was kid. A friend introduced me to scrapbooking nearly twenty years ago, and stamping and card making came along soon after. Over the years, I’ve enjoyed being part of the online card making community, as well as designing for some really awesome companies, stores, challenges, and publications. When I’m not stamping or busy being a mom, I also enjoy volunteering, photography, home decorating and DIY projects, and reading.

For my first project, I’m taking a little break from my holiday crafting to make a sparkly RAK for a friend. I just love the sentiments in Neat & Tangled's Awesome stamp set, and word dies are my jam, I tell ya!


For my background, I've stacked two white Star Cover Plate die-cuts and filled the star centers with a really sparkly silver glitter paper. 


The sentiment, die-cut from light aqua card stock using the corresponding Awesome die, is also stacked for more depth, as well as sponged along the bottom with teal ink for an ombre effect. I white embossed the rest of the sentiment onto a strip of dark gray paper and adhered both sentiment pieces to the Star Cover Plate. Underneath, I did some light shading in aqua ink for added interest.


Tip: When you'll be using only portions of a large die-cut, save paper by cutting down your card stock to fit just the part you'll need. Especially if you're working with specialty paper, such as the silver glitter paper I used for the star centers.


Thanks for joining me today, and I'll see you again next Friday!
6

November 2016 Release Day 3: Merry and Bright Ornament + Star Stencil and Cover Plate + Giveaway

Hello dear friends! It's that time again! Welcome to our November 2016 release week!
This month we have some truly amazing products for you - sequins, stamps, stencils and dies! All new products will be available on Friday, November 11th at 8am EST. Be sure to stop by here everyday this week for lots of fun, inspiration, and GIVEAWAYS!

In case you missed:

Today we have even more amazing products to share with you!

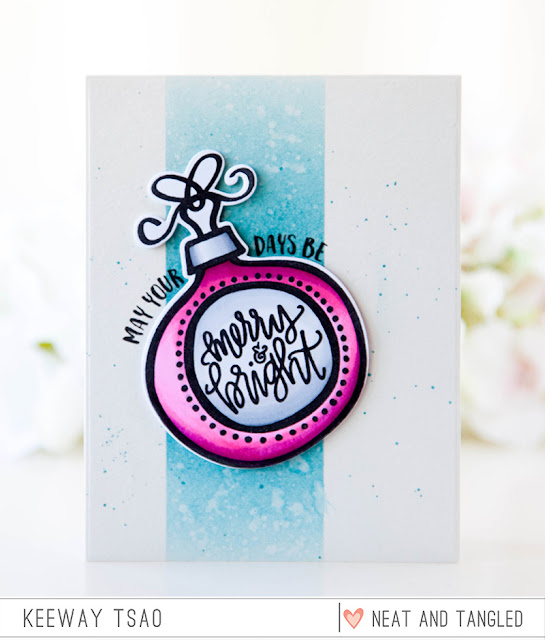
First up is a sweet 3x4 stamp set illustrated by Danielle Walls. Merry and Bright Ornament is the perfect size to use as the focal point for a card! With a fun hand draw ornament and  hand lettered sentiment it is a whimsical way to spread holiday cheer! 

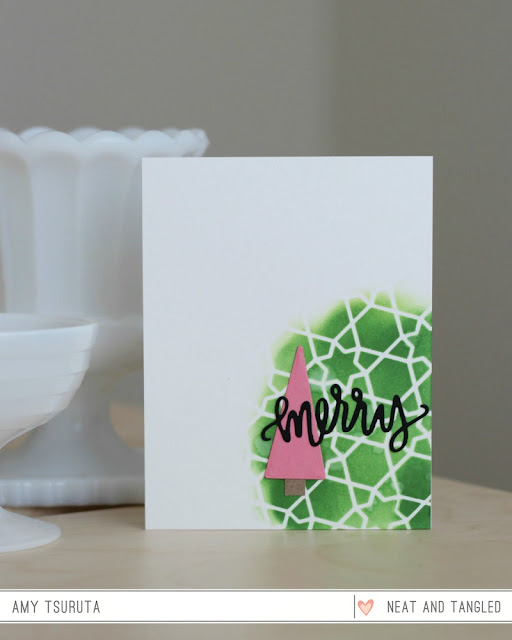
We also have a great new cover plate from Miriam Prantner. Star Cover Plate die is just shy of 4.25" x 5.5" making it the perfect size for your card fronts! With a fun geometric star pattern this die is incredibly versatile, great for the holidays and year round! The possibilities are endless when it comes to die cutting techniques with our cover plates! 
We've also taken that same fun pattern, and used it for our Star Stencil. This stencil measures 6x6 and is perfect for any paper crafting project! Use it to create backgrounds using your favorite medium - think ink, embossing paste, water colors! 
Now let's see these new goodies in action! Be sure to head to each design team members blogs for details by clicking on the photos, and for a chance to win a $25 gift certificate! One person will be chosen from among comments on the design team members blogs!


Talk about Merry and Bright! And now for a giveaway!


Would you like to win the new Merry and Bright Ornament stamp set and Star Cover Plate and Stencil? To enter:

1. Be a follower and leave a comment! 
2. Follow us on Facebook and share about release with your friends! (leave another comment)
3. Follow Neat and Tangled on Twitter and tweet about our release, use @neatandtangled! (leave another comment)
4. Follow Neat and Tangled on Instagram and repost about our release! Use #neatandtangledrelease (leave another comment)
SaveSaveSaveSaveSaveSaveSaveSaveSaveSaveSaveSave
105
Back to Top