Nesting Hexagons Cover Plate with Daria

Hi Dear friends!

Daria here. For today's post I was playing with Nesting Hexagons Cover plate from the latest January release. And of course, it was all about in-laid.  


I die cut several panels: from white, dark blue, turquoise and gold glitter cardstock (the last one only pancially). Then, the fun began. I spent an evening playing with different pieces, finding them a perfect place. With this type of geometric pattern, it is rather easy to made an in-lay technique, as many pieces are similar. I found inlaid to be a kind of relaxing and therapeutic:) 


I'be ended up with three fun and interesting backgrounds. The rest was to come up with sentiments and finishing touches.


I have decided to use three different types of sentiment with different placement.  

The first one is the cleanest and the simplest: just white stripes with stamped black sentiment (from You're Pretty stamp set). I think, it works good when you don't want to distract from the cool background created. 


For second background, I decided to use bright and big  sentiment to make a focal point. Contrast pink makes the job. Sentiment is from You're Pretty stamp set. It is one of my favorites from the last year. 

Finally, third background got die-cut sentiment from white cardstock. I stucked a few of Love word to make more dimensional. 


So, here are all three cards made with Nesting Hexagons Cover Plate. Which one is you favorite? I honestly can't chose:)

Thanks so much for stopping by, and have a great day! 

Hugs, 
6

You're a good friend

Hello there!

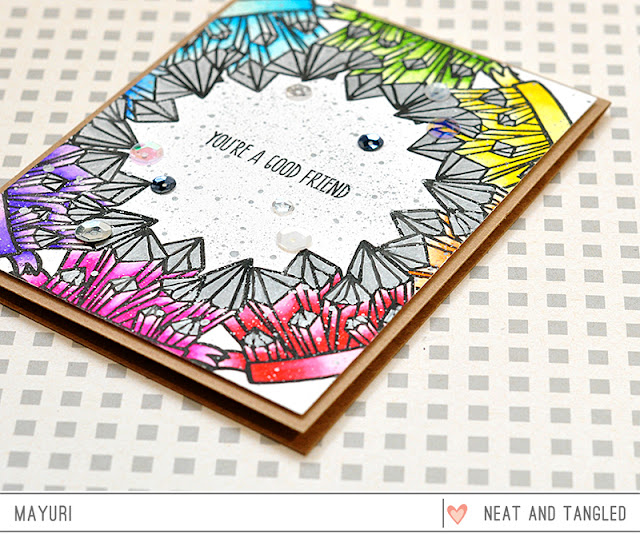
Mayuri here to share a card using the Dazzling stamp set ;-)

©Candles in the Garden. Neat and Tangled January 2018

I began by creating a mask from some postit notes of the main image from the set, so that I could stamp it round an imaginary circle in the centre of my panel of white cardstock. I fussy cut the mask out, and then stamped the image repeatedly on the panel, masking off the last impression each time.

©Candles in the Garden. Neat and Tangled January 2018

I used a waterproof black ink so that I could colour each area using my Zig Clean Color Real Brush Pens. I brushed colour towards the bottom of the crystals and used a waterbrush to stretch the colour out towards the top.

©Candles in the Garden. Neat and Tangled January 2018

I coloured the tops of the crystals with a silver Wink of Stella pen and stamped a sentiment from Beavers Eh in the centre. For some interest, I flicked some silver paint onto the panel too...

©Candles in the Garden. Neat and Tangled January 2018

I trimmed the panel down to slightly smaller than my kraft card base before foam mounting it to the front. To finish, I adhered some sequins.

©Candles in the Garden. Neat and Tangled January 2018

Thanks for stopping by!
5

Distress Oxide Love Notes


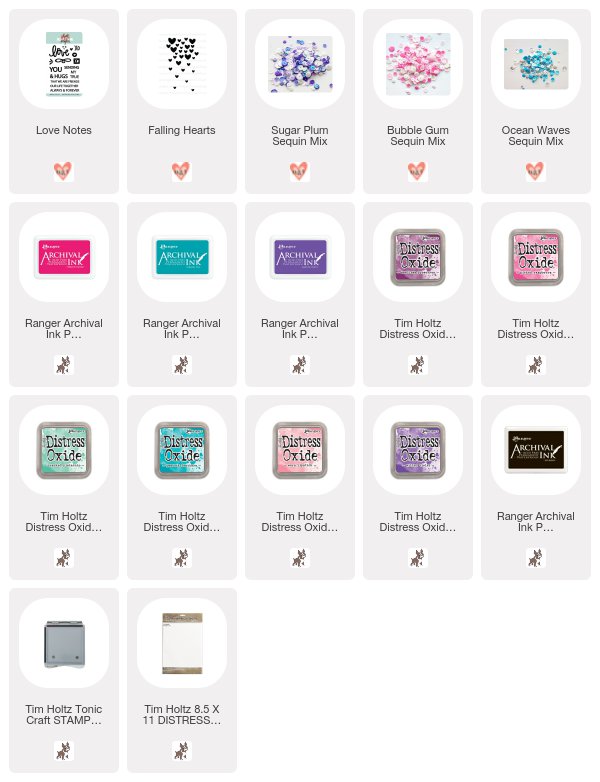
Hi there! It's Cheiron here with my monthly post and today I am going to share some quick and easy Valentine cards that I made with Distress Oxide Backgrounds. I am a big believer that Valentine's cards do not have to be pink and red...I have a few few friends who call teal and purple their favorite color. So today, I have made Valentine cards for all of them with some quick and easy Distress Oxide backgrounds and the Love Notes stamp set. I started with the color parings you see below (all ink colors and supplies are listed at the bottom of this post). 


I used a few of my favorite color combos of Distress Oxides, and smooshed them onto my non-stick craft sheet and sprayed them with water. I built up layers of color and dried the layers with a heat tool in between.


Once my layers were dry, I stamped the Falling Hearts stamp on the top of each panel twice using the darker Distress Oxide color from each pair.


Using a stamp platform and Jet Black Archival Ink, I stamped the word love onto each panel. The platform makes it super easy to create multiples! 


Here's what they look like all stamped :)  Once they were done, I also used the stamp platform to stamp the other part of the sentiment in matching archival inks, and added a few sequins to each. These cards are a bit different than the usual Valentines that I send out, but I love the artsy feel of them and how easy they are to put together once the backgrounds are made. 


SUPPLIES: 

5

Winter Foxes with Jessica Frost-Ballas


Hi friends! Jess here again with my final guest post this month! Over the course of the month I wanted to share projects that are very true to my personal style. My first card used alcohol inks and sparkly embossing powders, last week’s card focused on more of my great crafty loves: sequins and metallics and my final card uses distress inks and adorable critters. I think you could pretty much sum up my style with those key words and products! ;) Thanks again to all of you for stopping by this month and I hope you enjoyed my cards!

I couldn’t let my guest posts go by without dedicating one of my posts to the adorable critter designs from Elena Roussakis!

I started by stamping the fox couple and heart from Merry Kisses onto copic-friendly white cardstock and then I colored them with copic markers. I used the E70s for the two foxes, focusing the lighter shades on one fox and the darker on the other. That range is my favorite for warm grey brown fur! I die-cut them with the coordinating dies and added a few accents with a white gel pen and spectrum noir clear sparkle.


Then I blended distress inks in seedless preserves, shaded lilac, and spun sugar onto a piece of bristol smooth cardstock. Once it was dry I stamped the sentiment from Hello Winter onto the top of the panel and heat-embossed it with a sparkly purple-silver embossing powder. I also stamped a few snowflakes on the background with white pigment ink. I tore a piece of white cardstock to create the snowy ground for my foxes and then adhered them with foam mounting tape. Finally I added a few sequins from the Sugar Plum sequin mix to finish the card!

And that’s it!! Thanks so much for visiting and have a fabulous weekend!
10

Hooray! to a Koality Friend with Keeway


Hi friends! It's Keeway and today I'm here to share a birthday card packed full of cute critters! I absolutely adore the koala from the recently Koalifications stamp set and of course I needed to send him over some friends too. So, I picked up a few other buddies from the Wild Ones stamp set so that we can parrrr-taay!


I stamped all of my images in a dark brown hybrid ink, and then colored them with copic markers. I used my handy white gel pen to add some details on the images. Then, I die cut all of them with their coordinating Nice and Neat dies.

With so many critters on the card, I kept the background pretty simple by blending some Broken China distress oxide ink from the edges in, leaving the majority of the center white. Then, with the Peacock Feathers distress oxide ink, I stamped the large 'hooray' from the Hooray mini stamp set in the top right, which easily fills up all the remaining open space. I used my handy white gel pen again to add little detailing to match what I did for the critters.


Now that everything is all colored up, it's time to adhere everything together. I used some thin foam squares and my regular foam tape to vary the depth of the images. For example, the koala sits behind the turtle, so I used the thin squares on the koala, and my regular foam tape which is just a tad thicker on the turtle. Isn't it sweet that the koala in the scene finishes the sentiment? Love that guy!

Thanks for joining me today, and hope to see you next time!
4

Maze Die - Three Ways with Daria

Hi Dear friends,

Daria here. As Valentine Day is just around the corner, I've wanted to share some love themed cards. Maze - Nice and Neat Dies and A-mazing Stamp Set make it very easy. So, I will show you three simple, yet, I believe, fun cards.


The first card I made was this one with just released Pretty in Pink Sequins mix (loooove it) and a shaker.


I have added a felt heart for some interest. It made me think that maze die die-cut from felt could be a good idea. That is how the second card came to life.


I've placed the felted labirynth on a woodgrain cardstock and embellished sentiment with a couple of bells. It's like hearing bells singing when being in love.


And the last one happened when I've seen the square left from felt and thought, that a square shape would look good with maze-die. Here, the idea is that among so many people, as many as stars in the sky, I found the only One. :) 

For all three cards, I heat-embossed in gold and silver a sentiment from A-mazing Stamp Set 


I think this one is my favorite. Which one do you like? 


Here is a short video to show how the last two have been done.


Thanks so much for stopping by. I hope you liked some of these ideas and will give them a try. Be sure to tag us in social media, so we can see your projects.

Hugs,
Daria.

*Note our Maze die will be back in stock next week!

Neat&Tangled Products used:
Pretty in Pink Sequins Mix 
Maze - Nice and Neat Dies
A-mazing Stamp Set
Crystal Clear Sequins Mix
Seeing Stars Nice and Neat Die
Classic Tag 2 Nice and Neat Dies


5

Koalified to be my Valentine


Hi everyone! Happy Tuesday!

It's Jodi here with you today, and I have a card to share with you using the DARLING new Koalifications and Koalifications Nice & Neat Dies! This koala has stolen my heart!

I cut him and five hearts from X-Press It Blending Card using the Koalifications Nice & Neat Dies, and then stamped them all using Koalifications. I stamped the sentiment, "KOALIFIED TO BE MY VALENTINE" inside the banner. Love that! I colored them all with Copic Markers and then added shimmer to the banner and the hearts using a Clear Wink of Stella Brush Marker.


The background was created using the previously released Punchinella Nice & Neat Die, which I ADORE. I sponged a panel of white card stock using Candied Apple Distress Oxide Ink and Fired Brick Distress Oxide Ink, and then sprayed water and when dry, spritzed on watered down white acrylic paint.

I trimmed the panel down and then added a the white card stock frame, cut using the Punchinella Nice & Neat Die, on top. I assembled my card, popping up the Koala and hearts onto the Punchinella panel, and then layered that onto striped paper paper! Viola, a Koala Valentine!

Thanks for stopping by!
11

Beavers Eh with Kay

Hi there!
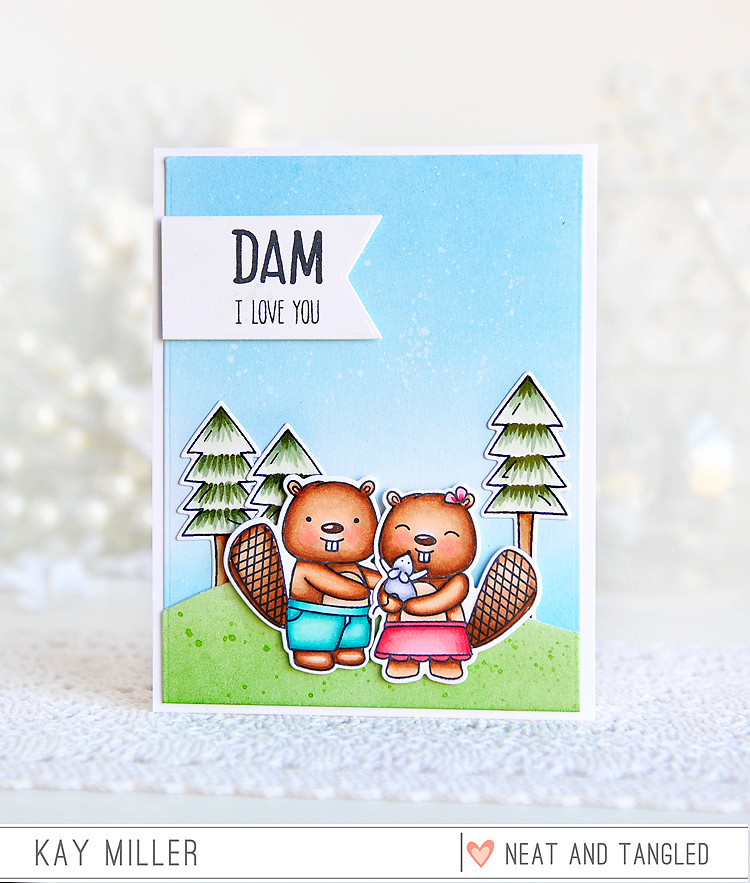
I have a super fun card to share with you today featuring the  adorable set from the January Neat & Tangled Release called Beavers Eh. This set has the cutest images and sentiments!


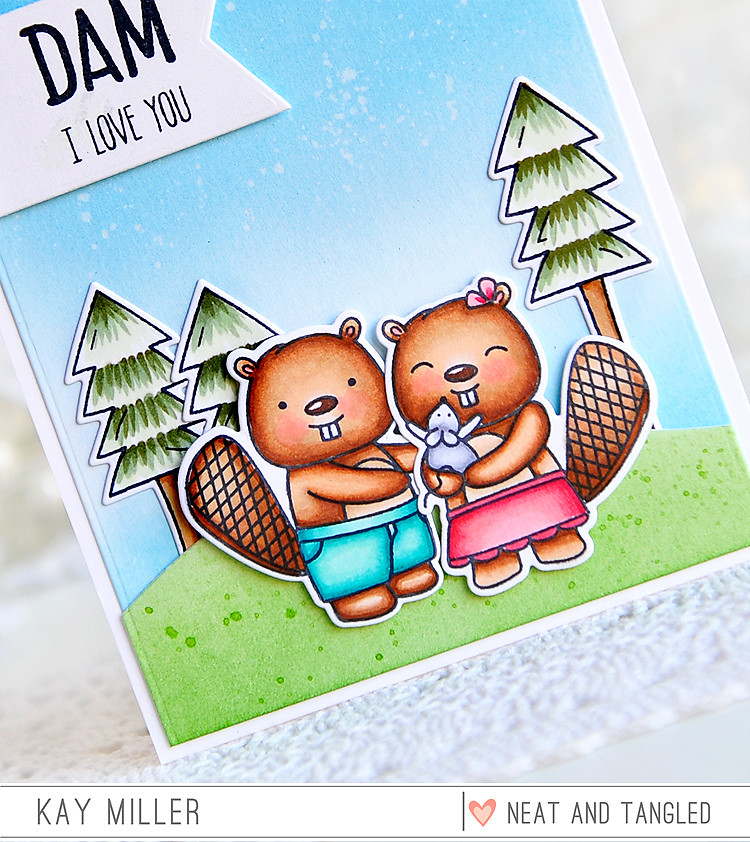
I combined two of the cute  beaver images along with the trees from the Lumberjack Love set to create this little outdoorsy scene. I thought it would make a perfect Valentines card! I used Salty Ocean Distress ink for the sky then blended some Mermaid Lagoon along the bottom. I had intended for that to look like a lake behind the grassy hill, but it really doesn't much. Oh well... I used Mowed lawn Distress ink for the grassy hill.


All of the images I colored with Copic markers and cut out with the coordinating dies. The trees I tucked behind the hill and glued with liquid adhesive. The beavers I adhered with foam tape in front.


I stamped the sentient on some white card stock and cut it out like a banner. I then adhered that to the top portion of the card with foam tape.


I hope you have enjoyed my card today! Thanks so much for stopping by!


Kay :)


6

Medallion Flower Builder Hi with Jessica Frost-Ballas


Hi friends! Jess here again with my second guest post this month! Over the course of the month I wanted to share projects that are very true to my personal style. My first card last week used alcohol inks and sparkly embossing powders and today’s focuses on more of my great crafty loves: sequins and metallics!

I love the Medallion Flower Builder die set and thought it’d be fun to play around with creating a pattern with only two dies and a variety of colored cardstock. Using the Peacock Feather sequin mix for inspiration, I cut the two sizes of leaf dies using white, navy, sky blue, matte metallic gold, and turquoise cardstock and popped out the insides of each leaf. I started my design in the top right corner by building the five pointed flower using each color of cardstock. I adhered those near the corner with liquid adhesive and then started arranging the design outward. I tried to vary the cardstocks randomly so that the design would be symmetrical but the colors would be more random. 

Once the design was built I wanted a simple but bold sentiment so I die-cut the HI using the Journaling Alpha dies. I cut each letter three times and adhered them together. Then I pressed the letters into versamark and heat-embossed them with clear embossing powder to create an enamel-like shine! I adhered them to the card panel and finished the card with a sprinkling of Peacock Feather sequins!

And that’s it for today! Thanks so much for stopping by and have a wonderful weekend!

-Jess
2

Using Stencils to Build Scenes with Kelly Latevola

Hello Crafters! 

It's Kelly here and today we are creating a one layer scene with the help of some stencils. 
We're also combining the new and the old by using two of our smaller but super sweet stamp sets, Little Stinker and Koalifications. 


I started by stamping out all my characters and then masking them before getting into the ink blending. I like tone on tone stenciling so I start by laying down on a light layer of color before adding the  stencil. Then I added even more of the same color. 


I left the edge of the yellow really light to help blend into the lighter green. Once I had all the background color down I went in with the tree stencil to start to break up the grass line. I used the same colors I used for the background to add in the trees. The combo of the yellow and the green gave me the idea to bring in Twisted Citron for another layer of trees. 


After I had all the distress oxide down I removed my masks and started coloring. 

You can watch the whole card come together in the video below


Even though these two wouldn't be hanging out in real life I think they make the sweetest friends on the card. 


Thank you so much for joining me. 
I hope you found something to inspire you!


Supplies:


Neat & Tangled LUMBERJACK LOVE
Shop at:
SSS | Neat & Tangled
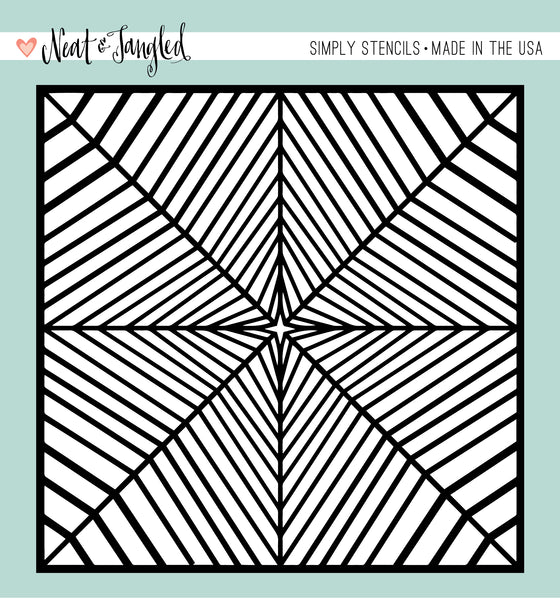
RADIATING STAR - SIMPLY STENCILS
Shop at:
SSS | Neat & Tangled
TREE DUO - SIMPLY STENCILS
Shop at:
SSS | Neat & Tangled
KOALIFICATIONS
KOALIFICATIONS
Shop at:
Neat & Tangled
LITTLE STINKER
LITTLE STINKER
Shop at:
Neat & Tangled
Sakura WHITE GELLY ROLL Medium Point Pens Set
Shop at:
SSS
EK Success WRITING PEN FINE TIP
Shop at:
SSS
Neenah Classic Crest 80 LB SMOOTH SOLAR WHITE Paper Pack 40 Sheets
Shop at:
SSS
Neenah Classic Crest 80 LB REAM Smooth Solar White Paper Pack 250 Sheets
Shop at:
SSS
Fiskars PREMIUM CUT LINE Paper Trimmer 12 Inches
Shop at:
SSS
Tombow MONO MULTI Liquid Glue
Shop at:
SSS
Ranger MINI ROUND INK BLENDING TOOLS
Shop at:
SSS
Ranger MINI ROUND FOAM REFILLS for Mini Round Ink Blending Tools
Shop at:
SSS
Tim Holtz Distress OXIDE INK PAD SET OF 12
Shop at:
SSS
Tim Holtz Distress Oxide Ink Pad CRACKED PISTACHIO
Shop at:
SSS
Ranger Inkssentials Non Stick CRAFT SHEET
Shop at:
SSS
Precision Heat Embossing Tool Gun
Shop at:
SSS
Simon Says Stamp Premium Ink Pad INTENSE BLACK
Shop at:
SSS
Simon Says Stamp Premium Dye Ink Pad BLACK
Shop at:
SSS
ZIG Wink of Stella GLITTER CLEAR Brush Tip Marker
Shop at:
SSS
Tim Holtz Distress Oxide Ink Pad FOSSILIZED AMBER
Shop at:
SSS
MISTI PRECISION STAMPER Stamping Tool Kit
Shop at:
SSS
MINI MISTI PRECISION STAMPER Stamping Tool Kit
Shop at:
SSS
3M 2 INCH WIDE POST-IT TAPE
Shop at:
SSS
Silver BLACK VELVET Brush Size 2 Round
Shop at:
SSS
Judikins Eclipse ART MASKING TAPE
Shop at:
SSS
Ranger Perfect Pearls PERFECT PEARL Individual Pigment
Shop at:
SSS
Tim Holtz Distress OXIDE INK PAD SET OF 12
Shop at:
SSS
Tim Holtz Distress Oxide Ink Pad PEACOCK FEATHERS
Shop at:
SSS
Tim Holtz Distress Oxide Ink Pad PICKED RASPBERRY
Shop at:
SSS
Tim Holtz Distress Oxide Ink Pad TWISTED CITRON
Shop at:
SSS
We R Memory Keepers TRIM AND SCORE Board
Shop at:
SSS
Copic Sketch Marker RV02 SUGARED ALMOND
Shop at:
SSS
Copic Sketch Marker RV04 SHOCK PINK
Shop at:
SSS
Copic Sketch Marker E53 RAW SILK
Shop at:
SSS
Copic Sketch Marker E55 LIGHT CAMEL
Shop at:
SSS
Copic Sketch Marker E57 LIGHT WALNUT
Shop at:
SSS
Copic Sketch Marker E59 WALNUT
Shop at:
SSS
Copic Sketch Marker C1 COOL GRAY
Shop at:
SSS
Copic Sketch MARKER C3 COOL GRAY
Shop at:
SSS
Copic Sketch MARKER C5 COOL GRAY
Shop at:
SSS
Copic Sketch MARKER C7 COOL GRAY
Shop at:
SSS
Copic Sketch MARKER C9 COOL GRAY
Shop at:
SSS
Copic Sketch MARKER 100 BLACK
Shop at:
SSS
Copic Sketch Marker BG23 Coral Sea
Shop at:
SSS
Copic Sketch Marker BG49 DUCK BLUE
Shop at:
SSS
Copic Sketch Marker YG03 YELLOW GREEN
Shop at:
SSS
Copic Sketch Marker W1 WARM GRAY
Shop at:
SSS
Copic Sketch MARKER W3 WARM GRAY
Shop at:
SSS
Copic Sketch Marker W5 WARM GRAY
Shop at:
SSS
Copic Sketch Marker RV00 WATER LILY
Shop at:
SSS
Copic Sketch Marker BG15 AQUA
Shop at:
SSS
7
Back to Top