You are My Sunshine with Carly Tee Minner


Hi Crafty Friends! It's Carly and I'm here with my last guest post for Neat & Tangled! I've had a blast coloring the critters from the Beach Day set so I couldn't resist sharing another summer card with you...


I'm a pretty new Copic convert so I love the practice that coloring the Neat & Tangled critters gives me.


To create a background for my little blue elephant, I created a repeating pattern with the "sunshine" sentiment. I love this technique now that I have a stamp positioning tool ;) I just place my sentiment in the MISTI and then move my cardstock in 1/2 inch increments to create the pattern.


I love how my card turned out and I think I will be coloring bunches more blue elephants!


Thanks so much for stopping by and have a great weekend! And thank you Neat & Tangled for inviting me to guest!
8

July 2018 Sneak Peeks!

Hello friends!

It's that magical time again! 

Our July release will begin Monday, July at 8am EST. It will be a week filled with inspiration, fun and giveaways!

But for now I'll leave you with some sneak peeks! We've got new stamps, dies, and a stencil! Leave a comment and let me know what catches your eye!


See you Monday!

xo 
Danielle
12

Magnolia Two Ways with Daria

Hello Dears,

Daria here. So glad you are joining me today. It turns out we are all in the team are big fans of our new Magnolia stamp set. You may scroll down to previous posts to see what Kay and Bibi made with these beautiful flowers. As for me, I've decided two play with some coloring too this time.


I stamped a half letter sheet card stock with Magnolia flower and then colored it with Zig Clean color Brush markers.  It is very basic coloring, but I like the look. Then, I cut it in two pieces and got front panels for two card.


For one of it, I die-cut the flower with coordinating dies many times from post-it notes and made some masks. I glued them on top of colored flowers and then ink-blended Broken China Distress ink. Love how bright it  turned out.


For the second card, I've decided to go for a more clean look, and left the panel as is.


To finish the cards, I used sentiments from Awesome and Celebrate stamp and die sets. I keep using them over and over again.


I also added Nuvo Drops in White and Crystal Clear Sequins.


I hope you liked that simple ideas and will give them a try. Be sure to tag us in social media. It is always so rewarding to see what you create. 

Hugs, Daria. 

***
Neat&Tangled Products used: 


6

Magnolia | 90 seconds video idea with Bibi


Hi there, is Bibi here and today  I'm sharing a 90 seconds video with super quick and easy project using the new Magnolia stamp set and die set by Neat and Tangled and I also used "Together" Stamp set and die set.


I sprinkled  Brusho Crystal Watercolours powders on wet watercolour paper for the backgrounds.  I used Turquoise +Ultramarine  and  Scarlet + Yellow.  

I have found that to achieve better results using Brusho Crystal Watercolours it is better to place the spray bottle at least 30 cm away from the paper and avoid water excess to get a lovely granulation effect.  I had to put the bottle near the paper on the video just to show you that in fact, I was using water but that not ideal as I had to repeat the process.  I didn't want a flat wash of colour there, I wanted the texture produced by the pigments.  Arg! when you are making a video not everything is straightforward.

I'm also sharing the most ridiculously easy way to add a hint of colour to images and I embellished with a few sequins.


That's all for today. Thanks for stopping by!

Happy Crafting

Neat and Tangled supplies used...
4

Magnolia with Kay


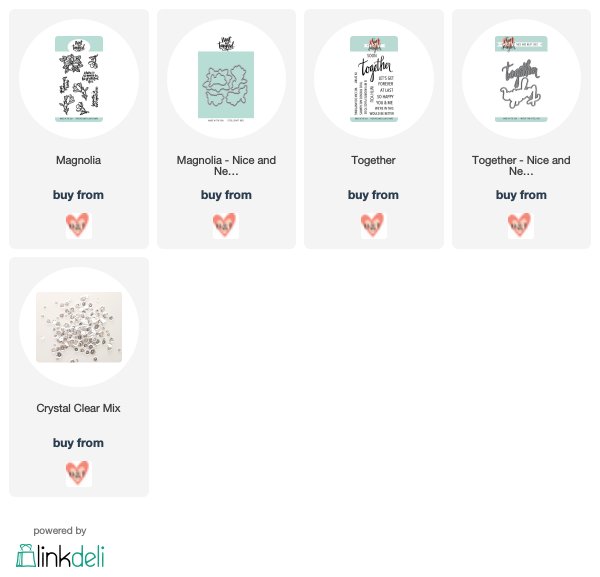
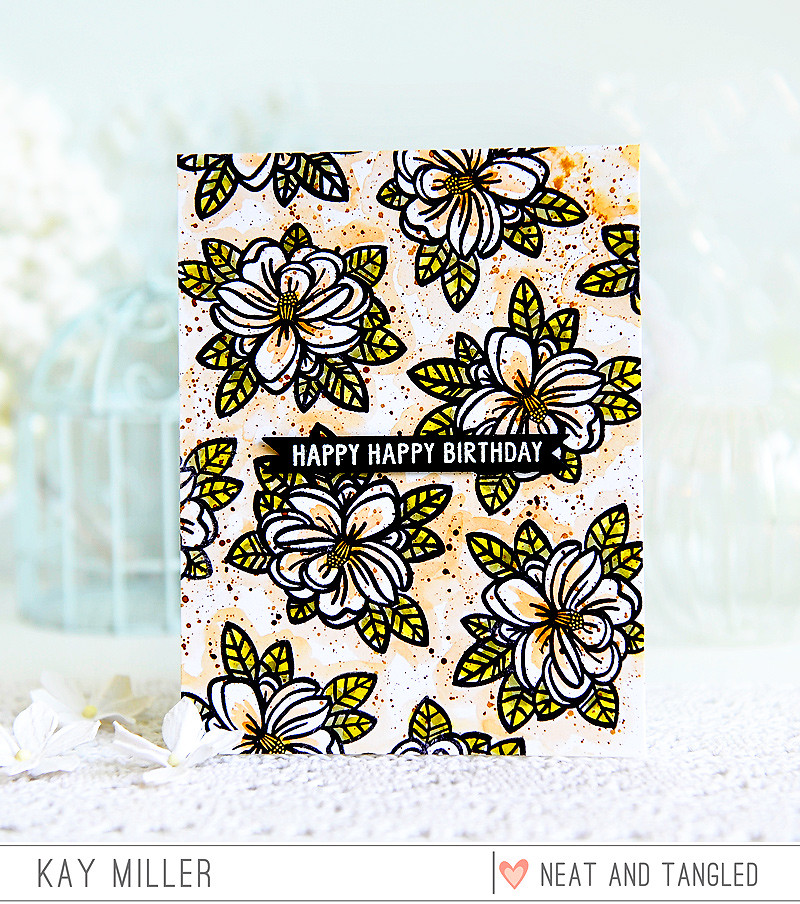
Hi there! Kay here, and I have a fun card to share with you today featuring the beautiful Magnolia stamp set from the Neat And Tangled June Release!


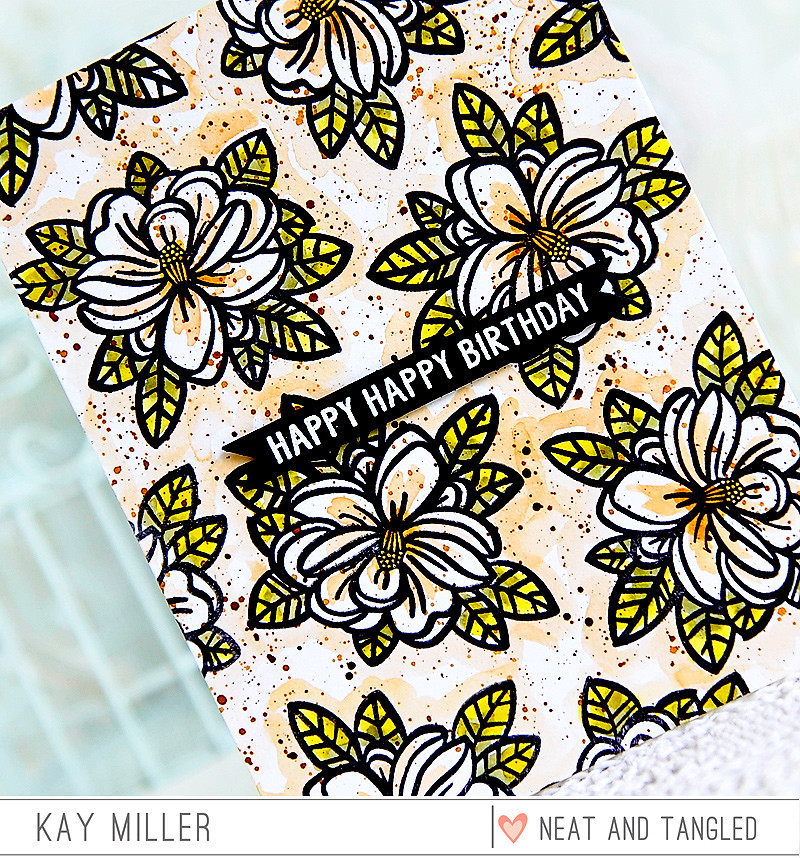
This card turned out to be one of my all time favorites I do believe! I love the colors I used for this. I used Bristol Board card stock and I stamped the magnolia randomly all over the 4.25 x 5.5 piece with waterproof black ink. I then watercolored the flowers with Distress Markers. When I was done with the watercoloring, I splattered the whole thing with some Vintage Photo Distress ink mixed with water.


The sentiment is from the Many Sentiments stamp set. I heat embossed it with white embossing powder on black card stock, and cut it out with the banner die that is included in the Scalloped Dies set. I adhered it to my card with foam tape.

You can find the products I used for my card by clicking the links below.

Magnolia stamp set
So Many Sentiments Stamp set
Scalloped Dies

I hope you have enjoyed my card today!

Thank you so much for stopping by!

Kay :)


6

S'more Fun with Carly Tee Minner


Happy Friday! It's Carly and I'm so happy to be back on the Neat & Tangled blog! Summer is here in the PNW and that means one very important thing to me - s'mores! (I like sugar, LOL!)

My love of the chocolatey-marshmallowy treats means that I am totally smitten with the S'more Fun stamp set and I thought it would be perfect to pair these little cuties with ingredients for the real thing.


To create my tag, I used a piece of watercolor cardstock and "smooshed" on some Worn Lipstick Distress Oxide ink.

While that was drying I stamped the chocolate, marshmallows and graham crackers. I colored the images with Copic markers.

To complete the tag, I stamped the sentiment and little hearts on the tag. Then I foam mounted the treats on top.


And I used my RV13 to color some white floss to match perfectly so I could attach the tag to a jar-full of s'mores ingredients.


I think this yummy treat jar would be the perfect thing to bring along to a BBQ or drop off with a friend who could use a little love (and chocolate).

Hope you have a sweet weekend!
6

The Greatest Treasure with Keeway


Hi there! It's Keeway here and I'm sharing a simple and sweet card with you today featuring the Yo Ho Ho stamp set. I love to reach for some older sets in my stash to remind everyone how much fun they are to play with!

The Yo Ho Ho stamp set is one of my favorites! I stamped the pirate girl, cat, and fish bowl in dark brown hybrid ink and colored the images with copic markers. Then I die cut the images out with the coordinating Nice and Neat dies.

I used a simple stitched rounded rectangle frame that I die cut out of smooth white card stock. I blended Shaded Lilac and Worn Lipstick distress oxide inks with the inner piece. I heat embossed my sentiment in the top right area in silver detail embossing powder.

I inlaid the blended background back into its stitched frame and adhered it in the center of a piece of pattern paper. Then I adhered my characters to the card with foam tape. And that finishes the card! Thanks for joining me today and see you next time!

6

Hello Summer Sale!

Hello friends!

We'd like to give a warm welcome to summer with a great sale! 

Our summer sale will run from June 21st through June 24th 11:59pm EST. Also please note all orders placed from 6/22/18 - 6/29/18 will not start shipping until 6/30/18. 

Happy summer shopping!

xo
Danielle


0

Something old and something new with Sveta Fotinia

Hello everyone! It's Sveta sharing today, and I prepared for you two different cards. For this first card, I used the So Fly stamp set and coordinating So Fly die set from the latest June 2018 Release.


I decided to go with a monochromatic color scheme using just touch of mint green. I stamped the main image, little clouds and the sentiment with black pigment ink. Then I die cut clouds from textured colored cardstock and adhered them using glue and foam adhesive.


I also added a little bit of grey pencil coloring on the plane. 


The second card is made using old but "oh so beautiful" Hooray Nice and Neat Die. Interesting that I used only one die to create this card. 


I die cut the wreath from both white and blue cardstock and then mixed them using an inlaid die cut technique. I adhered the asymmetrical inlaid piece in the center of a kraft panel and then adhered the entire piece to the top of a yellow card base, to get that yellow stripe at the bottom. 


As a final touch I added a few sequins from Snowfall Sequin Mix.


Hope you enjoyed today's post. Have fun!
2

Stencilling on YUPO

Hello there!

Mayuri here to sharing another card using the Geometric Circles stencil and the So Many Sentiments stamp set ;-)

©Candles in the Garden. Neat and Tangled JUNE 2018

I began by creating a background panel using YUPO paper and the Geometric Circles stencil. I dropped different colours inks and paints onto the paper before laying down the stencil and adding further colour.

©Candles in the Garden. Neat and Tangled JUNE 2018

I chose to leave the stencil there instead of heat setting the YUPO paper as I didn't want it to curl up. I left it overnight to dry and then removed the stencil to reveal the gorgeous pattern on the paper. I trimmed the stencilled background panel down to slightly smaller than my card base and adhered it straight down to a white card base.

©Candles in the Garden. Neat and Tangled JUNE 2018

I then stamped a bunch of sentiments from the So Many Sentiments set onto strips of black cardstock, sprinkled with white embossing powder and heat set. I then foam mounted them to the card front.

©Candles in the Garden. Neat and Tangled JUNE 2018

To finish off, I adhered a some sequins and wood veneer embellishments.

©Candles in the Garden. Neat and Tangled JUNE 2018

Thanks for stopping by!
3

Floral Mixed Media Tags | VIDEO | Natalie Elphinstone

Hi friends, it's Natalie here today and I wanted to share some of my favourite mixed media techniques with you to create these bold and vibrant layered tags.


I think sometimes as card makers we hear the term 'mixed media' and think it's for those arty folks who like to get messy with abstract painting and collage glue and all sorts of unfamiliar colouring mediums! But mixed media just means using a variety of different mediums or materials on the same project which means it's definitely achievable with the Neat and Tangled products you already have in your stash and a few of your standard cardmaking supplies.


Think about it.... if you create a card using an ink-blended background, a watercoloured image and finish it off with a sprinkling of sequins then that's mixed media! You might have been doing it for years, but just haven't called it by that name. And it can be as messy and abstract as you would like, or you can keep it clean and simple with a more graphic appeal.


In my video today I'm going to share all the techniques I used to create these tags, along with a few tricks and secrets along the way. I hope maybe I can teach you something new, or remind you to pull out some forgotten mediums. But most of all I hope to show you how easy it can be!


Supplies Used:

Classic Tag 2 Die Set
Friendly Florals Stamp Set
Friendly Florals Die Set
So Many Sentiments Stamp Set
Swirly Twirly Stencil
Nesting Hexagons Stencil
Geometric Blooms Stencil

Feel free to ask any questions you might have, and definitely please share any projects you make inspired by my tutorial today. I would LOVE to see!

Happy creating!
xxx
Natalie
16

Neat and Tangled Celebrating Summer Cardmaking Class!

Hello friends!

I am so excited to announce our next in person card making event! We have been searching high and low for a great place to have our next event, and we found it!  See below for details!
The class is now listed on our website HERE. Seats are limited, so don't wait too long to get your ticket!

I hope to see you there! :)
Danielle


0

Special Guest: Mona Toth!

Hello everyone it's Mona here. I was the winner of the Neat & Tangled Throwdown - PartyEnsemble Challenge and it's a great honor for me to be here. Today I am showing you four cards created with the new Neat & Tangled June release, I hope you will enjoy it.


For my first card I made the background with the Salty Ocean and Blueprint Sketch Distress Oxide inks and splattered it with water. Then I ran the Receding Blocks Cover Plate through my Die Cut Machine.

Then I applied the Die Cut to the background, stamped the images from the So Fly stamp set, colored them with Copic Markers and ran them through the Die Cut Machine with the Coordinating dies. I glued everything to my card and stamped the sentiment.


For the second card I blended the background with Twisted Citron, Lucky Clover and Forest Moss Distress Oxide Inks. I made some images with the Magnolia Stamp and Die set.
To the center of the card I stamped the "The beauty is everywhere" sentiment with Versamark watermark ink and heat embossed with white embossing powder. The images are colored with Copic Markers. As a final touch I added some dots with Nuvo Drops and White details.


For my third card I made a cute puppy with the Dog - Nice and Neat Die. For her paws I used the clouds from the So Fly die set.
The background is made with Receding Blocks Stencil and pink Distress Oxide inks. I glued my pieces to my card and heat embossed the stamped sentiments from the Clearly Canine stamp set.


For my last card I used the Hot Dog Stamps and Dies. After stamping and Die Cutting I colored the images with Copic Colors. For the card I picked warm tones and made a blending with Distress Oxide inks. I cut the podium shape from yellow paper stamped and heat embossed the sentiments on it then blended the edges. When my card was done as a final touch I decorated the ketchup and mustard with Glossy Accents and made some detailing with white pen.
Thank you very much for reading through my post, I hope that I have inspired you! If you like my creations follow me on Instagram. :)
8
Back to Top