July 2017 Release Sneak Peeks!

Hello friends!

Are you getting excited?! We are! July release week starts on Monday, July 3rd at 8am EST! It will be a week filled with inspiration, fun and giveaways!

But for now I'll leave you with some sneak peeks! We've got new stamps, dies, sequins and stencils!


See you on Monday!

xo
Danielle
7

One more Beach Day card with Sveta

Hello everyone!

Today Sveta is here to share some more summer inspiration with Beach Day stamp set.
I live near the Black Sea and swimming season is ON, but in my city if you are a real citizen you will take your first swim in September only when all tourists are already gone)
 First I made my background using Rice Paddies Simply Stencil and ink toning with grey ink color.
 Then I used Awesome die set for negative die-cutting on my background and added a "hello" word with stamping. I also added Stickles glitter inside of the "awesome" word.
 And of course I stamped this sweet hypo-girl, colored her and die cut using coordinating Beach Day dies.
Enjoy summer and be happy!
2

Coming Soon | Stephanie Gold


Hey loves! Steph here with a fun little stork/new baby card for you today. :)


I started by using the new Welcome Home stamp set and stamping the stork image in yellow. I topped it with the sentiment "coming soon" from the same set.

Next I die cut the stamped image from the Doily Tag Die in white cardstock. The tag is layered over a distressed piece of pattern paper from the Pink Paislee Cedar Lane Collection and then a strip of striped pattern paper from the same collection.

The tag finished off with a wrap or two of light grey striped bakers twine from American Crafts.


Thank you for stopping by today! See you soon for the July Release! Woo woo! ;)

Xo, Stephanie

Follow me: MY BLOG // FACEBOOK // INSTAGRAM // PINTEREST

1

You are amazing

Hello there!

Mayuri here to share a card using the Triangle Pattern Builder and Art Deco sets;-)

©Candles in the Garden. Neat and Tangled June 2017 - Triangle Pattern Builder

There are so many different ways you could use the Triangle Pattern Builder set, and I opted to go for a simple, geometric look for my background panel. I began by choosing a colour palette, ranging from a light blue through to a dark purple.

©Candles in the Garden. Neat and Tangled June 2017 - Triangle Pattern Builder

Starting with the lightest shade of ink (light blue), I stamped the largest triangle from the set onto a panel of white cardstock. Then I took a slightly darker shade (cyan) and a slightly smaller triangle image from the set, and stamped over the first impressions.

©Candles in the Garden. Neat and Tangled June 2017 - Triangle Pattern Builder

I repeated this step a couple more times, each time with a darker shade of ink and a smaller triangle - the end result was definitely worth the effort, however, I felt like it needed another layer...so I stamped the large background image from Art Deco on top of the whole pattern in the light blue shade of ink.

©Candles in the Garden. Neat and Tangled June 2017 - Triangle Pattern Builder

I trimmed the panel down to the same size as my card base and the stamped part of the sentiment onto it with black dye ink. The rest of the sentiment was stamped onto a strip of black cardstock with Versamark ink, sprinkled with white embossing powder and heat set.

©Candles in the Garden. Neat and Tangled June 2017 - Triangle Pattern Builder

To finish, I adhered the panel down to a card base and foam mounted the heat embossed sentiment to the front, along with a few sequins from the Fairy Garden Mix and the Ocean Waves Mix.

Thanks for stopping by!
6

June Guest Designer Janna Werner with a 'lucky' layout


It's Friday and our June guest designer Janna Werner is her for her third and final post of the month.  It's been a pleasure having her, and I know you are going to love today's project.  Here's Janna with all the details:

Hello everyone, this is Janna. I am here with my third and last post as guest designer for Neat And Tangled. Working with the beautiful stamps, dies and sequins was so much joy and I hope I was able to inspire you with my layouts and cards.

For today, I created another layout, using summerlike and happy colors and floral motives to emphasize the happy theme of the page. It is about one of our dogs, Luzie. She is a lovely and happy dog and very sweet (and she knows!). The title is German and means 'luck is furry'.


I worked with the Medallion Flower Builder stamp set to highlight the title and subtile and to add the dots on the page. The heart on the bottom of the scrapbooking layout was cut out with the Scored Shapes dies, as well as the circle in the back of the heart on which I stamped with the Heart Of Gold stamp set. 


The lovely light blue sequins give the finishing touch.


Thanks to everyone for stopping by today, please make sure to browse the Neat And Tangled blog for more inspiration from the amazing Design Team. Have a crafty day!

Lots of greetings,

Janna
2

Beach bums with Elena

Hi there!

Elena here, with a couple of cards featuring the new Beach Day stamp set.


The little hippo is wearing an itty-bitty-teeny-weeny-yellow-polka-dot-bikini. I love her chomping on that huge half-watermelon.


I created a frame using a rectangle from Scalloped, and sponged a bright sky behind. The tiny turtle is probably my favorite image of the entire set.


For my second card, I couldn't help but pile all of the main characters on and add a shaker element.


I kept the shaker sequins blue to coordinate with the mint sky color, and added shading under their feet to ground the images a little better.

I hope you like my projects! Thanks for stopping by!


5

Make a Splash with Keeway


Hi there! It's Keeway here and today I wanted to share another card featuring the June Release of the adorable Beach Day set. I just gotta, it's so cute! I love each and every one of the beach critters in the set, especially the elephant. But, I hadn't had a chance to share a project with this sweet rhino, so he's here today to make an apperance.

I stamped my images in black hybrid ink and colored them with copic markers. I then die cut all the images with the coordinating Beach Day dies.


For the background, I masked off diagonal lines with different widths of washi tape across a piece of white cardstock. Then I blended Wilted Violet, Picked Raspberry, and Tea Dye distress inks from bottom up. Then I removed the washi tape carefully, leaving three beautifully clean diagonal stripes across the background. Reminds you a bit like Adidas shoes, right?

Lastly, we need a place for our sentiment, so I brought out the Scalloped die set and die cut the wavy fishtail strip on kraft cardstock. I knew that I may fail to align the sentiment a bit so as a fool proof way to make sure I get all of it visible, I stamped it once directly onto my background, and once on the kraft fishtail strip. The MISTI tool assisted me in stamping the same place twice.


Now we've got all our pieces completed, so we can finally assemble it all onto the card with some foam tape!

Thanks for joining me today and see you next time!
3

Maple Leaves Journaling Card

Hi there! Kay here, and I have a card to share with you today using The Maple Leaves Journaling Card, Scalloped Dies and Rice Paddies Stencil.

I know it is not fall yet, but I love this stamp and wanted to play with it so bad! And Fall will be here before you know it and I will be ready ;)


My background was created with the Rice Paddies stencil. I used purple card stock and Worn Lipstick and Wilted Violet  distress ink. I then splattered that with some white acrylic paint.


I stamped the Maple Leaves Journaling Card onto watercolor paper with permanent black ink and watercolored them with Zig Clear Color Brush markers.


I then cut out the middle Scalloped frame from the Scalloped Dies and mounted that onto my background with foam tape. I cut out the Maple Leaves Journaling card and mounted that with foam tape as well.

I hope you have enjoyed my card today! Have a great week and thanks for stopping by!

Kay :)


3

Summer Watermelon Background

Hi there. It's Cheiron here with my monthly post. Seems like summer is finally here on the East Coast and nothing says summer to me like a backyard BBQ full of fresh summer produce and of course watermelon for dessert! I had this cute little hippo from the Beach Day set already colored. She is SO cute just chomping on her watermelon slice. I thought she would go great with a watermelon background.


To make the background, I cut out the Hexastar Cover plate from light green paper. I also cut another one from scrap paper to use as a stencil. I used the stencil piece (placing it slightly offset from where I would adhere it and blended Worn Lipstick Distress Oxide Ink through my makeshift stencil. Be sure to cover the sides with some post its while you are doing this so the ink does not go over the stencil. To make the "seeds" I used a Black Distress Marker with a Distress Marker spritzer. I then placed the green piece I cut from the cover plate on top of the piece I had inked up using foam dots.


To finish my card, I added a sentiment from the Scandinavian Prints set stamped on a Scalloped banner and topped off my card with a few sequins from the Sherbert Sequin Mix.


Hope you've enjoyed this little slice of summer!!!


7

The Cutest Beach Bums With Debby Hughes


Hi it's Debby here and today I'm sharing a card using the cute Beach Day set. You may have already seen a sneak peek of this card in the release day video and if you take a look at the video you'll be able to see all the Glossy Accents shine on this card that I couldn't quiet capture in my photographs. However I'm getting ahead of myself. I started the card by stamping the three critters, flag and bird from Beach Day in black ink on Neenah Solar White card, colouring with Copics and then die cutting with their matching dies


I added white gel pen details (cheeks, swim trunks plaid etc) and lots of Glossy Accents detail (duck rubber ring, beach ball, mask, arm bands, watermelon etc). Then I blended Lake Shores, Rosie Cheeks and Lavender inks on to a white panel. I lined up the Rice Paddies stencil over the bottom of the panel and added just the faintest watery touch too. 

To finish I mounted all the images with foam adhesive and then added the panel with more foam adhesive to a white card base covered with Echo Park patterned paper

Thanks for joining me today and I'll see you next time!
4

Heart of Gold with June Guest Designer Janna Werner


Happy Friday friends!  Our June guest designer, Janna Werner, is back with us again.  Today she's highlighting our Heart of Gold stamp set.  Here's Janna with all the details:

Hello everyone, this is Janna again. I hope you had a lovely June so far. Today I would like to share three cards with you, each highlighting the geometric heart from the Heart of Gold stamp set.


For the first card, the pink one, I heat embossed the background and placed a stamped geometric heart on top. I used a dark brown to stamp the image as well as the text, brown is a bit softer and friendlier than black and goes so well with pink! 


I used lots of layers and dimensional dots on that card.


The second card, the blue one, features a heat embossed heart. The card itself is very clean and simple and perfect, if you only have a few minutes of crafting time. The triangles in the background  (using the Tiny Trangles stamp set) were stamped with Versamark ink, it will create a stamped image that is a bit darker than the cardstock you stamp it on.  The sentiment was created using the Medallion Flower Builder set and a bit of masking.


The third and last card is a mini shaker card, again very clean and simple - don´t be tricked, this took the longest time to create! I really like shaker cards, because it makes lovely noises and makes me want to grab and shake it every time I see it!  I again used the Medallion Flower Builder set for the sentiment.


I hope you enjoyed today`s inspiration,

see you soon,

Janna
2

Masking and Faux Masking, One Card Four Ways


Hey everyone!  Miriam here sharing a set of cards using masking and faux masking techniques.

I set out to make a really simple card using my new Welcome Home set, and ended up with four cards featuring the same basic design.

I started by stamping the sign image on masking paper and then fussy cutting it to place over the stamped image on my actual panel.  I also added masking tape (I'll link to it below) around the edges of the panel.  Then I did some simple blending.  Once that was done, I added the sentiments, adhered it to the base and done.


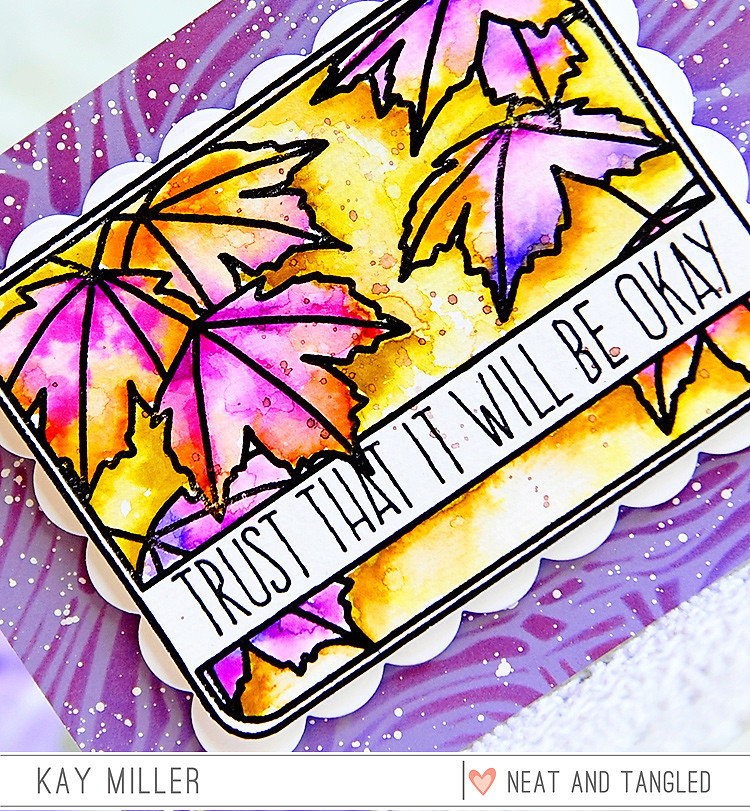
Then, I thought I would try a different method of masking that I haven't done in a while, using Frisket masking fluid.  The image was stamped on watercolor paper using Versafine, then I added the Frisket and waited for it to dry.  Once dry, I added some simple watercoloring.  After that was fully dry, I carefully rubbed the Frisket off and popped the panel up on the card base with foam tape.


Not everyone has Frisket, and there's a lot of waiting around for things to dry with the prior technique, so I thought I would try to fake it with watercolors.  In this next card, I simply watercolored around the image.  Before I started, I wet all the background areas with water and then worked quickly to add the watercolor making sure that the edges stayed wet as I went.  You do need to work quickly with this method which is why I stuck with just one color.


Once it was dry, I felt like it needed a pop, so I carefully traced around the image with a Copic marker to set it off from the background, and then I popped the entire panel up on the card base.


Finally, I wanted to try and recreate the crisp cleanness of the initial masked image with Copics, but I thought that it would be too tough to do the blending in the middle of the panel, so I opted for a simpler look, blending to a lighter color on the edges of the panel.


For this one I also went in with that slightly darker shade of color around the edges of the image to make it pop.


So four different ways to achieve that masked look.  Thanks for stopping by and hope you are having a great week!

Other Supplies Used:

2
Back to Top