October Release Peek 4!

Hello hello!

Here this evening with sneak peek number 4 for our big October release!  If you are just checking in, starting next Monday, October 1 we will be holding a week long release celebration! Each day I will reveal a new set and show tons of inspiration from the DT!  You are in for a treat :) OH! and there will be giveaways too!

So here is your last peek...I really appreciate all of your kind words and comments :)

peek4

Don't forget, Monday at 8:00 am EST is when all the fun starts!
11

Halloween Journal Page

Hello there! It's Kasia here today! While waiting for stamps from October release to arrive I've been keeping myself busy playing with earlier sets. Today I'd like to show you a little art journal page made using Halloween Scene and Graveyard Shift!

wicked1

I made this page because I really wanted to make something with Halloween twist. I picked a photo from a costume party we went to few years ago and played with my usual layers of papers, old book pages and masking tape covered with some gesso and paints. Once my background was dry the fun with stamps started!

wicked4

I used these cute, little bats from Halloween Scene and scattered around stars from this same set- I love that they come in variety of sizes, it was so much fun to incorporate them in my background!


wicked3
Than I added a spider and some spiderweb's from Graveyard Shift and stamped few halloween sentiments on my page.

wicked2

Maybe it's hard to see on the photos, but bats and spiders in here are gently sparkling with glitter! To get this look I grabbed my glitter gel pen (the one which you can get for cheap from stationery store!) and a wet brush, I traced over the stamped image with pen and then smeared the color by brushing over it. I think it couldn't get simpler (or cheaper!).

So that's all for me today! Thank you for stopping by!

Kasia


8

Guest Designer Stephanie Washburn!

I am so happy to have Stephanie here guest designing again! Her card is a serious stunner today!
* * * * * * *
Good morning! Stephanie here again today to share another project I made with these super cute stamps! I used Fresh Blooms and Just Hello on this card!
 neat and tangled hey girlfriend
I started by creating a bunch of masks of the small and large flowers from Fresh Blooms. I did this by stamping the images onto thin copy paper, cutting them out, and adding a little repositional tape to the back.
I started in the middle and stamped a large flower. I masked that flower and stamped a few more flowers around it. I continued this process, moving the masks around where I needed them, until the entire piece of cardstock was covered in overlapping flowers! LOVE the way it came out- I think it almost looks like patterned paper!
Then, I took out my Copics and colored the background a lavendar/gray color and the flower centers a golden yellow.
I cut the banner shape with my Silhouette Cameo and stamped the sentiment to finish it off!
Thank you SO much for having me as a guest this month! I have had so much fun playing with these stamps and sharing with you! I'd love for you to visit my BLOGor FACEBOOK PAGE!
Steph
13

October Release Sneak #3!

Back again with the next peek :) This is another one of the 5 sets being released next week! The fun starts October 1st with 5 full days of inspiration and giveaways! All 5 sets will be available for purchase next Friday, October 5th!!

So...let's make it official :)

sneak3
7

October Release Sneak #2!

Our big October Release starts next Monday, October 1st and includes a week long celebration with lots of inspiration and giveaways!  It's hard for me to wait so long to reveal these sets so here is another peek :)

Santa can't do it all by himself, now can he?


sneak2

Stop by tomorrow for some more inspiration and another peek! :)
9

Little Note Cards

Hello everyone! This is Pamela here. Hope you enjoyed yesterday's sneak peek #1! Today, I have 2 simple note cards stamped with my favorite Neat & Tangled stamp sets - Fresh Blooms and Just Hello.

This card just came to me when I saw the cute envelope stamp! I cut a scalloped edge from printer paper and used a sponge to create the sky background. I then die-cut a cloud from clear cardstock and hand-sew it on. It's a little hard to see from the photo but I've added some vellum wings to the envelope to make it look like it's flying!
N&T: Hello Mail

The second card is very similar in that it also uses the cute swirl from Fresh Blooms. Following Virginia's foot steps, I used the stamped swirl as a guide for me to glue the twine, giving the card some texture. I finished the card with the bee from the same stamp set with some vellum wings again!

N&T: A Little Note
That's all from me today. Come back tomorrow for some more inspirational ideas!

-- pamela
10

October Release Peek #1!

Hello friends!! I am so excited that release week is just a few days away!

I will be releasing 5 new sets next week!  The fun will start on Monday, October 1st, with the reveal and showcase of our first set, and the party won't stop until Friday, October 5th, when all 5 sets become available for purchase!  We've got a nice mix of holiday and everyday, something for everyone! And they all work so well with sets already released :)

I thought it would be fun to share a peek from each set this week, and would love to hear your guesses :)  So here is your first peek at our Winter 2012 Release!


Be sure to come back tomorrow for more!


9

A Neat & Tangled iPhone upgrade

Hello all!

Katie Gehring here to show you how I upgraded my iPhone using Neat & Tangled stamps.

So you may have heard that Apple's iPhone 5 was available for purchase last Friday.  Me?  Not so much.  I was driving my kids to school before work and couldn't figure out why all these people were standing in line outside the AT&T store at 7 a.m.! I am not what you would consider an early technology adapter.  I received an iPhone 4 for Christmas last year, and although I love my phone, updating models was just not part of the plan at this time (litereally, I can't upgrade for another year). :o)

I strongly believe that part of the fun of phones, tablets and laptops these days is the ability to personalize and customize your technology and experience.  In honor of this new technology, I decided to use some of my crafting supplies and Neat & Tangled stamps to give my old iPhone a little upgrade.

I pulled out a few of my Neat & Tangled sets: Little Tangles and Just Hello.

dsc_0084

I also used a few other supplies:

dsc_0083

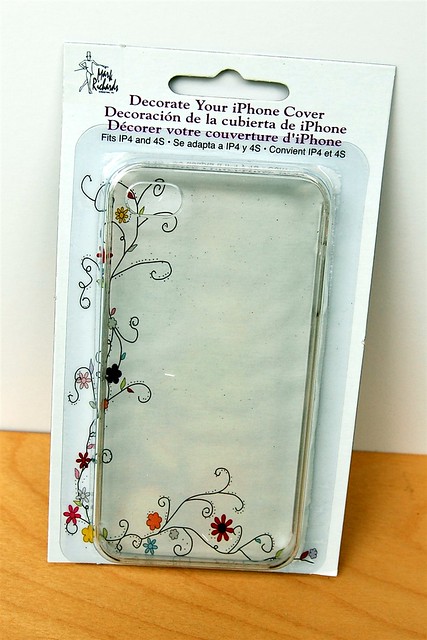
And you will also need one of these.

dsc_0087

I found this clear iPhone cover at Michaels.  It is created by Mark Richards Enterprises.  It was $3.99,  but you could use a coupon to bring down the cost even more.

I trimmed a piece of patterned paper to 2.25" by just a touch shorter than 4.5" and rounded the corners using the 3/8" corner chomper.  Using the phone cover as a guide, I traced oval where I would need to trim away the paper for the camera flash and lens.  I used my old Stampin' Up slot punch to start the oval and finished it with a craft knife- this is seriously the hardest part of the whole project.

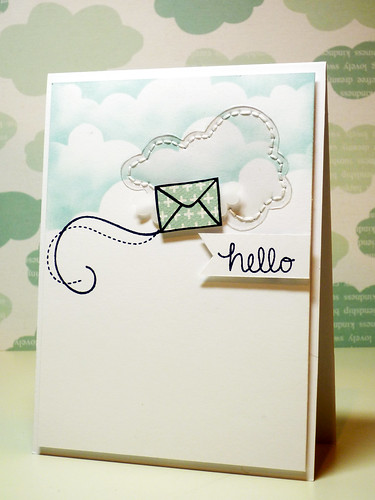
Next, I selectively inked and stamped one of the tangles from Little Tangles onto the cardstock to make a phone cord.  I stamped the phone from Just Hello on a piece of aqua cardstock and trimmed out the handset and adhered to the "cord."

dsc_0086

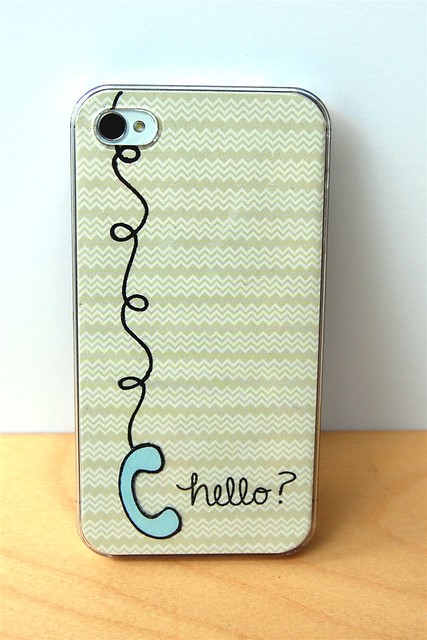
I also stamped the sentiment from Just Hello onto the patterned paper and then slipped it into the cover and snapped my phone in place. Now I have a low cost, but high style and totally adorable cover for my iPhone that just may help me keep loving my old phone until I can upgrade!

That's all for me today.  Thank you so much for stopping by!

Katie

17

YCU Challenge 14: Learning is Fun!

Hello Friends!

I am here today for this month's Young Crafters Unite Challenge! This time it's all about learning, so we are all using a technique that we've recently learned, or an old favorite :)

This week you get 2 sponsors! The always wonderful Simon Says Stamp
and me! :) 
Print

So, here is my card. For my technique, I fell back on an old favorite, paper piecing. This is probably my favorite technique, (although I do love using Distress Inks and embossing!) I think I like it so much because it can really change the look and a feel of a stamp. For example, with my card it allowed me to create custom outfits for the little ladies :) I used the gingerbread girls from the Hey, Cookie set. Even though it's really a Christmas set, I thought, what the heck!

ycu14
Be sure to join in the fun and check out all the other amazing inspiration at Young Crafters Unite!

Supplies

9

Halloween Weekend Day 2!

Hello, hello!  Welcome back for 2 day of our mini-Halloween showcase!  We are spotlighting both the Halloween Scene and Graveyard Shift sets to help inspire you to get spooky :)

There is a giveaway so be sure to go HERE to comment to enter!

I am so excited to be sharing these amazing projects with you! I'll tell you, these girls really out did themselves the past 2 days!

20120921gs
By Kasia Tomaszewska
20122109halloween
By Kasia Tomaszewska
HalloweenLayout
By Jean Manis
Happy Halloween
By Amy Kolling
_DSC0008
By Suzanne Dahlberg
N&T - Graveyard Shift Release
By Pamela Ho
GraveyardShift
By Chari Moss
Halloween PL spread
By Linda Trace
Custom Halloween journalling card 1
By Linda Trace
journalling card 2
By Linda Trace
journalling card 3
By Linda Trace
journalling card 4
By Linda Trace
I hope you have enjoyed the past two days!  I can't wait to see what you all create for this fun time of year! Be sure to add your projects in our Flickr group and share on our Facebook page!

I'll be back tomorrow :)
7

Halloween Weekend Day 1 + Giveaway!

Don't forget! Today is the last day for FREE SHIPPING in the Neat and Tangled shop!
FALLFUNSALE
Hi friends here today for a spooky little celebration! Be sure to read all the way to the bottom for the giveaway details!

I had mentioned earlier this week how much I love Fall, and part of the reason is  Halloween! I don't know why but I have always thought it was just a fun thing to celebrate. I have a million memories  of getting dressed up, parties, haunted houses, hayrides and more!

With October fast approaching the girls thought it would be fun to show off some Halloween themed cards using Halloween Scene and the new Graveyard Shift set! They are all so fun!! I love all the different ways they used the skeleton! Hope this inspires you to make some spooky cards of your own :)
dsc_0155
By Katie Gehring

dsc_0158
By Katie Gehring


Graveyard Shift
By Jean Manis
mary-dawn-003
By Mary Dawn Quirindongo
graveyardshift1
By Jean Manis
Happy Haunting Card
By Nina Yang

mary-dawn-002
By Mary Dawn Quirindongo

To win both Halloween Scene AND Graveyard Shift:
1. Be a follower and leave a comment telling me your favorite Fall activity!
2. Follow us on FB (leave another comment!)
3. Spread the word (tweet, FB, blog, whichever! leave another comment)

You have until 11:59pm on Sunday, September 23 to enter!

Stop by tomorrow for some more frightening fun! :)

72

Mixing and Matching

_DSC0020

Hi everyone! It's Suzanne here today with a couple of cards that I made doing one of my favorite things: mixing and matching sets. Last night I sat down and put all my Neat and Tangled sets in front of me, trying to think of ideas and this is where my mind took me.

On my card above, I started with the gray cardstock and thought that the perfect way to cheer it up would be with a rainbow theme, so I stamped the chevron image from Little Tangles in a variety of rainbow colors, starting at the bottom of the card. Once I got to the top, I stamped the sentiment from Just Hello and added the ribbon and the bling.

_DSC0013

And for my second card, I got a little more creative. I started by repeating the envelope from Just Hello in a pattern along the bottom panel of white cardstock, and once I got to the top of this card, I stamped one envelope in green, opting to turn this into a holiday card by adding the sentiment from Sweet Home and Santa hat from Hey Cookie. I added some glitter to the hat and mounted this onto some textured Bazzill cardstock.

That's all for today, but we hope to see you again very soon! Have a fun day!
13

Skeleton Shaker Card

Hi Everyone!
Chari here today to share a fun shaker card featuring Graveyard Shift.  This fun little card was pretty easy to create by using craft foam to create the shaker frame.

SkeletonShaker

To create this card I simply stamped and heat embossed Mr. Skeleton onto a piece of pattern paper.  I colored him with picket fence distress marker to create a subtle different between the image and the pattern paper.  I cut a frame from black craft foam and glued it around the image, filled the frame with some glitter & confetti and then glued acetate & a pattern paper frame to the top.

Pretty simple and fun! :)

SUPPLIES:

14

How To Make a Paper Quilt!

Hi Everyone, Jean here.

I have always loved quilts, quilt patterns, and quilt fabrics, although I’ve never actually done any quilting!  I was immediately drawn to the fabric-inspired Simple Stories Harvest Lane papers, introduced at CHA in July. I paired the papers, as well as a few from Simple Stories Homespun Holiday and My Mind’s Eye Gnome Sweet Home, with the adorable cottage stamp from the Neat & Tangled Sweet Home stamp set to create an autumn-themed home decor project.

Sweet Home Paper Quilt

I wanted to waste as little paper as possible for the project, so before I cut anything, I evaluated the paper patterns. The larger patterns were used for the background and the smaller ones for the cottage. I laid the cottage stamp over the papers to evaluate whether a paper would work or not.

UpCloseCottage 

Next, I die cut the nine background papers with the 3 ½” Lifestyle Crafts square die. Using the die made quick work for this step. I laid the cut squares out on my background 12” by 12” kraft cardstock, but didn’t do any adhering. I also didn't spend too much time deciding which square would go where at this point.

CottageQuiltStep1 

I heat-embossed nine cottages on the smaller-patterned papers and fussy cut them. I laid them out on the larger-patterned squares that I’d paired with them earlier when choosing the papers. 

CottageQuiltStep2 

I felt that the houses needed a little something extra, so I heat-embossed a selection of solid cardstock in matching shades. I fussy cut the doors, windows, and roofs and added the separate pieces to the patterned houses. I spent a bit of time moving the squares around - switching out doors, windows, and roofs - so that I wouldn't be repeating two brown roofs or two red doors (you get the idea) in a row either horizontally or vertically.

CottageQuiltStep3 

I glued the pieces in the reverse order – I adhered the doors and windows first, then the houses to the squares, and finally the squares to the background.  I framed the piece in a 12” x 12” frame.

I’m already thinking about a winter-themed project with the cottage stamp – that roofline would look terrific with some Icicle Stickles!

Supplies:
9
Back to Top