I cut the scene with the Classic Tag 2 die and also a second tag from white card also. I tied the two tags together with ribbon and twine to form a cute card and simple card.
Thanks for joining me today and I'll see you next time.
Hi Friends! We're welcoming our April guest Nina-Marie Trapani back to the blog today. This is her last post for the month and we're sad to see her go! We've so enjoyed having her back visiting on the blog and we know you have too!
Happy Friday everyone! Today I am excited to share another video featuring Gansai Tambi watercolors and Neat & Tangled products! Last week, I shared a video featuring these same products in a no-line coloring technique. This week – since the Gansai Tambi paints are a newer watercolor palette for me – I wanted to explore them a bit further and see how they did in creating backgrounds.
Watercolor backgrounds are something I greatly enjoy creating. The abstract feel of the watercolors, combined with how they layer and blend simply appeal to me. They are relaxing to make and allow me to have some “playtime” without having to worry about staying inside of lines or trying not to let colors mix. Backgrounds for the most part allow you to be free.
The Gansai Tambi watercolors worked beautifully for creating vibrant, layered backgrounds. I used all blues for these backgrounds, but you could definitely work with other colors. When I was working on painting these, I was in the mood for using blue tones; they make me think of the ocean.
In some of the backgrounds, I did use a bit of white metallic, which is included in the 36 set of Gansai Tambi watercolors. If you don’t have the Gansai Tambi paints – or do not have the 36 set – and would like to incorporate a metallic like this into your artwork, I recommend the Gansai Tambi Starry Colors set. This set of metallic watercolors are the same consistency and feel of the metallics included in the Gansai Tambi 36 set and include a few extra golds too!
The die is recessed into a coordinating blue cardstock frame. For a sentiment, I stamped the word “hello” in blue ink and heat embossed it with clear powder. To embellish the card, I used a few Sparkling Clear mix and 3mm sequins from Pretty Pink Posh.
These cards all look different and unique, which is the look I was going for. When I painted the backgrounds, I made sure to put the colors down differently on each watercolor paper panel. By varying up the paintings, I was able to make a set of cards that match, but each have their own character.
I hope today’s post has inspired you and gave you some ideas for working with watercolor backgrounds behind a die cut such as the Succulent Journaling Card, to create a pretty card set.
And a BIG, BIG thank you to my dear friends Danielle and Miriam from Neat & Tangled who allowed me to come guest with them this month; I had so much fun!
Hi there, it's Cheiron here with my monthly post. Today I am featuring the Faceted stamp set in a rainbow of colors. To create this glittery background, I stamped and embossed the Faceted panel with white embossing powder. Then I inked over the panel with a rainbow of distress inks.
Once the panel was dry, I inked the entire panel with Versamark ink and embossed it with Ranger Holographic embossing powder, then heat it with an embossing gun. To make it extra shiny, I added another layer of Versamark and embossing powder and heat it again. It is SUPER shiny in real life.
To complete the card, I added a stamped sentiment from the Faceted set in Blue Violet ink.
Hope you enjoyed this card! Thanks for stopping by :)
Daria here. Thanks for joining us today. I have a couple of cards to share with you.
I really like to mix and match papers different in shade and texture. I think it adds so much to the depth and overall design. So today, I am playing with die-cutting and layering different die-cut elements over each other to create dimension and interest on my cards.
For my first card, I used Seeing Stars Nice and Neat Die. As it is one big die, it took me no time at all to make all the different die-cuts from dark blue, vellum and glitter cardstock.
One of the five layers on this card made with dry embossing the Seeing Stars Nice and Neat Die onto the card-base. I've also made a few separate stars from Etc. Paper - wood-like paper sheets. Sentiment comes from my another favorite - Scandinavian Prints Stamp Set.
For my second project, I've took coordinating dies for Medallion Flower Builder set. I think, I can use it over and over again, and each time the result would be different.
I die-cut lots of flower petals, again from different types of paper: white, light blue, vellum, glitter and wood-like paper from Etc. Papers. Then, I put them on a burlap string across the card, adhering some of them in strategic spots for more stability. It took some time, but I really like the way it turned out.
I heat embossed the sentiment from the Medallion Flower Builder set in white. It looks very contrast on a darker card base, but coordinates with white flower petals on the top of the card.
Hope you liked these ideas and will give them a try :) Thanks so much for stopping by!
The intricate nature of this die really made me want to pull out my laser transfer foils and double-sided adhesive sheets for a technique I've used before. I began by covering a piece of cardstock with the adhesive sheet and then running it through my die-cutting machine with the coverplate.
I separated the cardstock from the die very carefully as I didn’t really want the pieces to fall out – thankfully, they stayed put, but to be on the safe side, I also applied some packing tape on the back to hold everything together. I carefully peeled away the liner paper from the smaller shapes only, leaving the border intact and exposing the adhesive just in those areas. Then I laid down some silver laser transfer foil over the sticky areas and gently burnished with my fingers.
I lifted the foil sheet away leaving the silver to adhere to the shapes and I couldn’t believe how quick and easy the process was! I repeated this using copper coloured foil for the border to complete my background. I then foam mounted the piece to a white card base.
For the sentiment, I went back to an oldie but a goodie - the Sparkle and Shine stamp set! I stamped the sentiment with Versamark onto some navy cardstock, sprinkled with Silver embossing powder and heat set. I trimmed it out and foam mounted to the card front.
Speaking of weekends this time last month I was hanging out with a ton of my crafty girlfriends most of whom I only get to see once or twice a year.
Needless to say I miss them a ton and I'm frequently looking for ways to create fun cards to send them so that they know I'm thinking of them.
I thought the Better Together set would be perfect to create a scene where two girlfriends were separated and missing each other. I used the Polygon Stencil and Pentagon Stencil to create two backgrounds that were similar but still different.
You can follow along from start to finish in the video below.
I really enjoyed the process of creating their two separate rooms but still finding ways to make the card work as a whole. Plus that large script sentiment outlined in white always makes my heart go pitter patter :)
Happy Friday! We're welcoming our April guest Nina-Marie back to the blog today. Today she's showing us how to watercolor with solid images. Here's Nina-Marie
Happy Friday everyone! I am excited to be bringing you a new watercolor video for you today which features a technique I am calling no-line layered watercolor.
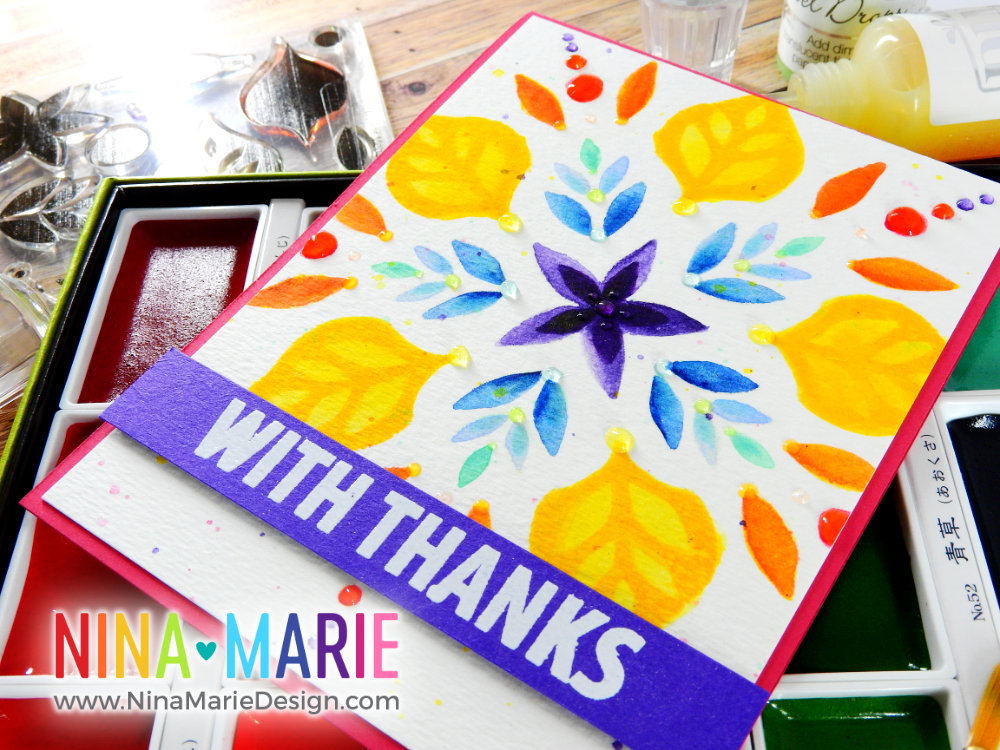
I wanted to use Neat & Tangled’s new Flower Medallion Builder stamp set for this card and I also wanted to do some watercoloring. But… the images in this set are solid, not outlines. Did that stop me from watercoloring? Nope; let me tell you what I did to get around that.
I love that you can build your own custom medallion designs with this set; very unique and a lot of fun! I’ve seen tons of examples from other artists that used different colors of ink to make their own designs. The result is definitely striking. However, like I said before, I wanted to watercolor. And by taking a very light ink, I was able to stamp the images into the design I wanted and then color over top of that ink to create the watercolor look. The ink I used for stamping was Simon Says Stamp’s Barely Beige ink.
This technique is very easy; especially with bold, clean lined shapes, such as these stamps in the Flower Medallion Builder set.
For watercoloring the images in, you could use any watercolor medium you prefer. In this card, I used the Gansai Tambi watercolor palette (36 colors). This was my first time using it and so far have been happy with the results it gives.
One thing to note, as with many pan watercolors, is that you need to get the colors working in the palette with quite a bit of water. Some palettes and pans need more water than others. With the Gansai Tambi set, I found by misting the entire palette with a bit of water and allowing that to seep in, that it got the colors softened a little for me while I worked on other things.
Then, when I was ready to actually color, I dropped a little puddle of water – about the size of a penny – into the pans I wanted to use. If the colors are not saturated enough with water, they have a chalkiness to them. I prefer them to be smoother and creamier, so I am generous with the amount of water I use.
To embellish my watercolored medallions, I used Nuvo Jewel Drops in all the colors except for the gray. Because I had a rainbow of colors in my medallion, I wanted to make sure that they were embellished with the same colors in the Jewel Drops.
I am a big fan of the jewel drops because they create such a gorgeous, translucent dot of color. They almost have a “magical” feel! Check out the great dimension you get once they dry…
I hope you enjoy today’s video and see how much fun it can be to create a no-line watercolor effect with solid stamped images!
Thanks for spending some time with me… I’ll be back again very soon with a new tutorial for you!
Hey there, Nancy here today with another look at the Cottontail Cuties stamp set. I created bunches of Easter cards this holiday season and this one was a favorite.
I started the design by watercoloring a few circles in coral and yellow. For the largest circle, I stamped the "cottontail cuties" text repeated with very light gray ink. A few of the circles were framed using cardstock and a circle die while the coral ones were placed floating off the side of the card.
To finish off the card a sentiment I used the Celebrate die and cut it out of white cardstock several times for a textured effect. The bunny from the Cottontail Cuties was colored with Copics and popped up with foam tape. A sprinkle of tiny clear sequins finishes off the card.
Hello there! Keeway here today with a sweet revisit of the Better Together stamp and Geomtric Bloom stencil. I love blending colors with stencils, and Neat & Tangled is never short of fun, unique stencil designs to add a fun and beautiful detail to your cards.
I started with blending a soft pink, purple, and blue ombre across the top and bottom of my cards, leaving the center white, and then added a touch of splatter as a finish. I then stamped my sentiment from Better Together stamp set: first hugs in blue, and then the remaining parts of the sentiment in dark brown.
Next, I stamped my images in copic friendly hybrid ink and colored them up with copic markers. I then started adding stitching patterns with my white gel pen on everything! First, the little girl's dress, then the teddy bear, and even the sentiment 'hugs'. It added such a cute touch!
Once all my pieces were complete, I then added them to my card with foam tape. Just a little stitching adds so much more to the card! Hope this inspires you to get creative with a white gel pen and add some fun details to images and sentiment.
Hi Debby here today and I couldn't resist getting the cute chick from the Eggstra Special set inked up. I know we are past Easter now but I think this card could pass for all year round, don't you? He's so cute after all!
I added the panel to patterned paper and then on to a Fog card base. Finally a little embellishment with some Nuvo Jewel Drops and this clean and simple card was done.
Thanks for joining me today and I'll see you next time.
It was love at sight when I first saw this stamp set, and the sentiments are too cute!
I started by creating a watercolored background using watercolor paper and Peerless watercolors. I left some white along the bottom for the sand to make it look like a little underwater scene.
I colored all of the images with Copic markers and cut them out with the Mermazing Nice and Neat dies. I did some highlights on the mermaid's hair with white acrylic paint.
I adhered all of the colored images to my watercolored background with foam tape and added some clear accent dots to look like bubbles.
I hope you have enjoyed my card today! Thanks so much for stopping by and enjoy your weekend and week ahead!
Hey everyone! This month's guest designer is no stranger to Neat & Tangled. Nina-Marie was part of our Design Team last year and we're thrilled to have her back visiting with us this month.
Here's a little more about Nina-Marie:
I am a fun, quirky girl in my mid-twenties. I grew up my whole life by the ocean, along the coast of the Mid Atlantic and New England. I have been making cards since 2007, perfecting my skills and techniques every day. Whenever I’m asked to define my style, I simply say “eclectic”. I do not follow a set design style; rather, I simply design whatever my mind feels like creating at that time. My favorite types of cards to make though are critter cards… I cannot resist the cuteness! :)
You're going to love Nina-Marie's cards today, and she also created a video to share. Take a look:
Hello friends! Background dies are
becoming fairly popular of late, and I wanted to share a technique that you can
do with certain background dies to create inked backgrounds!
Certain background dies are open in
the areas between the cutting lines; other dies are solid-backed. Depending on
the die, you can use this technique with background dies you already have. Or
you can use the die I’ve used today, which is the Neat & Tangled PolygonCover Plate die.
With some Distress Inks, I was able to create ink blended
backgrounds through the open areas of the die, which gave me the same effect as
if I had used a true stencil! The result looks awesome and is a great example
of how you can stretch the use of your supplies even further with a little
out-of-the-box thinking!
I did not have any trouble using the die as a stencil and
the die did not stain with the use of the Distress Ink. I cleaned up the die by using a damp baby wipe and all the
ink was easily removed. I have not tried this technique with all inks, so keep
in mind that using a different ink could lead to potential staining
(particularly alcohol-based inks). However, most water-based dye inks should
clean up just fine.
I hope you will be checking out the
video below to see how these cards came together! I will be back again next
week with another guest video for Neat & Tangled, so stay tuned for that!