Gold foiled cards with Sveta

Hello dear friends!

Sveta is here and I prepared for you two cards with gold foil. It's a new technique to me and I wanted to share with you the results of my first experience.


To get this effect you will need to have embossing ink, bond embossing powder, foil and iron/laminator. As this technique gives a little bit distressed look I went with solid stamp of a cloud from the Creepy Cute Shadows and Sentiments stamp set for the card with the girl and stripes made with washi tape masking.


The first idea that came to me after creating the striped background was a nautical themed card, so I chose the Sailmates stamp set for this one. I often like to keep my projects to two or three colors, so in addition to my white-gold background, I added only navy blue and red.


For my second card I went with a classic black & gold combination, and I love how it turned out! I left my girl from the Life is Beautiful stamp set black & white, coloring her with black and grey watercolor brush pens.  The hello sentiment is from the Everyday labels stamp set.


 Hope you enjoyed today's cards of mine and will be inspired to try it!

6

February Guest Designer: Kelly Latevola

Hello Crafters! 

It's Kelly here and this is my last post as the February guest designer. I'm so sad it's over! I had such a wonderful time visiting here. Thank you so much for having me. 


For today's card I started with a 4 x 5.25 card panel and stamped the Painted Hello all over the background in a pale aqua ink. Next I used Peacock Feathers  distress ink to add some ink blending to just the bottom right hand corner. I stamped the sweet girl from Lumberjack Love on a separate piece of white and colored her with Copic markers. I used a black multiliner to outline the image and add a bit of detail to her shirt. I also used my white gel pen to add some polka dots to her skirt. Once the detailing was done I fussy cut her out and outlined my edges with a Memento Tuxedo Black marker. The sentiment from the same set was heat embossed in white on a strip of black paper. I hunted up some black and white chevron paper to anchor the whole thing to my background. A few gold sequins finished the card off. 

I also have a card over on the MarkerPOP blog today using some Neat and Tangled so be sure to head over and check it out! I mixed some old (Fresh Blooms) and new (Painted Hello and Wholehearted Cover Plate)!

Huge thanks again to Danielle for the invite!
Kelly
10

Happy Ombre Roses Card by Taheerah

Hey everyone, happy Thursday! Taheerah here today with a fun ombre card!

Ombre is still really hot right now, and I've seen a few photos on Pinterest of ombre roses cakes, so I thought I'd try to create the same thing in card form! I decided to use the roses from Hand Stitched and set to work!

Here's what I created:


Yummy!


I stamped the roses repeatedly, then added an ombre wash of Distress Stain over the top! I then used the 'Happy' from Happy Holidays, and my MISTI to add my sentiments to finish off the card!

I hope you liked this quick and simple card, and would love to know your thoughts! Thanks for stopping by!

Supplies:
7

Hosannah - new and old


Hey everyone!  Miriam here today sharing a card using some new and old Neat & Tangled.

I thought that the Sunburst stamp would be a perfect background for a card featuring Easter Journaling 

I first inked up the Sunburst stamp several times using my MISTI and several shades of yellow ink.

Then I stamped the sentiment with Memento ink, and colored in the letters with a red Copic marker.  I also added a bit of Wink of Stella over top for some sparkle.


On the card base I stamped a few of the clouds from the aptly named Clouds set in white pigment ink.  It's a subtle way to soften the background.  I added a few mats as well as some clear sequins from the new Crystal Clear mix.  I love that you get small, medium, and large sequins in the mix!

Thanks so much for stopping by today!
4

The Daily Marker 30 Day Coloring Challenge + Giveaway!

Hello friends! Danielle here!

I am so excited to be playing along with Kathy Racoosin today for her latest 30 Day Coloring Challenge! This is seriously the best challenge ever because it's so simple, and you can spend as much or as little time as you want! All you have to do is color something! It could be a little flower, or an entire scene - whatever you feel like. Just have fun! You can get even more details HERE. Be sure to share your work during the challenge by using #thedailymarker30day on Instagram, or linking up HERE.
I was so excited to break out some pretty watercolors and just RELAX. We are gearing up for our March release in a few weeks which is keeping me busy, so it was really nice to just sit down and paint! 

Kathy and I thought it would be fun to both use the Faceted stamp set. I started by gold heat embossing it, and then watercoloring. I love how the gold shines :)  I also embossed a sentiment from a new March set you will get to see soon! Lastly, I added some of our Sunset Shimmer Mix sequins (my personal favorite mix!) to add a little pop!

I do hope you will take some time to play along!  

But wait, I also have a GIVEAWAY for you! To win our Faceted stamp set for yourself, leave a comment below and tell me what is your favorite thing to color with?
I think Kathy might have a giveaway for you too ;) So be sure to head over to her BLOG to enter!

Thanks for stopping by!
Danielle
216

Noticed By Neat and Tangled

We've been out and about checking out your work and love what we're seeing!

If you've been noticed, please proudly display this badge!

Cornelia's card using our Everyday Circles and You + Me stamp set immediately caught my eye! I love the overlapping circles with those gorgeous colors!

Yuki's card using our Meowwww stamp set put a big smile on my face!
Amanda's carding using Hello there and Falling Hearts made me swoon! That platinum embossing powder had me at hello!
Rae's card using Heart of Gold and Everyday labels is bright and bold!
And Hussena's card using our Hoop Die and Hand Stitched stamp set really took my breath away.

Thank you all so much for using Neat and Tangled for your projects, and for sharing your creativity with us!

If you use Neat and Tangled and would like to be noticed make sure to play along with our Little Tangles challenges, add cards to our Flickr group, or share on our Facebook page!

10

February Guest Designer: Kelly Latevola + VIDEO

Hello everyone!


Kelly back again! Today I used the well known technique of stamping in a light colored distress ink to create an image that appears as tough you've hand painted it. The Good to See You stamp set is perfect for this. Who doesn't want to achieve hand painted florals?! They're beautiful! I put together a video so you guys can see how I approach it. 

Remember with watercolor there is no right or wrong way to do it. Everyone's style differs, so do what looks pretty to you! 

Have a great weekend!
Kelly

7

So good to see you, with Elena

Hi there!

Elena here, with a one layer card using the January/February incentive set, So Good To See You. (It's free with any purchase of $50 or more! Click *here* to read more.)


I stamped the large sprig 4 times, to form a wreath. I did this without doing any masking whatsoever. If you look closely, you can see an overlap in the upper left quadrant, but it didn't bother me. The stroke of the stamp set is wide, whimsical, and very forgiving. You gotta love that! There was a more obvious overlap, at the bottom left, but I stamped a large flower separately, cut it out, and stuck it to hide the stamped seams.


And just so that one large flower wouldn't look out of place, I stamped a few smaller ones around the wreath, to bulk up where the other stamped images lined up.

Once the wreath was colored, I used a light, neutral colored marker (E40) to flick color in towards the sentiment. It has a sort of sunburst effect that highlights the sentiments even more.

I hope you like it! Thanks for stopping by.

♥.

4

Dimensional Die Cuts with Nina-Marie


Hi Everyone! It's Nina-Marie here today, sharing a card featuring a dimensional die cutting technique, as well as one of our newest stamp sets, Perfect Blend!
I love adding dimension to my cards and one of my favorite ways to do this is with craft foam (also known as fun foam). You can find this foam in any local craft store (usually in the kid's crafts section), and it's a very inexpensive product.

A few of the things I love most about using fun foam is that it allows me to create dimension on my card without having to deal with adhesive-backed foam tapes. It also saves me from having to cut lots of small pieces like when using foam tape, plus gives me much more even coverage underneath the element I am attaching it to.


I love using Copics to color in my images and I've got the colors I've used listed here for easy reference:
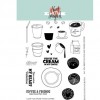
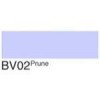
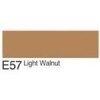
  • Coffee Mug & Saucer: BV0000, BV31, BV02, E57, E29
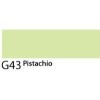
  • Flower Cluster: RV10, RV23, Y00, Y11, BV02, G43, YG97 
I've put together a video showing the step-by-step process! You can watch it below, or over on the Neat & Tangled YouTube channel!


If you enjoyed today's video, be sure to give it a thumbs up and subscribe! You can also find more inspiration from me over at my blog or on my own YouTube channel.


Thanks so much for stopping by today and spending some time with me... see you again soon! :)
xoxo, Nina-Marie


PRODUCTS


If you are interested in any of the products used in this post, I have them all linked below to both Simon Says Stamp and Ellen Hutson. Affiliate links used when possible.


8
Back to Top