It's No Joke!

Hello friends! Popping in to share something fun...

The code expires at 11:59pm EST!

Happy shopping! :)
Danielle


0

Springtime cards with Elena

Hi there!

Elena here, with a couple of springtime cards (make them and spring will actually come. this is becoming my mantra when all I see around me are banks of snow.)


My first card pairs the sweet bunny from Cottontail Cuties with the deer from Into the Woods as well as the Floral Heart frame. I used the wavy banner from Scalloped to prop up the bunny a bit, so that they could stare at each other properly. I love how the little animals work so well together!

I went straight-up Easter for the next card:


Using the Parquet stencil, I sponged on different shades of pink to act as a backdrop for my images (from Cottontail Cuties.)

To add some ground beneath their feet, I stamped the little grass images from the same set, in a way that would stretch to width of my card and used scissors to cut that out by hand. 

The sentiment was stamped directly onto the card base.

I hope you've been inspired to make a few springtime or Easter cards of your own!

♥.


3

Pastel Textured Background with Kelly Latevola

Hello Crafters! 

It's Kelly here and I am so ready to embrace Spring, how about you? 

One of my favorite things about Spring is all the soft pretty colors that are abundant in design and fashion. Unfortunately for me, my brain only operates in bright colors haha! 

I decided to challenge myself to create a card using those soft colors I can't ever seem to embrace. 


I knew my copic coloring was going to be next to impossible to get something super soft so instead I started looking at my distress inks. 

There are a ton of super pretty really serene colors that just scream Spring. 
I decided to use the so lucky sentiment because I knew it could really carry my card with next to no effort from me. It really is such an encouraging sentiment! 

You can see how I approached my soft colors and lots of texture in the video below


I wish you could see the sparkly silver shadow better in the photo because it really adds such a nice bit of shimmer to the card. Plus the clear sequins. I don't think I've ever loved an embellishment more! 


Thanks so much for visiting me! 
one more day and than you officially made it to the weekend :) 

For full supply list click here


4

Tiny Cuts with Nancy Damiano


Hey everyone, Nancy here with a closer look at the new Tiny Cuts die. I love this die for creating borders around my cards but I wanted to do something a little different. What if I ran the die across a card to create a punched out background? This is the result!


I lined up the dies 5 at a time and ran them through my Big Shot and repeated the process a few times to cut through the entire card. I backed the punched out card with a watercolored patterned paper for a peek of pink.


I wanted the background to shine, so just two images from the Eggstra Special and Cottontail Cuties stamp sets. A script title cut with the Celebrate die and covered with ink blending anchored with a vellum flag provides a simple and colorful title. A few scattered sequins from the Spring Mix complete the card!
8

Hello You!

Hi there! It's Cheiron here with a fun Hello card featuring a Distress Oxide Background. I have been making a lot of these fun colorful backgrounds lately to experiment with all of my new ink colors. I have a stack of them on my studio table now.  I always make them, and never know what to do with them. 

I've found that these are the perfect type of backgrounds to turn into cards with bold sentiments. The Hello You set allowed me to use all of the backgrounds I made to turn these backgrounds into cards to send to friends. 

Just add your sentiment, and a bit of detail and you are pretty much done. For this card, I stamped the Hello You over my colorful background, then also stamped the heart from the same set in the same inks that I used to create the background to add some interest.

Thanks for stopping by!

6

Just Because

Hello there!

Mayuri here to share a card using the Flower Medallion Builder set;-)

©Candles in the Garden. Neat and Tangled March 2017 - Flower Medallion Builder

I had a whole other idea for this card, and as such began by stamping some of the images from the set with white pigment ink onto a panel of white cardstock. I heat set the panel and then blended three different Distress Inks over the inked areas, hoping that the pigment ink would act as a resist. No such luck!

©Candles in the Garden. Neat and Tangled March 2017 - Flower Medallion Builder

My card then had to take a different turn as I wasn't seeing the results I was hoping to, so after I'd finished blending the Distress Inks, I spritzed some water droplets and noticed the white pigment ink beginning to run. I didn't mind the effect so I quickly heat set the panel, and spritzed a little more water and heat set again.

©Candles in the Garden. Neat and Tangled March 2017 - Flower Medallion Builder

I then re-stamped the images but this time with black dye ink, and while it was still a little damp, I brushed over some Perfect Pearls - you can't see the effect so well in the photos, but it looks great in real life!

I trimmed the panel down and foam mounted it to a white card base, stamped the sentiment with Versamark onto a strip of black cardstock and heat set in white. I foam mounted that to the card front and to finish, I added some Gold Mix sequins.

Thanks for stopping by!
5

A Blog Named Hero 5th Anniversary Blog Hop!

We are so happy to be hopping along today to celebrate the 5th Anniversary of A Blog Named Hero! Did you know that Danielle was a part of their original design team? We are so excited to help them celebrate!
You should have arrived here from Betty's blog!

Today Miriam created this simply elegant card combining Neat and Tangled and Hero Arts! She used our Calathea stamp set to create those beautiful leaves! She achieved the look by using a combination of first and second generation stamping, along with the rock and roll technique!

Your next stop on the hop is Ilina Crouse!  

And if you want to start from the beginning, or got turned around visit A Blog Named Hero for the full hop order!

There are also loads of giveaways this weekend so be sure to read more below!

GIVEAWAY INFO:
A Blog Named Hero is so thankful for our wonderful sponsors and collaborating companies!  Several companies decided to help us celebrate our fifth anniversary with giveaways and they were so generous that we decided to spread the love over both hop days with different prizes to be won each day!  Giveaway prizes total more than $500!  To win, leave a comment on each hop stop.  We will select winners randomly from different blogs so the more blogs you visit each day, the greater your chances of winning!  And be sure to visit the Saturday post from A Blog Named Hero for the list of Saturday hoppers and prizes!  Comments must be left before 11:59 PM EDT on Tuesday, March 28th and winners will be announced on March 30th.

Today's prizes include the following: 
Good luck and happy hopping!
SaveSave
453

Yo Ho Ho with Kay Miller


Hey eveyone!  It's Friday and we're thrilled to be welcoming this month's guest designer, Kay Miller, back to the blog!

Hello! I'm back again today with a couple more cute cards I created for my guest spot with Neat & Tangled this month. 

I used the absolutely adorable Yo Ho Ho stamp set and Yo Ho Ho matching dies. Cutest little pirates you've ever seen!


For my background I used Peerless Watercolor, and a wet on wet technique, then splattered with water and added some white dots with acrylic paint. The sandy mound was done the same way but splatted with some darker brown as well.


The cute designs were all colored with Prismacolor Colored Pencils, and cut out with the Yo Ho Ho matching dies. Everything was adhered with foam tape to a white card base.

I stamped the sentiment from the Yo Ho Ho stamp set in black ink and added a few sequins to finish it up!


Well I had to make a card with the little Pirate boy too. Couldn't leave him out :) The background is Salty Ocean Distress Ink blended onto Bristol Board and speckled with water.


Again everything was colored with Prismacolor Colored Pencils, cut out with the Yo Ho Ho dies, and adhered with foam tape.


I had a lot of fun playing with this cute set! I hope you have enjoyed seeing what I've created!

Thanks so much for stopping by!
11

Stamped Cover Plate with Stephanie Gold


 Hey friends! Stephanie Gold here today and I am sharing a fun and super colorful card I made using a few of March's new release products. :)


First I stamped out a few fun flower designs using the Medallion Flower Builder stamp set by Miriam Prantner. I used a total of 5 different bright colors to make it really interesting and eye catching.


Then to add even more texture, I die cut the design using the new Polygon Cover Plate. It ends up being a subtle and fun added accent. And finally, I used one of the big, bold sentiments from the Medallion Flower Builder set to finish my card off. I seriously love this set. :)

Thanks for joining me! Have a wonderful week!

Xo, Stephanie

Follow me: MY BLOG // FACEBOOK // INSTAGRAM // PINTEREST
8

Masking stamping for tropical card with Sveta

Hello everyone!

Sveta is here and I'm happy to share with you my new card. I really love this tropical trend that has won the hearts of lot of people. Are you among those?
I thought that Calathea stamp set was perfect to achieve a tropical look for my card. First I made masks of the leaves to create layers in my border stamping. I used outline images at the beginning, and then filled them with the colored layers.


For some leaves I used white pigment ink before or after (doesn't matter really) the main color inking to achieve a more soft tone. I think that the grey-green-pink color combo for the tropical design works really well.


For the bright big sentiment in the center of the card I chose the Hello You Stamp set. I stamped it in black ink and then in grey with a little displacement to make a shadow. For the final touch I added sequins from Neat & Tangled sequins mixes: Crystal Clear, Pearl and Lime.


Hope you enjoyed today's tropical walk into the stamp jungles!
19

Awesome Medallion Flower Cards - Two Ways

Hello Dears,

Daria here. How is your day going?

Have you got a chance to play with Medallion Flower Builder Set and coordinating die? Those are amazing sets from the latest release designed by Miriam Pranter.  As for me, I just can't stop using it. I came up with two cards for today.


For the first one, I used the in-laid technique and puzzled in different colorful pieces into die-cut petals.


For the sentiment: I first stamped the Awesome in black and then adhered the die-cut Awesome in white. This little trick helped to support overall dimension on the card.


My second card is all about masking. I used Medallion Flower coordinating dies to cut my masks from post-it notes. Then, I blended in some hickory smoke distress ink, took off the masks and stamped my petals from Medallion Flower Builder Set.  Love, how this one turned out.


 I also stamped the sentiment from Love Notes stamp set inside the card using the same ink as on the top. I am sure one of my friends will love it, lol :)

Hope you liked these ideas and will give them a try :) Thanks so much for stopping by!

Hugs,
Daria.

Neat&Tangled products used: 
Medallion Flower Builder Stamp Set
Medallion Flower Builder Nice and Neat Dies 
Awesome Stamp Set
Awesome Nice and Neat Dies
Love Notes Stamp Set


8

You Can Do Anything with Keeway

Hi friends! Keeway here today with some fun crafting with older released stamp sets and dies. Today I will be featuring the Big Top Birthday and Scalloped dies.
I always start by stamping and coloring my images. I colored with copic markers. Then I went die cut the sentiment You Can Do Anything in white cardstock three times. For one of the die cuts, I blended red dye ink from bottom up for each line of words, using post-its to mask off areas I did not want to ink. Then I adhered all three layers together, with my blended layer on top.
Next I blended a dark background with grey and black distress inks from top to bottom on smooth white cardstock.  I couldn't help but add a little bit of black paint splatter. I'm addicted to splatter!

Next, I wanted to create some framing so I cut 2 strips of red striped pattern paper and black cardstock. On the black cardstock I die cut the scalloped edges with the Scalloped dies.

Thanks for droppy by and see you next time!
Keeway

Neat & Tangled Products in Today's Project

8

March Guest Designer - Kay Miller


Hey everyone!  We're thrilled to be introducing Kay Miller as our guest designer this month!  Kay's got a beautiful, bright and clean graphic style, and we know you're going to love her cards this month!  Her's a little more about Kay:

Hi, I’m Kay Miller. I’ve been in love with stamping and card making for over 25 years, after wandering into a small stamp store in Anacortez, Washington, while visiting my Grandfather. I was totally enthralled then, and I’m still as excited about it today as I was then! I am currently living a long time dream of mine, creating for several of my favorite stamp companies. I live in Missouri with my wonderful husband, two great kids, and lots of furry friends. Along with my love of card making, I also enjoy creating Christmas ornaments from Polymer clay, digital scrapbooking, photography, and long walks outside with the doggies.

I am super excited to be guesting with Neat & Tangled this month! They have some of the cutest stamps and dies around!

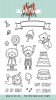
It was love at first sight when I saw the 
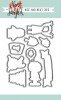
Medallion Flower Builder stamp set and dies! I'm a sucker for anything you can make into a flower or use for radial symmetry. I have two cards to share with you today using this fun new set!


I started with a piece of watercolor paper and stamped the leaves on that using Distress Inks. I then took a brush and some water and loosely went around the edges creating a soft watercolor look. When that was dry I added some speckles with the same Distress Inks.


I cut the watercolored panel to fit the top of my card and glued that down with adhesive tape. I used the MISTI to stamp the sentiment underneath in the same shades of ink that I stamped the leaves in. I then cut out three of the flower/leaf dies, arranged them on the side, and added some rain stones to finish it up.


For my next card I wanted to use the dies to create a flower. I took some plain white card stock and blended some purple and pink ink onto it, then cut the petals from that. I stamped the flower in the center of the card, then arranged the petals around it.


I used the tiny circle stamps and stamped those in between the petals, and added some sequins to the center. I used the MISTI to stamp the sentient with the same purple and pink inks to match the flowers.

Thank you so much for stopping by!
10

Die Cut Focal Point With Debby Hughes

Die cut focal point birthday card by Debby Hughes. Find out more by clicking on the following link:  http://neatandtangled.blogspot.com/2017/03/die-cut-focal-point-with-debby-hughes.html

Hi Debby here today with a look at creating a focal point from die cuts using the Medallion Flower Builder and Classic Tag 2 dies. 

Die cut focal point birthday card by Debby Hughes. Find out more by clicking on the following link:  http://neatandtangled.blogspot.com/2017/03/die-cut-focal-point-with-debby-hughes.html

I started the card with the Polygon stencil and blended white card with light pink and peach inks. Before lifting the stencil I spritz the card with a fine gold shimmer mist then lifted the stencil and lightly splattered the panel with a gold spray.

Die cut focal point birthday card by Debby Hughes. Find out more by clicking on the following link:  http://neatandtangled.blogspot.com/2017/03/die-cut-focal-point-with-debby-hughes.html

I wrapped twine around the panel and then moved on to create the die cut focal point. I had a set colour scheme in mind so blended various dye inks in to white card so that I had a lime green, dusky coral, dark teal and light blue pieces. I then die cut the Medallion Flower Builder shapes from the ink blended pieces. All except the light blue which I partially cut with a banner die from Classic Tags 2. I also cut a white banner and stamped the Happy Birthday sentiment from the Yo Ho Ho set in black ink. 

I grouped all the elements around the twine using foam adhesive to adhere and give dimension. I love how the colors of the die cuts pop off the shimmery subtle background.

Thanks for joining me today and I'll see you next time

Debby
7

Watercolour Stamping Video | Natalie Elphinstone

It's Natalie with you today, and I've got this pair of cards to show off which I made with some of the new release March products. There's a video at the end of this post where I walk you through a step-by-step of how I put these together.


I'm sure everyone is different in how they approach cardmaking, but often this is how I do it..... I get an idea in my head of how I want something to look, and then I sit down to figure out how I can make it happen. On this occasion I had a vision of a simple white card with a little window in the front where a cluster of brightly coloured leaves and flowers could explode through.


I knew the Medallion Flower Builder stamps and dies would be perfect as the cluster of floral elements, and to kick up the colour a notch I stamped them with a watercolour technique which I'll show you in the video.


I also subsequently decided that since I'm never very good at leaving things simple or with acres of white space that I would have to do something about my plain white cardstock background. I didn't want to distract from the eye-catching colours of the leaves so I opted for an inlaid diecut background because it adds subtle amounts of detail and texture without adding any other colours. I'll show you how I achieved this in my video too.


Supplies
Medallion Flower Builder Stamp Set
Medallion Flower Builder Die Set
Polygon Cover Plate Die
Classic Tag 2 Die Set
Dye Inks (I've used Studio Calico Color Theory Inks)

Maybe you'll try one of these techniques in your next card design? Please share it with us if you do!
xxx
Natalie


12

You are my greatest treasure (with Elena)

Hi there!


Elena here, with a little pirate couple from Yo Ho Ho.  I stamped, colored and die-cut the little pirates, and set them against a dark patterned paper backdrop.

To frame the pirates, I die-cut a rectangle from the Scalloped die set, and then used a smaller rectangle die to cut an opening. I love how this separates my 2 patterned papers!


I thought a wood-plank paper would be perfect on the card-base;  the whole walk-the-plank, swab-me-deck kind of vibe.

As I often do, I cut apart the sentiment to be able to stamp it in 3 places. One, at the top in the rounded banner (from the now unavailable Stamptember collaboration, Nuts About You.) I then heat-embossed the rest on banner flags from Scalloped.

I hope you like it! Thanks for stopping by!

♥. 
9
Back to Top