Hello there! Mayuri here to share some cards for the July Release - there's a great selection from this month's release, and I've experimented with a few techniques that I hope will inspire you! I've seen the watercolour trend showing up more in more in the card making world, and so I wanted to try a technique using Distress Inks and water.
For this first card, I stamped the shapes from Hello You in Picked Raspberry, Festive Berries, Shaded Lilac, Peacock Feathers and Salty Ocean all over a panel of white cardstock. I left a blank space in the centre for the sentiment.
I then took a damp brush and went over the stamped areas with water, sometimes using a light touch and sometimes slightly heavier. I liked how quickly the water seemed to dry in some areas, allowing me add more colour and more water to create a sense of movement.
I heat set the panel and then stamped the large sentiment from the same set with Versamark Onyx Black ink in the centre. I trimmed the panel down to the same size as my card base and adhered it straight down.
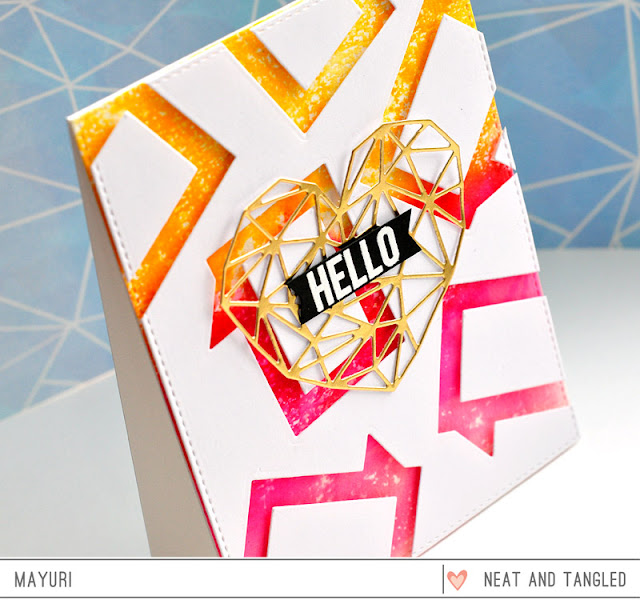
I added a few sequins and some gold splatters to finish up. For my second card, I took the speech bubble die from Square Thoughts and die-cut it several times from a panel of white cardstock.
I held on to all the centre pieces that get cut out with the die so that I could adhere them all back in place. First, I took an inky panel from my stash and adhered it down to a white card base, and then I foam mounted the die-cut panel in place.
I also die-cut the fractal heart shape using the Heart of Gold die and adhered that to the front of the card. The sentiment comes from the matching Square Thoughts stamp set and was white heat embossed onto a strip of black cardstock before being foam mounted to the front.
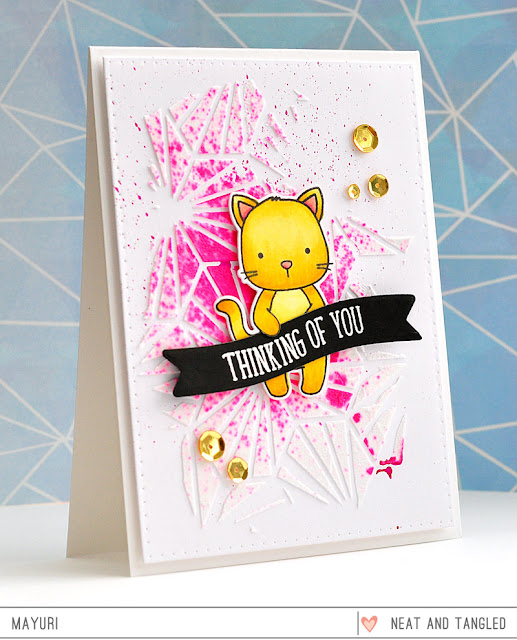
For my last card, I took the Geometric Blooms stencil, laid it onto a panel of white cardstock and swiped through some embossing paste. While the stencil was still in place, I also spritzed some Funky Fuschia Dylusions Ink spray.
I removed the stencil and set the panel aside to dry while I worked on the focal element. I stamped the cat from Kitty's Favorite Things onto a piece of white cardstock and coloured him in with Copic markers.
After my embossed panel had dried, I trimmed it down and foam mounted it to a card base. I die-cut the cat out using the matching die and also foam mounted it to the card front. I had added a little slit beneath his right paw so that I could tuck the sentiment banner underneath.
The sentiment banner was die-cut using the die from Kitty's Favorite Things and a sentiment from Succulent Journaling Card was heat embossed in white. To finish, I added a few gold sequins.
Thanks for looking!
:-)
July Release projects
copic coloring,
distress inks,
embossing,
geometric blooms stencil,
gold mix,
heart of gold die,
Hello You,
Kitty's Favorite Things,
mayuri,
sequins,
Square Thoughts,
Succulent Journaling Card
7.27.2016
loading..
Subscribe to:
Post Comments (Atom)


Gorgeous cards.
ReplyDeleteSo fabulous...love them all!
ReplyDeleteAWESOME projects!
ReplyDeleteFabulous collection of cards, so bright and colourful and full of life.
ReplyDelete