Showing posts with label sunset shimmer sequin mix. Show all posts

March Guest Designer - Julia Stainton!


Hi I’m Julia Stainton andI’m thrilled to be guest designing for Neat & Tangled for the month of March! I love creating and always have a project (or ten) on the go. Designing is a big part of my life and I’ve been a freelance designer since 2007. My family and I live in Ontario, Canada in a big old farmhouse that we are always renovating. You can find my work at Belle Papier {pretty paper}.


The Crafting is my Jam stamp set immediately caught my eye in the Neat & Tangled Shop. It’s so me! And seriously, if you’re hear reading a crafting blog, well, I’m pretty sure it’s you too! Scissors and brushes and buttons and sequins…oh my! It’s an amazing mix of my two crafty loves, paper crafting and stitching. 

Lately I’ve been absolutely addicted to 1. Creating Shaker Cards and 2. Watercoloring. It was an easy deduction to put them both today with this sweet stamp set and see what happened.

To start off with the project, I first stamped images from the Crafting is my Jam set randomly over some watercolor paper in Black Archival Ink. When watercoloring, you need a waterproof ink so test yours on a scrap before starting to add pigment. Another tip is to be sure you use watercolor paper and not just regular card stock. It really DOES make a difference. Once the images were all stamped I added in color using some of my favorite watercolors. Once the color was all in, I flicked the brush with wet pigment over the surface for a fun flecked look.


Creating a shaker card is so much fun and the fabulous sequins in the Neat & Tangled Shop are perfect for them. You’ll need two layers, a sheet of acetate/clear plastic, sequins, a die and some dimensional foam adhesive strips. Create a window in the card front by die cutting a circle from the watercolored panel. Adhere a piece of acetate to the back of this layer to form the window panel. Cut another layer of watercolor paper the same size as the front window panel and stamp the sentiment in the center of it so that it shows through the window. Apply foam adhesive to the back of the window panel around the edges of the paper. With a large layer like this I like to surround the circle perimeter with more strips of foam so that it doesn’t sag and so that I don’t need as many sequins. I chose the Sunset Shimmer Sequin Mix for a warm fun look. Fill the window section with a sprinkle of sequins, remove adhesive backing from foam tape and carefully place stamped layer onto the window layer. You will then have an enclosed shaker space. Finish off your card with embellishments and a card base and it’s complete!

What a beautiful card!  We're so excited to have Julia this month and we can't wait to see the rest of her projects!  

Have a wonderful weekend and meet us back here bright and early Monday morning for the first day of Release Week!  
3

The Daily Marker 30 Day Coloring Challenge + Giveaway!

Hello friends! Danielle here!

I am so excited to be playing along with Kathy Racoosin today for her latest 30 Day Coloring Challenge! This is seriously the best challenge ever because it's so simple, and you can spend as much or as little time as you want! All you have to do is color something! It could be a little flower, or an entire scene - whatever you feel like. Just have fun! You can get even more details HERE. Be sure to share your work during the challenge by using #thedailymarker30day on Instagram, or linking up HERE.
I was so excited to break out some pretty watercolors and just RELAX. We are gearing up for our March release in a few weeks which is keeping me busy, so it was really nice to just sit down and paint! 

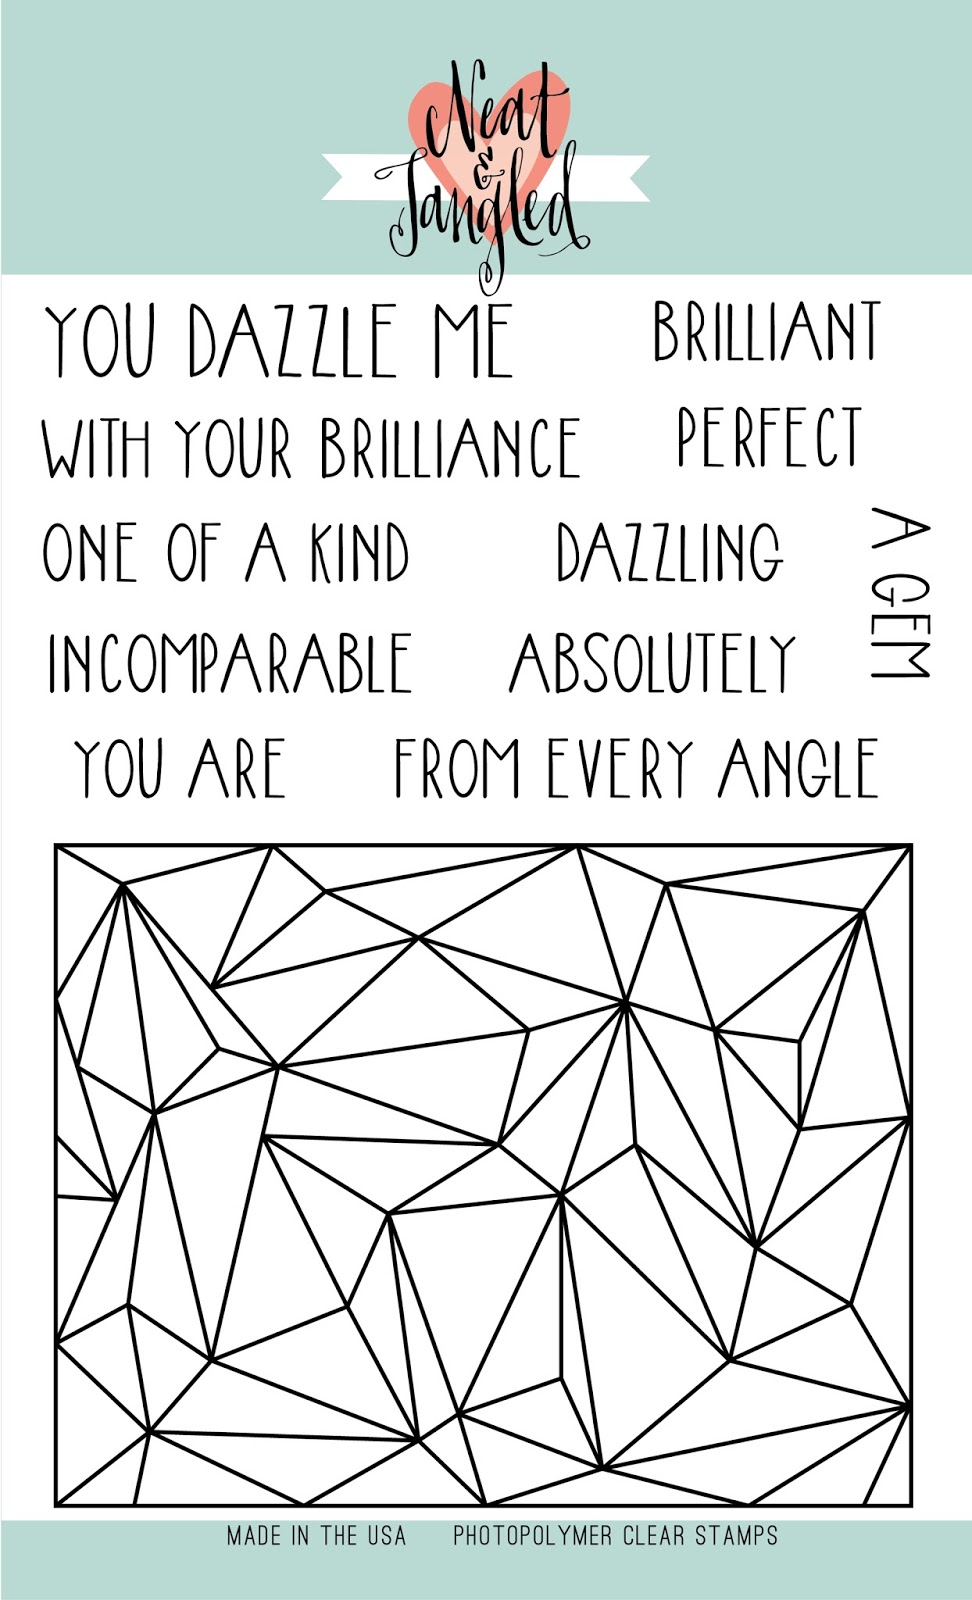
Kathy and I thought it would be fun to both use the Faceted stamp set. I started by gold heat embossing it, and then watercoloring. I love how the gold shines :)  I also embossed a sentiment from a new March set you will get to see soon! Lastly, I added some of our Sunset Shimmer Mix sequins (my personal favorite mix!) to add a little pop!

I do hope you will take some time to play along!  

But wait, I also have a GIVEAWAY for you! To win our Faceted stamp set for yourself, leave a comment below and tell me what is your favorite thing to color with?
I think Kathy might have a giveaway for you too ;) So be sure to head over to her BLOG to enter!

Thanks for stopping by!
Danielle
216

We are all made of stories...

Hello there!
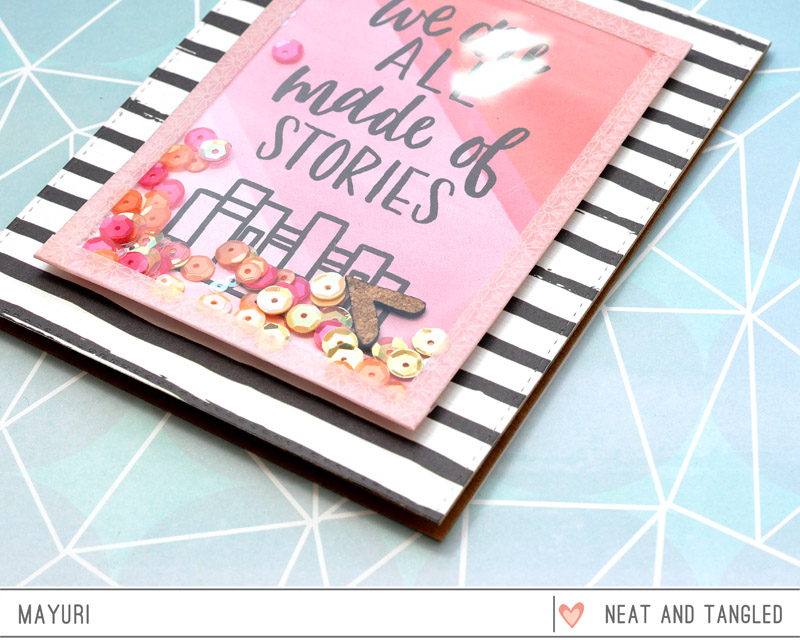
Mayuri to share a card using the exclusive 'We Are All Made of Stories' stamp set from the Mix Tape October Kit by Scrapbook Circle.
©Candles in the Garden. Neat and Tangled / Scrapbook Circle.

I also used some of the papers from the kit to whip up this super simple shaker card, using a technique demonstrated by Julie Ebersole here. I began by mounting a piece of pattern paper onto a kraft card base and then moved on to the shaker.
©Candles in the Garden. Neat and Tangled / Scrapbook Circle.

I then took a smaller piece of pattern paper and stamped the large greeting with black dye ink. I trimmed a piece of acetate to the same size and began sealing both pieces together with washitape on three of the four sides.
©Candles in the Garden. Neat and Tangled / Scrapbook Circle.

I added some sequins from the Sunset Shimmer mix along with one of the cork heart embellishments from the kit before sealing the pocket shut.
©Candles in the Garden. Neat and Tangled / Scrapbook Circle.

To finish, I foam mounted the shaker pocket to the card front! Simple, quick and easy!
©Candles in the Garden. Neat and Tangled / Scrapbook Circle.

Thanks for stopping by!
6

Scored Shapes: Happiest Birthday to You

Hello there!
Mayuri here to share a card using the new, Scored Shapes dies and a sentiment from Happiest Birthday.
©Candles in the Garden. Neat and Tangled September 2015 Monthly Post. Scored Shapes Dies.

I can see myself having so much fun with these dies - I left them intact for this particular project, but used individually opens up even more possibilities!
©Candles in the Garden. Neat and Tangled September 2015 Monthly Post. Scored Shapes Dies.

I took a panel of watercolour paper that already had some inky goodness on it (I never throw anything away!) and simply ran the Scored Shapes dies through it, setting aside the positive pieces. On the main panel, I stamped a sentiment from Happiest Birthday with Versafine Onyx Black ink.
©Candles in the Garden. Neat and Tangled September 2015 Monthly Post. Scored Shapes Dies.

On a white card base, I sponged some Delicata Golden Glitz ink in the areas that would show through the die cut spaces on the watercolour panel. To intensify the gold, I brushed some gold Perfect Pearls over the ink and misted lightly with water to set.
©Candles in the Garden. Neat and Tangled September 2015 Monthly Post. Scored Shapes Dies.

I foam mounted the die cut watercolour panel to the card base, revealing the gold through the apertures. I then adhered some of the positive pieces to the front along with matching sequins from the Sunset Shimmer sequin mix.
©Candles in the Garden. Neat and Tangled September 2015 Monthly Post. Scored Shapes Dies.

You could easily replicate this card with patterned paper, Gelli prints or anything that is lying around in your craft room ;-)
Thanks for stopping by!
Mayuri
3

Be Joyful Always

Hello! Anna is here to share my card 'Be Joyful Always'. I like white color in cardmaking, I like, when card is done almost of only whate cardstock. It feels so soft and light. And I like some touches of bright spots on such cards, so I wanted to create something like it this time.


Another idea was to use cover plate die cut, but only partially. I cut off the top and bottom parts of the die cut such way that it has become the height of four and a quarter inches. And than sticked with the foam tape on the white background. Alsomst ready! Just need some final details, that gived the pretty look to the card.


I stamped the sentiment from the Gardenia Blooms Journaling card on one of the negative parts from the die cut and pur it on the foam tape too. And as colored details - some flowers and sequins.


Supplies:


2

For the Record, Heather Campbell Loves Gardenia Blooms


Today we have Heather Campbell sharing, we were so lucky to have her helping out with our release this month and she's back with a couple more cards today!
_______________

Hello! I'm thrilled to be here today on the Neat & Tangled blog helping out for a few weeks! I've been a huge Neat & Tangled fan from the beginning and it's been so fun to play with the product for this last release!


Today, I have two cards to share with you today. My first card uses the new Gardenia Blooms Journaling Card stamp set.

To create this card, I stamped the journaling card and a sentiment on white card stock and then I colored the gardenias in with Copics very lightly using dots to create the depth and interest. Then, I fussy cut out the journaling card and mounted it on a card base with a patterned paper front. I love the simplicity and boldness of this card so much! 


Next up, I used the new For the Record stamp set.

When I saw this set, I knew I had to do something like this eventually and I'm so glad I finally went and executed just what I had envisioned! First I stamped the record player on watercolor card stock. Then I went in and got it wet and brought the watercolors to the paper in spectrum of rainbow colors. I had lots of fun flicking the watercolors around to create splatter too! Once it was dry I added a heat embossed sentiment and some gold sequins from Sunset Shimmer.


Thanks so much for stopping by and sharing part of your day with me! I hope you have a great day!
XOXO,
Heather

N&T Products Used:

   
2

May 2015 Release Day 1: Introducing Send Pretty Mail + Hoop Die + Embellishments and a Giveaway!


Hello friends! Welcome to our May 2015 release week! We are so excited to have you join us. We have LOADS of fun, inspiration, and giveaways for you! We will be introducing 5 new stamp sets, 3 dies, and some new embellishments! Be sure to stop by everyday. All stamps, dies and embellishments will be available in the shop on Friday, May 8th at 8am EST.

We have A LOT of new products for you today so get ready! Sorry for the photo overload :)

First up is a sweet 3x4 stamp set, Send Pretty Mail. With some fun lettering and fresh florals, this set is perfect for dressing up those envelopes and letting your recipient know there is something special inside! It's also great for making cards! Send Pretty Mail is also our May/June You're So Neat Incentive stamp set - meaning that it's FREE for all orders $50 and over! You do not need to add it to your cart, and there is no coupon code.
We also have a new stand alone die which I think you will love because it is on trend and has endless possibilities!  (And there might just be some coordinating stamp sets coming your way  this summer!) Say hello to our new Hoop Die designed by Miriam Prantner! Perfect for creating little pieces of embroidery hoop art!
We've also got LOADS of embellishments coming your way this week.  Including two new sequin mixes.
Mermaid Tail Sequin Mix

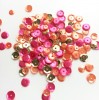
 Sunset Shimmer Sequin Mix
And several new colors of Lucy's Little Things Sparkly Shaker Mixes!
English Rose

 Flamingo

 Forget Me Not

 Star Shine

 Phosphorescence 

 Glacier

And now how about some inspiration using these new products!

These girls are so amazing!!

And how about a giveaway!

To win Send Pretty Mail and the Hoop Die:
1. Be a follower and leave a comment! 
2. Follow us on Facebook and share about release with your friends! (leave another comment)
3. Follow Neat and Tangled on Twitter and tweet about our release, use @neatandtangled! (leave another comment)
4. Follow Neat and Tangled on Instagram and repost about our release! Use #neatandtangledrelease (leave another comment)

See you back here tomorrow!

145
Back to Top