Showing posts with label Better Together Dies. Show all posts

Sending Hugs with Keeway

Hello there! Keeway here today with a sweet revisit of the Better Together stamp and Geomtric Bloom stencil. I love blending colors with stencils, and Neat & Tangled is never short of fun, unique stencil designs to add a fun and beautiful detail to your cards.
I started with blending a soft pink, purple, and blue ombre across the top and bottom of my cards, leaving the center white, and then added a touch of splatter as a finish. I then stamped my sentiment from Better Together stamp set: first hugs in blue, and then the remaining parts of the sentiment in dark brown.


Next, I stamped my images in copic friendly hybrid ink and colored them up with copic markers. I then started adding stitching patterns with my white gel pen on everything! First, the little girl's dress, then the teddy bear, and even the sentiment 'hugs'. It added such a cute touch!


Once all my pieces were complete, I then added them to my card with foam tape. Just a little stitching adds so much more to the card! Hope this inspires you to get creative with a white gel pen and add some fun details to images and sentiment.

Thanks for joining me today!
Cheers,
Keeway


3

Kid with a Microphone + Weekend SALES!!!


Ever since I saw the Kid with a Microphone sentiment from Happier Than, I wanted to fashion a microphone and pair it with this cute boy from Better Together! I looked through all the different sets and saw that the North Pole sign from Santa's Wonderland looked like it could be a microphone.


I masked off the ball (finial) and stamped the bottom of the pole right next to it so it's essentially a very short pole. Then I used the coordinating die for the sign and partially die cut the ball and then the pole. I used a Copic multiliner to draw in the lines on the ball and dots for the windscreen.


I also used created a mask for the tiny little snowman in the snowglobe from Elfs and Their Shelf and stamped it on to the boy's sweater to create a holiday sweater. The tree stump stage is from Lumberjack Love.


I used the falling snow stamp from May Your Holidays Be behind the boy's head and it was heat embossed with sparkle embossing powder. The big sentiment was also heat embossed and the hollow happier word was coloured in with red and orange Copic markers. To balance out the image with the big sentiment, I added sequins in five colours at the base of the tree trunk.


For those celebrating Thanksgiving this long weekend, enjoy your time with friends and family... with a bit of shopping!


Neat & Tangled is having sales all weekend! If you've had your eye on the last two releases, it's the perfect time to purchase a few early Christmas presents for yourself. ;)

Please visit my blog for a full supply list for this card.
5

Cosmo Cricket Week - Day 3

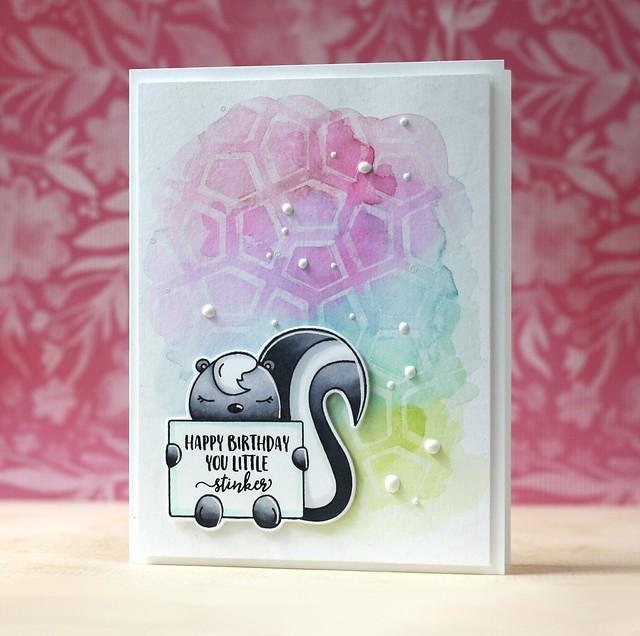
Neat & Tangled-Little Stinker

We are already halfway through our Cosmo Cricket collaboration week!  Each day this week we're sharing projects featuring Cosmo Cricket and Neat & Tangled.  We hope that you are enjoying the projects as much as we have been enjoying the products!

Every good collaboration need a couple prizes, right?  We've got a great bundle of Cosmo Cricket goodies to share with one of you.  Just leave a comment on each post this week and we'll pick a winner and announce them next week.

Cosmo Cricket also has a prize to share, so be sure to stop by and check them out on Facebook and Instagram.

Today Laura and Elena are sharing with us.  First up is Laura:

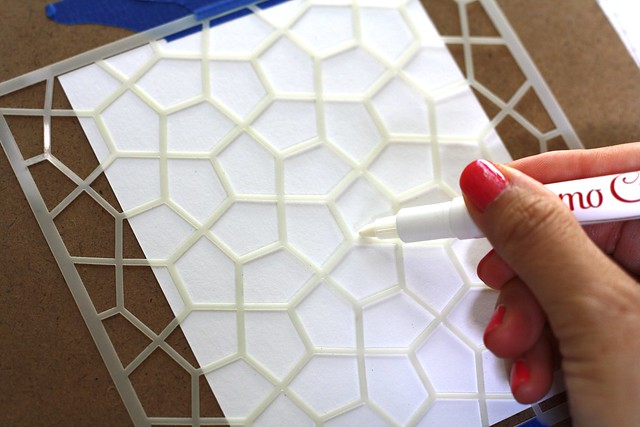
For my card, I used the Cosmo Cricket Resist Pen along with the Pentagon stencil for the background, tracing the stencil openings onto watercolor cardstock.

Neat & Tangled/Cosmo Cricket collaboration

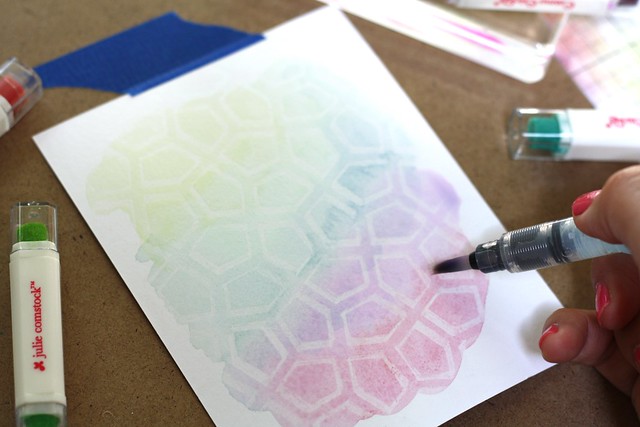
Then I used several of the Swatch Sticks to paint over the resist pattern. I dapped the swatch sticks onto an acrylic block and my water brush to pick up the color and control the intensity.

Neat & Tangled/Cosmo Cricket collaboration

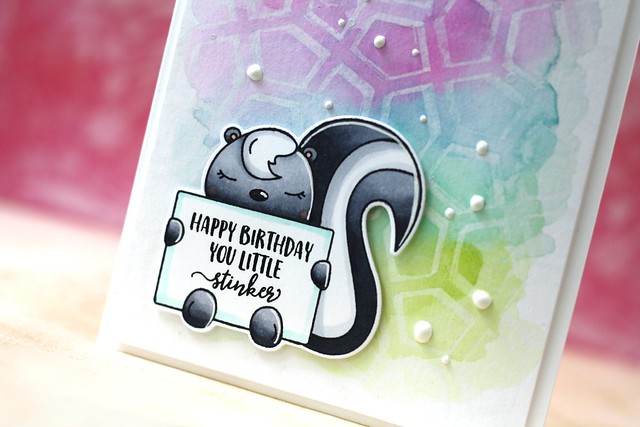
I added this sweet skunk image from Little Stinker along with a few accents using Glacier White enamel accents.


Neat & Tangled-Little Stinker

Next up is Elena:

Hi there!  For my first card, I stamped and colored elements from Mermazing and set them against watercolored backdrop. I adore these new products from Cosmo Cricket. They are made for watercoloring dummies like me! 


I used the watercolor brush to spread a little water around, then sprinkled some Pool Pixie Paint onto the piece, and basically my work was done.


I blended out the background a bit and added some flecks of lighter and darker paint to give depth to the scene.

My next projects are a little tag duo. I played around with the Candy Pixie Paint for both. On this tag, I used the Resist Pen to add polka dots to the bottom half of the tag, let it dry, and then watercolored with the Pixie Paint over-top.  When everything was dry, I used a brown pen to add doodly circles around each polka-dot.

I added the little girl image from Better Together, and the new script Celebrate die to finish off the tag.


For my last tag, I did more of the same: doodled polka-dots with the Resist Pen and watercolored over-top with the Candy Pixie Paint. I added the Hooray wreath a little bird (from Kitty's Favorite Things) to finish off.


Be sure to leave a comment and come back tomorrow for more inspiration from our Design Team.  At the end of the week one lucky commenter will win a Cosmo Cricket prize pack!
54

Suzy Plantamura - Better Together

Hey everyone!  You're in for another treat today.  Our August guest designer Suzy Plantamura is back, and today she's showcasing our Better Together stamps and dies.  Here's Suzy:

I’m back today with my second guest blog post for August with another “one stamp, five ways” post. Today I will be using the Better Together stamps and dies. I’ve made five cards using different background techniques to share with you today.


My first card is made out of white watercolor paper. I stamped several of the two sized hearts on the background using Versamark Ink and embossed with white embossing powder. I watercolored around the hearts with turquoise watercolor adding a little extra paint inside the hearts.


I stamped the images on white cardstock using a light tan ink. I colored them in with Copics blending in the light ink I stamped with so there are no outlines. I stamped and embossed the sentiment with bright pink embossing powder. Last, I attached the title at the top and bottom of the card and attached them two girls to the center of the card. I finished it with some blue and clear sparkly sequins around the hearts.


I started this card by watercoloring stripes on white watercolor paper using greens and blues.  I splattered it with water before it was dry so the colors would run together. I also added some turquoise splatters.


I also watercolored a small stitched rectangle. I embossed my sentiment, cut around the edges and attached to this rectangle. I stamped the little girl on white cardstock with black ink and colored her in with Copic markers. I attached her to the left side of the rectangle and added some twine.


I actually used patterned paper for this background instead of watercolor for once! I layered the patterned paper with white cardstock and then rubbed Distress Ink on a stitched oval for the final


I stamped the images on white cardstock with black ink and colored them all in with Copic markers. I attached them to the oval and then stamped the sentiment and some small hearts around the images. I added some sequins around the oval to match the card.


For this shaker card, I started by creating the background using a stencil and texture paste. I colored the paste with green Distress Ink and then rubbed it over a dotted stencil. I die cut a circle from the top and used this for my shaker with sequins inside. I glued some green twine around the outside edges of the circle.


I stamped the sentiment on a small oval die cut and embossed. The little boy and his cute fox is stamped with a light ink and colored with Copic markers with no outlines. I attached the oval and the boy to the bottom of the card.


My last card takes me back to my favorite watercoloring techniques for backgrounds. I watercolored one rectangle with blue and another piece for the ground with purples. I layered them over a white cardstock rectangle on the card front.


I watercolored a banner with pink paint and embossed the sentiment on it with white embossing powder. I stamped the girl, bear, and hearts with black ink on white cardstock and colored them in with Copic markers. I attached all of these images over the background.

You can visit my blog for more details on how I made these five cards. I’ll be back one more time in August using another wonderful Neat and Tangled stamp set! Have a great week! Suzy
7

Neat & Tangled / Hemptique Collaboration, Week 1


Hey everyone!  We're excited to be teaming with Hemptique this month!  While you are probably familiar with their very popular twine, they also have a number of other products that we'll be featuring this month including hemp paper and bookmarks.

Each Tuesday this month design team members will showcase projects that combine Neat & Tangled and Hemptique products.  Be sure to leave comments on these posts as we'll pick a lucky commenter to win a Hemptique prize pack at the end of the month.

Today Nina-Marie, Emily, and Miriam are sharing their creations.  First up is Nina-Marie:

Hi everyone! I'm sharing what I call a "watercolor collage", using stamps and dies from Neat and Tangled, as well as products from Hemptique.


Hemptique has some beautiful handmade papers available in their store, which I have used here on this card. I love the rough texture of this paper; much like watercolor paper, but a lot softer in feel.

I stamped images from the My Heart Sings Neat & Tangled set onto the paper with Versafine Black Onyx ink; I also gold stamped my sentiment using the Paris stamp set (also by Neat & Tangled) and Delicata Golden Glitz ink.

For watercoloring, I used Tim Holtz distress inks; Spun Sugar, Worn Lipstick and Picked Raspberry. I also watercolored some hearts and added a bit of shimmer using a Wink of Stella glitter brush.


I decorated my panel using a mixture of sequins and beads from Lucy's Little Things and Neat & Tangled; I also tied a length of hemp around the bottom portion of the panel and adhered a gold, wooden heart on top. The wood heart was created by die cutting a piece of wood veneer with a heart die from Neat & Tangled (included in the Hand Stitched die set); I colored it gold by smooshing it into my Delicata Golden Glitz ink pad.

To finish things off, I layered my watercolored panel onto a pink striped card base with some yellow pattern paper.

Next we have Emily:


Hi, everyone!  I've been a long-time fan of their hemp cord and have it in so many colours! I love the vibrant colours and quality of the cord.


For my card, I created a cute little scene using Better Together stamps and coordinating dies. I also used the Turkey Talk dies to create a speech bubble shaker. I created an anchor for the scene by looping black Hemptique cord, twisting it a couple of times and adhering it to the front panel with a tiny attacher.


Both the card base and front panel are scored along all four edges. There are a lot of details in my card but I've kept the layout clean and simple. Please visit my blog for a full supply list. :)

Finally, Miriam has a pair of cards to share:


Hi guys!  I was so excited to receive some hemp paper to try in my package.  It's a beautiful paper with a wonderful texture, and I wanted to see how it would work with my dies.

I used the Gardenia Blooms Journaling Card die, and I was really happy with how well the paper held up since it's a little bit softer than regular cardstock.  I also loved how well the embossed lines show on the paper.

To create some textural contrast, I also cut the card from some insulation pink cardstock.  Leaving the pieces intact (in the insulation pink cut), I colored the inlaid pieces with Copics and then transferred them into my hemp paper die cut.


I stamped the sentiment, from the Gardenia Blooms Journaling Card stamp set, and then adhered it to the card over a cardstock and then vellum mat.  I love how the vellum softens everything.

Then I figured I would put all those negative pieces from my hemp paper die cut to good use.  I inlaid them into a steel gray cut, adding a sentiment from the Maple Leaves Journaling Card stamp set.


I love the dramatic look and again the contrast between the regular cardstock and the hemp paper.  This one is super CAS, just popped up on my base.


Hope you all enjoyed today's projects.  We'll be back next Tuesday with another set of projects featuring Hemptique as well as another chance to win!  If you don't already, be sure to like Hemptique's Facebook page and tell them we sent you.  There just might be a giveaway over there towards the end of the month.  ;)
26

Happiest Birthday To You


Today's birthday card features loads of products, including the newly-released Better Together and Itty Bitty Welcoming Committee, as well as Happiest Birthday and the A Lot to Say Die. I coloured and die cut the kids from Better Together and added birthday hats from Itty Bitty Welcoming Committee. I popped them out from behind the window created with the A Lot to Say Die and stamped a sentiment from Happiest Birthday directly on the card base.


Thanks so much for stopping by!

Sources:

6
Back to Top