Showing posts with label hexastar stencil. Show all posts

Masking Stencils


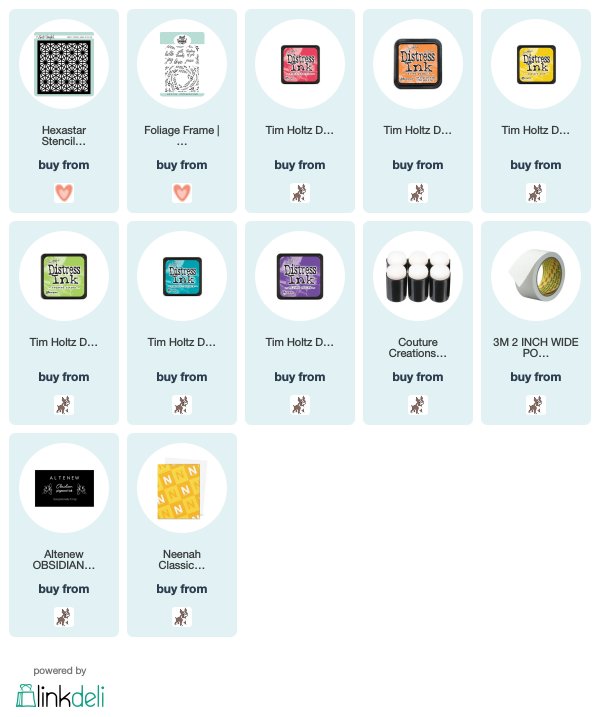
Welcome everyone! Mindy here today and I'm sharing a card I created by masking off my stencil. The Hexastar stencil has such amazing designs on it and instead of ink blending the entire background, I masked off certain areas to create my own design.

I found an area on my stencil where the design formed a full shape as shown below. I then centered it on a panel of Neenah Solar white card stock and held it in place with masking tape. Next, I started masking off areas around the designs. This helps protect the area so I'm only getting ink where I want it. Some areas I masked off with post it tape and some areas I just used scratch paper.


To create my rainbow pattern I am using Festive Berries, Carved Pumpkin, Mustard Seed, Twisted Citron, Peacock Feathers, and Wilted Violet Distress Inks. I apply each of these colors using a finger dauber which is great for small areas.


Once I have my pattern done, I can remove my masks and stencil. I kept this a simple one layer card by just adding a sentiment to the center using the Foliage Frame stamp set.

Masking off areas of your stencil to create your own design is a great way to get more out of your stencils.

1

Video Tutorial - Coloring Hair using Copic Markers with Mindy Baxter


Hi there everyone! It's Mindy from My Creative Scoop, and I have another Copic Marker Tutorial to share with you all!  I am using the stamp set Mermazing and also it's coordinating Mermazing Nice and Neat Dies. I just had to pair this mermaid up with the new Hello Summer Stamp Set and Hello Summer Die Set. I seriously cannot get enough of these layering script dies. I LOVE them! 

One of the most popular questions I get asked when coloring with Copic is coloring hair. So many people struggle coloring hair and I think it's one of the funnest parts to color. The trick to coloring hair is, to leave white in between the the strands so you can have natural looking highlights. 


In the video I'm showing you the simplest way to color blonde hair and still getting so much texture -- and it literally takes me just a few minutes. Of course you can spend a little longer on your hair and get a 'neater' look if that's the look you're going for -- but quick and easy is always great, too. Plus, it's way less intimidating! 

I'm coloring using E40, E41, E42 E43 and E44. You can do this exactly the way I'm coloring using ANY coordinating color combo. I also have tons of Hair Tutorials over on My Creative Scoop, that you can check out!


The background was super fun to make, I'm using my Neat and Tangled Hexastar Stencil and Nuvo Plum Glitter Paste!

I hope you enjoyed this months video. Have a great day!

Mindy

2

Double Stencilling

Hello there!

Mayuri here to share a card using one of my favourite stencils - Hexastar!

©Candles in the Garden. Neat and Tangled October 2016 - Hexastar.

I took a piece of kraft cardstock, laid down the Hexastar Stencil, and simply pounced some white pigment ink through the openings and onto the kraft.

 ©Candles in the Garden. Neat and Tangled October 2016 - Hexastar.

I removed the stencil to reveal the pattern, and heat set the pigment ink. I then laid the stencil down, in exactly the same place as it was before, but slightly offset it.

 ©Candles in the Garden. Neat and Tangled October 2016 - Hexastar.

This time, I pounced through various shades of Distress Ink. I removed the stencil once more and allowed my kraft cardstock panel to dry before trimming down.

 ©Candles in the Garden. Neat and Tangled October 2016 - Hexastar.

I die-cut a banner shape out of the kraft piece once it had dried and then stamped part of the sentiment from Into the Woods straight down onto a white card base. I foam mounted the kraft piece on to the card front and stamped the additional part of the sentiment onto some black cardstock with Versamark ink. I sprinkled with white embossing powder and heat set.

The sentiment was then die-cut out using the banner die from the Scalloped die set and foam mounted to the card front. To finish off, I added some of my favourite gold mix sequins ;-)

Thanks for stopping by!
2

Stenciling with Perfect Pearls

Hello there!

Mayuri here to share a card using the gorgeous Hexastar Stencil from the May Release!

©Candles in the Garden. May 2016 Neat and Tangled post. Hexastar Stencil and Perfect Pearls.

I love the geometric design of this stencil and can see myself reaching for it again and again to create awesome backgrounds! This card took no time at all to put together - I began by laying the stencil down onto some dark coloured cardstock and stamping all over with the Versamark Ink pad.

©Candles in the Garden. May 2016 Neat and Tangled post. Hexastar Stencil and Perfect Pearls.

I lifted the stencil away and brushed some gold Perfect Pearls over the sticky areas - I didn't mind the unevenness of my stamping (near the edges), as it give the overall look a sense of depth.

©Candles in the Garden. May 2016 Neat and Tangled post. Hexastar Stencil and Perfect Pearls.

I gently wiped any excess Perfect Pearls with a dryer sheet and trimmed the panel down to slightly smaller than my card base. Before foam mounting the panel, I swiped the Versamark Ink pad along all four edges of the card base, and again brush with the Perfect Pearls. This gave me a nice matching border...

©Candles in the Garden. May 2016 Neat and Tangled post. Hexastar Stencil and Perfect Pearls.

I wanted to keep the sentiment simple so that the focal panel could really be the star of this card, so I stamped one from the Origami Map set onto a strip of the same dark cardstock with Versamark, sprinkled with gold embossing powder and heat set. I trimmed the sentiment piece down and foam mounted it to the card front.

©Candles in the Garden. May 2016 Neat and Tangled post. Hexastar Stencil and Perfect Pearls.

To finish, I added a selection of Summer Sun and Gold Mix sequins.

Thanks for stopping by!
5
Back to Top