Showing posts with label Build A Tag Die. Show all posts

My Little Alligator | VIDEO | Natalie Elphinstone

There are two things that I love most about stamps and dies and stencils. One is the absolute endless possibilities they give and the other is that they don't ever 'run out'. So once you've invested in a few products you really have no limit to the amount of different projects you can create. And of course, I'm not just talking about card making! Your Neat and Tangled products work just as well on scrapbook layouts, pocket pages, notebooks, Bible journaling, home decor projects, you name it!


Today I was inspired to create a spread in my Travelers Notebook documenting a phase Shiloh went through as she was teething. First she developed her two middle teeth on the bottom, and then she sprouted her top incisors next. She looked like a little vampire! And keeping in mind I was still breastfeeding at this stage, so it was slightly frightening! LOL! 


Now I know there are all ranges of 'normal' out there, but my other 3 kids had done the standard thing of growing all their middle teeth first, so this was something a little unusual for me. Wondering if my baby was some kind of freak, I turned to the font of all wisdom.... and asked my Instagram followers what they thought ;-) You all reassured me that plenty of your babies had done the same thing and so maybe it wasn't so weird after all!


Anyway, it was still a story worth documenting and I had the ideal stamp set in mind to help me tell it. I figured the toothy chompy alligators from the Later Alligator set would match my theme perfectly, and I was right. A flawless combination of teeth and cute - just like Shiloh!


I created a series of little windows down the side of my page using the stacked circles from the latest release Build a Tag Die Set. Then I filled each one with different images to make a little scene, varying the shapes and images and products to generate a lot of interest. And as always I made sure to leave plenty of space to write my journaling.

You can watch the process of how my page came together in my video today. I hope you enjoy!


Supplies Used:

Later Alligator Stamp Set
Later Alligator Die Set
Friendly Florals Stamp Set
Friendly Florals Die Set
Snake Scales Stencil

Have a nice day!
xx
Natalie
2

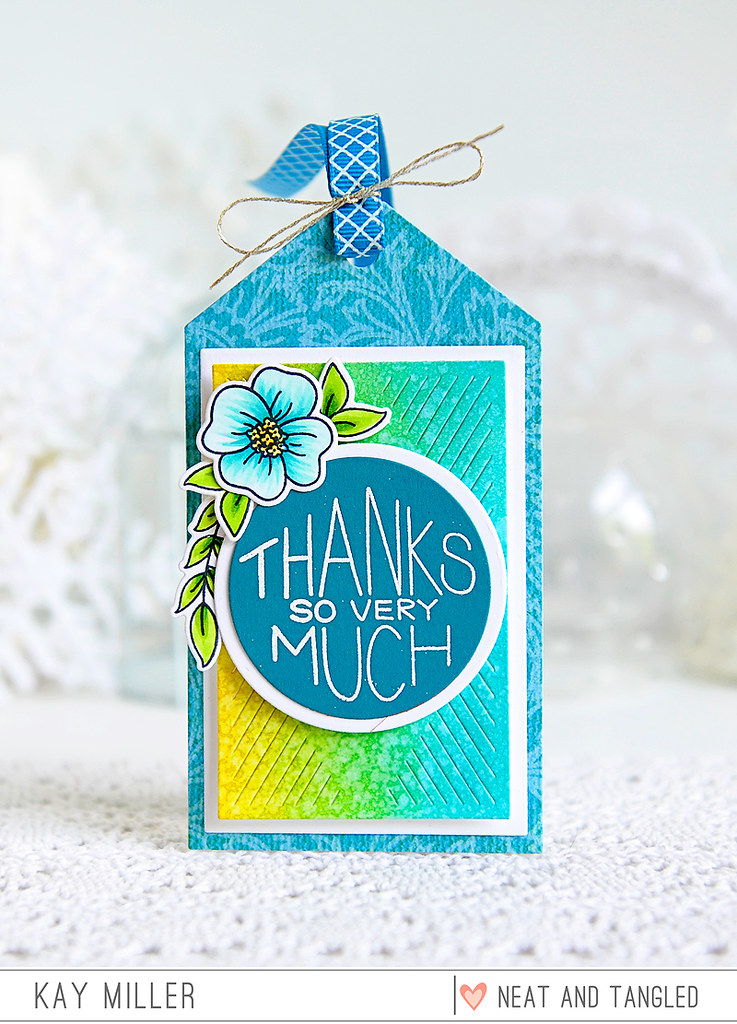
Thanks So Very Much Tag with Kay


Hi there! I'm excited to share with you a tag that I created with some of the fun new products from the August release!

I used the new Thanks So Much stamp set, Floral Frame Stamp set, Floral Frame Dies, Build a Tag Dies and the Gift Card Box Addition Dies.


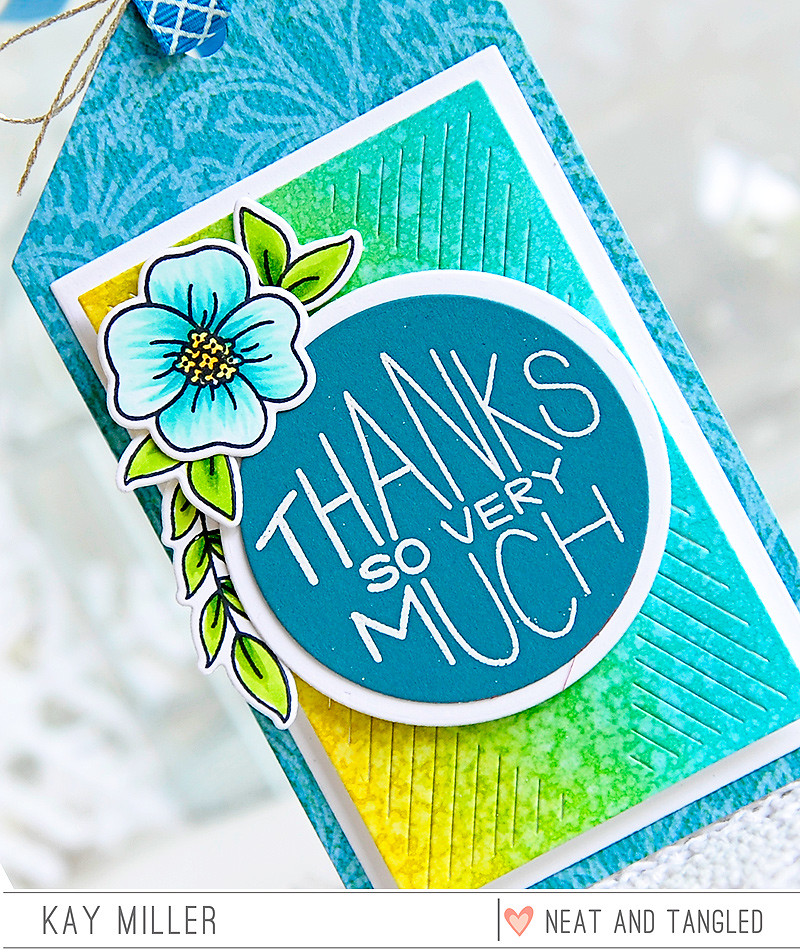
I cut the tag base out of some patterned paper that  I had on hand. I then blended some distress inks onto card stock and cut the piece from the Gift Card Box Addition dies. I added the white background layer to the back and adhered this to my tag front. 


I heat embossed the Thanks so very much sentiment on blue card stock with white embossing powder, and cut it out with the circle die included in the Build A Tag die set. I cut the white circle out to mat it with, and adhered this to my tag with foam tape.  The flowers and leaves are from the Floral Frame stamp set. I colored the images with Copic markers, cut them out with the coordinating dies, and adhered them to the tag with foam tape. To finish it off, I added some ribbon through the hole at the top and tied some sliver thread around it.

Products used for this project:

Gift Card Box Additions - Nice and Neat Dies
Thanks So Much Stamp Set
Floral Frame Stamp set
Floral Frame - Nice and Neat Dies
Build A Tag - Nice and Neat Dies

 I hope you have enjoyed my card today! Thanks so much for stopping by!

Kay :)

5

Stash Busting with the Build A Tag Dies


Hey everyone!  Miriam here sharing a whole slew of tags to share today using the new Build A Tag dies.

I got to thinking after I created this tag I shared last week, that this is a perfect set of dies for stash busting, so I set out to prove it.

I used one of my older paper collections (Amy Tangerine's Stitched collection for AC), cutting a 6" x 12" piece from eight different sheets.  Then I ran all the pieces from the Build A Tag set as well as the diamond die from the Gift Card Box Additions set through the die cut machine.


Full disclosure I have extended cutting plates, so I could do this in one pass.  If you have standard sized plates you'll have to cut a piece off and run it through separately, but that is easy enough to do.

Here's a look at one of my cardstock sheets with all the pieces cut out.


Once I had all my pieces cut out, I basically lined up all the main tag pieces and then distributed the rest of them to each tag, mixing and matching the different patterns.


I tried very hard to make this a quick set, not to over complicate things.  Normally if I was making just one tag, I'd probably add some stitching or embellishments, but here I limited myself to just adding a bit of foam tape for dimension.


All the sentiments are from the Thanks So Much stamp set.


There are so many different combinations and possibilities.  I'm planning to do this again, but with some old Christmas papers so I can knock out all the Christmas tags I need.


I hope this gives you some ideas and that you're able to make a dent in your pile of patterned papers too!
11

Neat and Tangled 6th Birthday Blog Hop Day 1!

This release week is a special week! It is our 6th birthday!  It is so hard to believe that it has already been 6 years!

To celebrate we have a week long blog hop with some of our favorite friends - I know you're going to be so inspired!

We are also having some BIG GIVEAWAYS!

(1) $100 Gift Certificate to the Neat and Tangled shop chosen from commenters along hop
(2) $50 Gift Certificates to the Neat and Tangled shop chosen from commenters along hop
A surprise giveaway on our Instagram page
A surprise giveaway on our Facebook page

To enter to win be sure to leave comments all along the hop all week long! Winners will be announced Sunday, August 12th.

In addition to all the fun of the hop, we are having an amazing release of new products! 

Elena is here to share some inspiration with you all today!

I love presenting a card and a matching box! The box is perfect for holding a gift card, which is my go-to gift:

neat and tangled release week


I started out by sponging purple inks onto a few pieces of white cardstock. These would become the first layers for both the box and the card. Then, I stamped and die-cut the Floral Frame and extra flowers from the set.

neat and tangled release week

I colored the leaves in shades of green, and kept the flowers in light pinks and yellows. I stamped the birthday greeting inside the frame opening and added a few accents by way of a white gel pen.

neat and tangled release week

I just love this new Gift Card Box die, designed by Miriam!  And the matching stamp set, Thanks So Much, makes them both must-haves. I die-cut the box, and the white layer for the top. I then die-cut a diamond shape into the top, and stamped the greeting into the opening. To finish off, I accented the box with a few flowers from Floral Frame.

I hope you are as excited about these new products as we are!

Here is a look at all the new August 2018 Products, and SURPRISE! They are all available NOW in the shop!

Your next stop on the hop is Laura Bassen! Don't forget to leave comments all along the hop each day this week!

If you get lost, or want to start over here is the full hop order for today:

Thank you for hopping along with us this week! :) Come back again tomorrow for more!

xo
Danielle
158
Back to Top