Showing posts with label Better Together. Show all posts

Copic Marker Tutorial : How to Color a Red Dress and Create Pleats

 
Hi everyone! I'm Mindy from My Creative Scoop and I'm super excited to share that I'll be starting a new Coloring Series with Neat and Tangled. So, once a month I'll be sharing some Copic Marker techniques and share with you how I color.
 
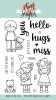
I'm going to be coloring this adorable little girl from the Better Together Stamp Set. Even though I didn't cut my images out there is a Better Together Nice and Neat Die Set, I stamped my image on Copic Xpress it Blending Card using Memento Black Ink. Take a look at my favorite Copic Must have products!
 
 Here's a list of Copic Markers I used:
  • Skin - E000, E11, E13, R30, R32
  • Hair - E30, E31, E33, E37, W5
  • Boots and Puppy - N1, N3, N5, N7, N9
  • Ground - E30, E31, E33, E0000
  • Dress - R35, R39, N5, N3, N1, C00
Check out the video on how I colored her dress and follow along if you have this set!


I really hope you enjoyed my video today. If there is anything particular you'd like me to do for a tutorial leave me a suggestion in the comments.
 
 Make sure you're subscribed to Neat and Tangled's YouTube Channel so you don't miss it. If you would like more Copic Marker tips and Tutorials make sure you stop by my site, My Creative Scoop and check out all of my tutorials. 
 
Be sure to check out Neat and Tangled's newest release, too! These cuties are simply a MUST!
Have fun shopping!
 
I'll be back next month.
 
♥ Mindy


6

Hugs from Michelle Short


It's the last Friday of the month, which unfortunately means we're saying goodbye to Michelle Short, this month's guest designer.  We have so enjoyed having her here and we know you have too.  She created the sweetest card for us today:

Hello there, Michelle here and I am back with my last card as a guest designer with Neat & Tangled this month. My card today uses the super cute Better Together Stamp set and coordinating Nice & Neat Dies.

I stamped the girl holding the owl and the bear using black ink. The images were then coloured using Copic Markers. I die cut them using the Better Together Nice and Neat Dies and then set them aside.


I die-cut a stitched square from white cardstock and then die-cut a circle inside. I took a piece of patterned paper and stamped the hugs sentiment on to it using black ink. This piece was added to a white square card base and then the frame piece added on top with foam tape. The girl and bear were then added to the card with foam tape. To finish off, I added a glitter pen to the girl’s bow and then a little jewel to the centre of it.

A big thank you goes to Miriam and Danielle for having me guest with them this month. I have loved it! I hope you have a great day!
6

Miss You Girlfriends with Kelly Latevola

Hello Crafters! 

Happy Saturday! 
You made it to the weekend. 
Whoop! Whoop! 

Speaking of weekends this time last month I was hanging out with a ton of my crafty girlfriends most of whom I only get to see once or twice a year. 
Needless to say I miss them a ton and I'm frequently looking for ways to create fun cards to send them so that they know I'm thinking of them. 


I thought the Better Together set would be perfect to create a scene where two girlfriends were separated and missing each other. I used the Polygon Stencil  and Pentagon Stencil to create two backgrounds that were similar but still different. 

You can follow along from start to finish in the video below. 


I really enjoyed the process of creating their two separate rooms but still finding ways to make the card work as a whole. Plus that large script sentiment outlined in white always makes my heart go pitter patter :) 


Thank so much for visiting me! 
I hope you have a wonderful weekend!

For a full supply list please click here

2

Sending Hugs with Keeway

Hello there! Keeway here today with a sweet revisit of the Better Together stamp and Geomtric Bloom stencil. I love blending colors with stencils, and Neat & Tangled is never short of fun, unique stencil designs to add a fun and beautiful detail to your cards.
I started with blending a soft pink, purple, and blue ombre across the top and bottom of my cards, leaving the center white, and then added a touch of splatter as a finish. I then stamped my sentiment from Better Together stamp set: first hugs in blue, and then the remaining parts of the sentiment in dark brown.


Next, I stamped my images in copic friendly hybrid ink and colored them up with copic markers. I then started adding stitching patterns with my white gel pen on everything! First, the little girl's dress, then the teddy bear, and even the sentiment 'hugs'. It added such a cute touch!


Once all my pieces were complete, I then added them to my card with foam tape. Just a little stitching adds so much more to the card! Hope this inspires you to get creative with a white gel pen and add some fun details to images and sentiment.

Thanks for joining me today!
Cheers,
Keeway


3

Simply Missing You and Basic Card Making Tips with Kelly Latevola

Hello Crafters! 

It's Kelly here and I'm super excited to share a personalized missing you card today. 

I think as card makers anything we make is usually with someone specific in mind. I really love the fact that anyone who receives a card from me was thought about from the start to the finish. When I saw the new Topography set I immediately thought of a way I could make more cards even more personal. 


I think most of us have friends near and far. Whether it's childhood friends who have moved away or friends we've met through this fantastic hobby. I thought adding in the outline of my own state to send to a friend whose moved away would be a cool way to let them know that the friends they left still missed them. On the flipside I think it would be cool to change up the sentiment and send the recipient a card with their own home on it. 

Since this card had minimal coloring I actually got to give a ton of other tips in this video I usually don't have time to talk about haha!
Check them out below


If that isnt the shortest video I've ever made it's a close second :) 
I am still in love with it though because because Black and White makes my heart go pitter patter when there's that POP of color. 


I love how the Topography set gives the card that gorgeous pattern but still makes sense with the design. This card came together so easy and I know whoever receives it will know that I'm sending some Ohio love :) 

Thanks for stopping by! 

xoxo
Kelly 

Supplies: 


5

January Guest Designer: Stephanie Klauck!


Happy Friday!  We're excited to introduce you to our first guest designer of the year, Stephanie Klauck!  Stephanie has an amazing clean and simple style, with bold pops of color or texture, and she's a true artist, you should definitely check out her Disney princess drawings on her blog, Round Here.  Here's Stephanie with a little more about herself:

Hi! My name is Stephanie and I have been a part of the paper crafting industry since around 2003. I love to create and share my creations online on my blog as well as my other favourite social media site, Instagram! ;)

I have been published with various paper crafting magazines throughout the years, including Scrapbook and Cards Today, Creating Keepsakes and Simple Scrapbooks, among others. I originally started out as a scrapbooker, but focus most of my craft time now on cardmaking and have recently gotten very interested in colouring and drawing.

I reside in Ontario, Canada with my husband Steve and two children, Caitlyn and Ryan. I work full-time in an administrative position and spend the rest of my time hanging out with family and friends, crafting, watching NHL and Nascar and reading on my kindle.

I am so excited to be guesting on the Neat & Tangled blog this month. For my first post I wanted to create a card using the adorable images from the Better Together stamp set. I had an idea in my head to stamp and colour the cute kids and have them stand together on the world.


To create my world, I cut out an arch shape from white cardstock that would fit on the bottom of my card stock panel and then I drew a rough sketch of the top of the globe on it with pencil. Once I was happy with it, I traced over it with a black Copic multi-liner and then I coloured it in with Copic markers before attaching it to my card stock panel.

I adhered the 3 kids to the top of the globe so it looks like they are standing on the world together. I adhered the middle girl with foam adhesive and the other two directly on the card.


To create my sentiment, I used two different sentiment stamps from the Perfect Blend stamp set, cut them apart, and changed up the words to work with my card design. I wanted to add a little something that went with the love part of the sentiment so I stamped a tiny heart from the Say Yes To Donuts stamp set, onto the world with red ink.

Thanks for joining me today on the N&T blog! I'll be back next week with another card to share! ;)
13

Kid with a Microphone + Weekend SALES!!!


Ever since I saw the Kid with a Microphone sentiment from Happier Than, I wanted to fashion a microphone and pair it with this cute boy from Better Together! I looked through all the different sets and saw that the North Pole sign from Santa's Wonderland looked like it could be a microphone.


I masked off the ball (finial) and stamped the bottom of the pole right next to it so it's essentially a very short pole. Then I used the coordinating die for the sign and partially die cut the ball and then the pole. I used a Copic multiliner to draw in the lines on the ball and dots for the windscreen.


I also used created a mask for the tiny little snowman in the snowglobe from Elfs and Their Shelf and stamped it on to the boy's sweater to create a holiday sweater. The tree stump stage is from Lumberjack Love.


I used the falling snow stamp from May Your Holidays Be behind the boy's head and it was heat embossed with sparkle embossing powder. The big sentiment was also heat embossed and the hollow happier word was coloured in with red and orange Copic markers. To balance out the image with the big sentiment, I added sequins in five colours at the base of the tree trunk.


For those celebrating Thanksgiving this long weekend, enjoy your time with friends and family... with a bit of shopping!


Neat & Tangled is having sales all weekend! If you've had your eye on the last two releases, it's the perfect time to purchase a few early Christmas presents for yourself. ;)

Please visit my blog for a full supply list for this card.
5

Cosmo Cricket Week - Day 3

Neat & Tangled-Little Stinker

We are already halfway through our Cosmo Cricket collaboration week!  Each day this week we're sharing projects featuring Cosmo Cricket and Neat & Tangled.  We hope that you are enjoying the projects as much as we have been enjoying the products!

Every good collaboration need a couple prizes, right?  We've got a great bundle of Cosmo Cricket goodies to share with one of you.  Just leave a comment on each post this week and we'll pick a winner and announce them next week.

Cosmo Cricket also has a prize to share, so be sure to stop by and check them out on Facebook and Instagram.

Today Laura and Elena are sharing with us.  First up is Laura:

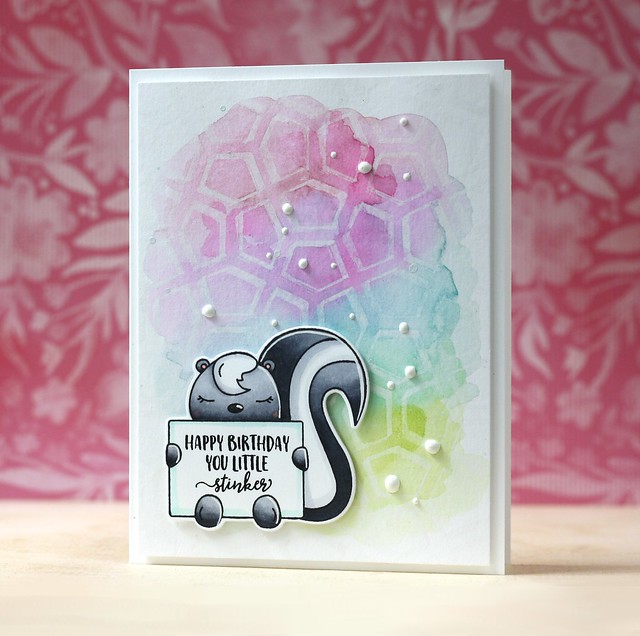
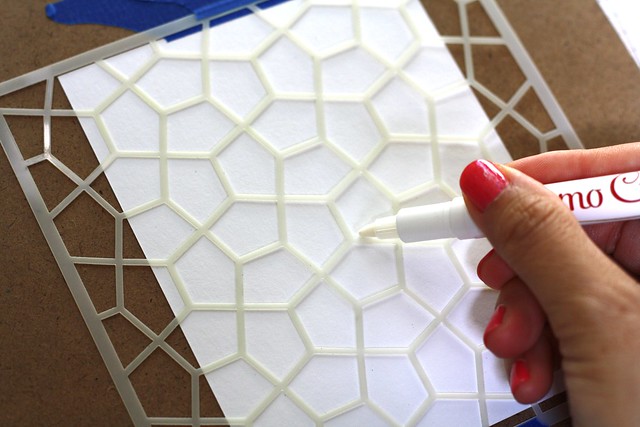
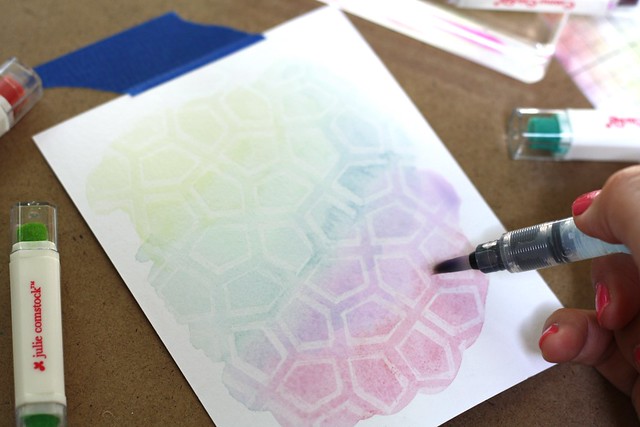
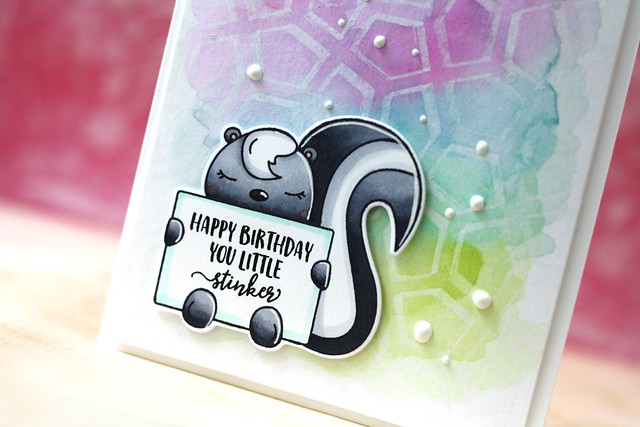
For my card, I used the Cosmo Cricket Resist Pen along with the Pentagon stencil for the background, tracing the stencil openings onto watercolor cardstock.

Neat & Tangled/Cosmo Cricket collaboration

Then I used several of the Swatch Sticks to paint over the resist pattern. I dapped the swatch sticks onto an acrylic block and my water brush to pick up the color and control the intensity.

Neat & Tangled/Cosmo Cricket collaboration

I added this sweet skunk image from Little Stinker along with a few accents using Glacier White enamel accents.


Neat & Tangled-Little Stinker

Next up is Elena:

Hi there!  For my first card, I stamped and colored elements from Mermazing and set them against watercolored backdrop. I adore these new products from Cosmo Cricket. They are made for watercoloring dummies like me! 


I used the watercolor brush to spread a little water around, then sprinkled some Pool Pixie Paint onto the piece, and basically my work was done.


I blended out the background a bit and added some flecks of lighter and darker paint to give depth to the scene.

My next projects are a little tag duo. I played around with the Candy Pixie Paint for both. On this tag, I used the Resist Pen to add polka dots to the bottom half of the tag, let it dry, and then watercolored with the Pixie Paint over-top.  When everything was dry, I used a brown pen to add doodly circles around each polka-dot.

I added the little girl image from Better Together, and the new script Celebrate die to finish off the tag.


For my last tag, I did more of the same: doodled polka-dots with the Resist Pen and watercolored over-top with the Candy Pixie Paint. I added the Hooray wreath a little bird (from Kitty's Favorite Things) to finish off.


Be sure to leave a comment and come back tomorrow for more inspiration from our Design Team.  At the end of the week one lucky commenter will win a Cosmo Cricket prize pack!
54
Back to Top