Happy Halloween!

Hello friends, Danielle here! I can't believe it is Wednesday already, my week is all thrown off because of hurricane Sandy. We were very blessed and sustained no damage or loss of power. I know so many others were not as fortunate and I am keeping you all in my thoughts.

You MUST stop by here tomorrow because there will be a BIG announcement!! I am so excited, and I know you will be too! There might just be some giveaways and a freebie  ;)

I also wanted to share a fun Halloween card I made using Graveyard Shift, and some Hero Arts!
Look at this skeleton
I just love embossing this skeleton in white on black cardstock! I also have made a few cards recently with this little panel that can open up. I think it adds a fun element to a card, something unexpected and a great way to tuck away a little surprise ;)
skeletoninside

I think this is pretty self-explanitory, but if should have any questions just ask! I hope you have a very safe and Happy Halloween!

Supplies


9

Working with 6x6 Paper Pads

_DSC0021b

Hi everyone! It's Suzanne here today with some tips on how to use those 6x6 patterned paper pads that you see appearing more and more in stores these days. I love them as much as I love my stamps, and one of the things people ask me the most is how to pair patterns together.

The beauty of 6x6 paper pads is that the manufacturer has done a lot of the work for you - all of the papers in a single pack fit a particular theme and have incorporated into them colors that automatically match one another. (Even if you don't think this is true, just tell yourself that it is true.) The tricky part is finding pads that fit your style and that carry a wide enough variety of patterns to suit your needs.


For my card today, I knew that I wanted to use Neat and Tangled's Do Not Open image, and for the sake of this tutorial I grabbed one of my newer patterned paper pads. This one by American Crafts is called Kringle & Co. From the front cover, you get a glimpse of the different patterns in the pack.

You might wonder why one might prefer these pads over 12x12 scrapbook sheets of patterned paper. These pads are usually $5-$7, and carry anywhere from 24-36 sheets. Some manufacturers print patterns on both sides of each sheet, and the patterns are sized much much smaller than they are on 12x12 sheets, making them perfect for card making. I also really love how easy these are to store - they stack beautifully, and scraps are easily tucked back into the covers.

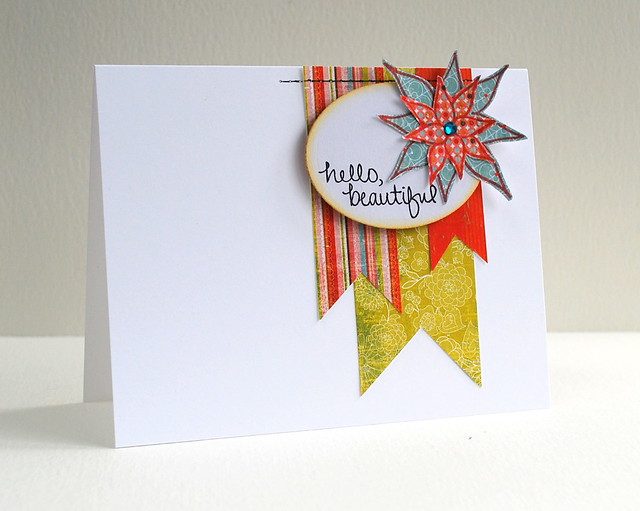
If you are new to patterned paper and want to give it a try, the next best step is choosing a sketch to work with. I chose this sketch from this week's CAS(E) this Sketch Challenge blog because I wanted to show how CAS can still incorporate patterned papers.


When I look at this sketch, I see a few places to incorporate patterns: the background, the front layer with the circle cut out, the focal point inside the circle, and even with a border or edge to embellish the left side of the front gray panel.


How do I choose which patterns to use? I usually flip through the book and try to find patterns that go with the stamps that I plan to use and that match each other. Above, I am showing you two patterns that don't seem to go very well to me. This is because the patterns are about the same size and because the colors in each seem too similar to me - too much black.


I pulled these three  patterns from the pack to show you examples of papers that can serve as smaller patterns (compared to those in the photo above). When patterns are small like this I often think them of them as having the same purpose that solid cardstock might have, like plain patterned paper. To me, it's almost as though the subtle pattern does not even exist.


Here we have the three sheets that I decided to work with. I first chose the gift pattern because it goes so well with the "Do Not Open" theme. Next I chose the mini red dotted paper to use as an accent and the cream paper with the stripes is going to go in the background. At this point I know that I will trim away the red border on that paper. Overall, we have a mix of colors and a mix in pattern sizes.

This brings up another point: some manufacturers distress all the edges of their patterned papers, so you might want to watch for that. Since we always have to trim the 6x6 sheets to fit onto a card, you want to pay attention and be sure to trim away all of the distressing so that the pattern appears balanced on your card, otherwise you run the risk of having one or two edges with distressing and the other edges without it. That can look funny. The other solution is to leave it and use Distress Inks to balance out the distressing on all the sides of the paper.


The last thing that you might be wondering is what to do with patterns that you aren't sure how to use. For example, I am not sure that this particular pattern is my style, but I know that the shades of green and cream match the other papers perfectly. Therefore, I can at least use this pattern to line the envelope of the card that uses other patterns from the same paper pack.

_DSC0021

So here is my final card...I made the stripes in the background go up and down because I thought they would look best perpendicular to the sentiment. I used that paper in the background so that all the darker layers on top of it would really pop. You can see that I ended up heat embossing the image in white onto two different patterns (one small, one large, but each plain enough that they serve the role that regular cardstock could here.) The red scalloped edge also balances out the red in the banner. Everything was mounted on a black cardstock base because I didn't have a perfectly matching shade of red for the base and because American Crafts incorporated black into several of the patterns in this collection. (I otherwise never would have thought to use black on a Christmas card!)

I think my final tip here is to have fun shopping for these! Until you learn who your favorite manufacturers of these paper pads are, it's best to see these in real life before buying, if possible. Always keep in mind that these pads often coordinate with brads, buttons, chipboard, stickers, and ribbon from each collection; if you prefer to work with any of these things, you may want to buy them so you have perfectly matching embellishments for your paper. Some companies make their pads in an 8x8 size instead of 6x6, and these are awesome because each sheet can be cut in half for two cards, unlike sheets in 6x6 pads; I think you get more for your money with these.

I hope you enjoyed reading my thoughts! Please let me know if you have questions!

ETA: Tracey left a comment below that made me think...it is true that you fall in love with certain papers and are scared to use them up. The nice thing is that some manufacturers don't appear to discontinue their lines, so you can always replenish your stock...or you can just hope that something even better will come out next year.

Suzanne


13

Halloween Hoop-Dee-Do!

Good morning friends!

Katie Gehring here to share a little home decor project I created with Neat & Tangled's Halloween Scene.

dsc_0162

I love using embroidery hoops with my paper projects for so many reasons.  First of all, hoops are cheap and plentiful; you can pick them up at any craft store for under a dollar for the smaller sizes to a few dollars for the larger sizes.  Hoops also lend to greater flexibility in your designs because you can add dimension without worrying about your project fitting behind glass. I also think hoops add a certain charm to your projects, and it's just fun to play with circles!

dsc_0160

I started with a 4" hoop and cut my patterned paper to fit the hoop.  I then stamped and cut out the house, ghost and bat.  The haunted hill was a piece of green cardstock that I trimmed using my circle cutters and adhered to the patterned paper background.

I stamped the tree, then adhered all the other elements using foam tape on the bat and ghost for a little more dimension. I stamped "boo" on a tiny tag and tied it to the top of the hoop with a bit of twine.  A little orange ribbon finished off the hoop.

That's all for me today!  Thank you so much for stopping by!  If you are celebrating Halloween this weekend, I hope your celebrations are safe and fun!

Katie

Project supplies

  • Cardstock: Ripe Avacado and Rustic White- Papertrey Ink; Gray- Bazzill
  • Patterned Paper: Lily Bee Designs
  • Stamps: Halloween Scene
  • Ink: Versafine Black
  • Fibers: Orange Ribbon- SU!, Twine- May Arts
  • Tools: Tag die- Papertrey Ink; Circle Cutters- Creative Memories
  • Embroidery Hoop- Jo Ann's stores
8

Quick step-by-step for cards full of texture!

Hey! It's Kasia here today and I'd like to show you in few simple steps how to add more funny textures and details into your cards! It really doesn't take that much time especially if you prepare few cards at once and effects are usually very interesting and surprising! In here I worked with some Christmas sets: Santa's Notes and Sweet Home! I snapped for you few photos of my process:


At this point you are done! I prepared these 2 cards in less than 30 minutes (with taking photos!), so it isn't really time consuming and with Neat and Tangled sets of stamps you could create many lovely scenes like these! Here are some details of each card for you:


I hope you will try some of these simple techniques and have as much fun with them as I do! Remember to share the results with us! Have a great day!

Kasia

7

Caring Hearts Card Drive

Hello friends! I just wanted to pop in an share a wonderful card drive with you! This is a great chance to make some cards for a really great cause(and you could win a prize too)! It's the Caring Hearts Card Drive run by the lovely Vera Yates.

This is an amazing card drive that collects holiday cards for the elderly that live in nursing homes. Can you imagine how much you could brighten their day? I do hope you'll participate! For some more information just go HERE. In addition to really making someone's day, you also have a chance to win a prize from Neat and Tangled, as well as many other awesome companies!

And here are the important details!

A few important details:

  • This card drive will be going on till November 30, 2012. Vera will need to receive your cards by November 30, 2012.
  •  Please make the cards for Christmas or Holiday Wishes. Anyone can send a card, your children, church group, scout troops, etc.
  • All cards need to have a message in it (it can be stamped or hand written).  
  • Please sign your name and where you are from. 
  • Please don't seal the envelope.
  • Please stick to just cards (all size welcome)
  • And please don't use any pins (safety reason).
  • You can mail the cards to:
                        Vera Yates
                        P.O Box 19158
                 
      Sugar Land, TX 77496


  • In each package, PLEASE include a piece of paper with your name, address, email address and how many cards you sent.  This helps me in keeping track for prizes! For each card you send, you will get a chance.  So the more cards you send, the better your chances. 


Hope you are all having a wonderful week :)
Danielle

2

Getting Warm and Cozy with Young Crafters Unite!

Hi friends!

Danielle here with the next YCU challenge! This time it's all about warm and cozy colors, just perfect for this time of year! I don't know about you, but despite the chill in the air, Fall evokes feelings of the warm fuzzies for me :) The lovely colors, and the cool temperatures make me want to snuggle by a fire!

I thought it would be fun to create a cozy card for this Little Bear. So I incorporated some warm, rustic cream cardstock, as well as the colors of the season.  I like to think he is enjoying the beautiful leaves before he sets off to hibernate :)

ycu15


Be sure to play along for the chance to win $25 from our sponsor, Simon Says Stamp!


7

Guest Designer Virginia Lu!

Happy Monday! Can't believe the weekend is over already! I hope that today's post brightens your Monday morning...our October Guest Designer Virginia is back again with another beautiful card!

Also, our newsletter subscribers were first to get the word and first dibs, but there is a discount code good thru Wednesday October 24. Use code TANGLES at checkout to receive 20% off your entire order.  (A few items are almost out of stock including Kindness Matters, Little Bear, and Santa's Notes
*  *  *  *  *  *  

hello beautiful

How I design:
1. Cut out three banners (large, medium and small) and arranged them in  group.
2. Add some faux stitching simply by piercing the holes and connecting the dots with a black fine pen.
3. Stamp the sentiment in the oval die cut, lightly distressed the edges.
4. Assemble the stamped and cut flowers. Add gem.
5. Adhere the oval sentiment with pop dots.
Tips: Choosing paper from the same collection makes it easy to make the design look cohesive.  Faux stitching is another easy and fun way to add details to a card.


*  *  *  *  *  *  
Thank you so much, Virginia, for joining us this month!

Supplies

Stamps: Fresh Blooms
Paper: white (Neenah), Layering paper (Punch, by Hero Arts), Konnichiwa by Basic Grey
Ink: Chalk Ink (Punch, Night) by Hero Arts , Scattered Straw Distress Ink by Rangers
Accessories: Spellbinders (oval), 3 D pop dots (EK Success), teal gem stone (Hero Arts)
Tool: Cuttlebug, Tim Holtz Ruler (Ranger), paper-piercer (Making Memories)


15

Neat and Tangled Newsletter

Happy Friday Friends!

Just popping in quickly to let you know that the first Neat and Tangled newsletter will be going out tomorrow!

It will have some information about a BIG event happening in November, inspiration, hints about future products, and most importantly...a discount code!

All you have to do is enter your email below and click subscribe!


3

Halloween Treat Toppers

Jean here with some Halloween treat bag toppers. Whether for a party favor or a trick-or-treating handout, these are fun and easy to make. I have created two versions with a combination of Neat & Tangled stamps. Because the cellophane bags I’m using are 4” wide, the toppers are the same width.

For the first version, I cut out a 4” x 4” piece of cardstock and scored it in the center so that when folded in half, the topper is 4” wide x 2” tall. I stamped a background in black with one of the Little Tangles stamps. I added a stamped ghost and bat from the Halloween Scene set, and a sentiment that I stamped onto a notched piece of cardstock.
    Halloween Treat Topper

For the second version, I added a bit more detail. In order to accommodate more elements, I increased the size of the topper. I scored a 6” x 4” cardstock piece in the center so that when folded it is 4” wide by 3” tall. I placed a die-cut circle onto the stamped background on which I included a ghost, a fence and a moon from the Halloween Scene set and a gravestone from Graveyard Shift. I added Stickles to the moon and the ghost for a bit of shimmer.

  Halloween Treat Topper

Got an upcoming party for which you need a lot of treat bags? To streamline the process for creating the toppers in quantity (using the first topper as an example):
  • Cut and score topper cardstock squares/rectangles; you can cut four from an 8 ½ x 11 piece of cardstock Cut sentiment banners from cardstock; 
  • Ink up Little Tangles stamp in black and stamp all of the cardstock backgrounds;
  • Stamp sentiment on banners; 
  • Stamp the ghost;
  •  Stamp and emboss bat;
  • Glue sentiment, ghost and bat to topper; 
  • Fill treat bags and attach toppers.


Supplies:
5
Back to Top